
How To Upscale Images
Enlarging an image without sacrificing quality is the principal attribute of upscaling photos, making images presentable in larger formats. The technique has been employed for many years in the TV, movies, and still photo industries to adapt to appear on HDTVs and other screens. Improving the quality of an image is an advantageous approach for a photographer to promote their work and make the most significant impression possible. The pros of image upscaling vary from attaining the best resolution and optimum photo quality to showcasing your photos in a glossy magazine or printing a copy to hang on your wall. Different image modification techniques are employed to upscale images; one of the standard techniques is bicubic interpolation, which determines new pixel values in conformity with the surrounding pixels in a weighted average. Other approaches include applying machine learning-based algorithms and editing tools like noise reduction and sharpening, which add to the results of the ultimate compositions obtained by upscaling an image. This blog will explain how to use these techniques categorically to proficiently upscale images with maximum outcomes.
Step 1: Image Upload
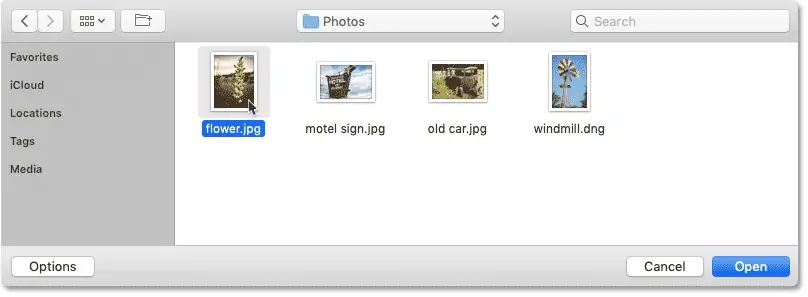
Open your preferred editing program on your PC and find and tap on the “File” menu at the interface.
Click the “Open” function to open a picture file in the dropdown menu.
Get to the folder where the photo file is stored on your computer.
After you’ve found the image file, click on it to choose it.
According to the software, you will need to press an “Open” or “Choose” button to affirm your choice and continue loading the photograph.
Next to the settings confirmation, the picture will be loaded into your software’s workspace, all set for advanced editing and manipulation.
Confirm that the image you’ve opened is the one you intend to upscale, as ensuing steps will include adjustments to this photo.
You can carry on with the following steps to start upscaling the image to your desired dimensions and details.
Step 2: Image Duplication
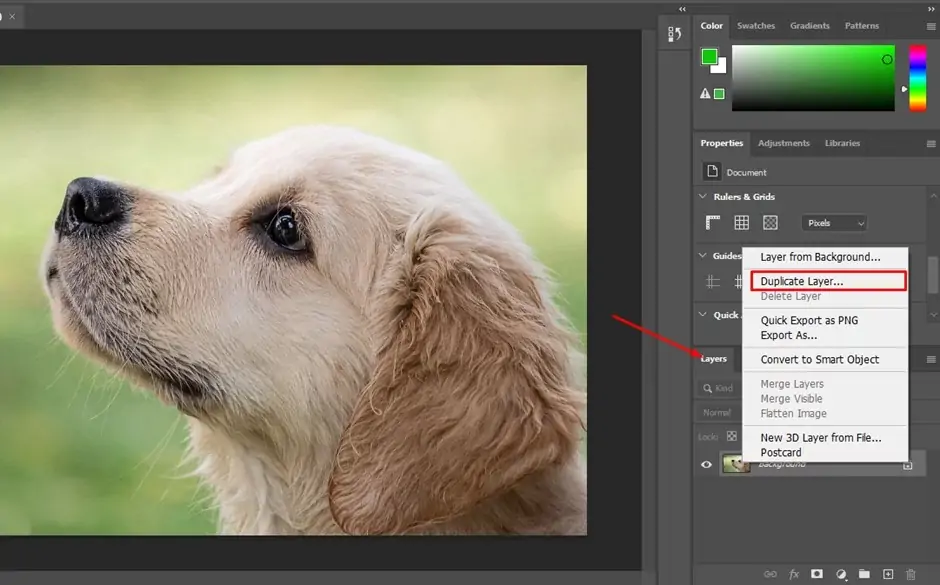
Locate the layers settings within your software to copy the original image layer before resizing to preserve a backup.
Head to the “Layers” panel or menu and click on the layer containing the initial photograph.
After the layer is selected, search for options to copy the layer. That can be named “Copy Layer” or “Duplicate Layer” within the layers menu.
Press the duplication button to form a duplicate of the first picture layer.
The copied layer will often emerge over the original layer within the layers panel.
Look into renaming the copied layer to help you differentiate it from the original. Right-click on the copied layer and select “Rename” or an identical choice to present it with a particular title.
Now that your original image is preserved for reference or future alterations, you’ll continue resizing the picture while protecting the initial layer.
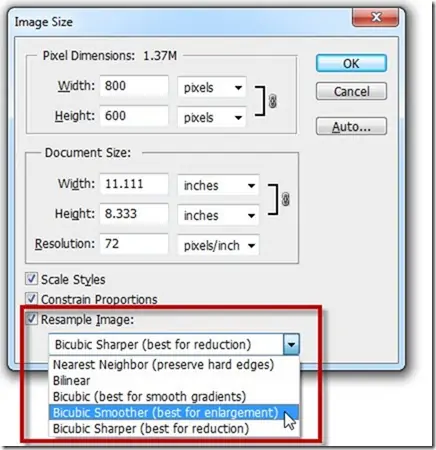
Step 3: Deciding New Measurements

Find the “Image Size” or “Resize” alternative within the menu bar of your image editing program.
Press on the “Image Size” function to open the discourse box for resizing.
Inside the “Image Size” discourse box, you’ll see fields to input the new measurements for your image.
Guarantee that the “Constrain Proportions” or “Maintain Aspect Ratio” option is checked to preserve the initial perspective proportion of the picture during resizing.
Enter the specified width and stature values for the upscaled photo within the relevant fields.
Leaning on your preference and expected application, you can indicate the dimensions in pixels, inches, or other units.
Put the “Resolution” field on a record, which decides the number of pixels per inch (PPI) within the upscaled shot. Alter this value if essential, assuming the specified print or display quality.
Since you’ve entered the new measurements and balanced the resolution as required, resume the following step to apply the resizing adaptations to the image.
Step 4: Specifying Resempling Strategy
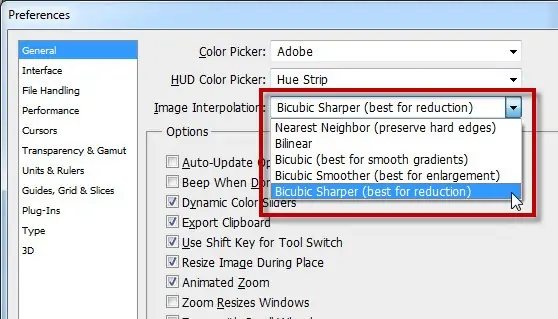
Explore the option to select the resampling strategy inside your software’s “Image Size” or “Resize” dialog box.
Generally, you’ll discover a dropdown menu or selection box labeled “Resample” or “Resampling Method.”
Tap on the dropdown menu to uncover the accessible resampling choices.
Standard resampling strategies include Bicubic, Bilinear, Nearest Neighbor, and Preserve Details.
Pick the fitting resampling strategy for upscaling the photo. For instance, Bicubic interpolation is often suggested to hold picture quality amid upscaling.
Every resampling strategy has characteristics that influence how the software creates new pixel values when resizing the picture.
Test with different resampling strategies to decide which produces the leading developments for your particular picture and fondness.
After you’ve chosen the required resampling method, apply the changes and upscale the picture to the mandated dimensions.
Step 5: Upscaling The Image
After selecting the required resampling method, find the confirmation button inside the “Image Size” or “Resize” dialogue box. This highlight can be labelled “Ok,” “Apply,” or comparative.
Press the relevant option to apply the resizing changes and upscale the picture to the desired measurements.
Your software will insert the existing pixels to make extra pixels and increment the picture size according to the chosen resampling method.
Based on the complexity and size of the image, this process can take a couple of minutes to finish.
Refrain from making more edits or alterations to the image until the upscaling process is wrapped up.
Next to the upscaling process, survey the upscaled picture to guarantee it meets your desires in terms of size and quality.
Step 6: Regulating Additional Settings
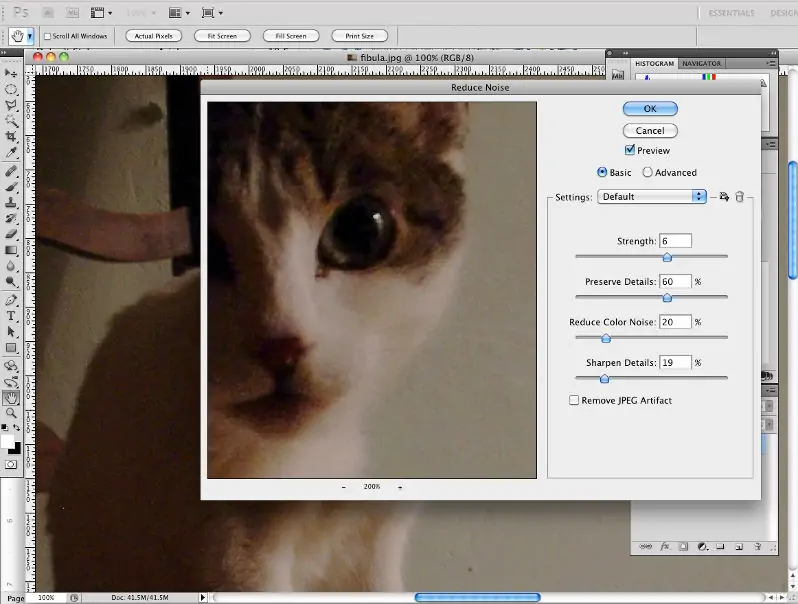
Consider the additional options your software offers to intensify the upscaled shot further.
Find the tools or adjustment choices associated with sharpening, noise decrease, and color rectification.
The use of Sharpening tools can strengthen the clarity and definition of edges within the upscaled photograph, compensating for any misfortune of sharpness amid the resizing process.
Noise-lessening tools can be utilized to diminish any clamor or artifacts that will have been presented during the upscaling practice, providing a cleaner and smoother image.
Color rectification tools permit you to alter the color balance, saturation, and other color parameters to attain the specified look for the upscaled photo.
Try different settings to polish the appearance of the upscaled photo according to your liking.
Watch out not to over-process the image, as immoderate alterations may lead to unnatural or unlikely consequences.
Step 7: Evaluating The Final Image

Scrutinize the upscaled image to confirm it meets your measurement, quality, and appearance requirements.
Review the different zones of your composition with the Zoom function and scan for any blurriness or blemishes presented during the upscaling process.
Comparatively, analyze the upscaled picture with the initial to evaluate the advancements and make any essential alterations if errors are noticed.
If you are happy with the results, save the upscaled picture in your liked file format (like JPEG or PNG) and spot it on your computer.
Select a fitting record title that reflects the content or purpose of the picture for simple identification afterward.
In case pertinent, consider revising the picture quality settings to accommodate file size with picture quality based on your expected utilization.
Decide on a suitable destination folder or directory for saving the upscaled image and tap the “Save” or “Export” button to conclude the process.
Step 8: Preparing For Sharing Or Printing
Once the upscaled image is saved, assume its planned utilization to decide the following steps.
If you opt to utilize the picture for digital purposes like web design or social media, you’ll specifically upload it to the particular stage or consolidate it into your project.
Reconfirm that the file format and settings are consistent with the requirements of the stage or project to preserve ideal quality.
In case you expect to print the upscaled image, ensure that it meets the resolution and size details for the specified print size.
Think of operating a proficient printer or directing to printing rules to guarantee the finest upshots.
Plan the upscaled image file for printing by selecting suitable print settings, including paper measurement, orientation, and colour profile.
In case of printing at home, utilize high-quality paper and guarantee that your printer is calibrated accurately for precise color generation.
Once prepared, move to print the upscaled picture and appreciate the upgraded visual mark it brings to your advanced or printed projects.
Conclusion
In conclusion, with the avant-garde and convenient editing tools available, the task of upscaling images looks quite leisurely. Yet it is factually an elaborate and attention-urging chore that requires an immense focus on remeasuring strategies and deliberation of appropriate picture resolution and quality values. The main objective behind the image upscaling is also a point to ponder. Whether you plan to exhibit your edited shot digitally or print it out for a physical exhibition, you must be mindful of the requirements, such as proper format, clarity, and finesse of the ultimate composition. Being reflective of all the essential guidelines, you can create well-polished and superb-quality upscaled images that tempt everyone.
