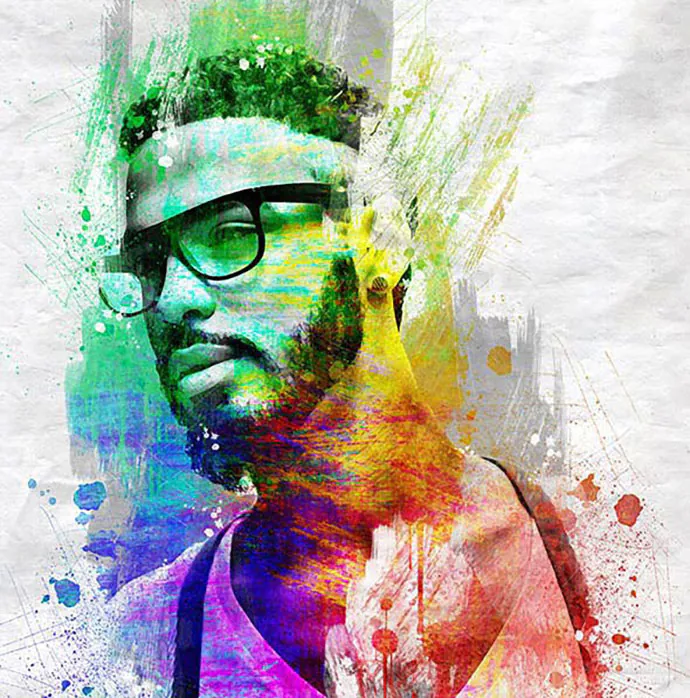
How To Turn Your Portrait Into A Splatter Art Painting
Splatter art is a vivid move against traditional perfection and accuracy, an acknowledged heritage of artwork. It breaks away from controlled painting techniques and out-and-out use of brush strokes, including all typical norms of ideal compositions. The mid-20th century art creators gave emergence and encouragement to splatter art paintings, adopting spontaneous and chaotic creative initiative as an escape from dullness arising from persistent demanding and tiresome paintings. The acknowledged name associated with this unique art style is Jackson Pollock, who skipped canvas stands, used the ground as his base for canvas, and used creative ways like drip painting and scattering raw paint on the canvas. With the cultivation of technology, physical paintings are rapidly getting overshadowed by digital compositions, but conventional art techniques continue to flair the digital canvas. Splatter art is one of those ancient styles many artists and designers still passionately adopt. In this blog, we will go through those approaches that can be put to good use while creating a splatter art painting out of your casual photographs, specifically portraits.
Step 1: Decide on your base image
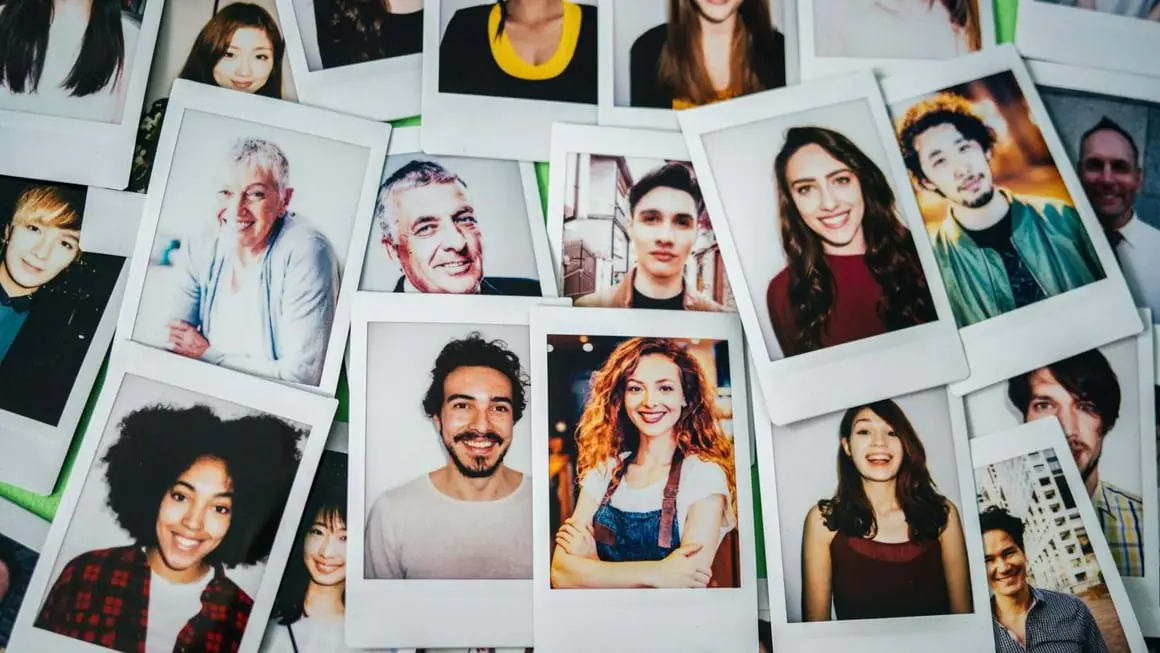
Give a thought to your portrait collection to specify the one for your editing process. You can also choose other famous portraits or images that inspired you on social media.
Select a portrait with particular highlights, expressions, or components you want to accept with transformation into a splatter art composition.
The portrait should have a solid, lock-in composition that can be further enhanced. Search for intriguing arrangements of subject matter and background.
Assess the feelings projected within the portrait. Does it bring out a specific disposition or estimation you need to complement in your splatter art?
Examine the level of detail within the image. Choose whether you keep holding a few of these details or change the whole picture into a more unique representation.
Step 2: Initiate the software and set your canvas

Start your digital art software, whether it’s Adobe Photoshop, Corel Painter, Procreate, or any other application that underpins digital painting. Ensure that you have the essential tools and brushes at your disposal.
Start a new canvas with measurements that adjust along with your inventive vision. Set the size and resolution, which can affect the ultimate quality of your work of art. A larger canvas works well for more complicated details, whereas a small canvas works for composition.
Enlighten yourself with layer settings in your software. Make different layers to separate the portrait from the splatter art elements. This layering framework will empower you to work non-destructively, making easy modifications throughout the process.
Import the chosen image onto one of the layers. You must confirm that the image fits within the canvas dimensions.
Keep saving your work regularly to not hinder your editing because of any data loss.
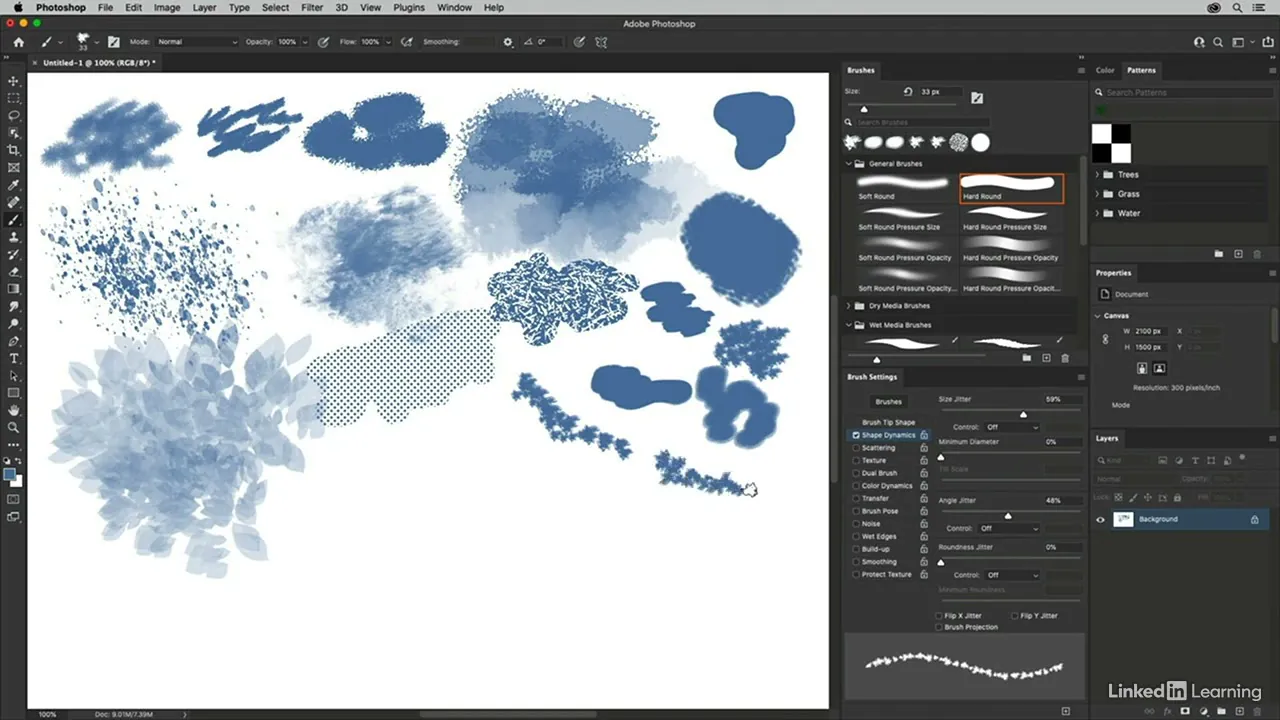
Step 3: Assemble your brushes and tools
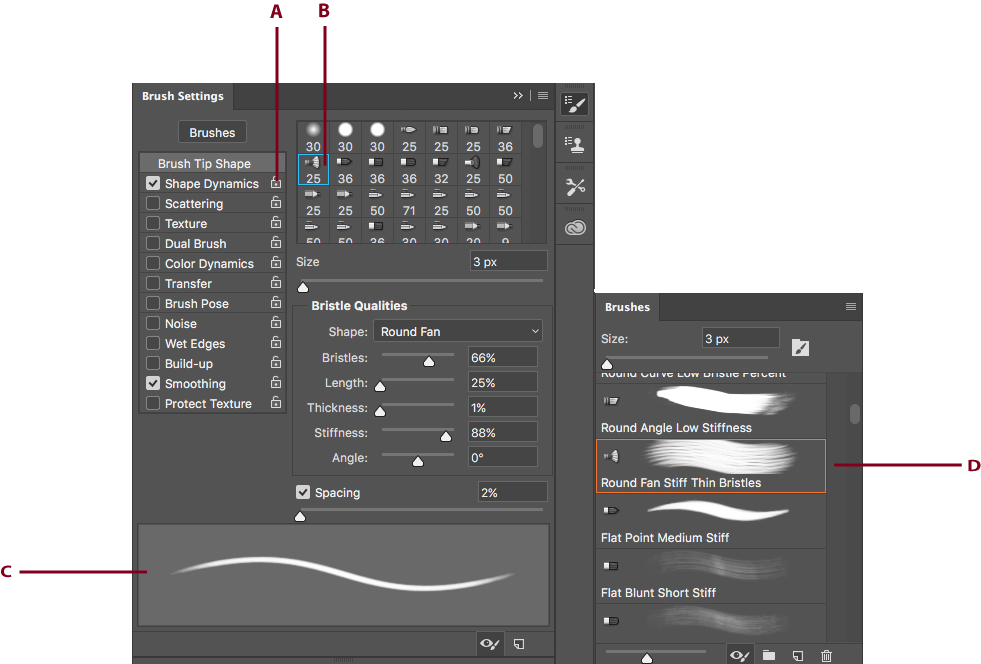
Surf the accessible brushes and select ones that suit making splatter impacts. These brushes offer a range of sizes, shapes, and opacities to provide variation in your splatter designs.
Once you’ve chosen your brushes, personalize their settings. Alter parameters such as brush size, hardness, opacity, and flow to fine-tune their conduct. Play with these adjustments to attain the required splatter impact; according to your choice, it can be subtle droplets or strong splashes.
Create a color palette that complements your imaginative vision. Splatter art regularly highlights dynamic and contrasting colors, so select tints that bring out the temperament or feelings you need to communicate in your composition.
Before moving on to brushwork on your portrait, test your customized brushes on a separate canvas to get familiar with their behavior. This trial stage makes refinements to your strategy and gives you an idea of how the brushes will interact with your chosen colors.
Step 4: Produce a splatter key layer
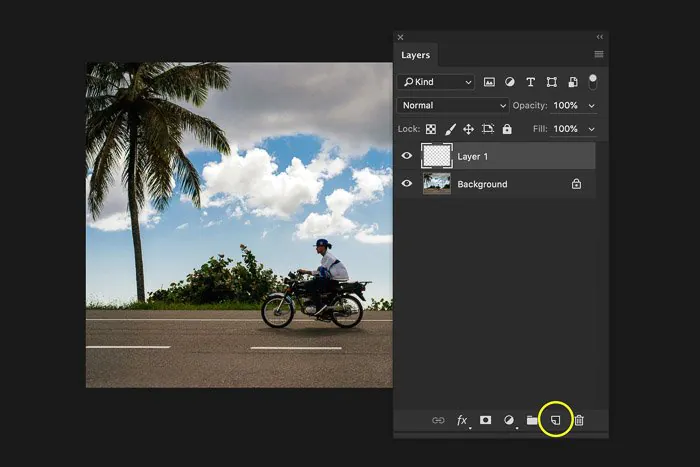
Go to the layers panel and make a new layer above the layer containing your portrait image. This new layer will be dedicated to your splatter art.
For harmony and clarity in the process, give this layer a descriptive name, such as “Splatter Layer” or “Abstract Effect.” Tagging layers helps you quickly identify their purpose during elaborate projects.
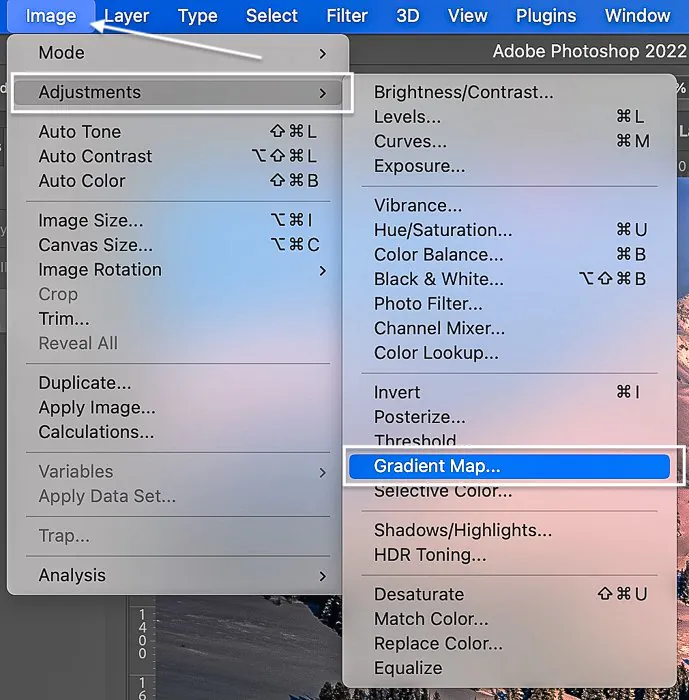
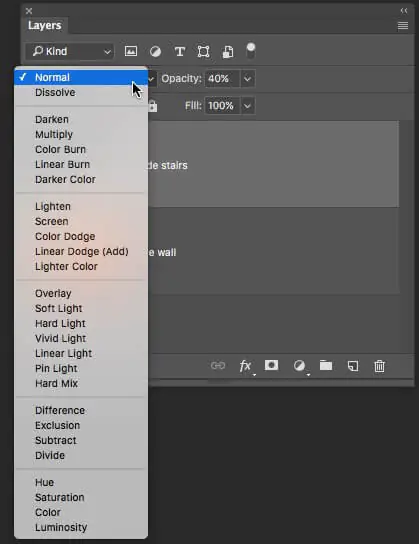
Explore the blending modes accessible in your software to decide how the splatter layer interacts with the underlying portrait layer. “Increase” and “Overlay” modes can make interesting blendings that improve the overall presentation.
You can tune the opacity of your splatter layer as per your desired level of intensity. You can also fine-tune the visibility of the splatter, achieving the specified symmetry between the portrait and the abstract components.
After preparing your splatter layer, utilize the customized brushes and tools you arranged earlier to start the inventive process. Apply splatter effects in a controlled but expressive way, testing with distinctive brush sizes, opacities, and colors to create a heavenly composition.
Step 5: Implement splatter effects
Select the suitable brush from your custom set. Consider the effect you need to attain: tiny color droplets, bold splashes, or a mix.
Modify the brush size as required to control the parameters of your splatter. Use larger brushes for prominent sprinkles and smaller ones for complex details.
Fine-tune the brush opacity to regulate the transparency of your splatter to attain a subtle or strong splatter effect, agreeing with your aesthetic vision.
Utilize your pre-selected color palette to apply splatter charmingly. Try using diverse colors and their alloys to imbue vitality and energy into your artwork.
Address your canvas with a blend of suddenness and control. Try different hand movements, flicks, and strokes to form unique designs and surfaces specific to splatter art paintings.
Use splatter in different layers if necessary. Layering can construct profundity and complexity, improving the overall visual effect of your work of art.
Adjust the blend modes again to achieve a captivating final interplay between the scattered abstract elements and the portrait below.
Continuously evaluate the composition as you apply splatter. Regulate the distribution of splattered elements to create harmonious art.
Step 6: Polish your splatter art portrait
To finalize specific aspects of your portrait, use digital brushes with accuracy. Highlight the eyes, facial contours, or other vital elements.
Work on textures to balance the abstract splatter parts and the underlying portrait; polish skin texture, hair, or clothing details as needed.
Adjust highlights and shadows to add dimension and vibrancy. Upgrade contrast to raise appealing aspects and foreground the splatter painting effects without affecting your portrait’s contours.
Add creative details like intricate patterns, subtle color gradients, or imaginative touches to chain the portrait’s elements and the splatter effect.
Try preserving the essence and identity of your original portrait. You are meant to create an immaculate combination of portrait characters and vigorous splash art.
Feel free to experiment with different brushes, blending modes, and layer adjustments as you refine your artwork. Repeated refinements can cause surprising results.
Step 7: Assess your work for the last time
Analyze your composition for color balance and overall visual impact. Look at how the scattered tints collaborate with the portrait below.
Get feedback from other artists to gain valuable insights and help you identify improvement areas.
Ensure the splash effects adorn and enhance the portrait instead of overwhelming it. Work for a symphonic existence between abstract and natural aspects.
Be willing to keep working on specific areas to get the optimal balance; experiment with different blending modes, opacity levels, and splatter effect intensities.
If color adjustments are required, start with slight modifications to improve the overall color scheme and unify the visual experience.
Perceive your work from the viewer’s point of view. Think about how it inspires their emotions or communicates what you want to convey.
Implement any final touches or enhancements to address comments and ideas gathered from the feedback phase.
Step 8: Finalize and export your image
Audit and organize your layers keenly. Confirm that each layer serves a particular purpose and contributes to the overall composition. Rename layers for organization and clarity.
Give a last glance at your work of art and make last-minute refinements so that you can modify any remaining details for perfection.
Confirm that your splatter is set at the required resolution. If you want to print your artwork, ensure it has the desired DPI for high-quality prints.
You can also include your initials and the creation date in your artwork to mark your proprietorship and honor the moment of your completion.
Save your wrapped-up art in different formats, like JPEG, PNG, and PSD, for compatibility with various display and sharing purposes.
Choose high-quality settings to protect the integrity of your creation.
Reduce compression to preserve details and color precision.
Make a backup of your project files, ensuring your hard work is defended against unanticipated data loss.
Create a documentation file detailing your creative process, techniques, and inspiration for your digital splatter art to share on social media or print.
Conclusion
Splatter art paintings, painted using digital tools and techniques, are a more extensive and advanced version of traditional 20th-century artworks. You can supervise everything from central to minor brush strokes to tiny paint drops or splashes. If your spontaneous artistry goes wrong or is not according to your expectations, you can always undo and redo your moves, taking acute advantage of modern technology. When these art effects are applied to your portraits or likable images, you get striking results with a cascade of bold and bright colors, which can excite the dull and tiresome minds, giving your artwork the appreciation an innovative piece deserves.
