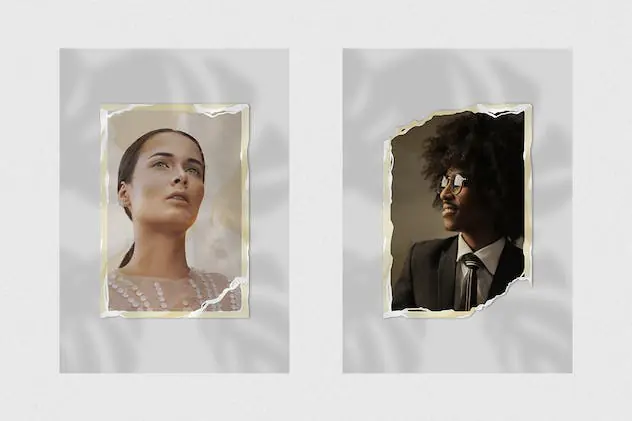
How To Add A Vintage Frame To Your Images
Adding vintage frames around your images summons an antique touch to the modern visuals that can trigger reminiscent memories in viewers. These frames solidify the contextual significance and raise fascinating ancient tales about your photographs. In contrast to trendy frames, vintage frames never get outdated and keep charming people with an adorable aura of past times. Digital tools like Photoshop, CorelDraw, Gimp, or online image editors offer a variety of vintage-style frames, like wooden frames, gold frames, French frames, rustic frames, and a lot more. Each kind of frame is suited to specific image settings and subject dimensions. By experimenting with the various frames, you can find the most complementary ones for your photo. You can also use a standard vintage frame design for a series of images or create a vintage collage, giving your album a unified look and a more descriptive quality. You can inframe your desired images according to your desired era, style, and mood effects, using the steps and techniques to add vintage frames mentioned in the following blog post.
Step 1: Open your preferred image
To process adding a vintage frame to your image, choose and open an image in your editing application, such as Adobe Photoshop.
Launch your editing program and go to the “Open” or “File” option in the menu. Tap on it, and you will see a browser window.
Move to the folder with your picture collection and select your desired image. Press “Open” to bring the image into your editing workspace.
Once the picture is stacked, it’ll be shown on the canvas for editing and improvements.
The preparation step of opening and adjusting an image makes the image accessible for editing and getting the wanted vintage frame.
Step 2: Make or select your vintage frame
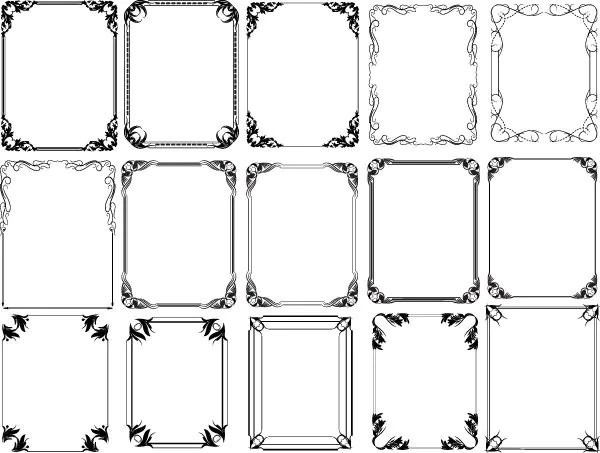
With graphic design experience, you can make a custom vintage frame from scratch using the software’s drawing and design options. You get complete creative control and let the frame cooperate perfectly with your image.
On the other hand, you can look for online available vintage frames or visit websites that offer free or paid frames. Download the frame of your choice and store it on your computer for use in your project.
Some software, like Photoshop, provides you with pre-installed frame presets. You can find these built-in choices and select one that will look quite impressive with our picture.
Step 3: Fix the image and the vintage frame
If you created or downloaded a vintage frame as an image file, it should be found in a separate window or tab in your software. Click on this window or tab to start working on its integration with your image.
Select and drag your mouse cursor on the vintage frame image. Hold it and drag it over to the tab or window where you see your opened image. As you look over the image, you’ll take note that your cursor changes to a crosshair or hand symbol, demonstrating that you can drop the frame onto the image.
Delicately release the mouse control to drop the vintage frame onto your image’s canvas. The frame will pop up as a new layer over your original image.
Next, use the Transform tool or the Ctrl+T or Cmd+T keys to adjust the measure and position of the vintage frame layer to fasten your picture accurately. You can tap and drag the frame’s corners to resize it and move it around the canvas to discover the perfect arrangement.
Step 4: Tune up the blending mode of the frame layer
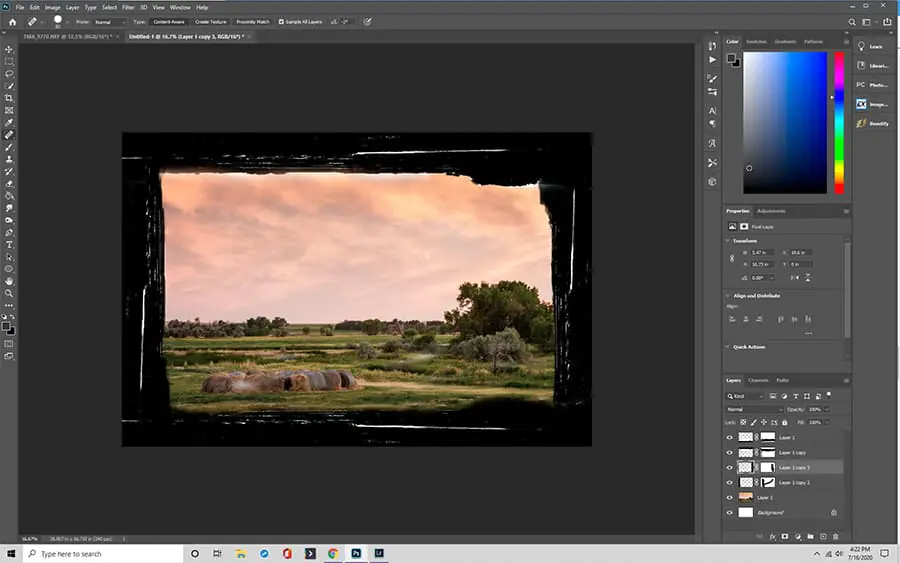
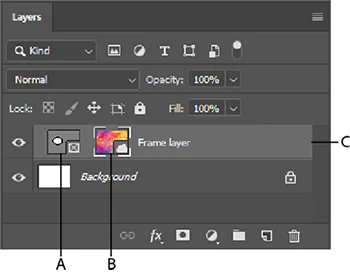
Select the outline layer you see on your program layer board by clicking it.
Find the blending mode drop-down menu in your software’s layers panel. In Adobe Photoshop, this menu can be seen at the top left of the layers panel and is titled “Normal” by default.
Test with the different blend modes in the blend mode menu to observe their influence on the interaction between the vintage frame layer and your original image. Each blend mode features an exciting way of combining the two layers, modifying colours, contrast, and transparency.
Select a blend mode that harmonizes with your image and the vintage frame. Standard blend modes for vintage impacts are “Multiply,” “Overlay,” “Soft Light,” and “Screen.” Still, the perfect mode depends on your particular photo and creative ideas.
Once you finalize the frame layer blend mode, you can adjust options like setting opacity: low opacity for subtle effects and high opacity for sharpness.
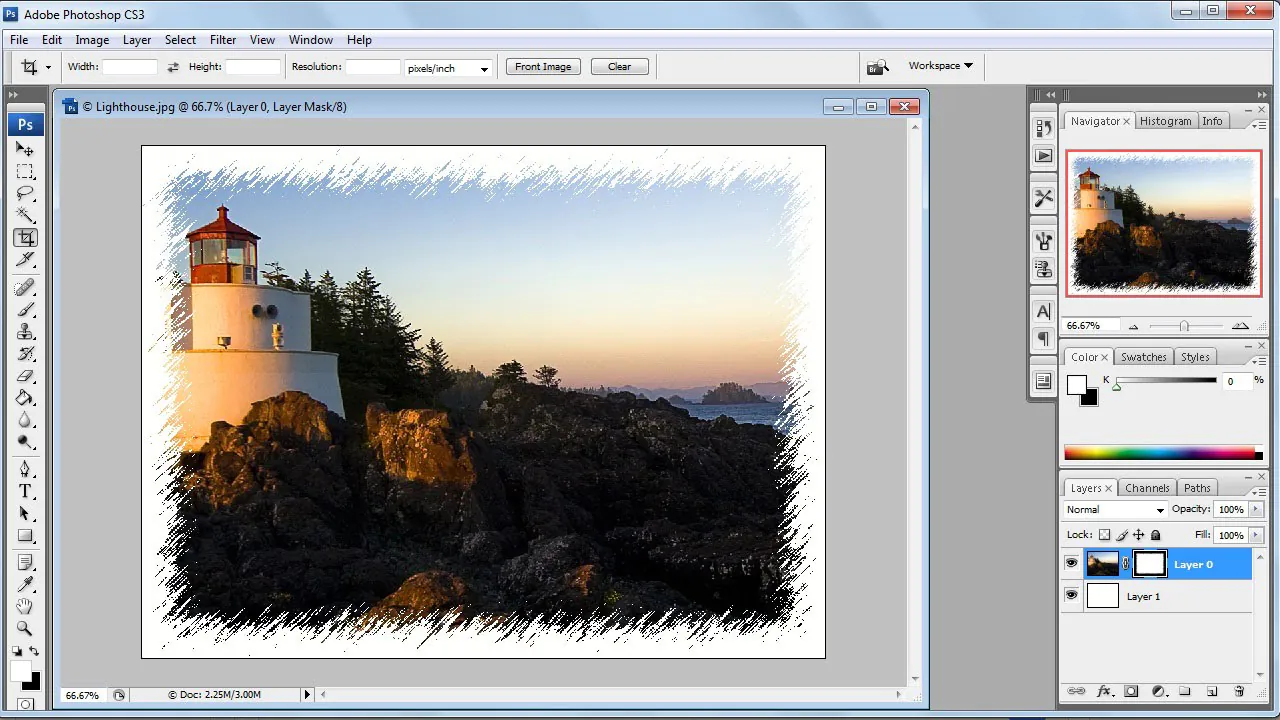
Step 5: Make a layer mask for the frame layer
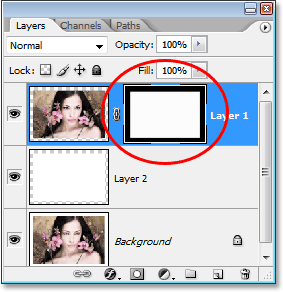
Click on the vintage frame layer within the Layers panel of your image editing software.
Search for the “Add Layer Mask” option. Adobe Photoshop displays it as a square symbol with a circle in the middle. Press on it to include a layer mask to the vintage frame layer.
Pick the brush tool in your software and set its colour to black. You’ll use the black brush to mask parts of the vintage frame.
Set the opacity and hardness of your brush. A low hardness level is helpful for gradual blending, while a high hardness is better for precise masking.
Now, paint over the areas of the vintage frame you want to mask. When you paint with a black brush, those regions will become transparent, exposing the underlying image. On the other hand, using white on the layer mask will bring back those areas of the frame.
Keep painting until you have refined the mask and achieved the desired look. You can zoom in for more perfection and use different brush sizes for details.
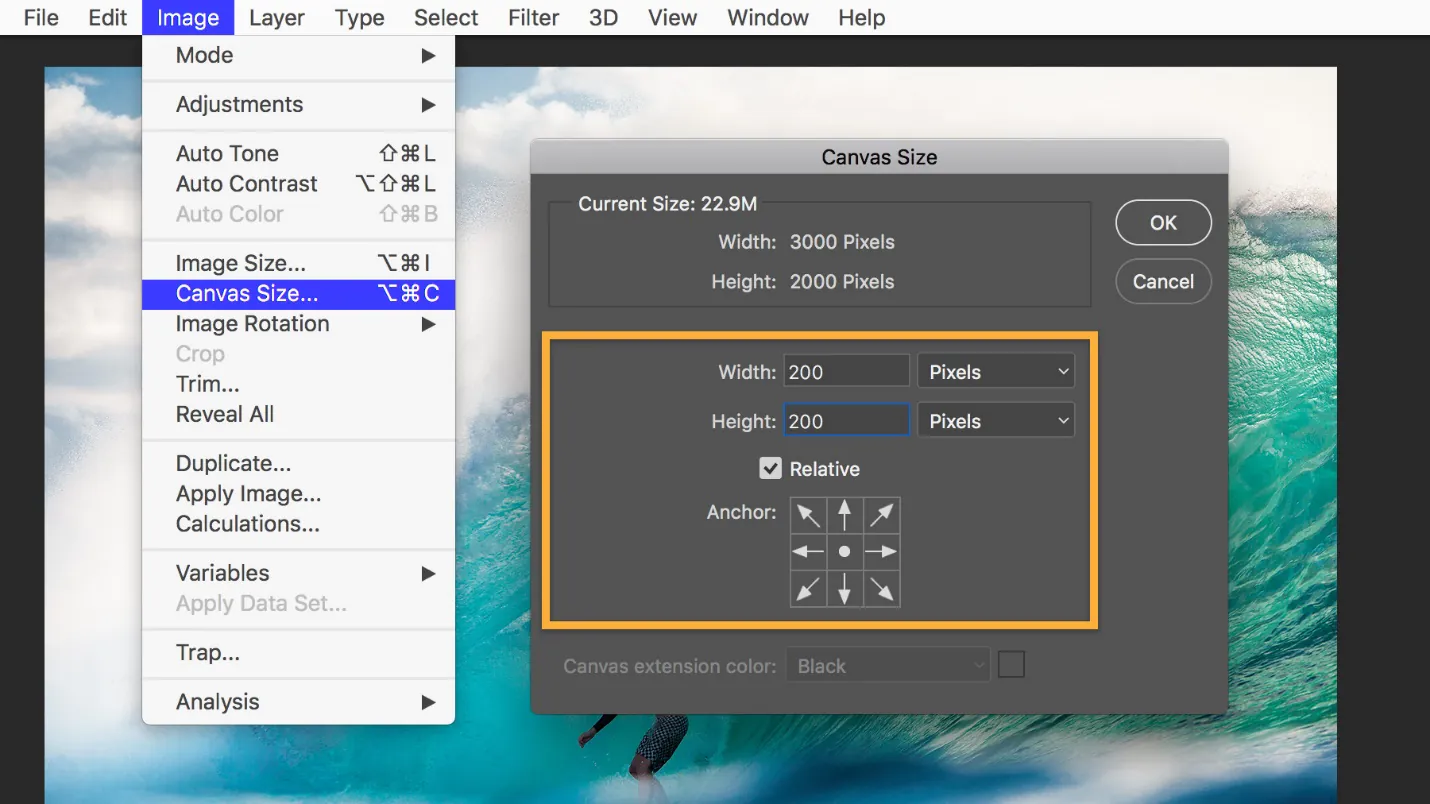
Step 6: Regulate the frame transparency
Confirm that the frame layer is still selected, and look for the opacity slider. It is located at the top of the layers panel in Adobe Photoshop. The opacity is shown in percentage form.
To steer the opacity of the vintage frame layer, drag the opacity slider up or down. You also have the option to enter the desired opacity percentage manually. Lowering opacity increases frame transparency, which makes more of the underlying image visible.
Focus on your image on the main canvas as you tweak the opacity. You can also witness a live preview of your changes to see the instant effect on your image.
Calibrate the opacity to get the right balance between the vintage frame and the original image. This phase creates a subtle bolstering impact that enhances the overall appeal of the image without overpowering it.
Step 7: Give a final review and save your composition
Take a final look at your vintage framed image. Take a close-up to look for minute features or flaws that need further modification.
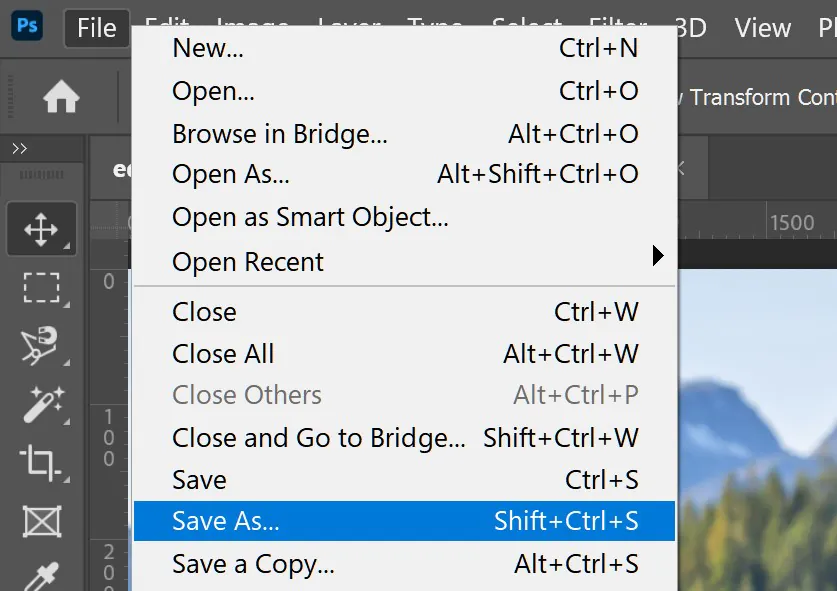
Navigate to the “File” menu, typically found in the upper left section of the programme window.
You will see the “File” menu with Save As or Export options. Tap any one of these options.
Choose a file format like JPEG, PNG, or TIFF for your finalized image. All of these forms have suitable specifications for images. Choose the format that best meets your demands.
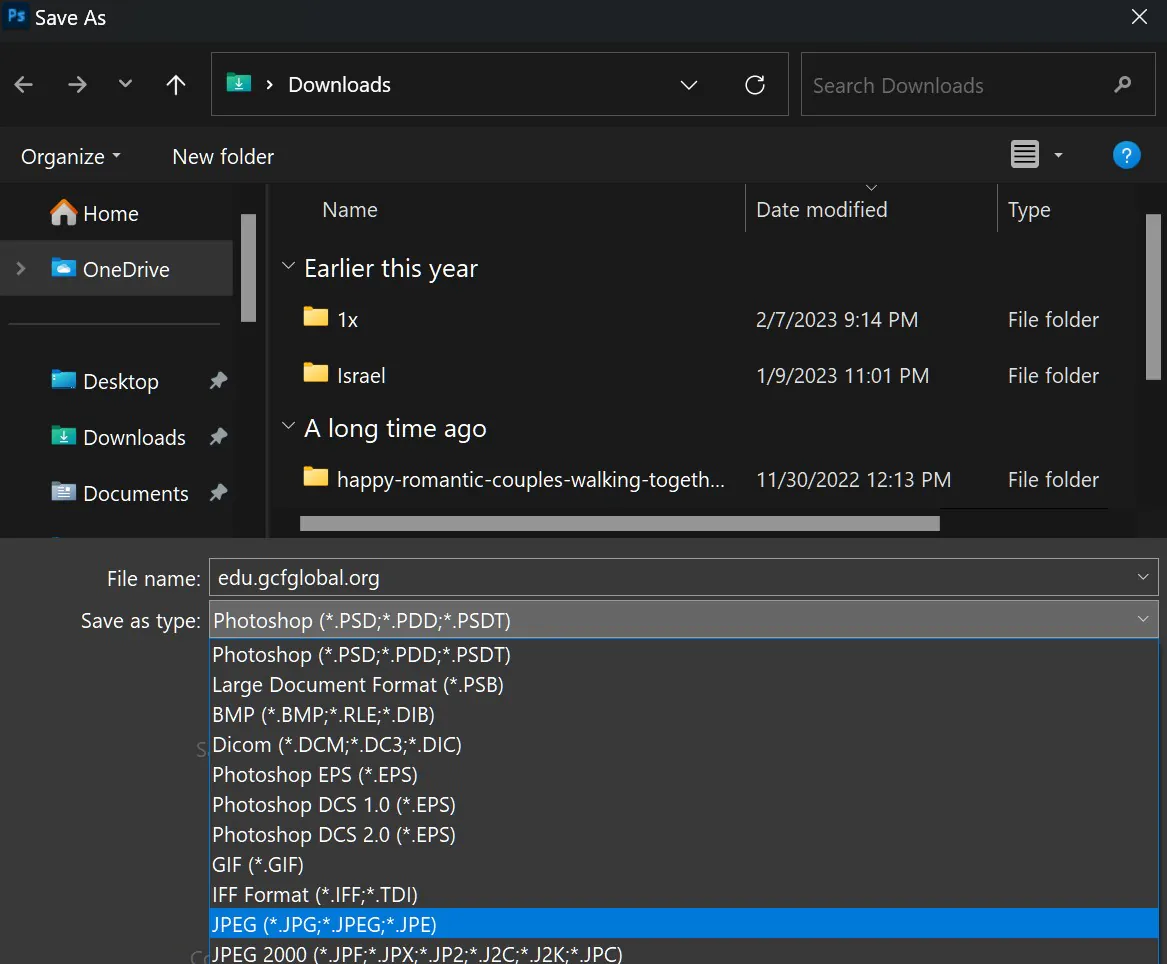
After clicking the format, a dialogue box will pop up so you can specify your image’s file name and location.
You can change the compression and image quality settings according to the file format. Higher quality settings result in bigger file sizes, but more image detail is retained, so set accordingly.
After configuring settings, click the “Save” or “Export” option to save your transformed image.
Step 8: Publicize your image
Choose the platform to share your vintage frame composition. You can go for Instagram, Facebook, or online art-sharing websites.
Compose a winsome and meaningful caption for your photograph to help people understand and appreciate your work and provide contextual tales.
You must regard the image resolution as some platforms may have specific size recommendations or constraints, so make sure your image fulfils these criteria.
For a closer bond, you can print your vintage-enhanced image for physical display or gift it to your friends.
Publicizing your vintage composition is the accomplishment of the creative cycle, which connects people with your vision.
Conclusion
In conclusion, vintage framing gives your images a light vintage touch and does not overshadow the core aspects. It also saves valuable time and minimizes your efforts, as you can mask your image with vintage charm by just using a suitable vintage frame. A single frame is for multiple outcomes, from influencing the subject’s aura to impacting the background. Without a hitch, you can build up the visual effects and create nostalgia indicative of the days gone by, like 20th-century Victorian-era civilization, rustic settings, or royalty, using frames ranging from royal gold to dithery wooden frames.
