
How To Make A Transparent Background For Images
Transparent backgrounds create many choices for image enhancement by allowing you to incorporate the same subjects into various backgrounds. You can try solid colors, fascinating landscapes, complex patterns, or textured backdrops to magnify the integrity of your subject. The transparent background technique is valuable for correcting flaws and manipulating the general image. You can employ it to remove undesirable surroundings from your image subject and, at the same time, bring more innovations to your everyday photos. You can create themed images, including friendship themes, birthday themes, travel themes, seasonal themes, and many other endless novel choices. Besides, transparent backgrounds offer adaptability for promoting products and online content. You can consistently coordinate products and images into differing promotional content, improving brand consistency and visual appeal. Furthermore, they streamline the method of making exciting social media posts, making your online presence more significant and glamorous. For detailed guidelines to create a transparent background for your images, comply with the following steps:
Step 1: Image Selection

The selection of an image is a milestone in creating a perfectly transparent background. Consider the following keys while choosing it:
Clarity: Select a picture with a clear subject that you can easily extract. Images with well-defined subjects are more straightforward to work with.
Resolution: Higher-resolution pictures give more enhancements and result in better transparency results. Never go for low-resolution photos; they will show up pixelated.
Format: Confirm that your image is in a format that bolsters transparency. PNG is the most prevalent for images with transparent bases.
Subject Size: Take note of the subject’s size in the picture. More prominent subjects often make the editing more manageable.
Once you have the proper image, continue to the following steps, ensuring your chosen picture adjusts to a transparent background.
Step 2: Image and Eraser Tool Setup

Open your chosen picture in your favorite picture editing program. Most proficient software applications, like Adobe Photoshop or GIMP, will work well for this process.
After opening your image, explore the toolbar or menu and find the “Background Eraser Tool.” It’s a fundamental tool for effectively erasing the background from your photo.
Press on the “Background Eraser Tool” to choose it. This tool will automatically identify and evacuate the background while protecting the main subject. It rearranges the process by combining opening the picture and selecting the vital tool into one step.
Step 3: Manipulating Eraser Parameters
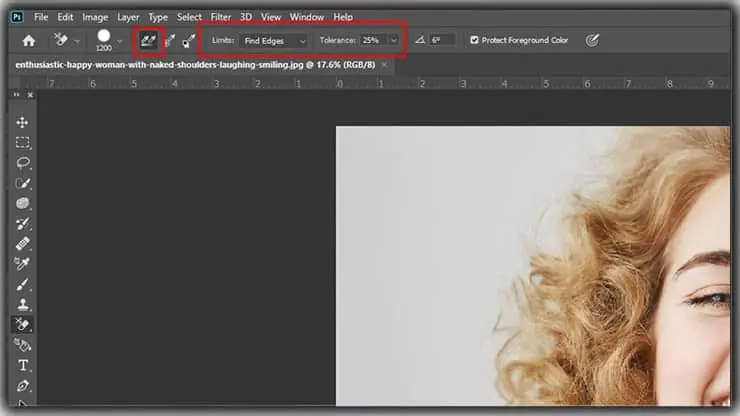
Alter the brush size. A larger brush covers more range but may be less exact, whereas a smaller brush is superior for point-by-point work. Select a size that suits the details of your image.
Set hardness to regulate the softness or hardness of the brush edges. A harder brush makes sharp edges, whereas a gentler one results in a smoother move between the subject and the backdrop. Modify these aspects according to the image’s edges.
Adjust the Tolerance setting to determine how closely the pixel’s color matches the pixel you want to remove. Higher tolerances remove a broader range of colors; lower tolerances remove more specific colors. Start with a reasonable tolerance and adjust as needed.
You can choose whether the Tolerance tool samples the current or all layers in some editing apps. If you want to affect the background of the image you are working on, make sure to sample only the current layer.
Step 4: The Erasing Process
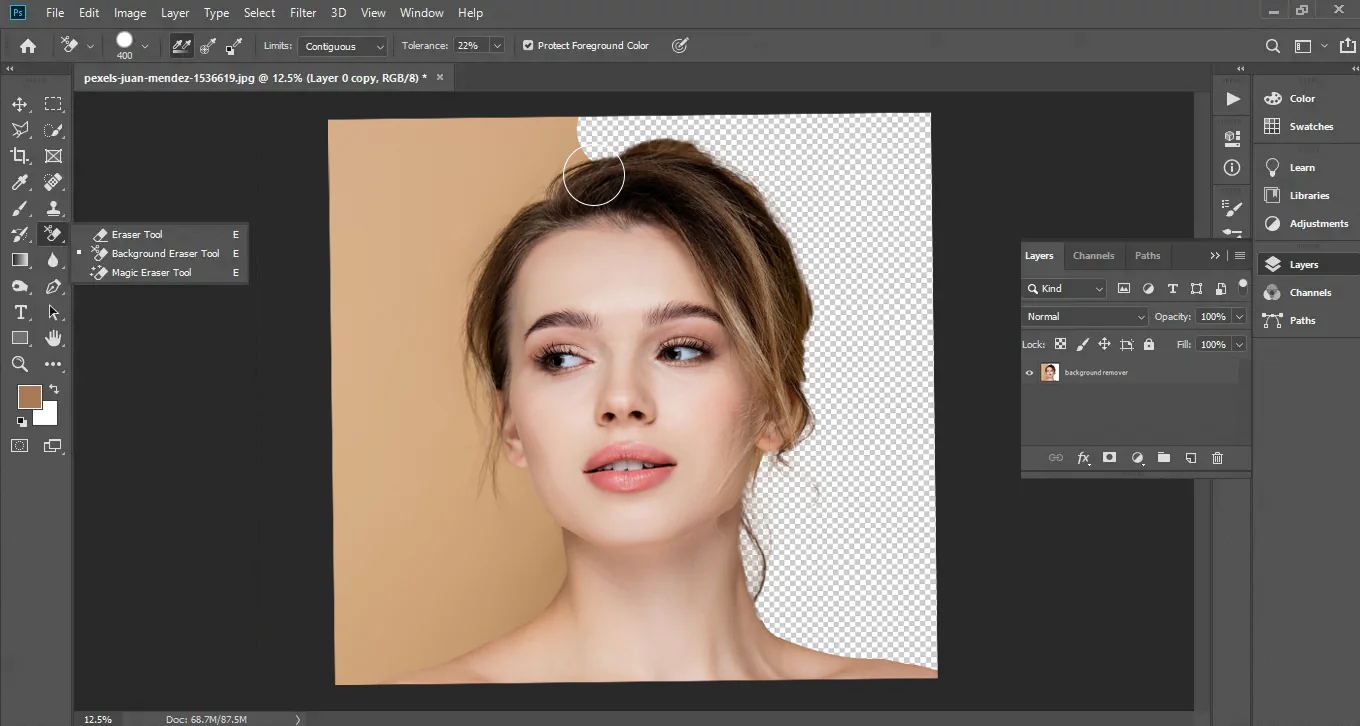
Cautiously work around the edges of your subject. Utilize a consistent hand and be attentive to accuracy. The refined tool settings you’ve chosen help you keep up the keenness of the subject while removing the background.
Eradicate the background continuously, moving from the outer edges inward. This systematic approach permits you to monitor the changes and make alterations as required. Take your time to ensure exactness.

When dealing with complex zones or objects with delicate details, zoom in on the image. This close-up look empowers you to work precisely, ensuring that no undesirable pixels stay in the background.
Pause intermittently to evaluate your progress. Zoom out and see the picture as a whole to guarantee that the background is slowly vanishing, leaving your subject uncut.
Try undo and redo alternatives. Be bold to utilize these functions if you make a mistake or have to compare diverse stages of your work.
Step 5: Reforming the Edges
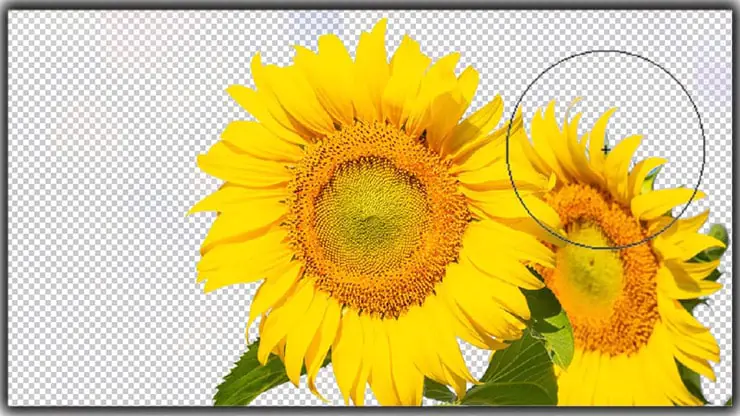
Choose the zoom tool to get a closer look at the edges. That lets you work on the finest details with great precision.
Use a soft brush with the Eraser tool to gently smooth out any rough or broken edges along your object. Make cautious strokes to ensure the main subject keeps its shape and clarity.
Use the feathering options to soften the edges, making the swaps between subject and background more natural. Tune the softening settings as necessary.
Consider applying discreet shadows or highlights to the edges of your subject. That could improve the authenticity of the cutout, mainly if your subject is set against a background with distinctive lighting.
To ensure the cutout works well in different scenarios, play with placing your subject on a couple of backgrounds. That helps you distinguish any remaining flaws and make final alterations.
As you refine the edges, keep in mind to save your work routinely to avoid losing your editing efforts.
Step 6: Reassessing Transparency
Closely review the whole image. Seek out any stray pixels or leftovers of the background that will have been missed amid the erasing and refining.
Various editing programs also have a feature to check for transparency. Utilize this feature to recognize regions where the background is still displayed.
Lay your subject on different backgrounds to see how it appears. Assess it against light and dark environments to confirm that no hidden background components are apparent.
If you find any remaining background components, utilize the eraser or brush tool to remove them physically. Pay consideration to subtle traces around the subject’s edges.
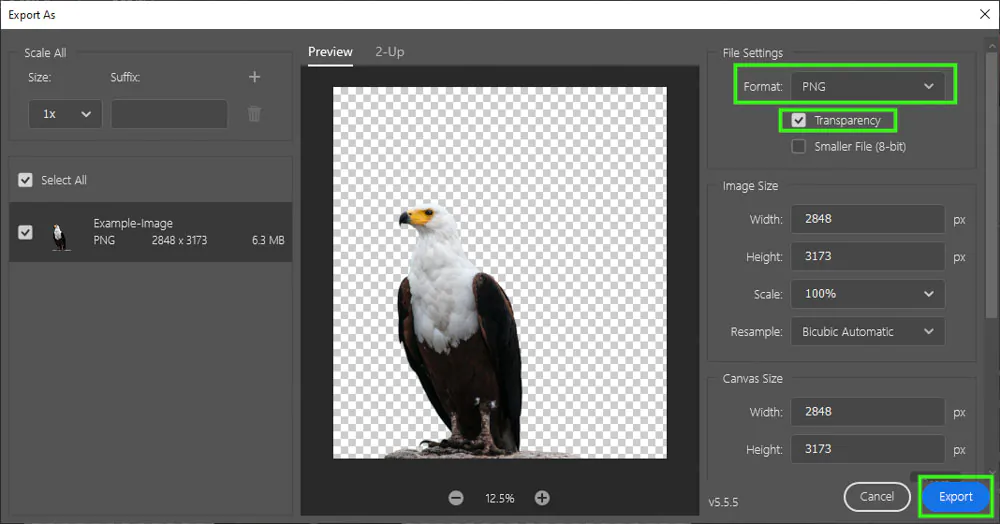
Once you’re done with the background is, save your image in final transparency settings, picking a format that supports transparency, such as PNG.
Move to the “File” menu and click “Save” or “Export. Choose PNG and select your destination folder to save the file.
Use the “Save” or “Export” option to save your transparent image as a PNG.
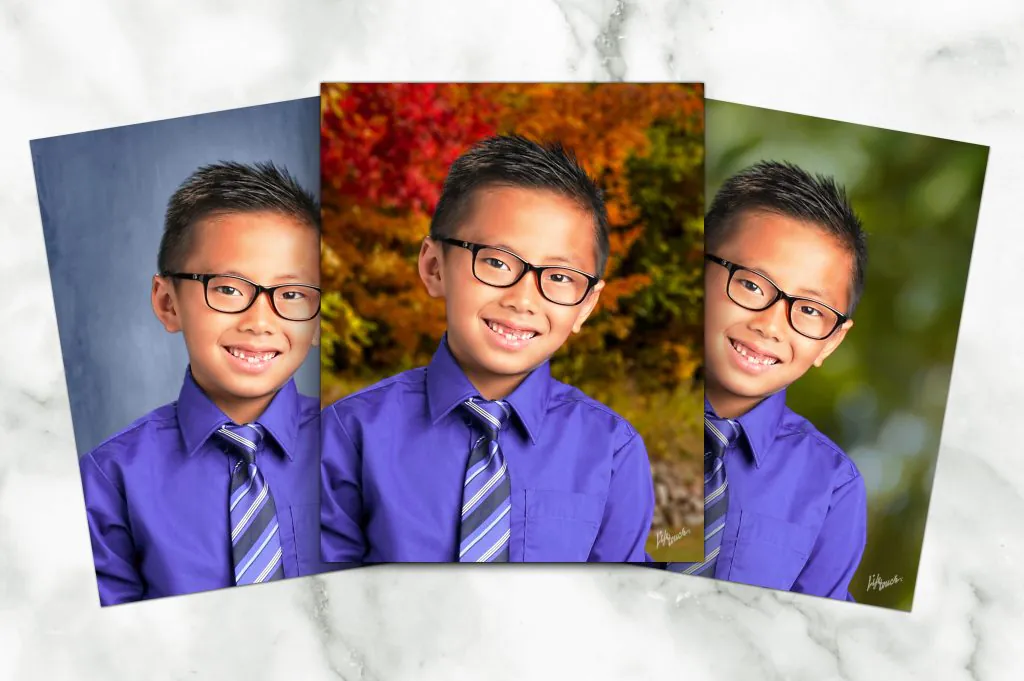
Step 7: Integrating the Transparent Image
Create a collection of different backgrounds, from plane colors to bustling backdrops, that you can use with your transparent subject.
Experiment with placing your images on chosen backgrounds one by one.
Test the interaction of the subject with each background. Make sure there are no obvious flaws, like remnants of the previous background or distracting changes.
If essential, adjust the position and size of your transparent subject to ensure it looks natural on each background.
Assess the lighting and shadows in the background images. Tweak your subject’s lighting to match the new environment.
Check the overall realism and coherence of the composition. Your picture should look like it was initially shot within the chosen background.
Repeat the overlay and assessment for all the background images.
Step 8: Final Scan and Export
Review your image on the chosen backgrounds one final time. Pay consideration to any regions that will require further refinement.
Ensure the subject’s colors, shadows, and highlights are consistent with the background. Modify any essential color or lighting settings.
Make a high-resolution duplicate of your transparent image. That ensures that you have excellent quality for your projects.
Keep your transparent image and its variations in a descriptive folder.
Make backups of your work, including the original and transparent versions, and save your final image.
Conclusion
In conclusion, transparent backgrounds change your images’ environment entirely and revive the subject’s appearance. One of their most exciting and unique aspects is their aptitude to give your subject a wholly different and often unrecognizable context. Besides everyday images, this approach is also premium in marketing, customizing greeting cards, enhancing the prestige of your presentations, and amplifying your social media experience. Regarding the steps and techniques described in this blog article, you can get accurate results in your image editing process while making a transparent background.
