How To Turn A Photograph Into Renaissance Art Painting
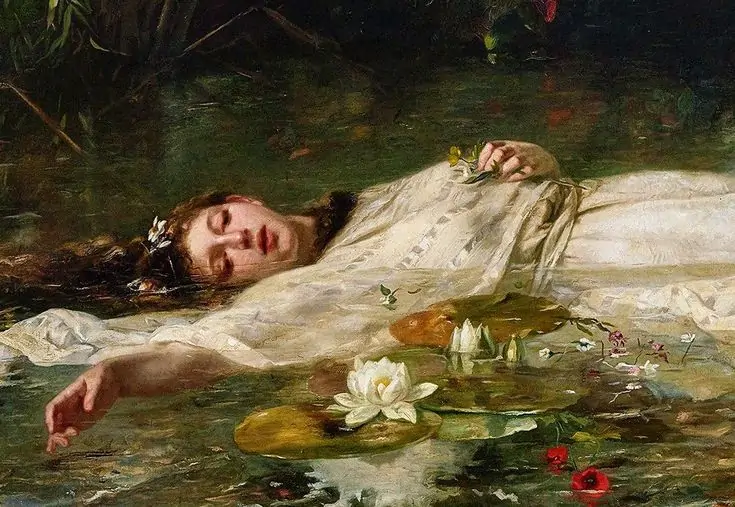
The Renaissance, which dominated European art during the fourteenth, fifteenth, and sixteenth centuries, encompassed various mediums, including painting, sculpture, architecture, music, and literature. It was brought about by themes of the resurgence of classical learning, a heightened awareness of nature, and a more individualistic perspective on human nature. While we explore Renaissance art pieces, we sense that the symbolic forms overpower each Renaissance painting. The subjects expand from images from the Bible to portraiture, events from contemporary culture, and scenes from classical religion. Human figures are continually depicted in busy stances, displaying facial expressions, making gestures, and engaging in social interactions. Taking provocation from Renaissance artworks, modern artists are also creating digital Renaissance paintings with a blend of Renaissance characteristic features and contemporary techniques. Various editing techniques are pretty helpful in creating Renaissance paintings, either from scratch or by recreating an ordinary photograph into Renaissance art. The most functional choices include composition strategies, color palette adjustment, creative textures and brushwork, background manipulation, lighting and shadow manipulation, and more.
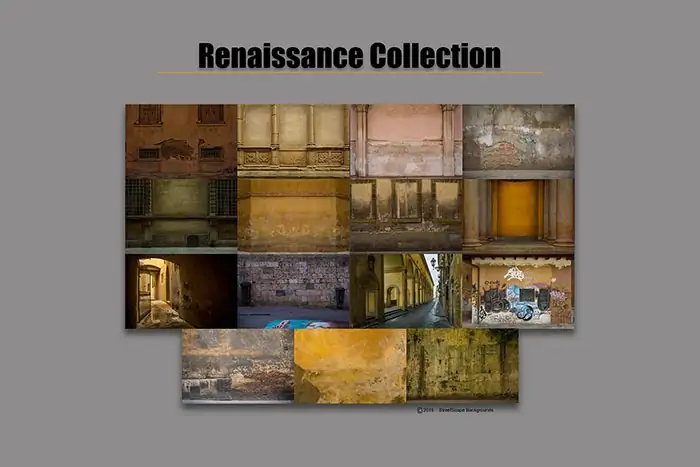
Step 1: Image Selection
Decide the objective of the image transformation, whether it’s an individual project, aesthetic exploration, or client commission.
Select an image with precise subjects and exciting components accommodating the specified Renaissance style. Images from Portraits, landscapes, and still-life photography can be valuable options.
Study the arrangement of the photo, considering components such as proportion, symmetry, and central points. Search for solid visual features that can be enriched or emphasized within the modification process.
Assess the lighting conditions within the photo, as lighting is vital in making temperament and climate in Renaissance art. Seek photographs with well-defined light and shadow ranges that can be further complemented.
Make sure that the chosen photo has adequate resolution and clarity to support nitty-gritty editing and changes. Photographs with higher resolution give more adaptability and permit better adjustments.
Step 2: Using Composition Options
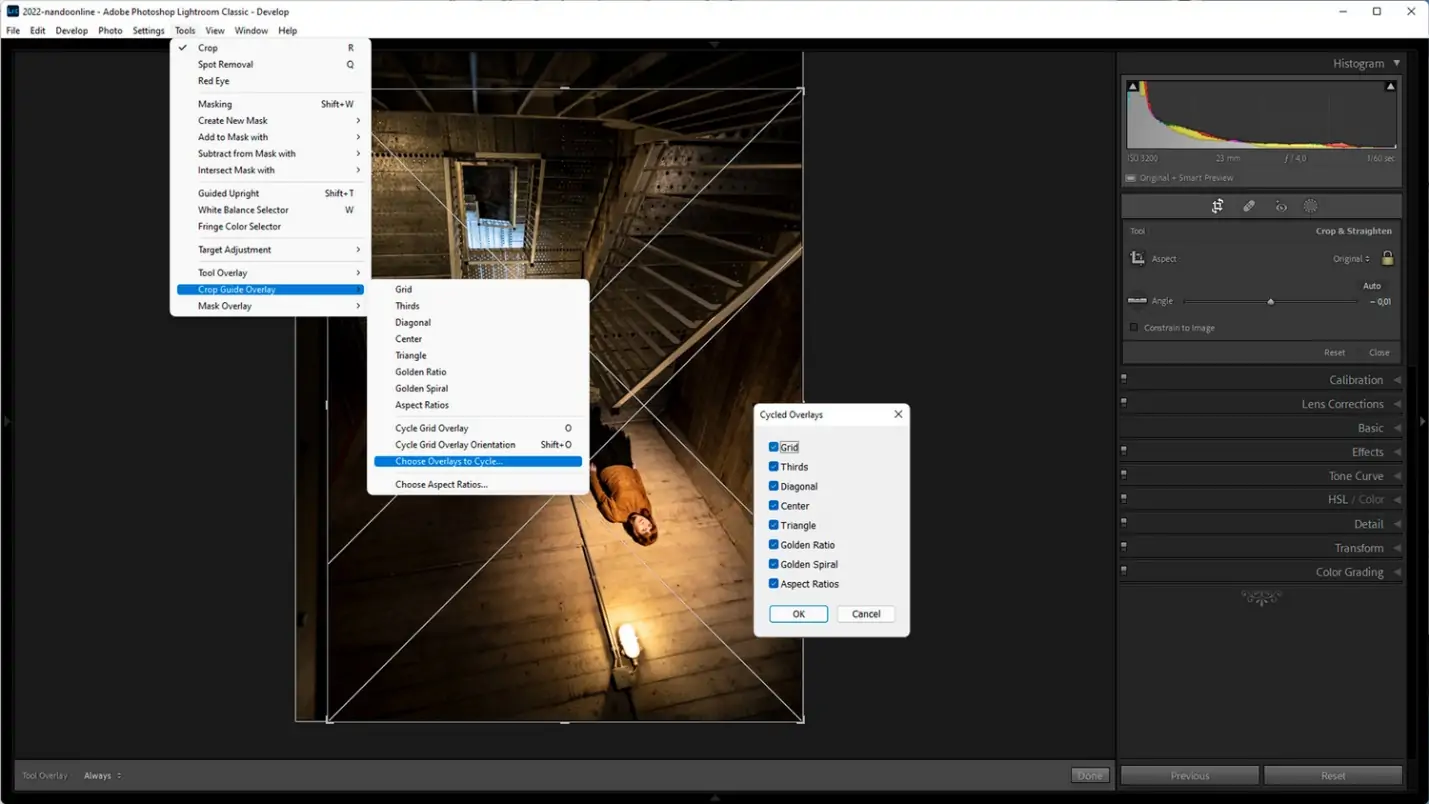
Assess the photo’s existing composition and decide if any alterations are required to comply with Renaissance standards of balance and symmetry.
Employ the rule of thirds to direct the prevalence of subjects and other components inside the frame. Reposition principal components along the intersecting points or along the grid lines for visual interest.
Recognize and dispose of any distracting elements or clutter within the backdrop that degrade from the main focus of the picture. Utilize editing tools to remove undesirable zones and emphasize the central subject.
Check that the photo’s primary subject is noticeably featured and possesses a noteworthy portion of the outline. Alter the composition to draw attention to the subject and create a central point for the viewer.
Keep in mind the required aspect ratio for the final painting and alter the editing accordingly. Try distinctive compositions to discover the most visually engaging setting that suits the Renaissance style.
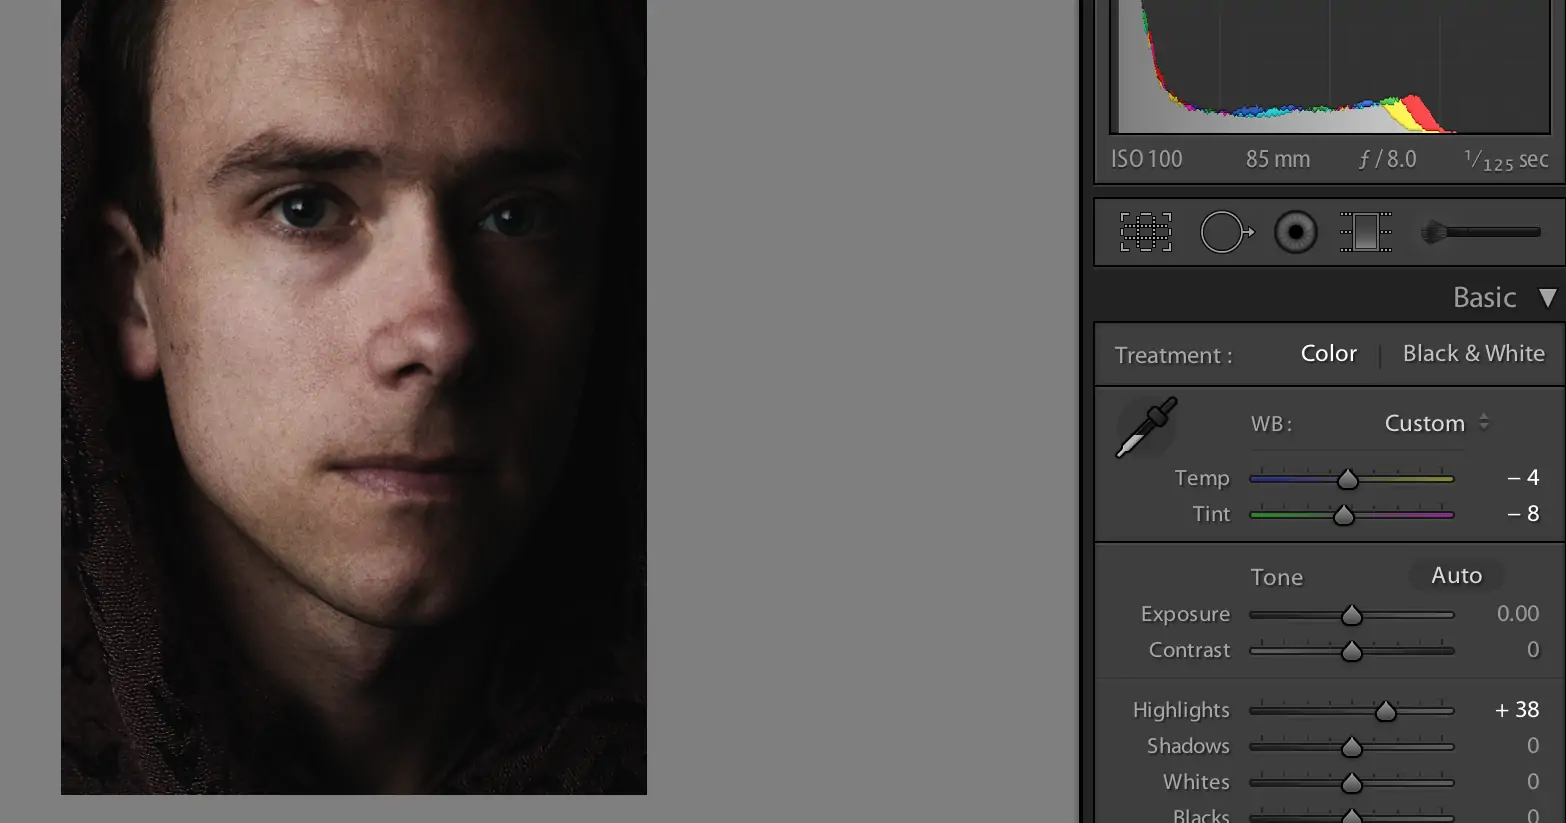
Step 3: Adjusting Color Palette
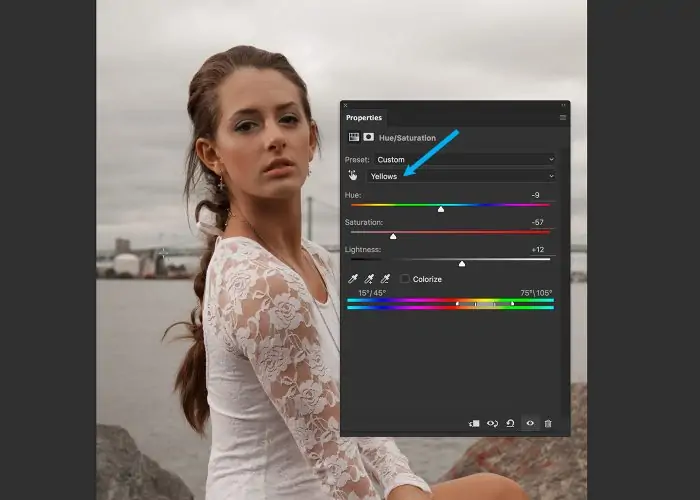
Start by desaturating the colors to attain a more gentle and serene palette reminiscent of Renaissance canvases. Decrease the vibrancy and intensity of tones to make a milder, more agreeable general appearance.
Prioritize earthy tones like ochre, sienna, and burnt umber, which were commonly utilized in Renaissance art. Alter the color balance to favor warmer tones and create a cohesive color plot throughout the picture.
Attend to skin tones and check that they appear natural and true to life. Alter the color temperature and saturation to attain a realistic substance tone that complements the overall color palette.
Improve the contrast between highlights and shadows to make profundity and dimension within the picture. Alter the levels or curves to maximize the contrast while protecting detail in the highlights and shadows.
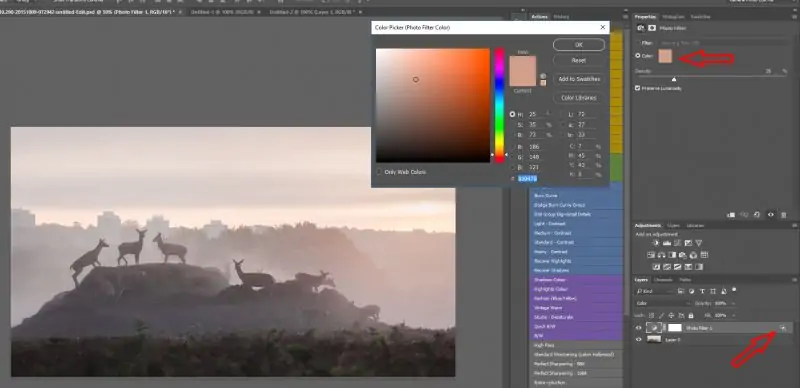
Add the concluded color grading settings to tune the painting’s broad color harmony and temperament. Try different color filters or adjustment layers to reach the specified visual mark and bring out the soul of Renaissance art.
Step 4: Creative Textures And Brushstrokes
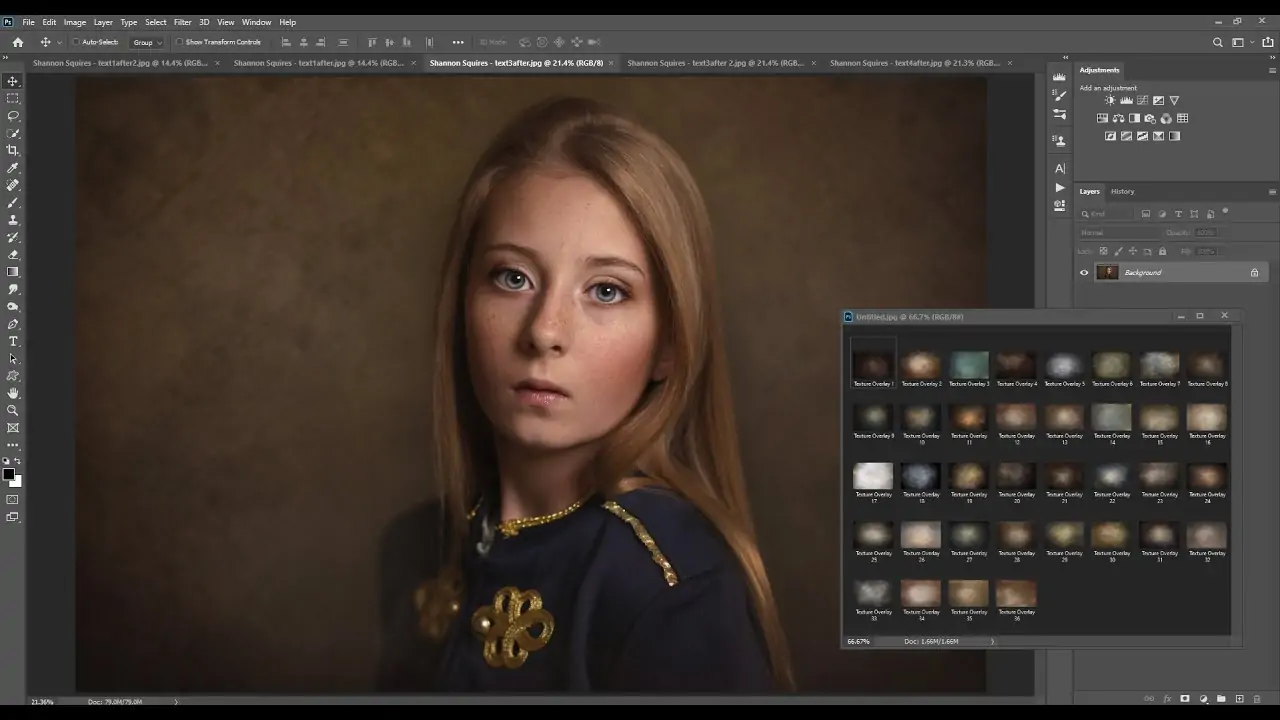
Select digital brushes that imitate the texture and brushstrokes of Renaissance canvases. For a naturalistic and painterly effect, prefer brushes with assorted shapes, sizes, and opacity levels.
Add texture overlays to the photo to give it profundity and dimension. Utilize surfaces that resemble canvas or material to mimic the impression of conventional painting textures.
Try different brushstroke strategies to form realistic and vibrant surfaces, including cross-hatching, stippling, and blending. Change the pressure and heading of the brushstrokes to imitate the mild subtleties of hand-painted art.
Paint in layers to assemble the painting continuously, beginning with broad strokes and gradually including more refined subtle elements. Utilize blending modes and opacity settings to match the painted components with the initial photo.
Check out the detail and accuracy when applying brushwork to the photo. Emphasize capturing the enigmatic textures and designs found in Renaissance artworks, such as fabric folds, foliage, and architectural features.
Step 5: Recreating Lighting And Shadows
Consider the lighting within the initial photo and distinguish regions where enhancements can be made to get a more sensational and climatic impact reminiscent of Renaissance art.
Determine the essential light sources within the image and upgrade their intensity and contrast to explain brightness and focus. Alter the brightness and color temperature to recreate natural or artificial lighting.
Execute the chiaroscuro strategy by developing shadows and amplifying highlights to create solid contrasts between light and shadow. Use gradient masks or adjustment layers to enhance shadow ranges while specifically protecting detail within the highlights.
Consider the light heading within the unique photo and ensure consistency with the specified aesthetic effect. Utilize directional lighting to shape and set up the shapes of the subjects, making a sense of volume and dimension.
Apply atmospheric perspective procedures to make profundity and spatial figment within the composition. Hush faraway components and decrease their contrast to recreate the impacts of air haze and distance discernment, elevating the general sense of profundity within the image.
Step 6: Including Symbolic Objects
Present symbolic components or themes motivated by Renaissance art to pervade the painting with more profound meaning and story significance. Consider connecting classical allegories, devout images, or chronicled references pertinent to the subject matter.
Give over-consideration to facial expressions and body language to communicate feelings and stories inside the painting. Emphasize subtle signals and expressions that bring out the disposition and climate of Renaissance artworks or story scenes.
Include decorative details and embellishments motivated by Renaissance enriching arts to heighten the illustration’s visual curiosity. Incorporate complex patterns, flower themes, or architectural components to improve the composition and inspire the abundance of the time.
Make a sense of narrating inside the art by organizing the components in an energetic and inviting composition. Organize the subjects and props in a way that recommends development, interaction, or a particular arrangement of events, welcoming viewers to decipher the scene and induce its fundamental account.
Utilize the background of the painting to communicate extra layers of meaning or imagery. Join symbolic scenes, architectural settings, or atmospheric components that complement the central subject and contribute to the painting’s overall story or topical setting.
Step 7: Making Final Tweaks
Weigh up the painting, evaluating its composition, color palette, and temperament. Assess whether it effectively captures the pith and style of Renaissance art.
Review any remaining details that will require correction or refinement. Make little adaptations to brushwork, lighting, and texture to improve authenticity and visual development.
Confirm consistency in fashion and strategy throughout the artwork. Verify that components such as brushstrokes, lighting appearance, and color treatment are cohesive and pleasant-sounding.
Consider the passionate effect of the painting on the viewer; it should cultivate a sense of awe, interest, or thought, which is a trait of Renaissance art.
Apply any final color grading alterations to get the specified temperament and environment. Polish the color adjustment, contrast, and saturation to improve visual enticement.
Conduct a last quality check to confirm that the composition meets your benchmarks of brilliance. Zoom in to examine details and resolution, and make any vital refinements to ensure a groomed final upshot until you’re pleased.
Conclusion
In conclusion, Renaissance artworks are enduring gems that surpass mere illustration, exemplifying the heart of human creativity, brilliance, and cultural revitalization. Renaissance themes present a glimpse into history, proposing an understanding of the time’s societal, spiritual, and intellectual breezes while uplifting amazement and affection for their outstanding magnificence. Borrowing ideas from those antique artworks, you can augment the visual manifestation of your paintings and images by uniting chronological features with everyday contexts. The step-by-step process mentioned in this article can guide you while creating authentic and endearing Renaissance paintings using suitable digital tools and techniques.
