How To Include A Synthwave Effect In An Image
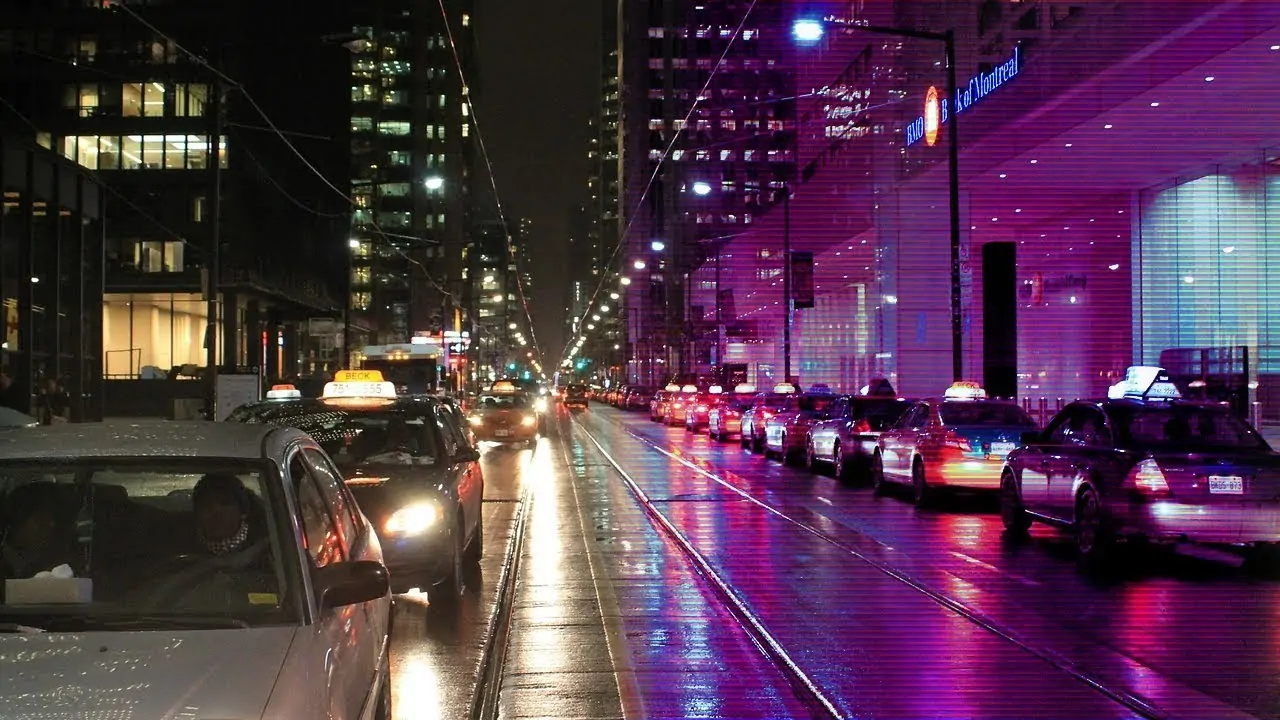
The fascinating synthwave aesthetic associated with the visual trends of the 1980s and 1990s has revamped modern art. Traditionally, the synthwave represents a corresponding musical style and a unique visual aesthetic, such as themed artwork on album covers. It has become vastly utilized in visual art with time, including ideas from 1980s retrofuturism, science fiction, cyberpunk imagery, neon pink and cyan hues, retro digital visuals, and grid lines. Besides, often stylized sunset renderings are among its most noticeable aspects. The synthwave aesthetic is also known as neon-noir, outrun, and retrowave. Neon pink and cyan tones are ubiquitous throughout synthwave, making it one of the genre’s most identifiable characteristics. In image creation and manipulation, the synthwave aesthetic is absolutely prevailing and used to create or modify the existing photograph by integrating its characteristic elements. Different editing tools and techniques like brushes, writing tools, color balancing, adjustment layer, and blending modes jointly play their function in creating impressive compositions that appeal to viewers with their futuristic nature.
Step 1: The Software Launch And Image Import

Commence by heading to the Adobe Photoshop program on your computer and double-click to launch the program.
If you do not have Adobe Photoshop downloaded, you’ll install it from the Adobe website and observe the installation instructions given.
After your Photoshop launches, you will be welcomed with the main screen or workspace. You can make a new project by selecting “Create New” or open an existing venture by clicking “Open.”
Explore the area where your photo is saved on your PC. Utilize the file browser inside Photoshop to find the picture file you ought to alter.
Pick the image file and click “Open” to bring it into Adobe Photoshop. The file will emerge within the primary workspace zone and be ready for editing.
You have effectively completed step 1 by spreading your photo in Adobe Photoshop and setting the layout to include synthwave details.
Step 2: The Image Duplication
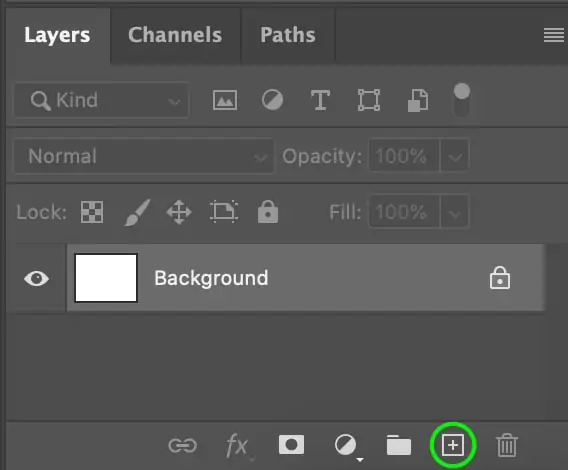
The Layers panel is on the right side of the screen. If you do not see it, go to the “Window” menu and select “Layers” to display it.
Within the Layers panel, tap on the “New Layer” symbol at the bottom. It will be like a square with a tucked corner. Or, you can go to the “Layer” menu at the top of the screen, select “New,” and after that, select “Layer.”
Next, you will see a new layer that will show up over your photo within the Layers panel. It’ll be named “Layer 1” by default. You can rename it to something more apparent by double-clicking on the layer title and writing a new title.
The new layer, including synthwave features, is instantly available. Any alters or augmentations you make on this layer will be partitioned from your unique photo, permitting you to work non-destructively.
Step 3: Drawing Synthwave Details
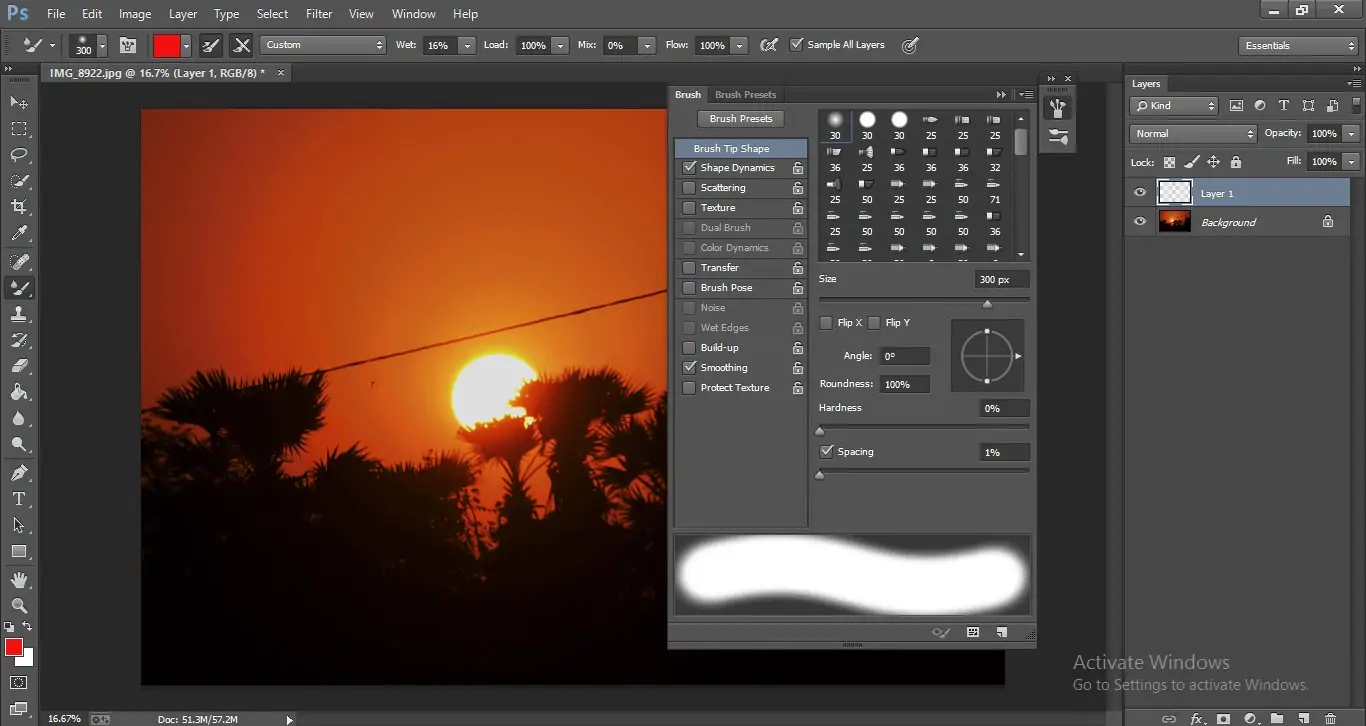
Select the suitable tool for including synthwave features in your photo. Standard choices incorporate the Pen Tool, Shape Tool, or Brush Tool, each providing diverse capabilities for making shapes and plans.
Decide the particular synthwave features you need to join, such as neon lines, framework designs, palm trees, or retro cars. These details add to the retro-futuristic flavor related to synthwave.
Employ the chosen apparatus to draw or create the specified synthwave components on the new layer you created within the ex-step. You can sketch freehand or use shapes and paths to make exact designs.
Play with diverse shapes, sizes, and courses of action to attain the specified composition. Assume how the components will bond with the photo and the overall aesthetic you need to accomplish.
Carefully polish and alter the synthwave components until you’re delighted with the by-product. Utilize keyboard shortcuts like Ctrl + Z for Windows or Command + Z for Mac to fix any foul-ups and attempt once more.
Step 4: Filling Synthwave Colors
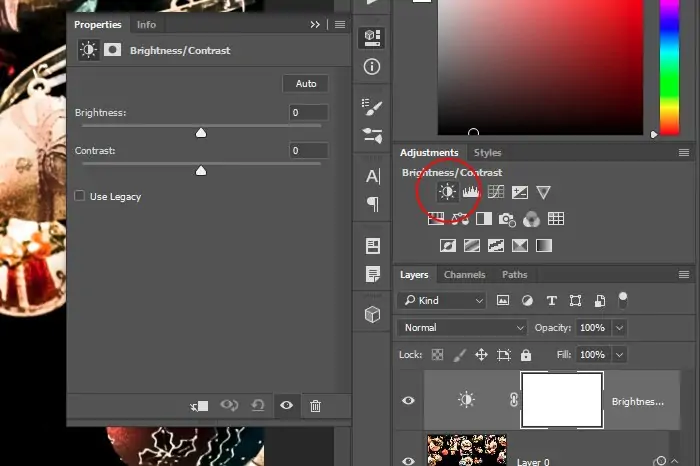
Select the synthwave components layer within the Layers panel to ensure you work on the proper layer.
Explore the “Image” menu at the top of the screen and select “Adjustments” to get to different color alteration choices.
To direct the colors of the synthwave components, use adjustment layers of hue/saturation, color balance, or vibrance.
Utilize the sliders inside each adjustment layer to change the colors’ tint, saturation, and brightness. That lets you get a fiery and neon-like appearance that’s usual for synthwave.
See the changes in real-time as you alter the sliders to check that they complement the overall taste of your photo.
Reckon the mood and environment you need to speak via your synthwave components and alter the colors appropriately. Make robust and eye-catching color plans or more repressed tones depending on your inclinations.
Step 5: Enhancing Composition’s Gleams
Pick the layer holding the synthwave segments within the Layers panel.
Analyze different effects to improve the components’ neon-like impression. The most recommended effects can incorporate glow, blur, or other stylized filters.
Head to the “Filter” menu at the top of the screen and select “Blur” to add a blur impact to the synthwave pieces. Play with different blur settings to get the required distribution level and gleam.
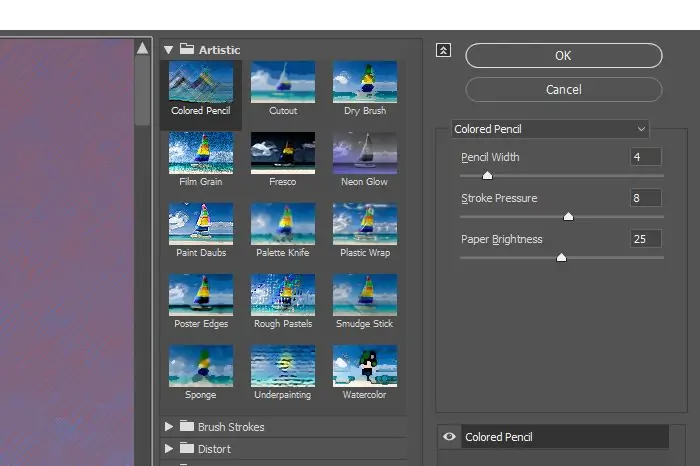
You can also select “Filter Gallery” from the “Filter” menu to get to a wide variety of aesthetic filters. Investigate alternatives like “Glowing Edges” or “Plastic Wrap” to include interesting visual impacts to the synthwave details.
Preview the effects in real time and change the settings as needed to achieve the desired result. Be sure of the general aesthetic you want and how the effects will harmonize with the composition of your photo.
Lay the chosen effects to the synthwave component layer and oversee how they improve the components’ neon-like impression and futuristic vibe.
Step 6: Regulating Blend Modes And Opacity
Rectify the opacity of the synthwave components layer to fuse them with the fundamental photo. Bringing down the opacity permits the picture to reveal through, making a more consistent unification.
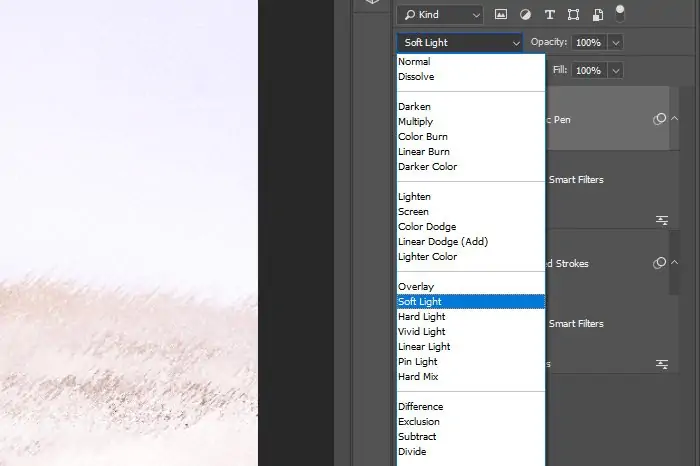
Test with varied blending modes for the synthwave components layer to attain the required effect. Screen, Overlay, and Lighten are the Common modes for synthwave segments.
See each blending mode to see how it influences the appearance of the synthwave components in connection to the photo. Select the blending mode that upgrades your composition’s widespread aesthetic and disposition.
Utilize layer masks to uncover or cover specific parts of the synthwave components layer. That is for exact control over which ranges of the photo are influenced by the synthwave components.
Establish the blending and masking so the synthwave components are consistently coordinated with the photo, making a cohesive and visually engaging composition.
Try various blending and masking strategies until you accomplish the specified result. Do not be perplexed about undoing it, and try again if necessary.
Step 7: Performing Final Changes
Survey your composition and make any last alterations to make it meet your imaginative vision. You can tune colors, contrast, or general brightness to increase the visual impact.
Consider including extra effects or components to further enhance the synthwave’s beauty. For instance, use lens flares, light leaks, or texture overlays to add profundity and climate to the composition.
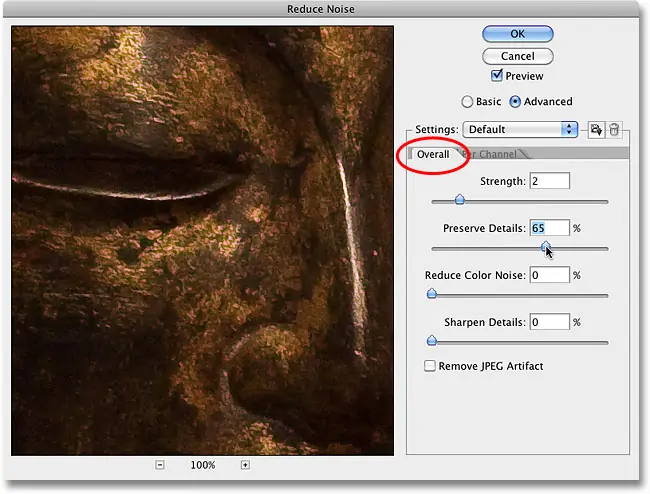
Try with the creative filters or adjustment layers till you get the specified temperament and tone. You can also apply sharpening or noise-lessening procedures to enhance the picture’s quality.
Assess your composition from a distance to ensure it looks cohesive and balanced. Make any vital tweaks to the composition or arrangement to progress the overall visual flow.
When you get a satisfactory result, save your edited photo in the applicable file format. You can also save a duplicate of the initial photo and protect the layers in Photoshop format for future alterations.
Share your synthwave-inspired photo piece on social media with mates, or submit it to online communities or exhibitions.
Conclusion
In conclusion, including a synthwave effect in your photographs is like including a striking and exquisite visual inducement that results in a pleasingly transformed visual expression. The spotlighted features of the synthwave aesthetic, like the sovereignty of neon pink and cyan hues, can nudge a feeling of thrilling energy and wistfulness when fused with the images. Along with the use of the hallmark colors, the synthwave symbols like grid patterns, palm trees, antique motorcars, and futuristic city views further strengthen the recreation of the illustrations. Eventually, you can create visual art corresponding to the birth and development of the earliest synthwave aesthetics.
