How To Create Naïve Art
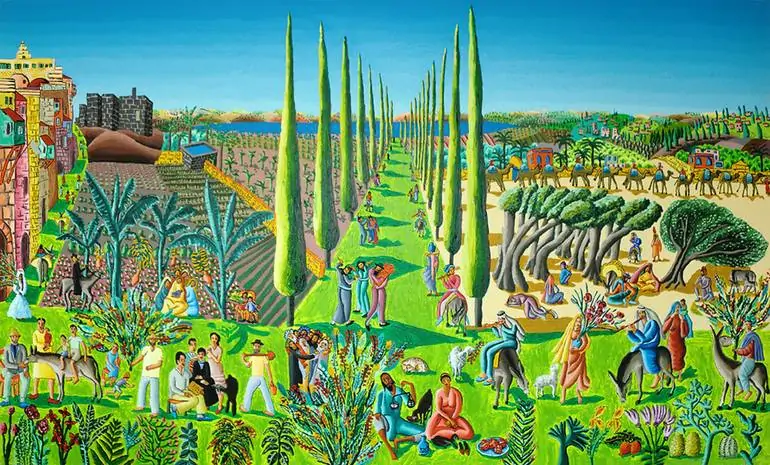
Naïve art, also called primitive art, represents the creative outputs of untutored or self-taught artists. Those artists rely wholly upon their innate skills and creative intuition instead of following traditional painting principles or art techniques. Their art compositions feature a juvenile spirit that indicates simplicity without any constrained proportions or perspectives. Modernists treasure this art form deeply because of the simplicity of the themes of naïve artists. They have been skipping what they truly envisioned due to the superficial sophistication of art within a traditionally established system; likewise, the concepts of naïve art provide them with a simple and basic vision upon which they could freely devise pleasing artworks. You can also create your own naïve artwork and experiment with ideas relevant to simplicity and privilege of expression. Starting from choosing a proper art software with essential features and tools like sketching tools, texture option optimized brushes, shape tools, and layering setup; you can end up with a spellbinding naïve chef-d’oeuvre. The step-by-step application of these approaches is as follows:
Step 1: Selecting A Suitable Art Software
Select digital art software that accommodates the plainness and suddenness of naïve art, such as Procreate, Adobe Fresco, or even elementary drawing apps.
Prefer software with intuitive interfacing and rudimentary drawing functionalities to bypass overbearing complexity.
Reflect on compatibility with your device and the program’s availability to guarantee a smooth and agreeable creative approach.
Check out the accessible brush choices inside the chosen program, picking up brushes that imitate conventional mediums such as pencils, crayons, or markers.
Seek for highlights that encourage freehand drawing and experimentation, permitting a fluid and expressive workflow.
Try with trial forms or free options before reserving for an investment, guaranteeing the program meets your needs and inclinations.
Eventually, select tools that enable you to declare your inventiveness and grasp the lively soul of naïve art in your digital manifestations.
Step 2: Directing The New Canvas Measurements And Resolution
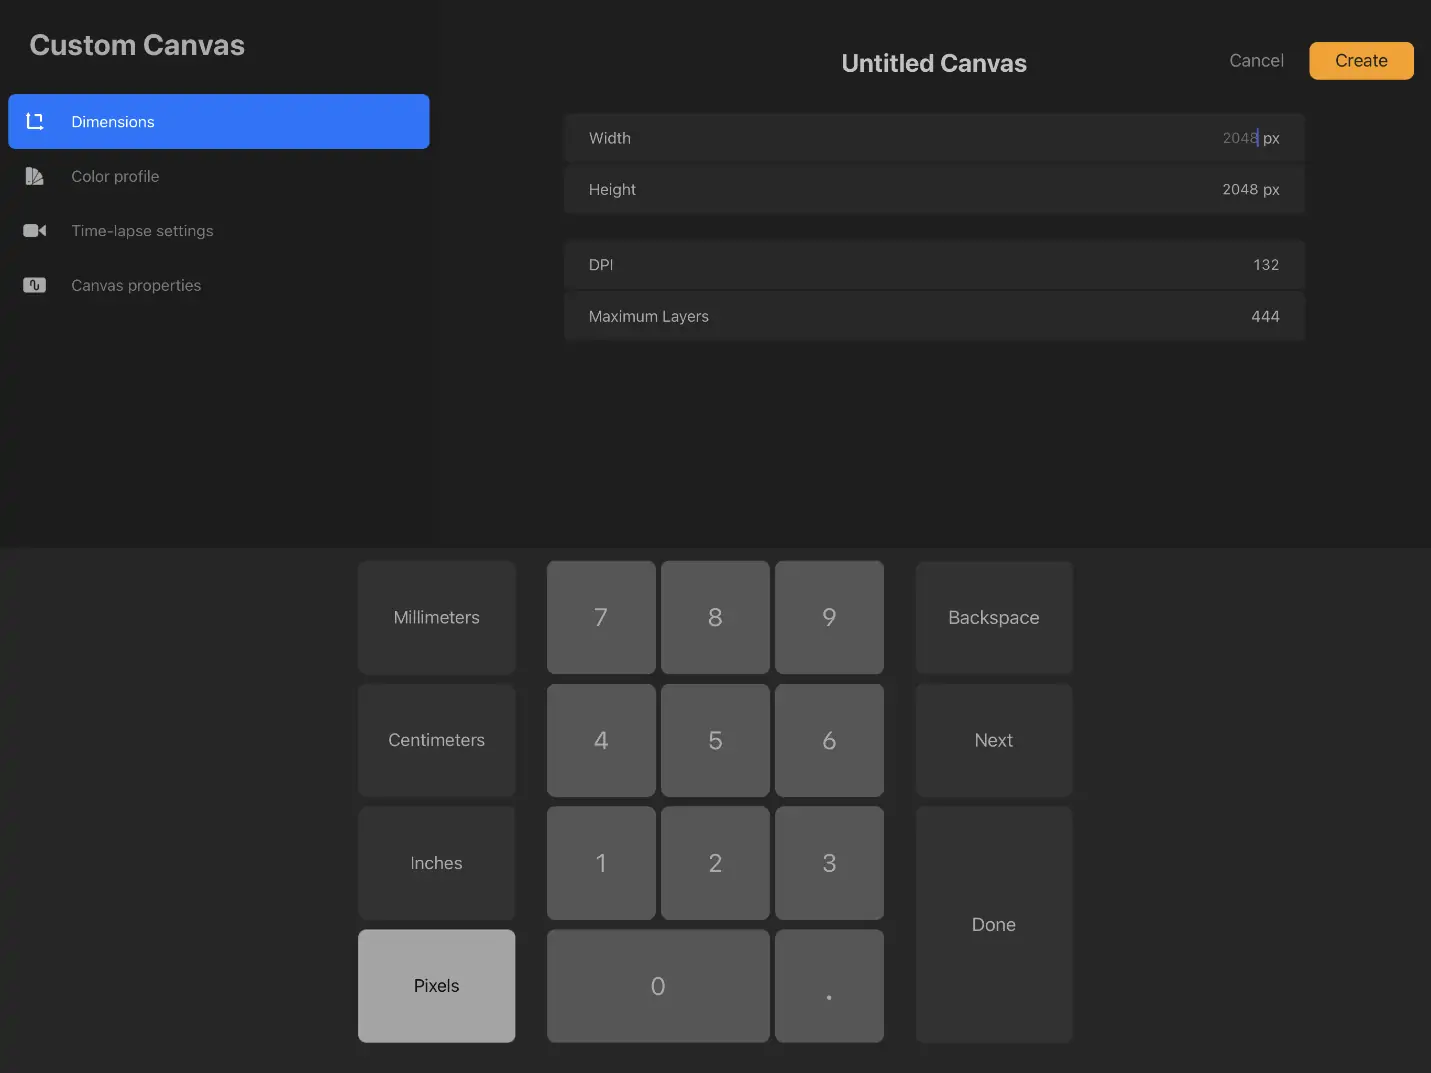
Create a new canvas in your chosen digital art software and confirm that its size fits your planned ultimate output.
Consider beginning with a square or rectangular canvas, often utilized for digital artwork, and alter the dimensions as required.
Select a resolution that equalizes quality with file size, opting for a resolution appropriate for printing if desired.
Select a foundation color or let it be transparent, depending on your creative vision and inclinations.
You can edit other canvas settings, including orientation (you can choose from landscape or portrait) and units of measurement (such as pixels, inches, etc.).
Preserve your canvas file in a consistent format like PNG or PSD to protect layers and facilitate future altering.
Make sure that your workspace is tidy and orderly, refining your digital environment for inventiveness and efficiency.
Recheck your canvas settings and make any fundamental alterations before continuing to outline your naïve art composition.
Step 3: Creating The Initial Sketch Of Naïve Art
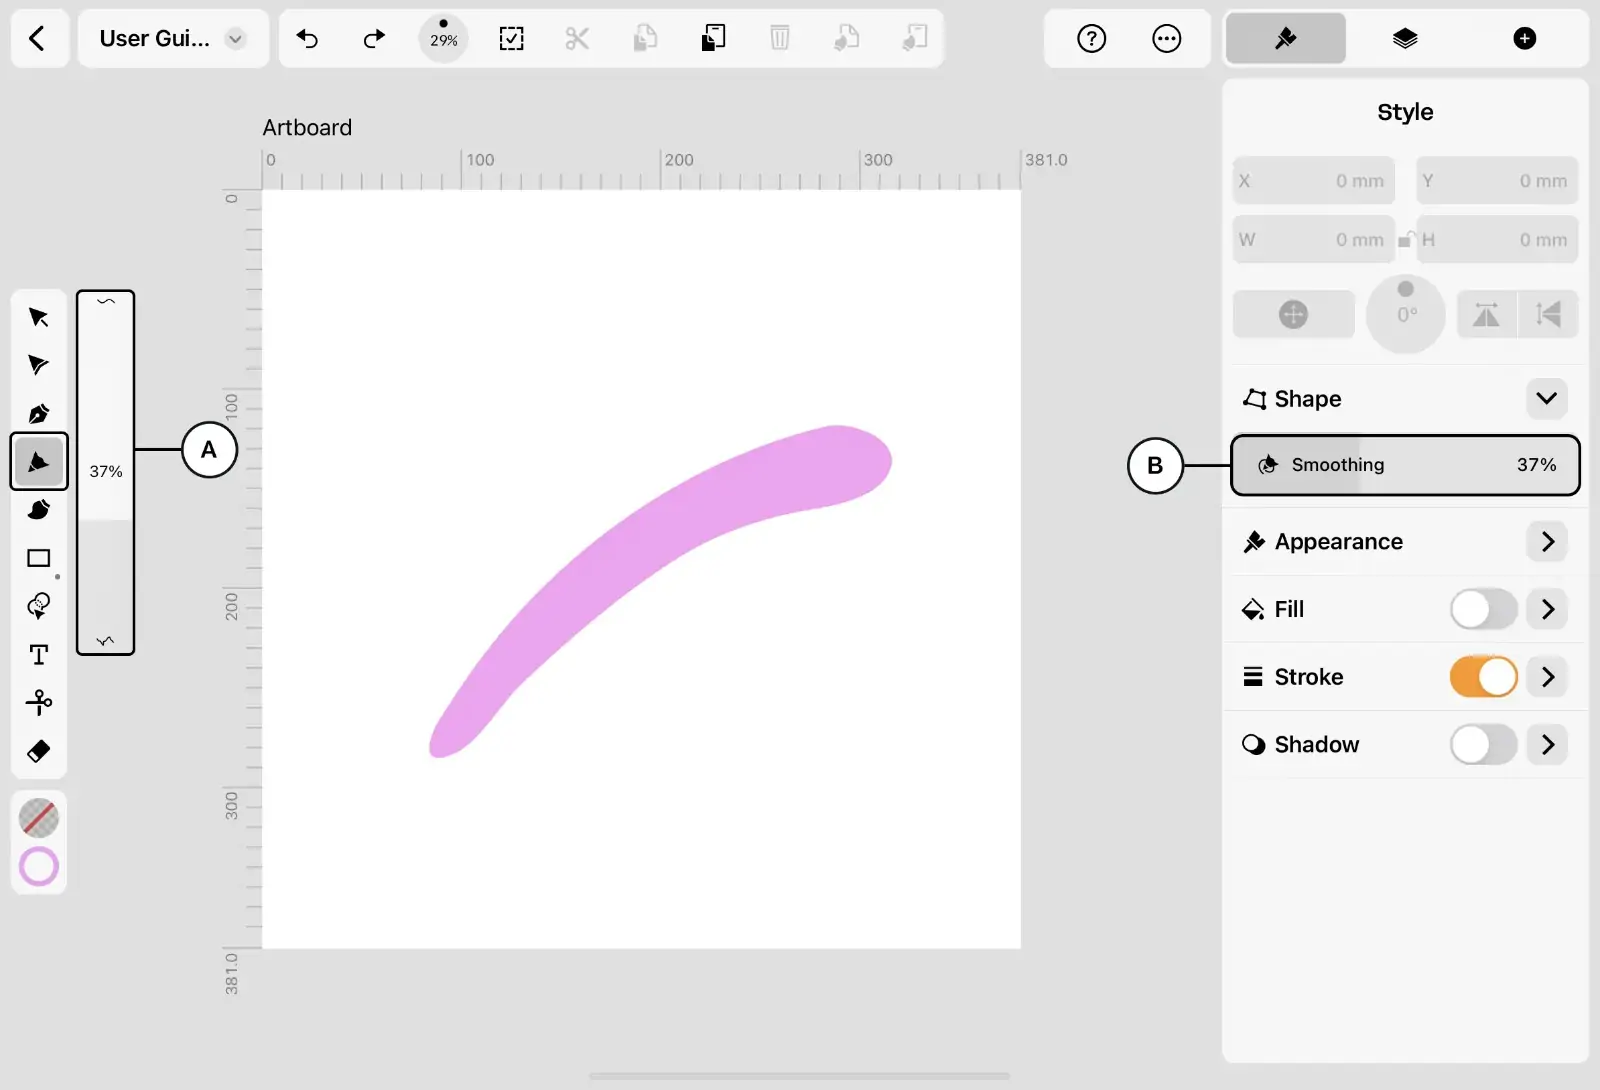
Start by freely drawing the most components of your naïve art composition employing a digital drawing tool or stylus.
Explore the variety of advanced drawing tools, such as brushes, pencils, and pens, that are accessible in your painting program.
You can also utilize the eraser tool to correct any botches or refine your drawings by expelling undesirable lines or marks.
Revolve about capturing your subject’s pith with basic lines and shapes, abstaining from perplexing subtle elements.
Grasp flaws and suddenness in your outline, which will permit a perky and natural feel to your work of art.
Play with various brush sizes and opacities to differ the thickness and magnitude of your lines.
Consider your artwork’s all-in-all composition and poise, guaranteeing that components are organized pleasantly.
Keep the sketching process smooth and natural, permitting room for imagination and exploration.
Do not stress about making botches; naïve art appreciates genuineness and the artist’s individual perspective.
Take breaks as required to step back and evaluate your sketch, making alterations or refinements as needed before moving to include color and detail.
Step 4: Filling The Sketch With Bold Huess
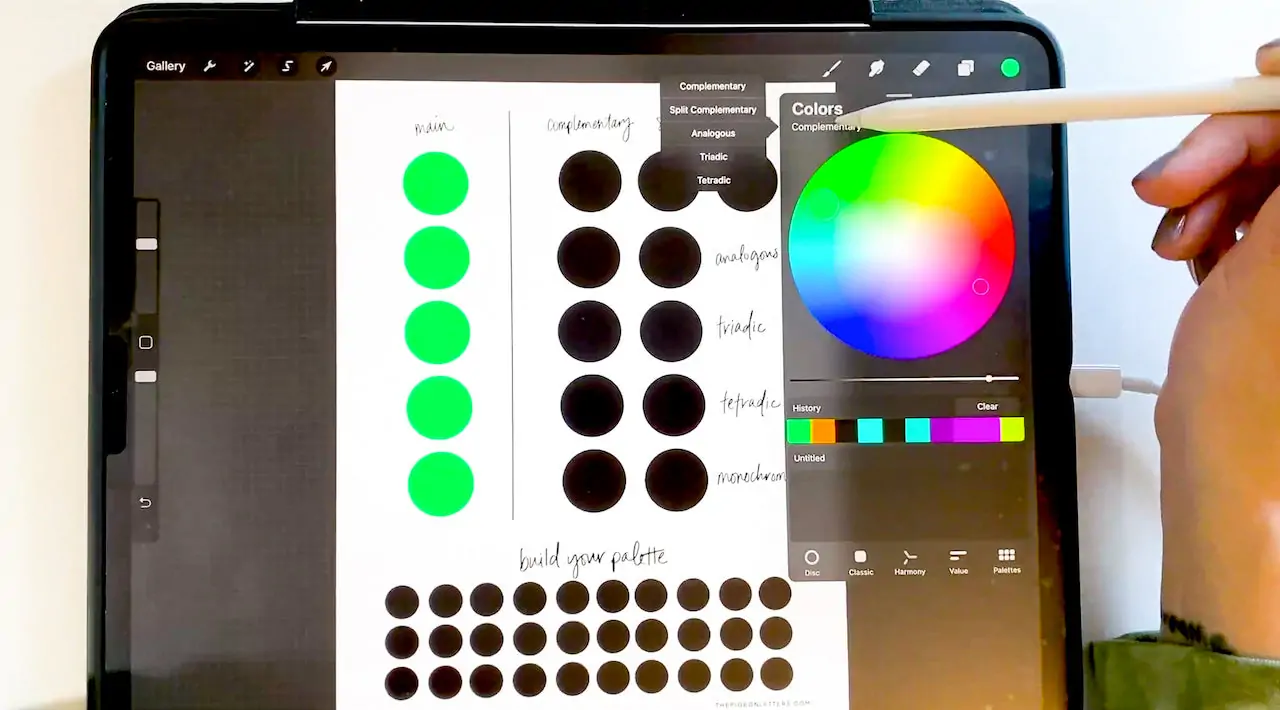
Choose a limited color palette that reflects the unusual and dynamic nature of naïve art.
Start by filling in expansive ranges of your composition with flat colors, utilizing wide strokes or the paint bucket feature.
Stress simplicity and intensity in your color choices; don’t use excessively subtle or quiet tones.
Test with layering colors to make profundity and dimension inside your work of art.
Look into utilizing contrasting colors to maximize visual appeal and make energetic compositions.
Do not over-worry about remaining inside the lines; grasp spontaneity and permit colors to bleed and cover.
Hold the color application free and grungy, protecting the lively and naïve aesthetic.
Step back once in a while to survey your color plot’s general adjustment and balance, making adjustments as required before continuing to the next step.
Step 5: Accentuating Spontaneous Brush Strokes

Start by including simple details in your work of art, centering on characterizing key highlights and components.
Utilize various brush sizes and shapes to form surface and profundity inside your composition.
Try different brush strokes and strategies to get intriguing impacts, like stippling or cross-hatching.
Join exceptional and perky components into your details, grasping the juvenile charm of naïve art.
Consider including texture in particular zones of your artwork, such as clothing, foliage, or foundations, to upgrade visual development.
Avoid overworking your details; keep harmony between simplicity and complexity to protect the naïve aesthetic.
Once in a while, evaluate the across-the-board effect of your points of interest and make alterations as required.
Remember to have fun and let your inventiveness flow as you add identity and character to your naïve craftsmanship composition.
Step 6: Experimenting With Creative Effects And Filters
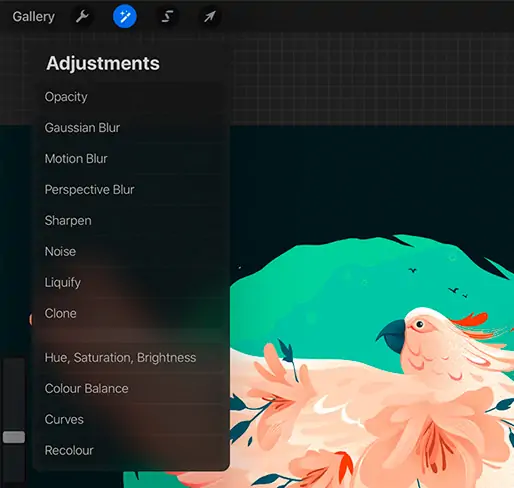
Assess your work of art and recognize regions that will aid from refinement or improvement.
Utilize special tools for adjusting colors, contrasts, and brightness levels to attain the required result and feel.
Examine lighting and shadows to increase profundity and dimension to your composition.
Think of including extra components or details to further develop the story or temperament of your artwork.
Try using exceptional filters or effects to comprise visual lure and climate.
Take pauses occasionally to step back and see your work of art with fresh eyes, making any vital alterations with a focused vision.
Look for input from peers or mentors to pick up new points of view and experiences in your artwork.
After you’re delighted with the overall appearance and feel of your work of art, save your file and craft it for sharing or printing.
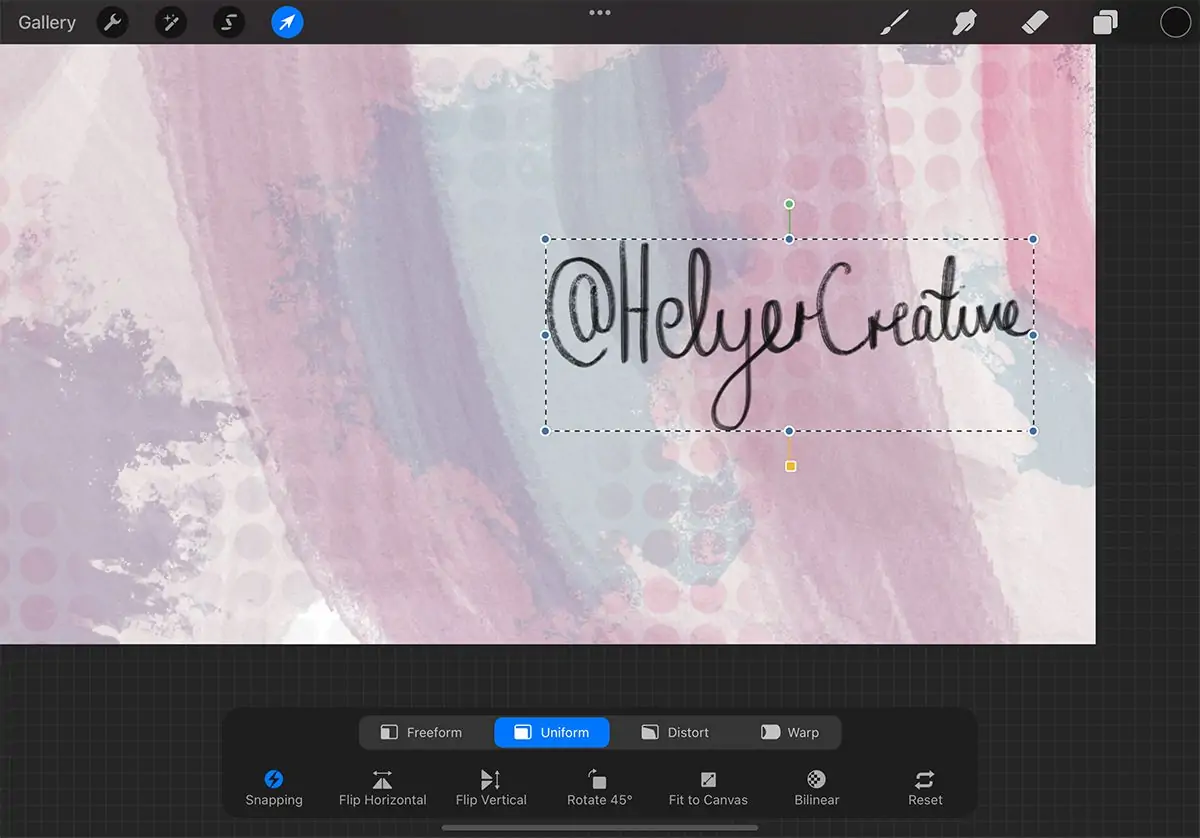
Step 7: Integrating Your Signatures Or Other Personal Specifics
Audit your work of art one final time, addressing any remaining details or regions that require alteration.
Guarantee that your composition keeps up the lively and unconstrained feel characteristic of naïve art.
To improve the overall effect of your piece, make any necessary changes or refinements to colors, shapes, or surfaces.
Consider including a signature or watermark to your work of art to personalize it and ensure your inventive work.
Preserve your finished artwork in an appropriate format, such as JPEG or PNG, so that it is optimized for sharing or printing.
To exhibit your inventive ability, share your work of art with others, whether through social media, online displays, or local shows.
Observe your achievement and grasp the delight of making naïve art, recognizing that your mesmerizing viewpoint has been shared with the world.
Conclusion
To sum up, naïve art is not merely an aesthetic approach that toasts simplicity; it holds rich cultural and historical significance. The roots of this art are linked to marginalized rural communities and offer a mouthpiece to artists who may have been omitted or shunned by conventional culture. It opts to portray the energies and ventures of ordinary individuals. Through their naïve art pieces, the artists can demonstrate adored artistic expressions and a character of the originality and strength of the human temperament. Eventually, each naïve art piece symbolizes its creator’s unusual vision and unique perception of society and its incidents.
