How To Straighten Or Distort An Image
When it comes to digital image manipulation, many tools are available for straightening or distorting images. Whether you’re looking to fix an uneven horizon, adjust the perspective of a building, or create a surreal, distorted image for artistic effect, a few key techniques and tools can help you achieve your desired result. This blog post will cover some basic principles of image distortion and correction and explore common techniques and tools used in popular photo editings software such as Adobe Photoshop and GIMP.
Understanding Image Distortion and Correction
Before we dive into the specifics of image manipulation tools and techniques, it’s important to understand what we mean by “image distortion” and “image correction.”
In general, “distortion” refers to any alteration of an image that changes its appearance from what the original subject actually looked like. That can include stretching or compressing the image, warping its shape, or changing its perspective. Distortion can be used creatively to achieve surreal or abstract effects, or it can be unintentional and undesirable, such as when a photo is taken with a wide-angle lens that causes the subject to appear distorted.
“Correction,” on the other hand, refers to any effort to undo or fix the effects of distortion, bringing the image closer to what the original subject actually looked like. It can involve straightening or adjusting the perspective of an image or using tools to correct the distortion caused by lens or camera issues.
Now that we’ve defined our terms let’s go through some common tools and techniques for straightening and distorting images.
Straightening an Image
One of the most common reasons to straighten an image is to fix an uneven horizon line in landscape photos. Fortunately, many image editing tools offer a simple “straighten” function that can automatically adjust the angle of your photo to make the horizon level.
In Adobe Photoshop, for example, you can use the “Crop” tool to straighten your image. Simply select the “Straighten” option in the tool’s settings, then click and drag a line across the part of the image to be straightened (such as the horizon line). Photoshop will automatically rotate the image to level it out.
In GIMP, the “Straighten” tool can be found under the “Transform” menu. Select the tool, then click and drag a line across the part of the image you want to straighten.
In both cases, it’s important not to over-correct the image, which can result in a distorted or unnatural-looking result. Use your best focus to determine how much correction is needed, and preview the result before saving your changes.
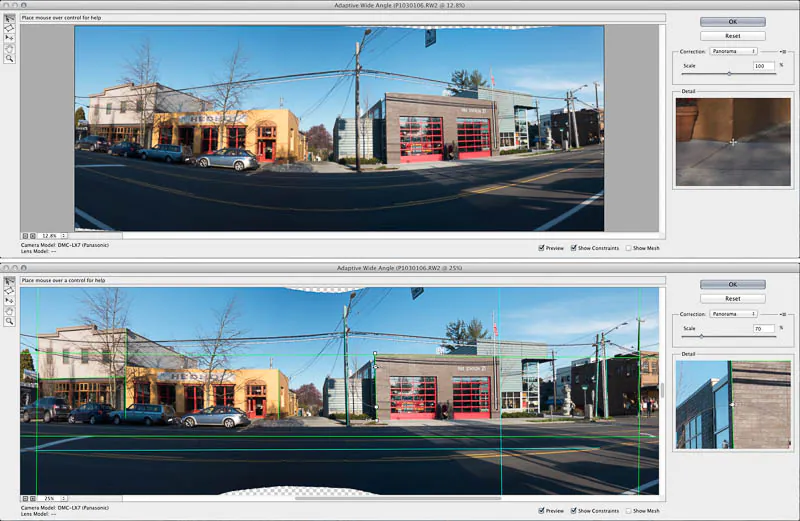
Adjusting Perspective
In addition to straightening images, you may also need to adjust their perspective to correct the distortion caused by camera angle or lens distortion. It is particularly common when photographing buildings or other objects with a strong vertical or horizontal orientation.
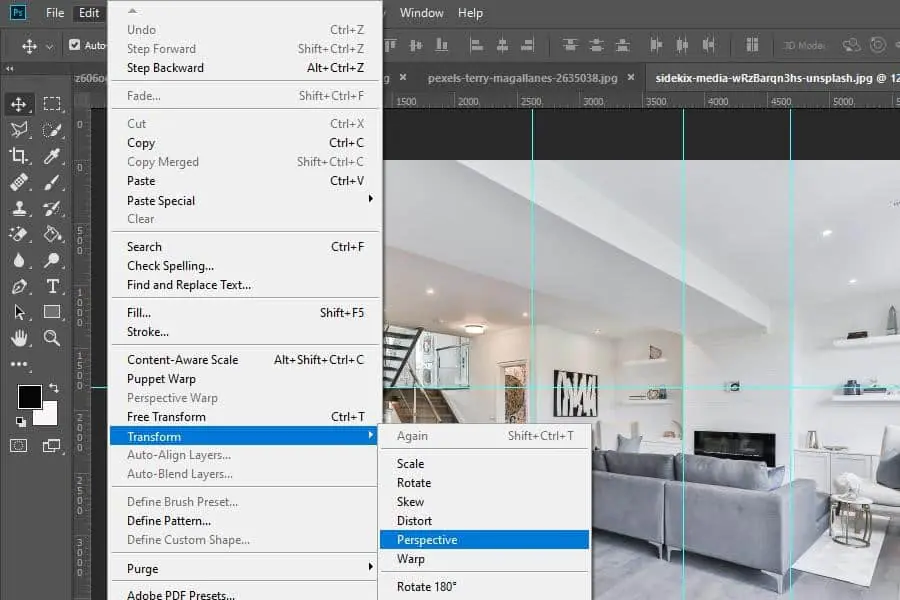
One common tool for adjusting perspective is the “Transform” tool, available in Photoshop and GIMP. This tool allows you to adjust the angle and shape of an image by dragging its corners or edges.
To use the Transform tool in Photoshop, select the layer you want to transform, then go to Edit > Transform > Perspective. You can then drag the corners of the image to adjust its perspective.
In GIMP, the Transform tool is located under the “Tools” menu. Select the tool, then click and drag the image’s corners to adjust its perspective.
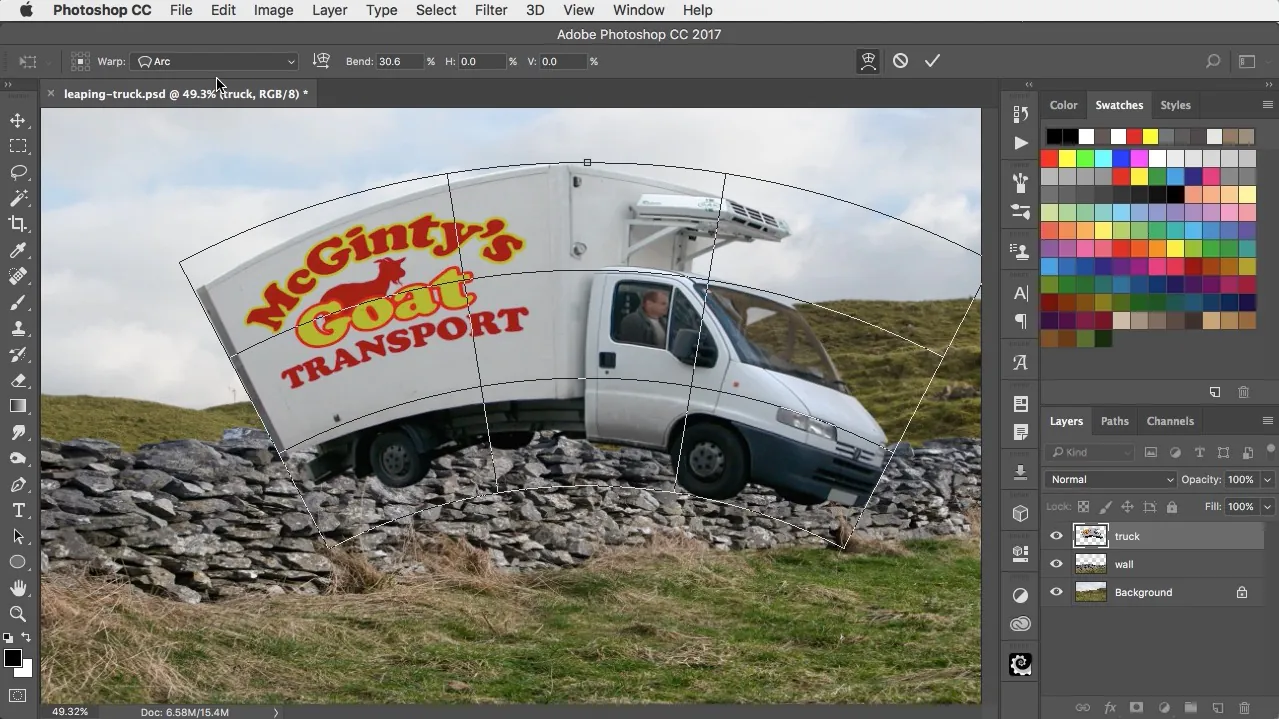
Another option for adjusting perspective in Photoshop is the “Warp” tool, which allows you to warp the shape of an image while preserving its perspective. It can be useful for correcting distortion caused by lens or camera issues and creating artistic effects.
To use the Warp tool in Photoshop, select the layer you want to warp, then go to Edit > Transform > Warp. That will display a grid over the image that you can use to warp its shape. You can drag individual points on the grid to create different shapes or use the handles on the edges to control the overall distortion.
It’s important to be careful when using the Warp tool, as overdoing it can result in a distorted or unnatural-looking image. As with any image editing tool, previewing your changes before saving them is always a good idea.
Distorting an Image
While image distortion is often something we try to avoid, there are also times when we may want to intentionally distort an image for artistic effect, which can be done using various tools and techniques, depending on the specific effect you’re trying to achieve.
One common technique for distorting images is to use a “liquify” tool, which allows you to warp and distort an image in real-time. It can be useful for creating surreal, abstract images or adding a sense of motion or fluidity to a static image.
The Liquify tool can be found in Photoshop under the “Filter” menu. Simply select the tool, then use the various brushes and settings to warp and distort the image as desired.
In GIMP, a similar effect can be achieved using the “IWarp” tool, which allows you to warp and distort an image in real-time. Select the layer you want to warp to use this tool, then go to Filters > Distorts > IWarp. That will display a grid over the image that you can use to warp its shape.
Another option for distorting images is to use a “displacement map,” a grayscale image that can distort another image’s pixels. It is a robust tool for creating abstract, surreal effects or blending multiple images in interesting ways.
To use a displacement map in Photoshop, create a grayscale image representing the distortion you want to apply. That can be done using any image editing software that allows you to create grayscale images.
Once you have your displacement map, open the image you want to distort in Photoshop and go to Filter > Distort > Displace. That will open a dialog box where you can choose the displacement map and adjust the settings for the effect.
In GIMP, the “Map Object” filter can achieve a similar effect. To use this filter, open the image you want to distort and the displacement map, then go to Filters > Map > Map Object. That will open a dialog box where you can choose the displacement map and adjust the settings for the effect.
The Basic Steps
Whether you want to straighten an image or distort it for artistic effect, the basic steps are fairly straightforward. Here are the basic steps to straighten or distort an image:
Open the Image Editing Software
The first step is to open the image you want to edit in your preferred image editing software, such as Adobe Photoshop or GIMP.
Select the Correct Tool
If you want to straighten an image, you’ll need to use a tool such as the Crop tool or the Perspective Crop tool in Photoshop. If you want to distort an image, you’ll need to use a tool such as the Liquify or Warp tools.
Make Your Adjustments
Once you have selected the appropriate tool, you can begin making adjustments to the image. If you’re straightening an image, use the Crop tool to crop the image or the Perspective Crop tool to adjust the perspective. If you’re distorting an image, use the Liquify or Warp tool to manipulate the image’s shape.
Preview Your Changes
Previewing your changes before saving them will give you a chance to see how the image will look once the adjustments are made. If you’re unsatisfied with the changes, you can always undo them and start over.
Save Your Work
Once you’re satisfied with your changes, save your work. Be sure to save the edited image as a new file so you don’t overwrite the original image.
Experiment and Refine
If you’re unhappy with the initial results, don’t be afraid to experiment and refine your technique. Try different tools and techniques to achieve the desired effect. You’ll become more proficient at straightening or distorting images with practice and experimentation.
Overall, straightening or distorting an image is a fairly straightforward process that can be accomplished using a variety of tools and techniques. Following these basic steps and experimenting with different tools and techniques, you can create stunning images that capture your unique vision and style.
Conclusion
In conclusion, many tools and techniques are available for straightening or distorting images, depending on your specific needs and goals. Whether you’re looking to correct perspective in a landscape photo, create a surreal, abstract image using a liquify tool, or apply a displacement map to distort the pixels of an image, there are many options available in popular editing software such as Adobe Photoshop and GIMP. However, using these tools with care and discretion is important, as overdoing them can result in a distorted or unnatural-looking image. Always preview your changes before saving them, and be willing to experiment and try new techniques to achieve the desired effect. With a little practice and persistence, you can master the art of image distortion and correction and create stunning, eye-catching images that capture your unique vision and style.
