
How to Set Vanishing Points in a Picture
Setting vanishing points in images is a worthy approach to amending perspectives and distortions using imaginary parallel lines that seem to meet each other at the same points. Introducing vanishing points to your images gives them a near-reality two or three-dimensional structure by aligning their elements in a composite visual impact. The parallels resulting from the vanishing points bring about the features of naturalism and straight horizons to the buildings and other structures as they coach our eyes, giving off a look of depth and dimension. Besides displaying realism, vanishing points create interesting illusions like infinite corridors, disappearing vanishing points, surreal architecture, whirlwind or cavern illusions, or surreal landscapes. These illusions can upgrade the images by adjoining a sense of perplexity and intrigue, hooking the viewer’s imagination and making the image linger in the mind.
Step 1: Open Your Image Editing Software
To begin, launch your chosen image editing software on your computer. Whether using Adobe Photoshop, GIMP, or any other application, ensure it is installed and ready to use. Once launched, you’ll be greeted with the software’s user interface, providing various tools and options to edit and enhance your images. If you don’t have the software installed, download it from the official website or any trusted source. With the image editing software up and running, you can import your image and set vanishing points to achieve a realistic perspective in your artwork or photographs.
Step 2: Import Your Image
After opening your image editing software, the next step is to import the image you want to work on. Most software allows you to do this by clicking “File” and then “Open” or dragging and dropping the image directly into the workspace. Ensure that your chosen image is of sufficient resolution to retain quality during editing. Once imported, the image will appear on the canvas, ready for your creative adjustments. At this stage, you can assess the perspective and composition of the image, identifying potential areas where vanishing points can be established.
Step 3: Identify the Perspective
With your image imported into the editing software, the next essential step is to carefully analyze the composition and identify the perspective within the scene. Look for parallel lines or surfaces that seem to converge in the distance, forming natural vanishing points. These lines may include the edges of buildings, roads, or other elements that create depth in the image. Understanding the perspective is crucial, as it allows you to determine the correct placement of vanishing points for achieving a realistic 3D effect. Train your eye to recognize the subtle cues that guide the viewer’s perception of depth and space within the image. Once you’ve identified the perspective lines and vanishing points, you’ll be better equipped to set the vanishing points and align elements accurately, resulting in a visually striking and convincingly realistic final composition.
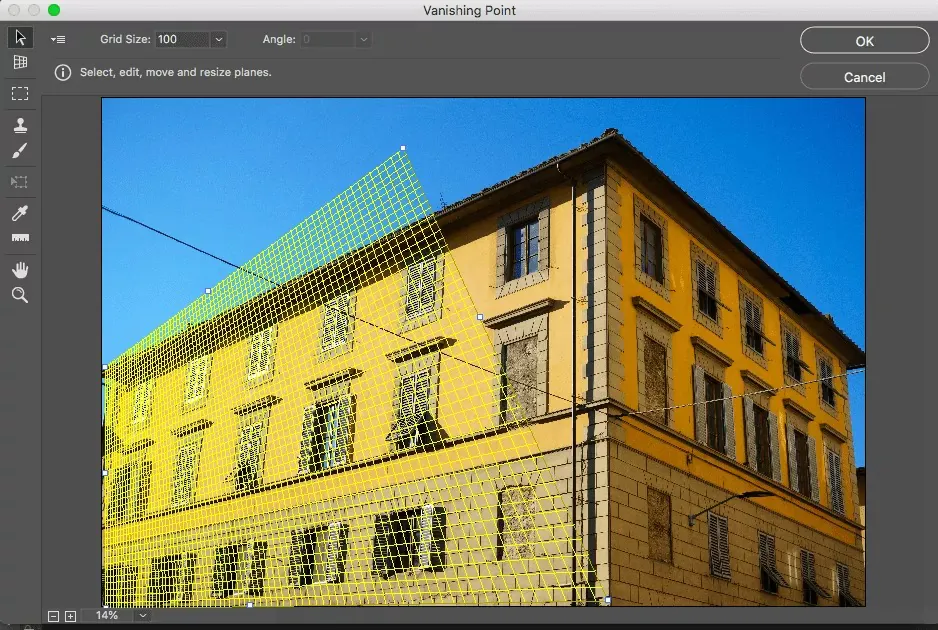
Step 4: Locate Vanishing Points
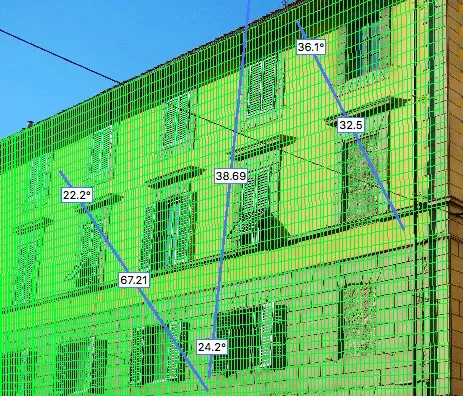
Now that you’ve identified the perspective lines, it’s time to locate the vanishing points within your image. Vanishing points are imaginary points where parallel lines converge on the horizon or disappear. To find them, visually extend the identified perspective lines until they intersect. In most cases, at least two vanishing points represent horizontal lines’ convergence from different angles. These vanishing points are pivotal in creating a sense of depth and realism in your image. Understanding their placement is essential as it determines the accuracy of the perspective in your artwork or photograph. Use your image editing software’s drawing tools or guidelines to mark these vanishing points and keep them in mind while aligning elements and enhancing the overall composition.
Step 5: Create a New Layer
Working on a separate layer in your image editing software is crucial as you set vanishing points. Creating a new layer allows you to draw the perspective lines without altering the original image, providing greater flexibility and control during editing. In most software, you can easily add a new layer by clicking “Layer” in the menu and selecting “New Layer.” Alternatively, you can use the keyboard shortcut specific to your software. Once the new layer is created, ensure it is positioned above the original image layer. This arrangement enables you to make adjustments and fine-tune the perspective lines while still preserving the integrity of your original artwork or photo.
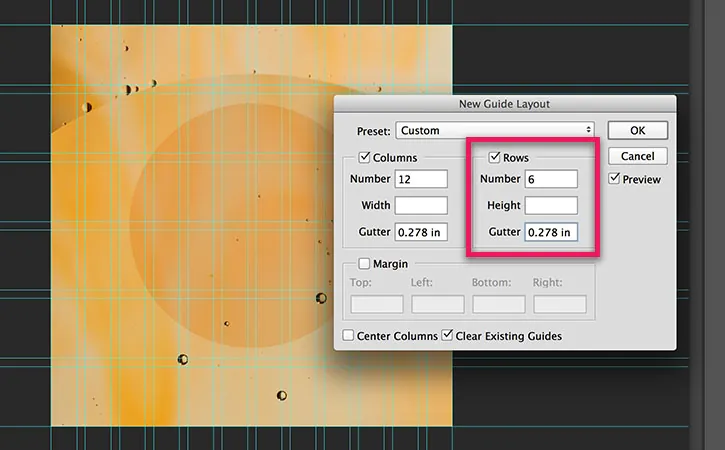
Step 6: Use Guides or Rulers
With the new layer, it’s time to set up guides or rulers in your image editing software. These tools are essential for accurately positioning perspective lines and vanishing points. Guides are non-printing lines that you can drag from the rulers to specific locations on your canvas, while rulers provide a visual reference for precise measurements. To activate guides, navigate to the “View” menu, select “Show Guides”, or use the corresponding shortcut. Next, click and drag the guides from the rulers to extend them from the vanishing points to relevant areas in your image. Align these guides with the identified perspective lines to ensure your artwork maintains realistic proportions and depth.
Step 7: Draw Perspective Lines
With guides or rulers in place, it’s time to draw the perspective lines on the new layer using the drawing tools in your image editing software. Carefully trace the extended guides from the vanishing points to the corresponding elements in your image that follow the perspective. The goal is to recreate the natural convergence of parallel lines, infusing your artwork with depth and realism. Use straight-line tools or pen tools to ensure precision in your lines. As you draw, keep an eye on the composition, ensuring all elements align with the established perspective. You may need to adjust the position of the vanishing points or fine-tune the lines to achieve the desired effect. Patience and attention to detail are essential during this step, as it forms the backbone of your artwork’s perspective. Once completed, you’ll witness your image transform into a captivating, lifelike scene, drawing viewers into its engaging world.
Step 8: Align Elements
Now that you’ve drawn the perspective lines, it’s time to align all the elements in your image to match the established perspective. Focus on each object, structure, or person in the scene, and adjust their positioning accordingly. Use the perspective lines and vanishing points as a guide to ensure that all elements converge realistically, as they would in the actual 3D space. This step is crucial for achieving a seamless and cohesive composition that looks natural to the viewer’s eye. You may need to resize, rotate, or distort certain elements to fit within the perspective lines accurately. Pay attention to details like shadows and reflections, which should also align with the perspective to maintain realism. Take your time during this stage, as precise alignment will elevate the overall quality of your image editing work, resulting in a visually convincing and immersive final piece of art.
Step 9: Fine-tune and Adjust
With all elements aligned to the established perspective, it’s time to fine-tune and make necessary adjustments to ensure a polished and realistic outcome. Carefully review your artwork or photo, zooming in on specific areas to check for inconsistencies or imperfections. Attention to details such as line accuracy, object proportions, and overall visual balance. Consider the lighting and shadows, as they enhance your image’s depth and a three-dimensional feel. Use the various tools and adjustments in your image editing software to refine the colours, contrast, and sharpness, making sure they complement the perspective you’ve set. Don’t hesitate to experiment and iterate, as this iterative process often leads to superior results. Seek feedback from others if possible, as fresh perspectives can provide valuable insights. Finally, step back and evaluate the final composition, ensuring it achieves the realistic perspective you initially aimed for. Once satisfied, you can proceed to the last step and save your masterfully edited image.
Step 10: Merge Layers and Save
After successfully setting vanishing points and achieving a realistic perspective in your image editing project, it’s time to finalize your work and save the masterpiece you’ve created. First, merge all the layers in your image editing software, combining the original image layer with the layer containing your perspective lines and adjustments. This step ensures that all your edits are integrated into a cohesive image, ready for viewing and sharing. After merging the layers, double-check for any last-minute touch-ups or refinements to enhance the overall quality. Once satisfied, save your edited image in a suitable format, such as JPEG or PNG, depending on your intended use. Consider saving an additional copy in the native format of your image editing software, preserving the layers and editability for future modifications. Now, you can proudly share your artwork or photograph, showcasing your talent and skill in setting vanishing points and achieving stunning perspectives in your digital creations.
Conclusion
The vanishing points technique makes your work easier, specifically when dealing with your images’ dimensions and perspective. You can guarantee the acute accuracy of the objects placed in your image. In architectural images, vanishing points aid in correcting distortions so that buildings and structures appear straight and genuine. It is also a time-saving technique, as after meticulously setting vanishing points, you can quickly fix your image’s distorted elements and make it look more polished and clarified. Whether you incorporate vanishing points into architectural photography, digital art, or even your usual images, they always herald wondrous and gratifying effects.
