How Can I Incorporate Alpha Channels Into My Images
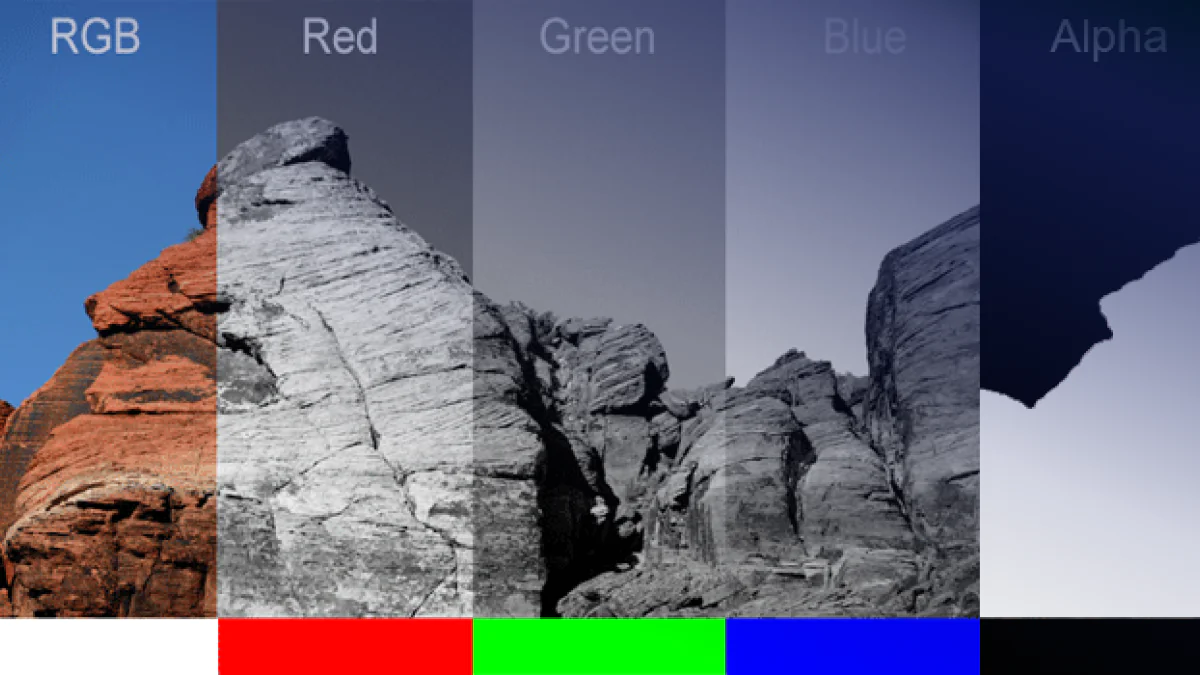
Adding alpha channels to your images has great visual significance in maximizing their splendour owing to transparency effects, startling graphics, soft edges, and realistic shadow effects. Due to their graphic specifications, alpha channels are highly productive while working with graphic assets like graphic and web design, video editing, and digital content. Alpha channels’ supple implications and powerful compositing capabilities encourage you to produce more exquisitely inviting and professional-looking photographs. Besides adding transparency and complex compositions, you can also design custom-shaped borders for images for a distinctive dazzle. Moreover, alpha channels’ transparent backdrop lets you put the logo in various materials without background mismatching issues for logo designing. By integrating alpha channels, you can trim your workflow by providing precise cutouts and transparent backgrounds, eliminating manual adjustments and ensuring design consistency. This blog article can assist you in incorporating alpha channels into your images for your graphic design projects or simply perfecting your privy photos.
Image Editing Software
Adding alpha channels to images is fundamental in editing programs like Adobe Photoshop and GIMP. Adobe Photoshop and GIMP provide comprehensive tools for adding alpha channels to images, empowering you to create stunning and professional-looking visuals. If you’re using image editing software like Adobe Photoshop, GIMP, or similar tools, here’s how you can add alpha channels
Adobe Photoshop:
Adobe Photoshop is a powerful and popular software for image editing and manipulation by professional photographers, designers, and artists. Here’s how you can add alpha channels in Photoshop:
Open Your Image: Launch Adobe Photoshop and open the image you want to edit by navigating to “File” > “Open.”
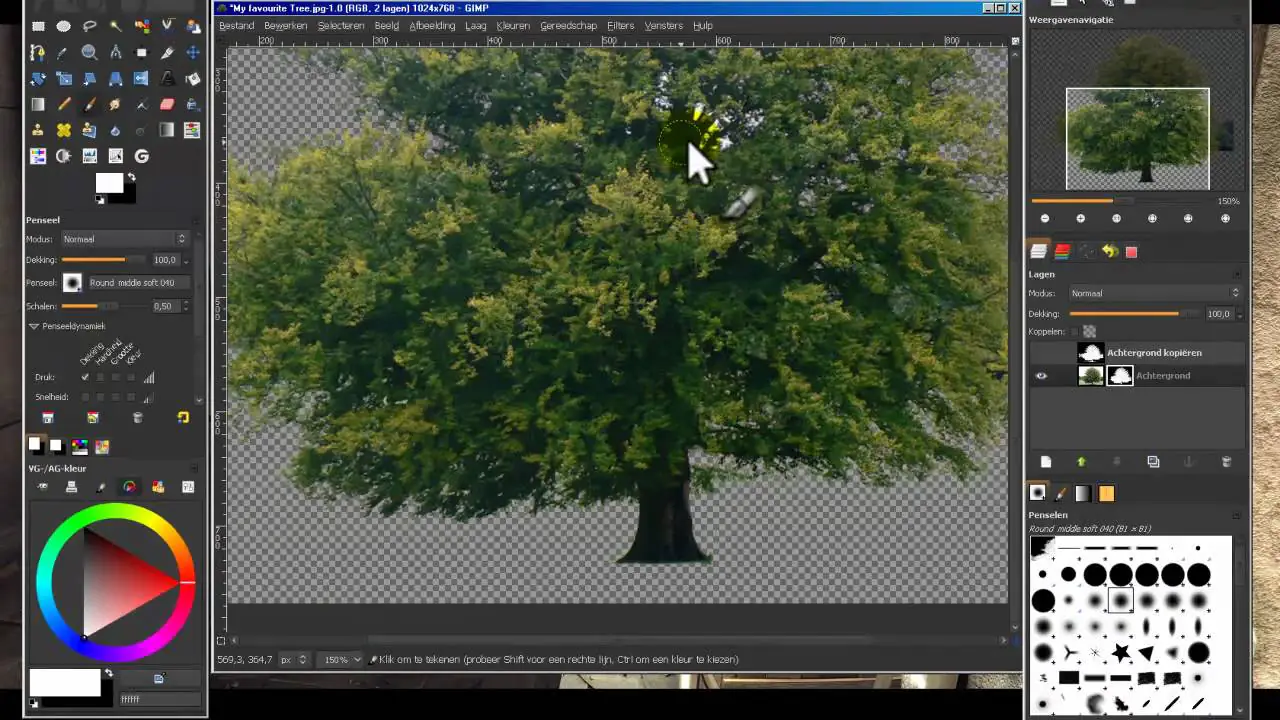
Check Transparency Support: It’s essential to ensure that your image format supports transparency. The ideal formats for images with alpha channels are PNG and TIFF. If your image is already in one of these formats, it might already have an alpha channel. To verify, examine the “Layers” panel. If the layer thumbnail displays a checkerboard pattern around it, it signifies the presence of transparency.
Add an Alpha Channel: If your image does not have an alpha channel, you can add one in a few simple steps. Right-click on the layer in the “Layers” panel and select either “Convert to Smart Object” or “Convert to Layer.” This process will create a new layer while retaining the original image’s properties.
Design Custom Shapes: Adding an alpha channel allows you to create custom shapes and unique borders for your image. To achieve this, utilize any selection tool available in Photoshop (e.g., Marquee, Lasso, or Pen) to outline the desired area. Once selected, right-click on the selection and choose “Layer via Copy” or “Layer via Cut” to create a new layer containing the selected content.
Edit Transparency and Effects: Adjusting transparency and applying effects is made effortless through the “Layers” panel. To control transparency, simply reduce the opacity of a layer using the opacity slider. Additionally, you can experiment with various layer styles, such as drop shadows, glows, and bevels, to add depth and realism to your image.
Save the Image: Once you are satisfied with the changes and have successfully incorporated alpha channels into your image, save it in a format that retains transparency, such as PNG.
Adobe Photoshop’s comprehensive tools for working with alpha channels make it an exceptional platform for creating visually stunning and professional-looking images. With the ability to control transparency and design custom shapes, your creativity is limitless. Alpha channels also facilitate intricate compositing and layering techniques, allowing you to blend elements and produce captivating visual compositions seamlessly.
GIMP:
GIMP is a free and open-source image editing software that offers powerful features and tools for image manipulation. Here’s how you can add alpha channels in GIMP:
Open Your Image: Launch GIMP and open the image you want to work on by navigating to “File” > “Open.”
Check Transparency Support: Like in Adobe Photoshop, ensure that your image format supports transparency. GIMP natively supports the XCF format, which preserves transparency. If your image is in another format like PNG, it may already have an alpha channel.
Add an Alpha Channel: If your image lacks an alpha channel, you can effortlessly add one by going to “Layer” > “Transparency” > “Add Alpha Channel.” This step allows you to control the transparency of individual pixels in the image.
Design Custom Shapes: Adding an alpha channel paves the way for creating custom shapes and distinct borders. Use GIMP’s selection tools (e.g., Rectangle Select, Free Select, or Paths) to outline the desired area. Then, copy the selection to a new layer by pressing “Ctrl + C” followed by “Ctrl + V” or navigating to “Edit” > “Copy” and “Edit” > “Paste As” > “New Layer.”
Edit Transparency and Effects: Explore GIMP’s “Layers” panel to adjust transparency and apply effects. Here, you can easily modify the opacity of a layer using the “Opacity” slider. Moreover, GIMP offers an extensive collection of filters and tools for creative manipulation, allowing you to apply various effects and enhancements to your image.
Save the Image: Once you’ve skillfully incorporated alpha channels into your image and completed the editing process, save it in a format that preserves transparency, such as PNG.
GIMP’s intuitive user interface and versatile tools make working with alpha channels an engaging and rewarding experience. The software’s capability to control transparency, design custom shapes, and apply diverse effects empowers users to unleash their creativity and produce captivating visuals.
Using Libraries
Incorporating alpha channels programmatically using libraries like PIL and OpenCV empowers developers to work efficiently with images in various applications, including computer vision, machine learning, and data preprocessing tasks.
PIL (Python Imaging Library):
Python Imaging Library (PIL), now known as Pillow, is a versatile library that offers comprehensive image processing capabilities in Python. Adding alpha channels using PIL involves the following steps:
Open the Image: Begin by importing the PIL library and opening the image you want to work with:
python
from PIL import Image # Open the image image = Image.open(“input_image.png”)
Check Alpha Channel: Verify if the image already has an alpha channel. PIL supports alpha channels for images in RGBA or LA mode:
python
if image.mode in (“RGBA”, “LA”): # Image already has an alpha channel pass else: # Add an alpha channel image = image.convert(“RGBA”)
Design Custom Shapes: Similar to the steps in image editing software, you can create custom shapes using selection tools and paste them onto new layers:
python
# Create a mask (selection) of the desired area # mask = Image.new(“L”, image.size, 0) # Draw custom shape on the mask # mask_draw = ImageDraw.Draw(mask) # mask_draw.polygon([(x1, y1), (x2, y2), …], fill=255) # Create a new layer and paste the mask onto it # custom_shape_layer = Image.new(“L”, image.size, 0) # custom_shape_layer.paste(mask, (0, 0), mask=mask) # Add the new layer to the image # image = Image.alpha_composite(image, custom_shape_layer)
Edit Transparency and Effects (Optional): Apply transparency adjustments or other image effects programmatically using the built-in functions in PIL.
Save the Image: Save the image in a format that preserves the alpha channel, such as PNG:
python
image.save(“output_image.png”)
OpenCV:
OpenCV (Open Source Computer Vision Library) is a widely used open-source computer vision and image processing library. While OpenCV primarily focuses on computer vision tasks, it can still work with alpha channels in images.
Load the Image: Start by importing the OpenCV library and loading the image:
python
import cv2 # Load the image image = cv2.imread(“input_image.png”, cv2.IMREAD_UNCHANGED)
Check Alpha Channel: Verify if the image already has an alpha channel. In OpenCV, an alpha channel is represented by a fourth channel (usually denoted by the “A” in the “BGRA” mode):
python
if image.shape[2] == 4: # Image already has an alpha channel pass else: # Add an alpha channel image = cv2.cvtColor(image, cv2.COLOR_BGR2BGRA)
Design Custom Shapes (Optional): Creating custom shapes in OpenCV can be done using various drawing functions:
python
import numpy as np # Create a mask (selection) of the desired area # mask = np.zeros(image.shape[:2], dtype=np.uint8) # Draw custom shape on the mask # pts = np.array([(x1, y1), (x2, y2), …], np.int32) # pts = pts.reshape((-1, 1, 2)) # cv2.fillPoly(mask, [pts], (255,)) # Add the mask as the alpha channel to the image # image[:, :, 3] = mask
Edit Transparency and Effects (Optional): Manipulate the alpha channel to adjust transparency or apply other effects.
Save the Image: Save the image with the alpha channel using PNG format:
python
cv2.imwrite(“output_image.png”, image)
These steps open a world of possibilities to create visually appealing and sophisticated images with seamless transparency and captivating effects, whether custom shapes or intricate compositing; comprehending alpha channels in programming libraries can significantly enhance image processing workflows and produce exceptional results.
Conclusion
In closing, alpha channels are a necessity for specific digital content where transparency and composition are major requirements, like in logos, icons, or 3D models. These channels let you neatly cut an object’s edges from its background so that you can neatly adjust it to a new environment. Additionally, Alpha channels also accredit you to blend images and merge different elements to produce attention-grabbing compositions. You can also structure your images with creative borders other than conventional rectangular frames. The capability of alpha channels is premium in graphic or web designing, video editing, and any task that calls for visual persuasion.


