How To Set Up Multiple Exposures In Images
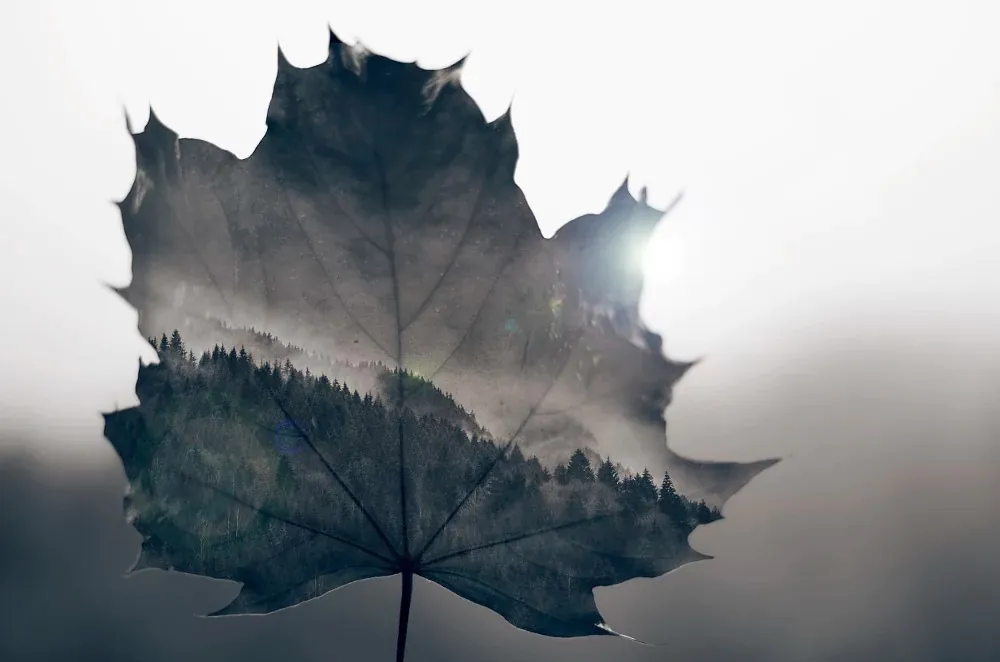
Multiple exposures combine two or more independent exposures into a single image. Though many cameras have built-in multiple exposure setups to adjust the mode and number of exposures you want in your photographs, you can also create multiple exposures in post-processing utilizing advanced methods such as opacity modification, blending, or layering different photos together. This technique enables the creative use of several subjects, textures, or light patterns in a single photograph. You can build compelling visuals with several narratives in one image by carefully mixing or aligning layers. Eventually, effortless integration of multiple elements is achieved by selectively revealing or concealing certain sections of each exposure.
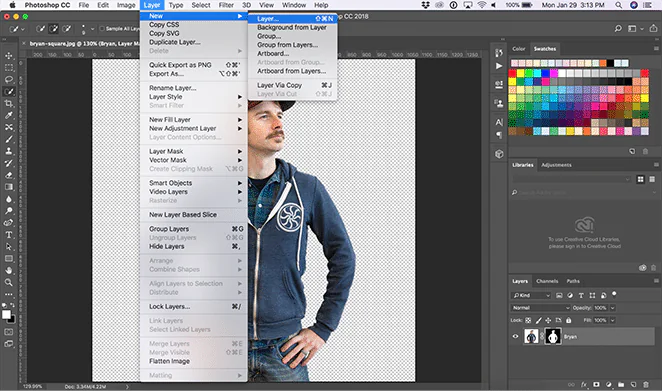
Open your images:
To begin the process, open the images you intend to work with within your chosen editing software. You can accomplish this by selecting the “Open” or “Import” option from the software’s file menu. Drag and drop the image files directly into the software’s workspace. Ensure the images you open are in a compatible file format, such as JPEG, PNG, or TIFF, to allow the software to recognize them. By opening the images, you will have them readily available as separate files or layers within the software. That will enable you to edit, apply adjustments, enhancements, or any other desired modifications.
Create a new document:
To create a new document in your image editing software, locate the “New Document” or “Create New” option typically found in the file menu. When you select this option, a dialogue box will emerge in which you can configure the parameters for your new document.
In the dialog box, you can set the document’s dimensions, including width and height, either in pixels, inches, or other units of measurement. Additionally, you can define the resolution, color mode (such as RGB or CMYK), and background contents (e.g., transparent, white, or a custom color).
Once you’ve inputted the desired settings, click the “Create” or “OK” button, and the software will generate a new document based on your specifications. This new document will be your working canvas to arrange and edit the images or layers to create multiple exposures.
Arrange the layers:
After opening your images as separate layers in your image editing software, you can arrange them in the desired order. Here’s how you can do it:
Click and drag each layer in the layers panel to rearrange their order. Drag a layer above or below another layer to change their stacking order.
Pay attention to the layer order you establish. The topmost layer will be the most visible, while the layers underneath will be partially or entirely hidden depending on their opacity and blending modes.
Try different combinations to find the best composition for your multiple exposures.
Align the layers:
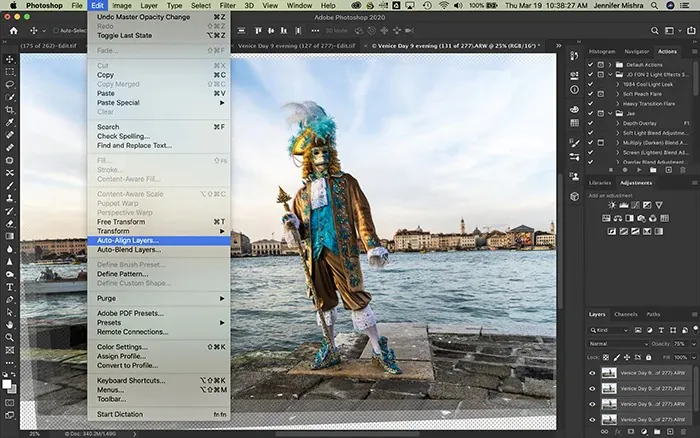
Aligning the layers in your image editing software ensures they are correctly aligned and registered, especially if there is any slight misalignment between the images.
Select the layers that you want to align. You can do this by holding down the Shift key and clicking on each layer in the layers panel. Alternatively, you can select individual layers using the Ctrl/Cmd key.
Look for the alignment tools in your software and click on the alignment option you desire. The software will then analyze and align the selected layers based on the chosen alignment method.
After alignment, zoom in and inspect the edges or other critical details to verify alignment accuracy.
Adjust layer opacities:
Adjusting the layer opacities allows you to control the visibility and transparency of each layer in your image editing software. Here’s how you can adjust the layer opacities:
Open the layers panel or a similar panel in your software. This panel typically displays a list of all the layers in your document.
Locate the opacity slider for each layer. It is usually represented by a percentage value next to the layer name or as a slider control.
Click and drag the opacity slider for a particular layer to adjust its opacity. Moving the slider to the left can decreases the opacity, making the layer more transparent. Moving it to the right will increase the opacity, making the layer more visible.
Adjust the opacities of multiple layers to find the right balance and combination of exposures.
Fine-tune the opacities until you achieve the desired result.
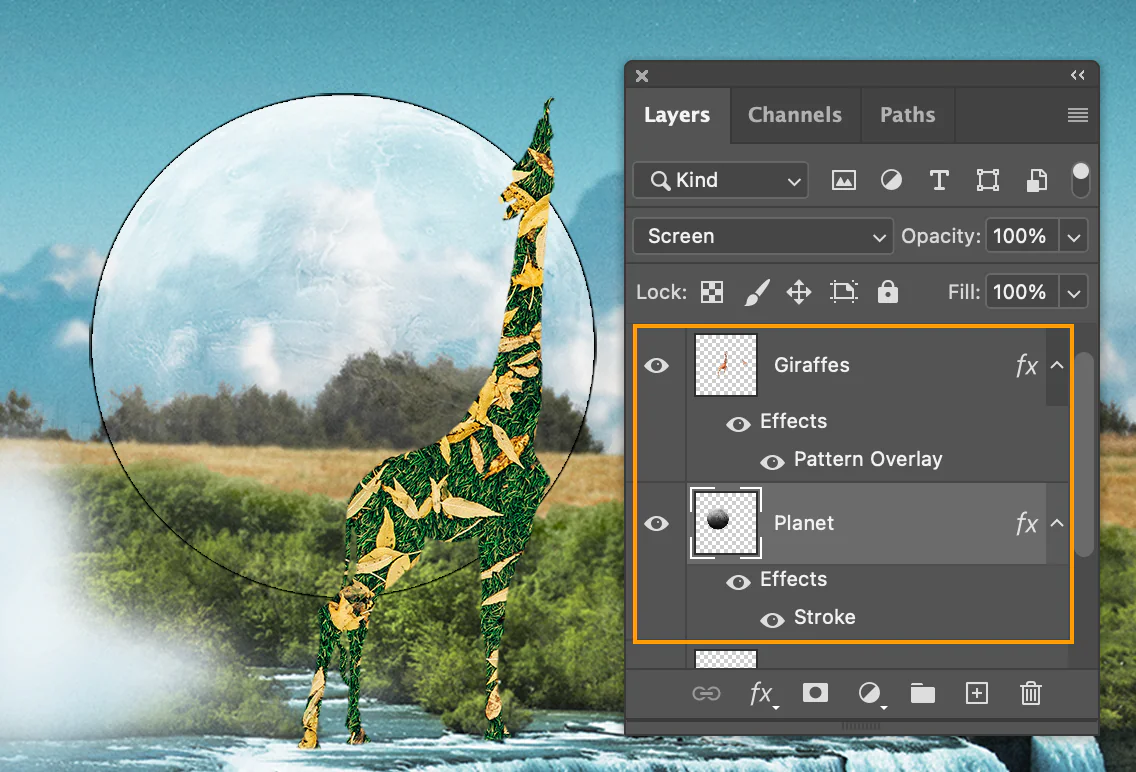
Blend modes:
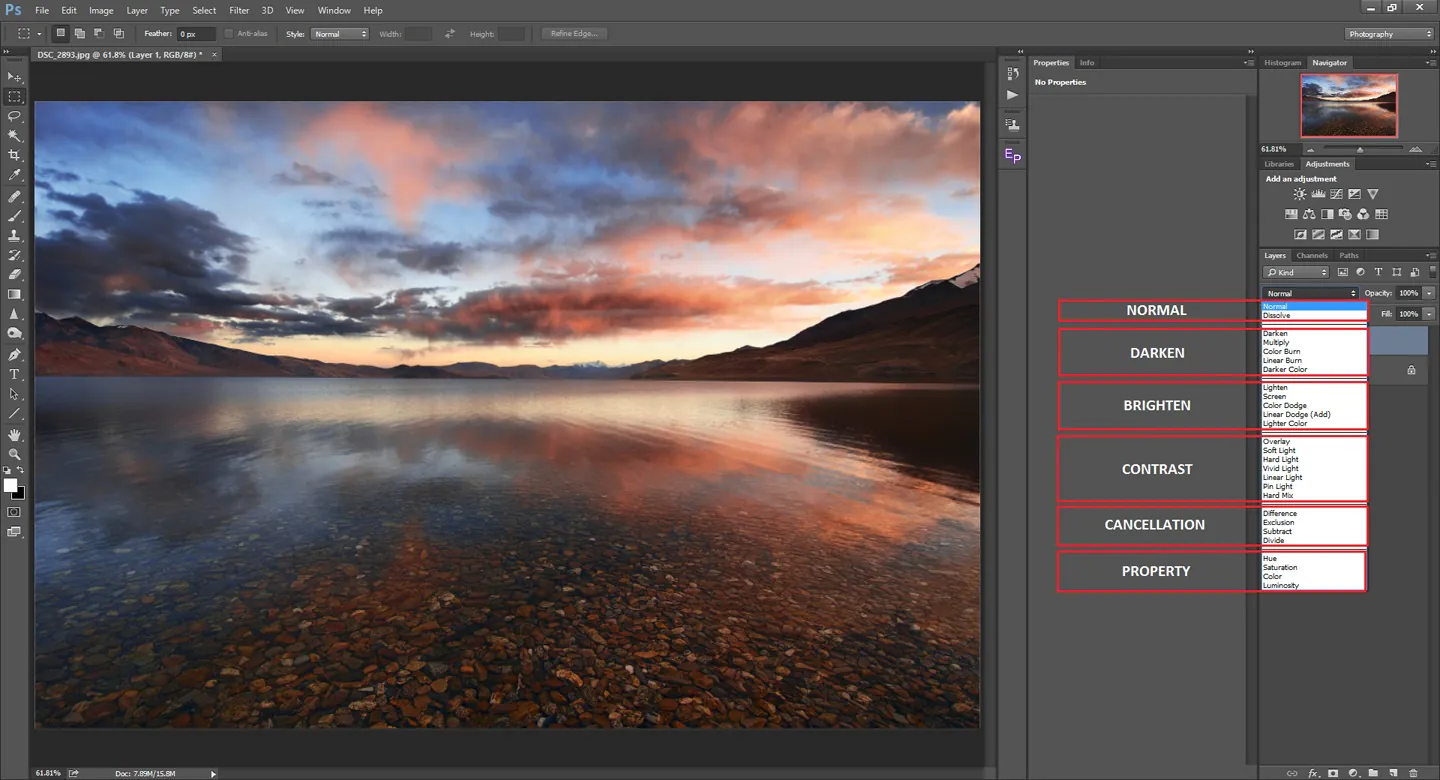
Blend modes can achieve various creative effects when working with multiple exposures. Here’s how you can use blend modes:
Open the layers panel or a similar panel in your image editing software, which displays the list of layers in your document.
Select the layer you want to apply a blend mode to. You can click on the layer name or thumbnail in the layers panel to activate it.
Locate the blend mode drop-down menu or selector. It is typically found in the layers panel or a blending options panel.
Click on the blend mode drop-down menu and explore the available options. Different software may have different names for blend modes, but there are common ones you’ll likely encounter, such as Normal, Screen, Multiply, Overlay, Soft Light, and many more.
Repeat the process for other layers, applying different blend modes to each layer as desired.
Layer masks:
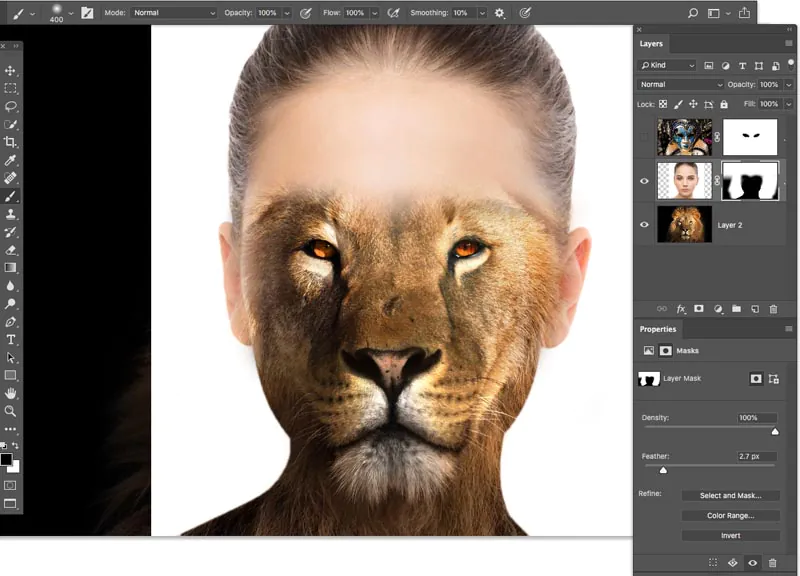
Layer masks let you selectively reveal or hide specific parts of a layer. Here’s how you can use layer masks:
Open the layers panel or a similar panel in your image editing software, which displays the list of layers in your document.
Select the layer to which you want to add a layer mask. Click on the layer name or thumbnail in the layers panel to activate it.
Click on the layer mask button or choose the option to add a layer mask. A layer mask thumbnail will appear next to the layer thumbnail in the layers panel.
Now, use paint on the layer mask with the brush tool. Set the brush color to black or white. Painting with black will hide parts of the layer while painting with white will reveal them.
Adjust the brush opacity and size as needed for precise masking. You can also use soft-edged brushes to smooth transitions between hidden and revealed areas.
Paint on the layer mask to selectively reveal or hide portions of the layer.
You can also use selection tools, gradients, or other techniques with layer masks to create more complex and precise masking effects.
Repeat the process for other layers that require masking.
Adjustments and enhancements:
Some standard adjustments and enhancements you can make include:
Brightness and Contrast: Use adjustment tools or curves to adjust the brightness and contrast of your image. Increasing brightness can make the image lighter while adjusting contrast enhances the difference between light and dark areas.
Color Balance and Saturation: Adjust the color balance to control the overall color cast of your image. You can fine-tune the red, green, and blue levels to achieve the desired color balance. Additionally, you can increase or decrease the saturation to make the colors more vibrant or muted.
Shadows and Highlights: Use adjustment tools like Shadow/Highlight to brighten shadows or recover details in highlight areas selectively. That helps balance the exposure and reveal more information in dark and bright regions.
Sharpening: Apply sharpening techniques to enhance the clarity and crispness of details in your image. Be cautious not to over-sharpen, as it can introduce artifacts or noise.
Noise Reduction: Reduce noise or graininess in your image, especially in low-light or high-ISO situations. Use noise reduction tools to smoothen the image while preserving essential details.
Cropping and Composition: Adjust the composition by cropping or repositioning elements within the frame. That improves the visual balance and emphasizes the subject.
Vignetting and Lens Correction: Correct lens distortions, chromatic aberrations, or vignetting caused by the lens.
Retouching: Finally, use retouching tools to remove blemishes, unwanted objects, or distractions from the image.
Save and export:
Once you have completed your desired adjustments and enhancements to the image, you can save and export your final edited version:
Go to the “File” menu in your image editing software and select the “Save” or “Save As” option. It lets you save the edited image while preserving the original file.
Choose the file format for saving your image. Standard formats include JPEG, PNG, TIFF, and PSD (Photoshop document). Consider the intended use of the image to determine the appropriate file format. JPEG or PNG are often suitable options for online sharing or general use.
Set the destination folder where you want to save the edited image. Choose a location on your computer or external storage device where you can quickly locate the file later.
Provide a file name for the edited image. Choose a descriptive name that helps you identify the image in the future.
Adjust additional saving options or settings, such as image quality, compression level, or metadata. These options may vary depending on your software.
Click the “Save” or “Export” button to save the edited image with the specified settings. The software will process the image and save it to the designated folder.
Conclusion
In closing, by carefully blending diverse elements and producing revolutionary compositions that attract viewers on an ulterior level, multiple exposures can merge reality with fantasy. Multiple exposures, like any other image editing technique, necessitate a dedication to precision and a willingness to explore. This unrelenting commitment enables us to produce engaging pictures that transcend the every day, leaving viewers with a lasting impression and solidifying the efficacy of creative creation. Remember to frequently save your work after each step progression when setting up multiple exposures in your images to avoid accidentally losing progress.
