How to Reshape Your Photos with Cubism Techniques
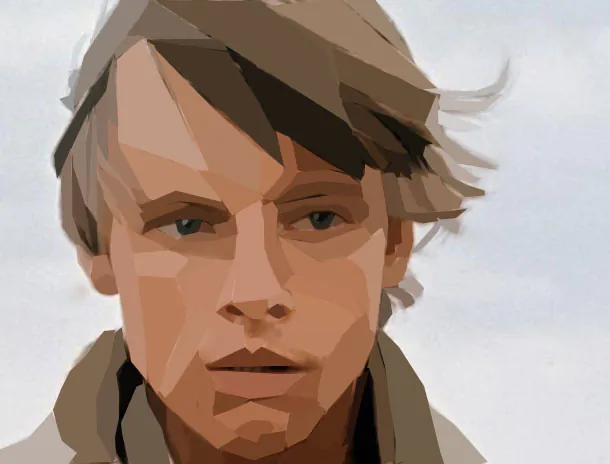
Cubism is an elegant manipulation of an image that fragments and reassembles it in a format that depicts numerous viewpoints simultaneously. It uses geometrical shapes and angles to create a fragmented image as well as a generic illustration of the original subject. Including cubist features in your picture editing process can provide a one-of-a-kind and visually appealing result. You can turn a portrait into a kaleidoscope of sentiments or a landscape into a jigsaw of perspectives. You can spawn splashy, one-of-a-kind works by combining cubist features into your image editing projects. Cubism art has replaced traditional boundaries with a canvas of angles and an improvisation of shapes. The result? A visual mandala that questions assumptions and requires participation. The broken pieces combine to produce a whole greater than the sum of its parts. Image alteration becomes an intellectual adventure, similar to the pioneering spirits of Picasso and Braque. Your canvas is more than just a screen; it’s a dynamic domain where geometric forms work together to communicate sentiments and storylines underneath the surface.
Step 1: Gathering Source Images
Start by selecting the images you’ll use as the foundation for your cubism creation. Choose a primary image that’s rich in detail and serves as the core subject. For instance, if you’re working with a portrait, select a photo that contains the essence of your subject’s personality.
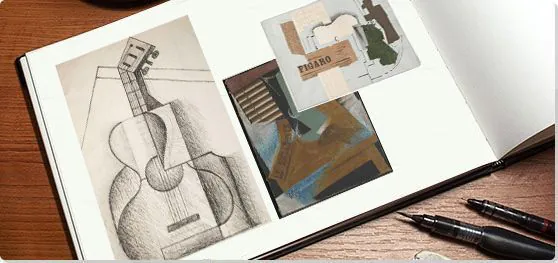
Next, gather supporting images that complement the primary one. Look for textures, patterns, and shapes that can enhance the cubist effect. These images will become the elementary units for the geometric fragments that characterize cubism.
Remember, this step is about scouting visual elements to make your cubism piece unique and captivating. Think practically and watch for diverse textures and patterns that can be seamlessly integrated into the final composition. By curating a collection of images that tell a story, you’re setting the stage for an engaging cubist artwork.
Step 2: Selecting a Cubism Style
Now, delve into the exciting process of choosing a cubism style that aligns with your creative vision. Explore various cubist artworks for inspiration, considering aspects like the degree of fragmentation and the arrangement of geometric forms.
As you navigate this step, keep your chosen primary image in mind. Consider how different cubism styles can enhance its visual impact. Whether you opt for Analytical Cubism with intricate shapes or Synthetic Cubism with playful collages, your choice will influence the overall feel of your artwork.
Remember, this step lets you infuse your personal touch into the cubist transformation. Your style selection sets the tone for the rest of the process, so let your artistic instincts guide you toward a style that resonates with your vision.
Step 3: Identifying Key Elements
In this crucial phase, carefully examine your primary image and supporting visuals. Identify the key elements that define the subject’s essence or narrative. Focus on significant details like facial features, objects, and background elements.
As you scrutinize the images, consider how to translate these key elements into distinct geometric fragments. Consider which parts of the image can be broken down into shapes without losing their recognizability. This step requires acute keenness and a strategic mindset to capture the essence of your subject while embracing the cubist aesthetic.
By pinpointing these essential components, you’re setting the stage for a successful cubism transformation that harmonizes the original image with the abstract nature of the style.
Step 4: Creating Geometric Fragments
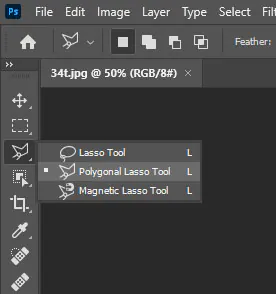
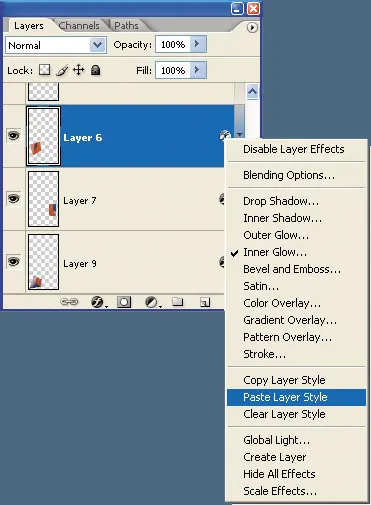
The hands-on part comes: transforming key elements into captivating geometric fragments. Use your preferred image editing software to isolate each element and carefully convert them into distinct shapes. Use selection tools, masks, and layers to achieve clean and precise results.
Pay attention to the balance between abstraction and recognition. Each fragment should reflect a facet of the original image while contributing to the cubist effect. Experiment with different shapes and sizes to find the right combination that brings out the essence of your subject in a novel and visually intriguing manner.
As you create these fragments, you breathe life into the cubist transformation. This step showcases your technical skills and artistic intuition, bridging the gap between the familiar and the abstract in your artwork.
Step 5: Arranging Fragmented Layers
Now that you have your geometric fragments, it’s time to arrange them to capture the essence of cubism. Begin by creating a new canvas or layer in your editing software. Arrange your fragments strategically, keeping the original composition and artistic vision in mind.
Experiment with layering and overlapping fragments to create a dynamic and multidimensional effect. Play around with the placement of each fragment to find the right balance between chaos and harmony. Keep referring to your primary image to ensure that the arrangement retains the subject’s essence while embracing the abstract nature of cubism.
As you arrange these fragments, you’re orchestrating the transformation from traditional imagery to visually engaging cubist artwork. This step requires precision and creative flair to achieve a balanced and captivating composition.
Step 6: Blending Color and Texture

Now that your cubist composition is taking shape, it’s time to infuse it with colour and texture. Select a palette that complements the mood and theme of your artwork. Apply colours to your fragments, experimenting with various hues, shades, and tones to create depth and dimension.
Consider adding textures corresponding to your composition’s elements to enhance the cubist effect. Apply textures that mimic brushstrokes, paper, or other materials to different fragments. That adds a tactile quality to your artwork, amplifying the sensory experience for your viewers.
In this step, you breathe life into your cubist creation, turning abstract forms into vibrant, textured elements. By skillfully blending colour and texture, you’re adding layers of complexity that engage the viewer’s senses and make your artwork visually intriguing.
Step 7: Adding Dynamic Overlays

Now, let’s elevate your cubist artwork with dynamic overlays. Incorporate elements like lines, shapes, or patterns that intersect and interact with your fragments. These overlays can enhance the sense of movement and energy in your composition.
Experiment with different overlay options, adjusting their opacity and blending modes to get the desired effect. These overlays can act as visual connectors between the fragmented elements, contributing to the overall coherence of your cubist artwork.
You’re infusing your artwork with an extra layer of visual interest by introducing dynamic overlays. This step enhances the dynamic nature of cubism, guiding the viewer’s eye across the composition and creating an engaging visual journey.
Step 8: Fine-Tuning Composition
As you near the completion of your cubist artwork, it’s time to refine the composition for maximum impact. Step back and critically assess the arrangement, colours, textures, and overlays. Make subtle adjustments to achieve balance and harmony in your composition.
Consider the visual flow of your artwork. Ensure the viewer’s gaze moves smoothly across the fragments and overlays, guided by the arrangement you’ve crafted. Make minor changes to fragments’ positions or sizes to enhance the overall coherence.
In this step, your attention to detail and artistic sensibility shines through. Fine-tuning the composition ensures that your cubist creation is visually captivating and effectively communicates the fusion of abstraction and recognizable elements.
Step 9: Balancing Perspectives

Now, focus on the perspective of your cubist artwork to ensure a harmonious viewing experience. Evaluate how the fragments and overlays interact from different angles. Adjust the placement and orientation of elements to maintain an engaging composition from various viewpoints.
Consider the visual hierarchy and the focal points of your artwork. Guide the viewer’s attention to the most significant elements while allowing them to explore the intricacies of the composition. Balancing perspectives ensures that your cubist creation remains visually engaging and captivating from every angle.
In this step, you’re fine-tuning the spatial arrangement of your elements, catering to the diverse ways viewers may interact with your artwork. This attention to perspective elevates your cubist piece, making it a dynamic and immersive visual experience.
Step 10: Applying Final Touches
As you approach the completion of your cubist artwork, it’s time for the final touches that bring everything together. Zoom in and carefully examine each fragment, overlay, and element in your composition. Make any necessary refinements to enhance the overall visual impact.
Fine-tune colour contrasts, adjust textures and ensure every detail aligns with your creative vision. Address any inconsistencies or distractions that may have arisen during the process. Add subtle highlights or shadows to specific elements to enhance their three-dimensional quality.
Your attention to detail and commitment to perfection shines through in this final step. Applying these meticulous final touches ensures that your cubist artwork is a cohesive and captivating masterpiece that resonates with viewers and reflects your unique creative voice.
Conclusion
Lastly, cubism is a worthy technique that manipulates pixels while fracturing the mundane and assembling it into an entrancing consonance of perspectives. Once restricted to a screen, the canvas expands into a dynamic domain where angles and shapes combine beautifully, generating visual effects that interact past the ordinary. It represents a paradigm change in how we interpret, interact, and perceive visual material. Images transcend their utilitarian foundations, using cubism as a conduit. The pixels are remodelled into poetic sentiments, creating a profound conversation between the viewer’s imaginative perceptions and the delicately layered creative conception.
