How to Design Photo Strips
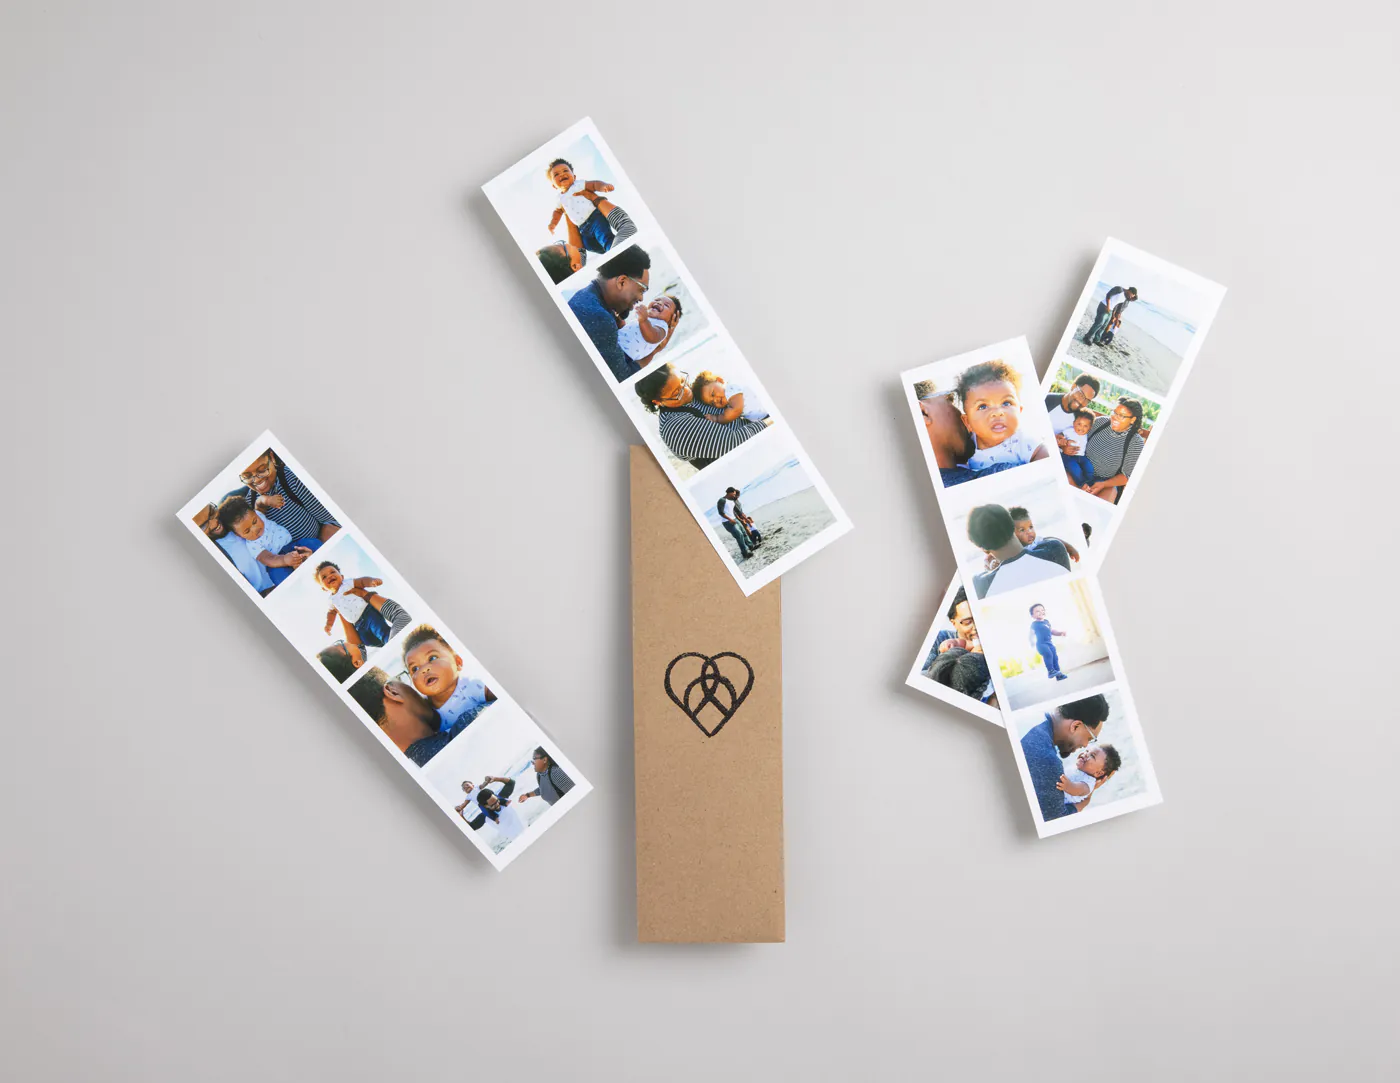
A photo strip is a creative arrangement of many photographs, either linearly or sequentially, typically shown side by side. They are intended for various objectives, including narrative, displaying a collection of connected photographs, or producing an aesthetically appealing composition. Photo strips in image editing comprise picking and organizing photographs, applying filters and effects, and improving aesthetic glamour. They can be used in various formats, including blog entries, social media postings, digital collages, and tangible prints, allowing individuals to express themselves artistically and narratively. Photo strips, in general, are a flexible tool for visual narrative and artistic expression. They play a significant role in visual storytelling by arranging multiple images in a linear or sequential format, guiding viewers through a narrative or theme, and fostering emotional connections. Photo strips also offer a cohesive composition, inspiring innovative arrangements, transitions, and effects that showcase individuality and artistic flair. Photo strips maintain thematic consistency, accentuate connections, and encourage creativity through experimentation with aesthetics, colour schemes, and transitions. This blog article is a great start for creating delightful photo strips, particularly when attempting to relate events in restricted areas, letting you efficiently preserve memories and communicate concepts on a level that individual images cannot.
Step 1: Select Your Images
Choosing the right images is crucial for a compelling photo strip. Begin by identifying a theme or narrative you want to convey. Then, curate a set of images that align with this theme. Ensure a balance between visual coherence and diversity, picking images that complement each other in colours, subjects, and styles.
Consider the emotional impact you intend to create. Are you telling a story, evoking a mood, or highlighting a progression? Keep in mind the overall layout of your photo strip as well. Select images that can be arranged sequentially to maintain the flow and visual appeal. By thoughtfully handpicking your images, you set a strong foundation for a captivating photo strip that resonates with your audience’s emotions and interests.
Step 2: Arrange the Sequence
Arranging the sequence of your images plays a vital role in the narrative flow of your photo strip. Open your chosen image editing software, such as Adobe Photoshop or Canva, to start the process. Experiment with various arrangements by dragging and dropping the images onto your canvas. Visualize the story you want to tell and the emotional journey you aim to evoke.
Consider the pacing of your sequence. Do you want a gradual buildup of tension or a sudden contrast between images? Rearrange them until you achieve a harmonious progression. Pay attention to the visual balance, ensuring no image overpowers the rest. You aim to create a seamless visual experience that guides the viewer’s eye from one image to the next. By thoughtfully arranging the sequence, you enhance the storytelling potential of your photo strip and make it more engaging for your audience.
Step 3: Crop and Resize
In this step, you’ll need your image editing software to refine the dimensions of your selected images. Open your software, such as Adobe Photoshop or another tool you’re comfortable with. Begin by cropping each image to eliminate unnecessary elements that might distract from the main subject or disrupt the visual flow.
Focus on maintaining a consistent aspect ratio across all images to ensure a uniform look in your photo strip. Resize the images to fit the canvas dimensions you chose for your strip. This step is worthy of achieving a polished and cohesive final result. Removing distractions and optimizing the sizes allow your audience to appreciate your photo strip’s visual details and transitions.
Remember, precision in cropping and resizing enhances the professional quality of your creation, contributing to a more engaging and visually pleasing experience.
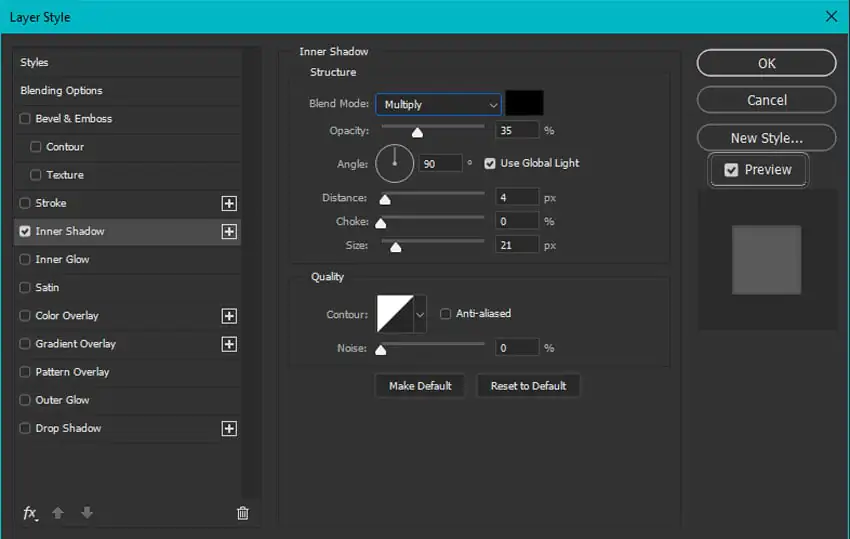
Step 4: Apply Filters and Effects
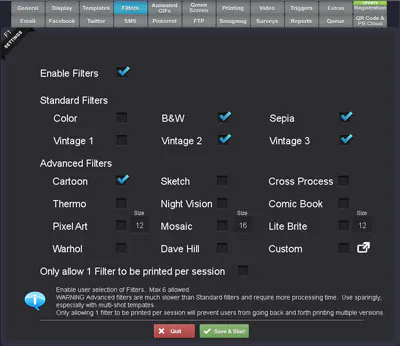
It’s time to use your chosen image editing software to infuse your images with creativity and style. Open your preferred tool and experiment with filters, adjustments, and effects. These enhancements can help you achieve a consistent mood or thematic tone throughout your photo strip.
Experiment with filters that align with the narrative or emotions you want to convey. Filter can add depth and character to your images, whether it’s a vintage vibe, a modern aesthetic, or a dreamy atmosphere. Adjustments like contrast, saturation, and brightness can further refine the visual impact of each photo.
Remember, moderation is key. Avoid overloading your images with excessive effects that could detract from their natural beauty. The goal is to enhance, not overwhelm.
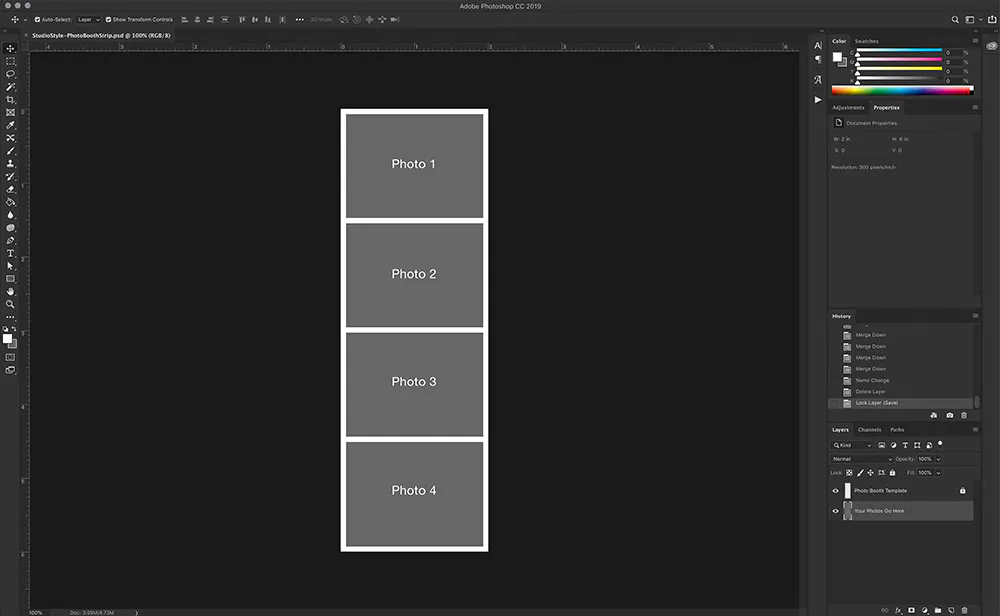
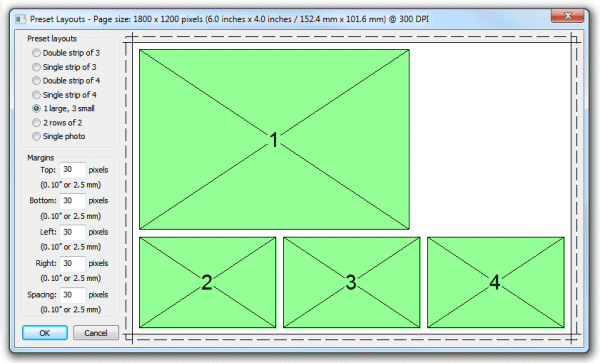
Step 5: Create a Canvas
Open your image editing software to establish the canvas for your photo strip. Use the software’s features to create a new canvas with dimensions suitable for your intended display. This canvas will serve as the foundation for arranging your images.
Consider the final platform for your photo strip – whether it’s for a blog post, social media, or print. Adjust the canvas dimensions accordingly. Most image editing software tools, like Adobe Photoshop or Canva, offer preset canvas sizes for various platforms, making it easier to choose the right dimensions.
A well-proportioned canvas ensures your images will be showcased effectively without cropping issues. It provides a clear space to assemble your photo strip and experiment with the layout.
Step 6: Place Images
Now that your canvas is ready, it’s time to bring your curated images onto it. Open your image editing software and use the tools to individually import your images onto the canvas. Arrange them in the sequence you decided upon earlier, considering the narrative or thematic flow you want to achieve.
Drag and drop each image onto the canvas, ensuring a logical progression from left to right. Leave a slight gap between images to maintain a clean and visually pleasing layout. Utilize alignment guides and grids provided by your software to ensure precision in placement.
At this stage, focus on achieving a balanced composition that guides the viewer’s eye smoothly from image to image. By thoughtfully placing the images on the canvas, you set the foundation for a visually cohesive and engaging photo strip that effectively communicates your creative vision.
Step 7: Add Transitions
Enhance the transitions between your images to create a seamless visual flow within your photo strip. Open your image editing software and explore tools that can help you achieve smooth transitions. Consider using gradient overlays, fades, or subtle borders between images.
These transitions prevent abrupt jumps between images, making the viewing experience more pleasant. They also contribute to the overall cohesiveness of your photo strip. Experiment with different transition styles to find what suits your narrative or theme best.
Remember that the goal is to create a harmonious transition while maintaining the individuality of each image. Subtle transitions ensure that the focus remains on the content of each photo rather than the transitions themselves.
Step 8: Incorporate Text and Graphics
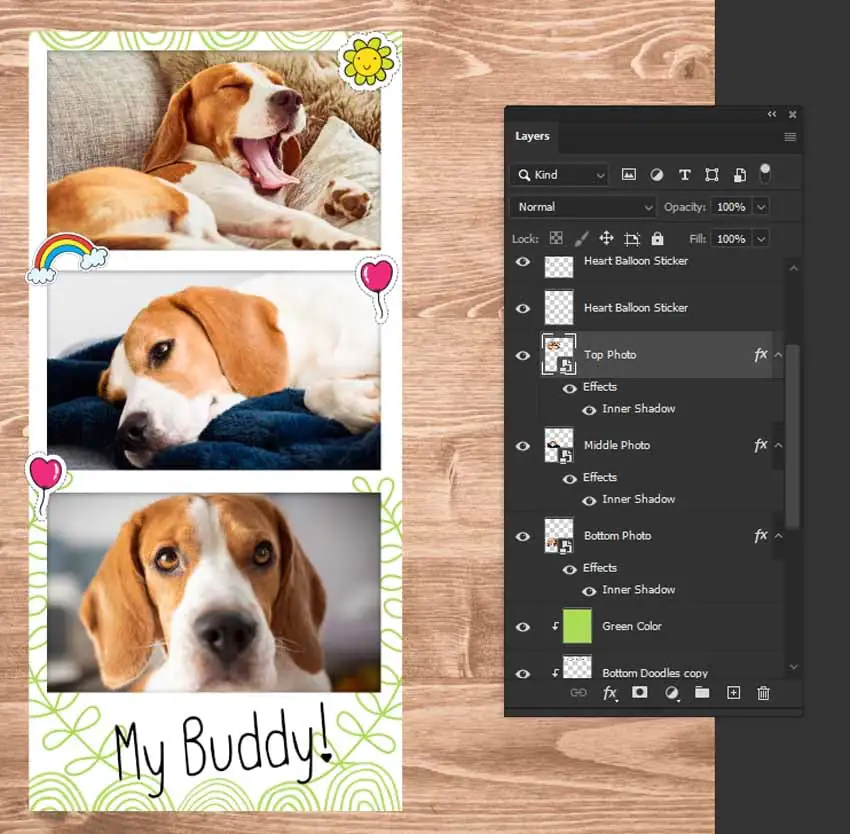
To enhance the storytelling aspect of your photo strip, consider adding text captions or graphics that provide context or additional information. Open your image editing software and use text tools to insert captions, labels, or other relevant text elements.
Choose fonts and text styles that complement the overall aesthetic of your photo strip while ensuring readability. Position text strategically near the images it pertains to, guiding the viewer’s understanding of the narrative.
Additionally, you can incorporate simple graphics, icons, or symbols that reinforce the theme or message of your photo strip. However, be mindful not to overcrowd the layout – simplicity often has a greater impact. Balancing text and graphics with your images adds layers of meaning and depth to your creation.
Step 9: Review and Adjust
Before finalizing your photo strip, take a moment to review the overall composition and make any necessary adjustments. Zoom to get a holistic view of your creation and assess its visual impact. Open your image editing software and carefully evaluate each element.
Check for alignment, spacing, and potential distractions that could divert the viewer’s attention. Ensure that text, graphics, and transitions enhance the images rather than overpower them. Make any necessary refinements to achieve a polished and cohesive look.
By sharing your photo strip with a friend or colleague, consider seeking a fresh perspective. Their feedback can offer valuable insights that you might have overlooked. By dedicating time to review and adjust your photo strip, you ensure that it effectively communicates your creative vision and provides a captivating experience for your audience.
Step 10: Export and Share
With your photo strip refined and ready, it’s time to share your creative work. In your image editing software, navigate to the export options. Choose a suitable file format, such as JPEG or PNG, and adjust the resolution based on the intended platform.
Consider the final destination of your photo strip – whether it’s for a blog post, social media, or print. Adjust the dimensions and resolution accordingly to ensure optimal quality.
Once exported, share your photo strip on your chosen platforms. Post it on your blog, share it on social media, or incorporate it into your creative projects. Engage with your audience and invite their feedback. Celebrate the satisfaction of successfully designing an engaging and visually captivating photo strip.
Conclusion
In conclusion, picture strips provide a rare forum for producing compelling visual storytelling and expressing artistic creativity. They efficiently guide viewers through tales and concepts by arranging several pictures linearly or chronologically, establishing connections along the way. Unlike individual photographs, photo strips provide a varied communication medium with cohesive compositions, imaginative layouts, and constant themes. These creative assemblages, which share experiences in restricted areas, preserve memories, transmit ideas, or stimulate responses, are adaptive tools that enable people to connect effectively.
