
How To Render White Objects To White Background?
It is not common to render a white object against a white background. However, if you come across a situation where you need to handle such a type of business project then this blog will serve as your guide through the whole process. The background of any rendered object is equally important as the rendered object itself is. For a clear and successful portrayal of every facet of an object, you need to make sure that the background does not overshadow your marketing piece.
Acquiring the same significant status as the foreground, background helps to create a sharp contrast with the object in focus. However, there arise challenges when you render a white object against a white background. This occurs mainly due to the inability to distinguish the object from its background color. All minor and essential details go unnoticed if this happens. Hence, to render a white object precisely, you need to follow a few tips mentioned below in great detail –
Tips for White object rendering
Tip No #01
At first, you must research your object thoroughly to understand the attributes of your product. It is important to keep in mind that the object, background, and lighting would not be of the same color. By default, a rendering program changes your background, lighting, and object n to white color. Thus making it difficult to distinguish the object from its background at first look, the frequently asked question arises, “what do we do in this situation?” You should note down in your copies that neither background nor product is purely white.
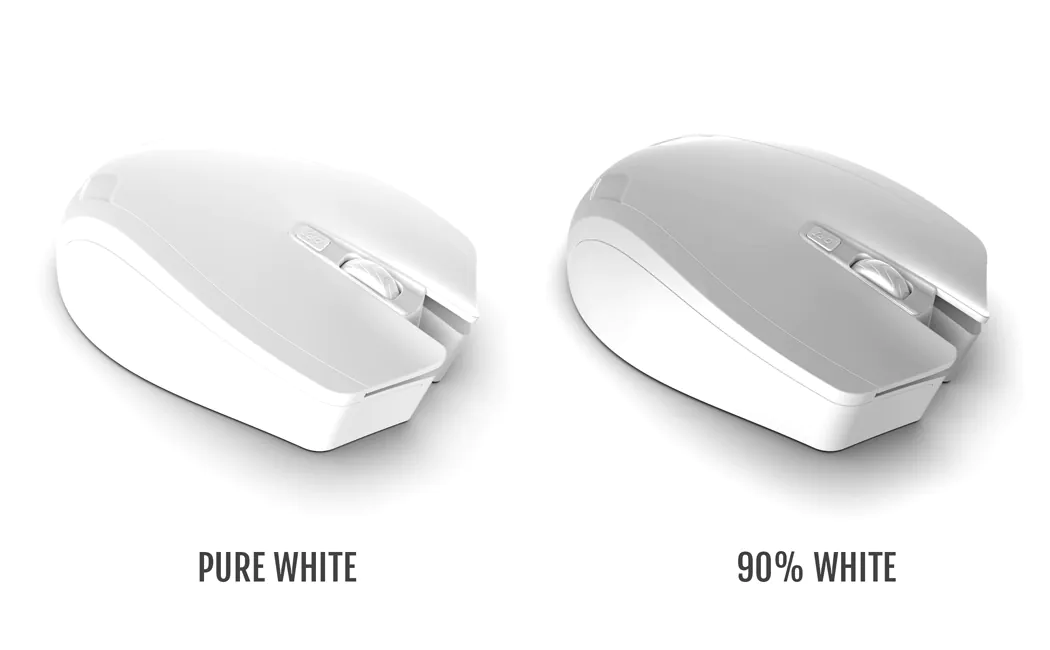
By saying so, it is meant that you must aim to keep the white color up to 98 percent to make the product distinguishable from the all-white background. You can even put a tinge of blue color to enhance the perception of whiteness or yellow color to instill warmth feels. You should try and create a contrast between the background and the product. To do so, use a warmer or a cooler shade of white to create a contrast that is visible to the naked eye.
Tip No #02
The second process needs expertise and delicacy of expression to make the product appear fascinating even when there is not much detailing. For example, Apple’s products usually feature geometric lines and curves. All these features are highlighted by throwing perfect lighting effects. Airpods are fixed against a white background in such a manner that shadows and lights fall on the perfect spots as intended by the professional editor. There is no need to cast light on the edges as they become more undistinguished from the white background. You can place a shadow around the edges of the product to make the gray outline better define the product geometry. Adding light can further act as an enhancer along with the product corners. In this way, you can make a simple background and object look more appealing by using lights and shadows inappropriate places.
Tip No #03
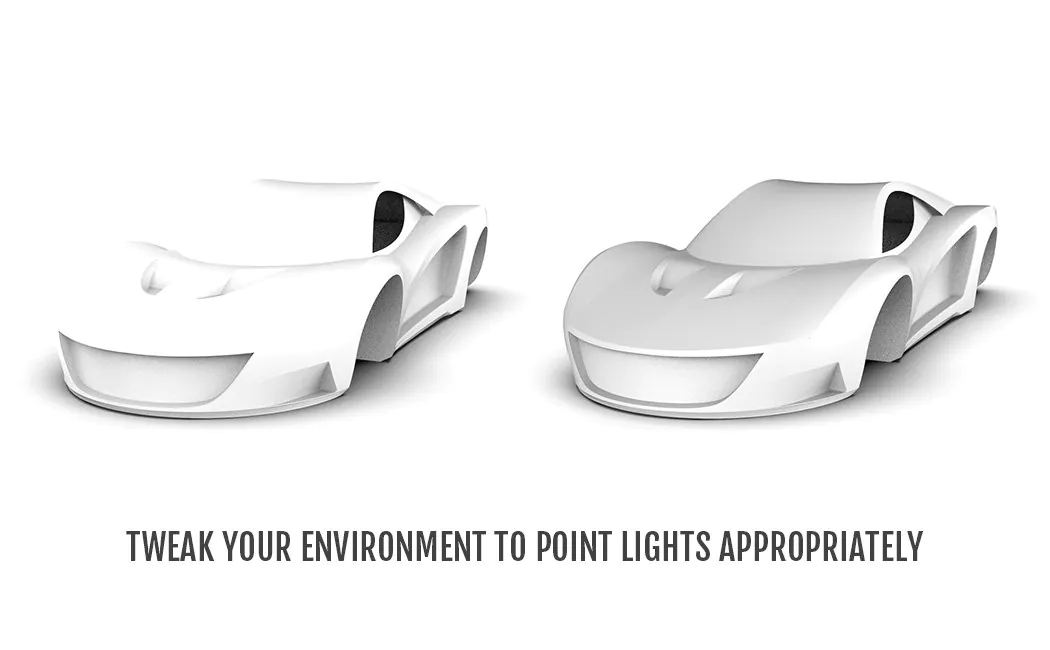
Image background removal or manipulation requires a list of essential tools. If you want to add a shiny touch to your product photograph, this will resultantly make lighting and shadows appear sharper. Similarly, if you are working to make your product look matte, the shadows appear blurry. The environment features a perfect blend of light and dark elements. You can employ the same concept to make your product images appear natural and subtle. It is important to note the counter effects of shadows, lights, and contrast on your product appear as a whole. Overdo one thing and the whole product is sidelined by the effect. Try to consider multiple revisions when editing a white background against a white object. Use a product image as a draft and make several revisions on the draft version of the product image. In this way, the original can be recovered when things do not fall into place according to plan.
Tip No #04
If you are not able to achieve desired highlights in your product photographs. You can try out this instant trick to make your highlights more prominent. Photoshop or any relevant photo editing software can create remarkable product highlights. This approach allows better control over your rendered image enabling you to edit it at any point in time. In case you have flexible timelines you can make your product photograph look flashier by adding artificial highlights as well. You can always reach out to a professional editor to acquire help in your design process to make things end up in high-quality renders.
Tip No #05
You can reduce or increase the level of contrast in your photographs by hand. While making such adjustments manually you must be careful. When the black details in your photograph get lost you can use specialized tools like Photoshop’s Curves Tool and boost the grays in your photographs. Using these tools you are leaving all the blacks and whites as-is.
Tools will allow you to make semi-white portions appear grayer than black. By incorporating a vignette you can form a distinct border or a spotlight in your photograph. Rendering a white object against a white background demands extra effort, to render things to perfection you need to work on the mental or visual reference. The whole process becomes easier when you have a good idea of what you want to achieve. Make up your mind as to where you want highlights to be and where do the shadows go. It is a good idea to stop using templates and add your touch of creativity to create materials from scratch.
All these tips and tricks make the rendering process a lot easier to accomplish than using traditional ways. It enables you to stick to your design goals by adding environments, textures, colors, and other materials wherever required. Last but not the least, if you are not a professional photographer you can rather aim to become a good product designer by implementing the aforementioned tips. By doing so, you can create photorealistic renderings. Happy Rendering!
How ITS Can Help You With Image Background Removal Service?
Information Transformation Services pledges to provide you with the best error-free and accurate Image Background Removal Service. With over 2000 satisfied customers we have all the expertise to transform your valuable data into an intriguing experience for your users. Such a diverse and augmented team of professionals is guaranteed to equip you with all the latest and efficient services and that too in the shortest turnaround time possible. Here at, ITS workspace environment and our Team is well suited to your comfort to favor communication. ITS offers ISO 2700 Certified BPO Services to make you feel, that your product and idea are in the safest hands. Contact us today, to outsource ITS Photorealistic Rendering Services and get a free quote within one business day!
