
How To Mend Blurry Images In 5 Easy Steps
Blurry images, due to lacking sharpness and out-of-focus appearance, and missing some other details, appear to be unstable and unappealing. The eye’s natural preference for brittle, well-defined visuals with clarity and accuracy is influenced by texture, depth, and clarity. Lack of sharpness in objects or subjects can result in soft, fuzzy appearances, affecting visual engagement and hindering effective communication of narratives. Various factors like camera shake, motion blur, poor light conditions and motion blur are responsible for this frustrating outcome of getting images with blur and out-of-focus-like issues. Different methods like sharpening tools and techniques, deblurring filters, masks etc., can play a vital role in mending blurry images. As a result, you can transform your dull and unattractive blurry images into sharp and clear ones. This blog article addresses 5 easy steps that include the details of the technique and tools you can apply to deblur your images and restore their clarity and sharpness.
Step 1: Importing and Assessing the Blurry Image
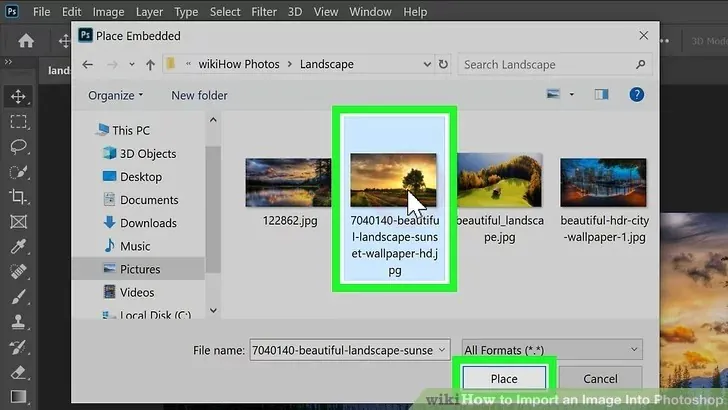
Import the Blurry Image: Open your preferred image editing software and navigate to the “File” menu. Choose to import or open the blurry image you want to mend.
Assess the Blurriness: Carefully examine the imported image and assess the extent of blurriness. Identify the specific areas that require improvement. Determine if the blurriness is uniform throughout the image or if it is more prominent in certain regions. Note any important details or elements that should be preserved or enhanced during editing.
Identify the Causes of Blurriness: Analyze the image to determine the potential causes of blurriness. Was it caused by camera shake, improper focus, motion blur, or other factors? Understanding the root cause will help you choose the appropriate techniques and adjustments to address the blurriness issues.
Select the Targeted Areas: Select the areas in the image that require the most attention based on your assessment. These may include faces, important details, or regions with significant blurriness. By focusing on specific areas, you can selectively apply targeted enhancements to improve the sharpness and clarity.
Plan the Editing Approach: Consider the best editing techniques and adjustments based on the identified causes of blurriness and the desired outcome. That involves using sharpening filters, deblurring tools, or other editing features your chosen software provides.
Step 2: Apply Sharpening Filters and Tools
Once you have imported the blurry image and assessed the blurriness, it’s time to apply sharpening filters and tools to enhance the overall clarity and sharpness. Most image editing software provides various sharpening filters and tools to help this process.
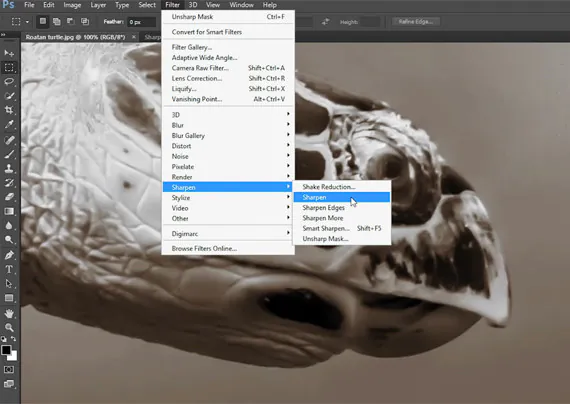
Locate the Sharpening Filters: Find the menu or tool options for sharpening in your image editing software. These filters are designed to enhance the sharpness of the image and reduce blurriness.
Experiment with Filter Settings: Adjust the settings of the sharpening filter to achieve the desired level of sharpness. These settings may include parameters like radius, amount, and threshold. Start with conservative settings and gradually increase them while observing the changes in the image. Be cautious not to oversharpen, resulting in unnatural or exaggerated details.
Use Unsharp Mask Filter: One commonly used sharpening filter is the “Unsharp Mask.” This filter enhances the contrast along edges, making them appear sharper. Adjust the settings of the Unsharp Mask filter until you achieve the desired sharpness while preserving a natural look.
Try Smart Sharpening: Some advanced image editing software offers smart sharpening tools. These tools use sophisticated algorithms to selectively sharpen the areas that need improvement, minimizing the chances of introducing artifacts or noise. Experiment with the settings of the smart sharpening tool to find the optimal balance between sharpness and natural appearance.
Apply Localized Sharpening: In addition to global sharpening, consider applying localized sharpening to specific areas that require more attention. You can use selection tools or masks to isolate these areas and apply to sharpen adjustments only to them. That aids in precise control over the enhancement process and helps retain the image’s overall balance.
Frequently compare the edited image with the original and make adjustments accordingly. The goal is to achieve a natural-looking result where the blurriness is effectively reduced while maintaining a visually pleasing appearance.
Step 3: Utilize Deblurring Techniques and Tools
In this step, you will explore deblurring techniques and tools further to improve the clarity and sharpness of the blurry image. Deblurring techniques address blurriness caused by camera shake, motion blur, or out-of-focus issues.
Deconvolution Filters: Many image editing software offer deconvolution filters that can help reduce blurriness. These filters work by analyzing the blur pattern and attempting to reverse it. Experiment with the settings of the deconvolution filters to find the optimal balance between reducing blurriness and maintaining a natural appearance.
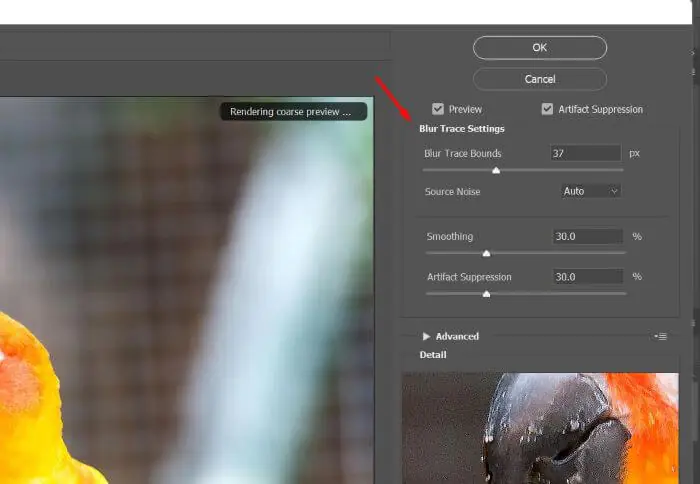
Shake Reduction: Some advanced image editing software provides specific shake reduction tools. These tools utilize complex algorithms to analyze the motion blur caused by camera shakes and attempt to restore sharpness. Go with the instructions provided by the software to apply shake reduction adjustments to the image.
Smart Deblurring: Certain image editing software incorporates smart deblurring tools that intelligently analyze the blur type and apply appropriate adjustments. These tools can handle different types of blurriness, including motion blur and out-of-focus blur. Explore the smart deblurring options in your chosen software and make adjustments accordingly.
High Pass Filter Technique: Another effective deblurring technique involves using the high pass filter. Duplicate the image layer, apply the high pass filter to the duplicate layer, and adjust the settings to reveal fine details. Blending the high pass layer with the original image layer can enhance the sharpness and reduce blurriness.
Combine Techniques: In some cases, combining sharpening filters and deblurring techniques can yield better results. Experiment with different combinations to find the most effective approach for your specific image.
Step 4: Make Targeted Adjustments with Masks
To further enhance the clarity and sharpness of specific areas in the image, it’s time to make targeted adjustments using masks. Masks allow you to selectively apply edits to chosen regions, ensuring the enhancements are focused where they are most needed.
Identify Areas for Targeted Adjustments: Based on your assessment of the blurry image, identify the specific regions or elements that require additional attention. These areas may include important details, faces, or regions with significant blurriness.
Create a Mask: In your image editing software, create a mask that covers the selected area. Masks can be created using various tools such as the brush, selection, or gradient tools. Ensure the mask covers the desired region precisely while smoothly blending with the surrounding areas.
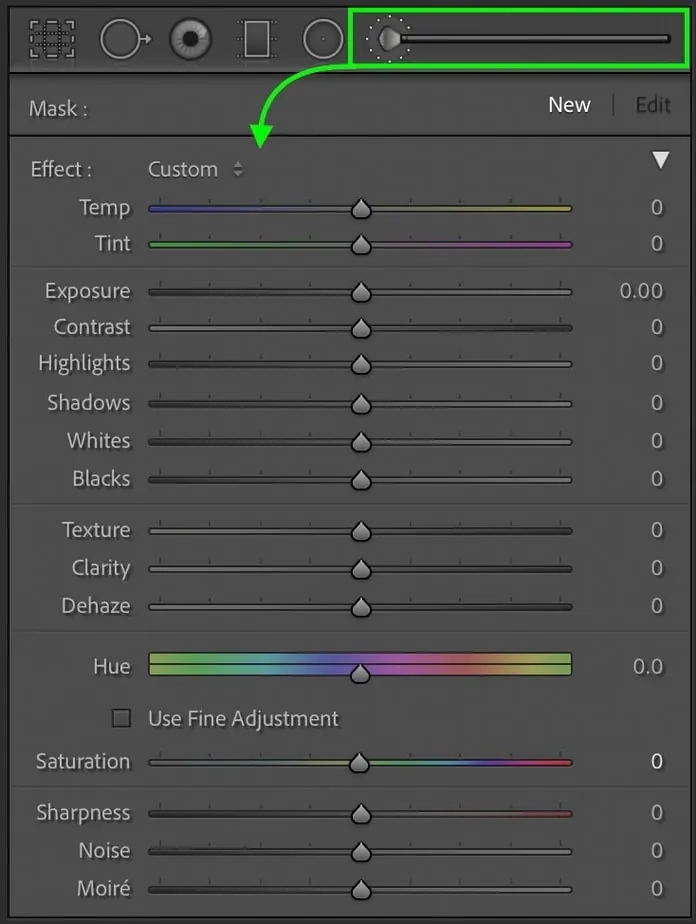
Apply Sharpening or Clarity Adjustments: Once the mask is created, apply sharpening or clarity adjustments to the selected area. Use sharpening filters, smart sharpening tools, or clarity adjustments provided by your software to enhance the sharpness and bring out details. Be cautious not to overdo the adjustments, resulting in an unnatural or exaggerated appearance.
Refine the Mask if Necessary: If you notice any artifacts or unwanted effects around the masked area, refine the mask using tools like feathering or refining edges. That will help to create a seamless transition between the edited area and the rest of the image.
Evaluate and Fine-tune: Regularly compare the edited image with the original to evaluate the effectiveness of the targeted adjustments. Make any necessary refinements to the mask or adjustments to achieve the desired balance between sharpness and natural appearance.
Step 5: Final Touches and Exporting the Enhanced Image

After applying sharpening filters, utilizing deblurring techniques, and making targeted adjustments, it’s time to add the final touches to your image and prepare it for export.
Evaluate the Overall Look: Step back and evaluate the edited image. Take a moment to assess the sharpness, clarity, and overall visual impact. Pay attention to any areas that may still appear unnatural or overly processed. Make a note of any adjustments that need to be made to achieve a balanced and pleasing final result.
Fine-tune Brightness and Contrast: Adjust the brightness and contrast levels if necessary. Carefully observe the image and make subtle tweaks to enhance the tonal range and improve overall image quality. Avoid making extreme changes that can lead to loss of detail or introduce artifacts.
Color Correction: If needed, correct color to ensure accurate and pleasing color representation. Adjust the white balance, saturation, or individual color channels to achieve the desired color balance. This step is particularly important if the blurriness affects the color accuracy of the image.
Noise Reduction: Check for any noise or grain that may have been introduced during the editing process. Apply noise reduction techniques or filters to reduce unwanted noise while preserving image details. Strive for a balance between noise reduction and maintaining overall sharpness.
Export the Enhanced Image: Once you are satisfied with the final adjustments, it’s time to export the image. Choose the appropriate file format (JPEG or PNG) and set the desired resolution. Consider the image’s intended use, whether for digital display or print and adjust the resolution accordingly.
Conclusion:
Blurry images are professionally and visually unpleasant. Therefore, they must reflect clarity and accuracy. Nonetheless, you can discover how to repair your blurry photographs using proper methods and strategies. Be considerate to get creative with different tools and approaches because each image demands a distinct strategy to use when deblurring. Adhering to the fundamentals of imagine deblurring, you can maximize the artistic value of your images while preserving the cherished memories associated with that specific shots.
