
How To Compose A Composite Photo
Composite photos go beyond the limitations of a single frame by displaying multiple scenes in a single photo. Because of their ability to own immense creative freedom, these images stimulate the viewer’s attention by exhibiting surreal and fantasy scenarios. A composite photo can tower above originality limitations and endow the viewer’s imagination to think outside the box owing to blending various elements of various images taken at different times and places. You can convey your creative narrations by playing with different color compositions and textures and bring about a harmonious overall composition. To craft the art of composing a composite photo, you have to know the step-by-step approach you can use to achieve a refined and cohesive composite photo in which imagination takes the leading position and reality gets engrossed. The following blog looks into all of the technical details that can improve and creatively enhance your composite photos to render a lasting impression.
Step 1: Conceptualize and Collect

The first step in creating a composite photo is to conceptualize and collect the necessary resources. Take the time to brainstorm and visualize the concept or story you want to convey through your composite photo. Consider the mood, theme, and overall composition you aim to achieve. Think about the elements, subjects, and backgrounds that will bring your vision to life.
Once you have a clear idea, begin collecting the images and resources that align with your concept. Look for high-resolution photos that match your desired style and aesthetics. That may include background images, subjects, props, or any other elements you want to incorporate into your composite.
When selecting images, consider factors such as lighting conditions, perspectives, and color schemes. Ensuring that your collected images have visual consistency will greatly contribute to your composite photo’s overall realism and coherence.
Make use of various resources like stock photo websites, personal photo libraries, or even your photographs. Curate a collection of images that will serve as the building blocks for your composition.
Creating a mood board or gathering reference images that inspire you during this stage is also helpful. These visual references will serve as a visual guide and aid in communicating your concept to others or reminding yourself of the desired outcome.
By taking the time to conceptualize your idea and collect the necessary images and resources, you lay a strong foundation for the successful creation of your composite photo. This initial step sets the stage for the subsequent stages of planning, editing, and refining your composition.
Step 2: Plan and Set Up
After conceptualizing your composite photo, the next step is planning and setting up your workspace for editing. This stage involves organizing your resources and creating a structured environment to work effectively.
First, take your conceptualized idea and develop a composition plan. Consider each element’s placement, size, and perspective within the photo. Sketch out a rough outline or create a storyboard to visualize how the elements will come together in the final composition. This planning phase helps you establish a clear vision and ensures your composite photo has a balanced and visually appealing composition.
Once you have your composition plan, it’s time to set up your workspace in your chosen image editing software, such as Photoshop. Open a new project with the appropriate dimensions for your composite photo. Import the collected images as separate layers into the software, organizing them in a logical order that corresponds to your composition plan.
Having a well-organized workspace allows for greater flexibility during the editing process. Each image layer can be easily accessed and manipulated individually, making adjusting positions, sizes, and blending options easier to achieve the desired effect.
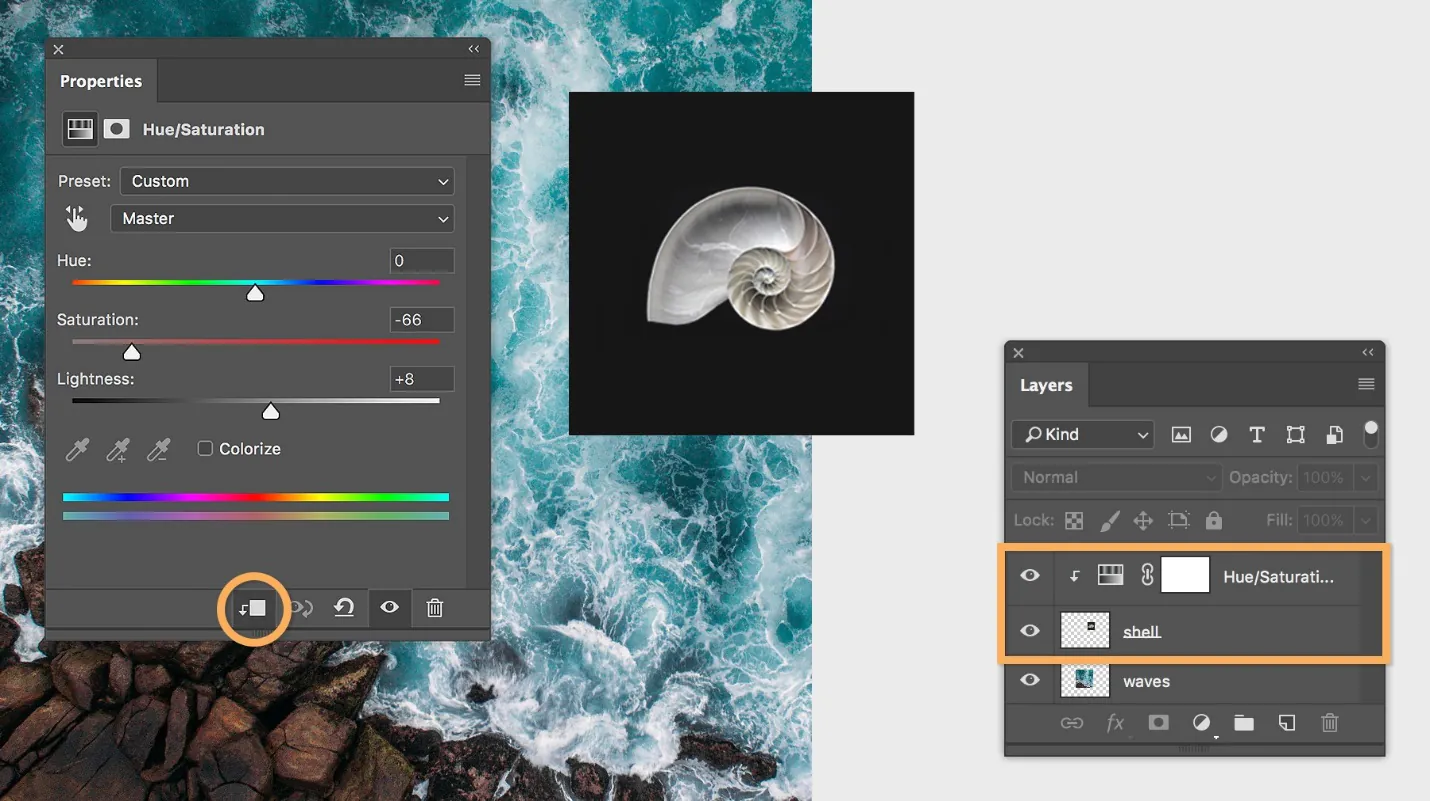
In addition to the image layers, consider utilizing adjustment layers, masks, and other editing tools that can enhance your workflow and provide more control over the editing process.
By planning your composition and setting up your workspace effectively, you establish a solid foundation for creating your composite photo. This stage ensures that you have a clear roadmap and an organized workspace that will streamline the editing process and contribute to the overall success of your composite photo.
Step 3: Arrange and Mask
Once you have planned your composition and set up your workspace, it’s time to arrange the elements and apply masking techniques to integrate the subjects into the background seamlessly.
Begin by placing your chosen background image as the base layer of your composition. Adjust its size or crop it as necessary to fit your desired dimensions and composition. The background image sets the stage for the entire composite photo and serves as the foundation for the rest of the elements.
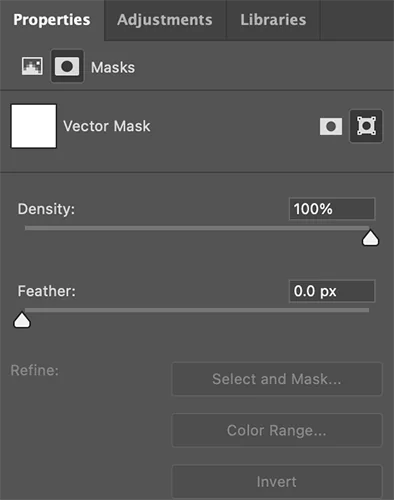
Next, work on isolating the subjects from their original backgrounds. That is where masking comes into play. Select the subject layer you want to work with and apply a layer mask to it. Layer masks help you to hide or reveal specific parts of an image by painting on the mask itself. Use tools like the Brush tool to paint with black on the mask to hide areas of the subject, revealing the background beneath. Conversely, painting with white on the mask will reveal the subject and hide the background.
Take your time to carefully and precisely mask out the subjects. Pay attention to details like hair or intricate edges to ensure a realistic blend. Zoom in and use smaller brush sizes for more accuracy.
If your subject has fine details or transparency, like hair or glass, consider using more advanced masking techniques, such as refining the edges or using Photoshop’s Select and Mask tool. These techniques help you create clean and precise selections.
Repeat the process for each subject layer, isolating them from their original backgrounds and placing them on separate layers above the background layer. This layering technique allows you to have full control over each element and adjust its positioning as needed.
Throughout this process, continually refer to your composition plan to ensure that the placement of the subjects aligns with your desired composition and storytelling.
By arranging the elements in your composition and applying masking techniques to create smooth transitions, you are one step closer to achieving a cohesive and visually appealing composite photo. Refining the masks and ensuring that the subjects blend seamlessly with the background creates a natural and convincing final result.
Step 4: Refine and Blend
Once you have arranged the elements and applied masks to isolate the subjects, refining and blending them seamlessly into the composite photo is time. This step involves adjusting each subject layer’s size, position, and orientation and utilizing blending techniques to create a cohesive and realistic composition.
Start by fine-tuning the placement and scale of each subject within the composition. Use transformation tools like Free Transform or Warp to resize, rotate, or distort the subjects as necessary. Pay attention to perspective and lighting to ensure that the subjects integrate naturally into the scene.
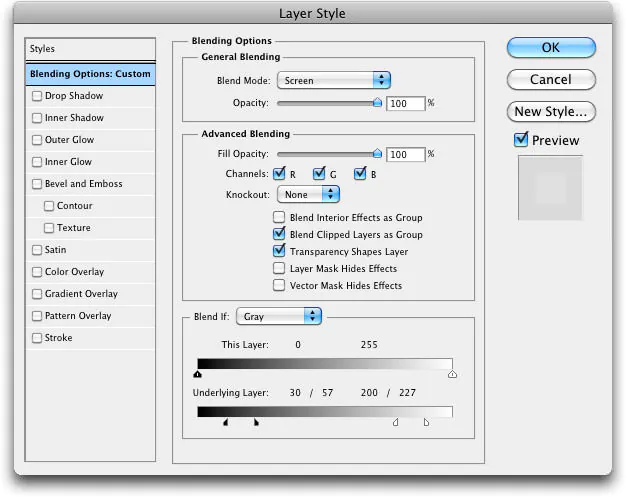
Next, focus on blending the subjects with the background. Try different blending modes to achieve the desired effect. Blending modes determine how the pixels of the subject layer interact with the layers below, affecting their color, brightness, and transparency. Common blending modes include Normal, Multiply, Screen, Overlay, and Soft Light. Choose the blending mode that best integrates the subjects with the background and adjust the layer opacity if needed.
To enhance the blending further, refine the transitions between the subject and background using brushes and gradients. Soft brushes with low opacity can blend the subject layer’s edges with the background, creating a smooth and seamless integration. Use a combination of brush strokes, erasing, and masking to achieve a natural and realistic appearance.
Pay attention to lighting and shadowing. Adjust the brightness and contrast of the subject layer to match the lighting conditions of the composite photo. Use Dodge and Burn tools to selectively lighten or darken areas to create depth and add realism. Consider adding shadows beneath the subjects using the Brush tool or layer styles like Drop Shadow.
Continuously evaluate the composition as you refine and blend the elements. Refer back to your composition plan to ensure that the subjects are integrated harmoniously with the background and that the overall visual flow is maintained.
Lastly, make any necessary adjustments to colors, saturation, and overall tonal balance to achieve a unified look across the composite photo. Use adjustment layers to fine-tune the color and tone without permanently altering the original layers.
By refining the placement, blending, and overall integration of the subjects with the background, you create a composite photo that appears seamless and visually compelling. Take your time during this stage to ensure smooth transitions, the lighting is consistent, and the final result is a cohesive and convincing composition.
Conclusion
In a nutshell, composite photos have incalculable worth in every aspect of image modification. This approach produces visually amazing visuals and aids in creative development, resulting in a more extensive and meaningful vision. Before you start creating your composite photo, you must have a firm grip on specific skills and procedures. Once you have the fundamental skills and procedures in place, you may show off your innovative thoughts and push beyond the confines of conventional photography approaches.
