How To Make An Oil Pastel Portraits Step By Step
Digital oil pastel portraits combine the tactile charm of conventional oil pastels with the boundless possibilities of digital artistry. For creating such compositions, specialized image editing software are used to replicate the radiant qualities, bold strokes, and intricate layering evident in traditional oil pastel artworks. This approach offers creators the liberty to experiment using an extensive color spectrum, blending modes, and layers to attain their desired effects. With meticulous brushwork and deliberate layering, artists can conjure the rich textures and depth that define physical oil pastels. The digital platform also simplifies adjustments, allowing for effortless fine-tuning of details, tones, and highlights with the brushstroke of a virtual tool. The braid of technology and makes digital oil pastel portraits act as a testament to the fusion of legacy and ingenuity in contemporary art. This blog will cover a comprehensive sequence of steps guiding you through the creation of digital oil pastel portraits. These steps encapsulate the essence of traditional techniques while handling the benefits of modern digital utilities.
Image Selection and Preparation
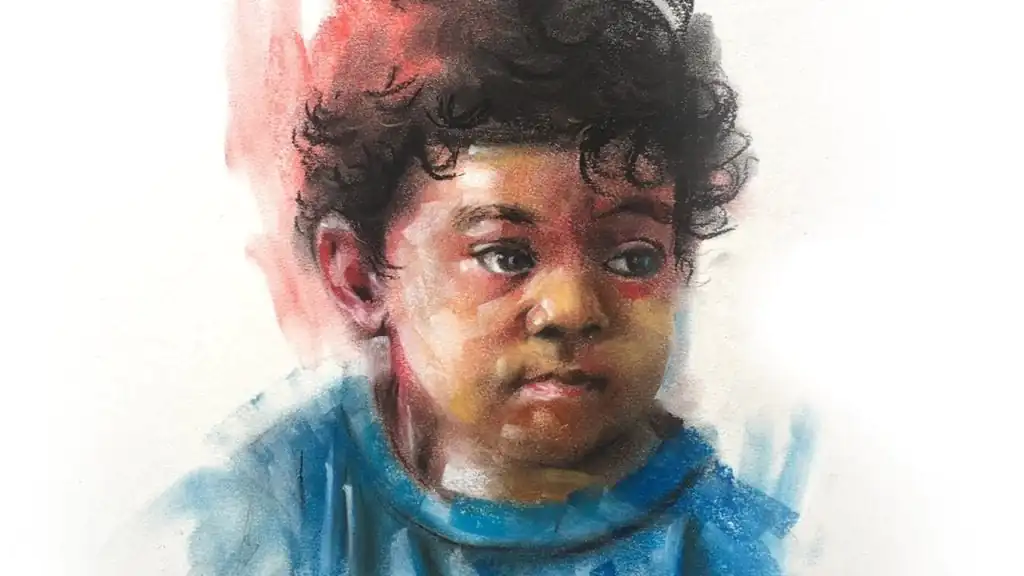
Step 1: Subject Choice Select a subject that resonates with you, one that possesses distinct features or emotions that you want to convey through your artwork.
Step 2: Image Quality Assessment Choose a high-resolution image that captures intricate details. A clear and detailed image provides a solid foundation for your creative process.
Step 3: Initial Adjustments Enhance the image’s visual appeal by adjusting aspects such as brightness, contrast, and sharpness. These adjustments lay the groundwork for your artistic journey.
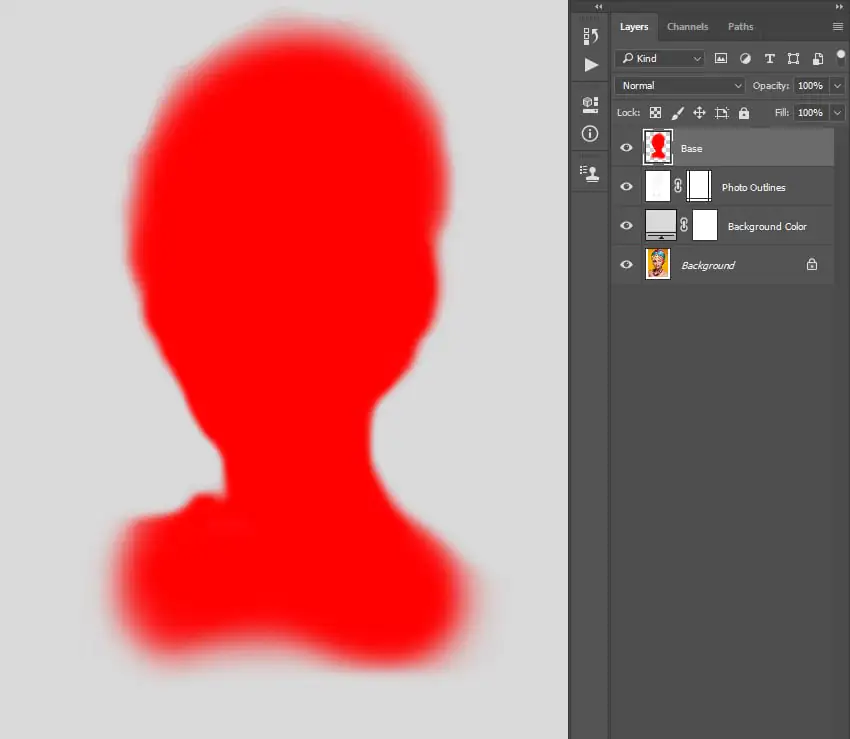
Base Color Application
Step 1: Layer Creation Open your chosen image in the editing software and create a new layer to work on. This ensures your original image remains untouched.
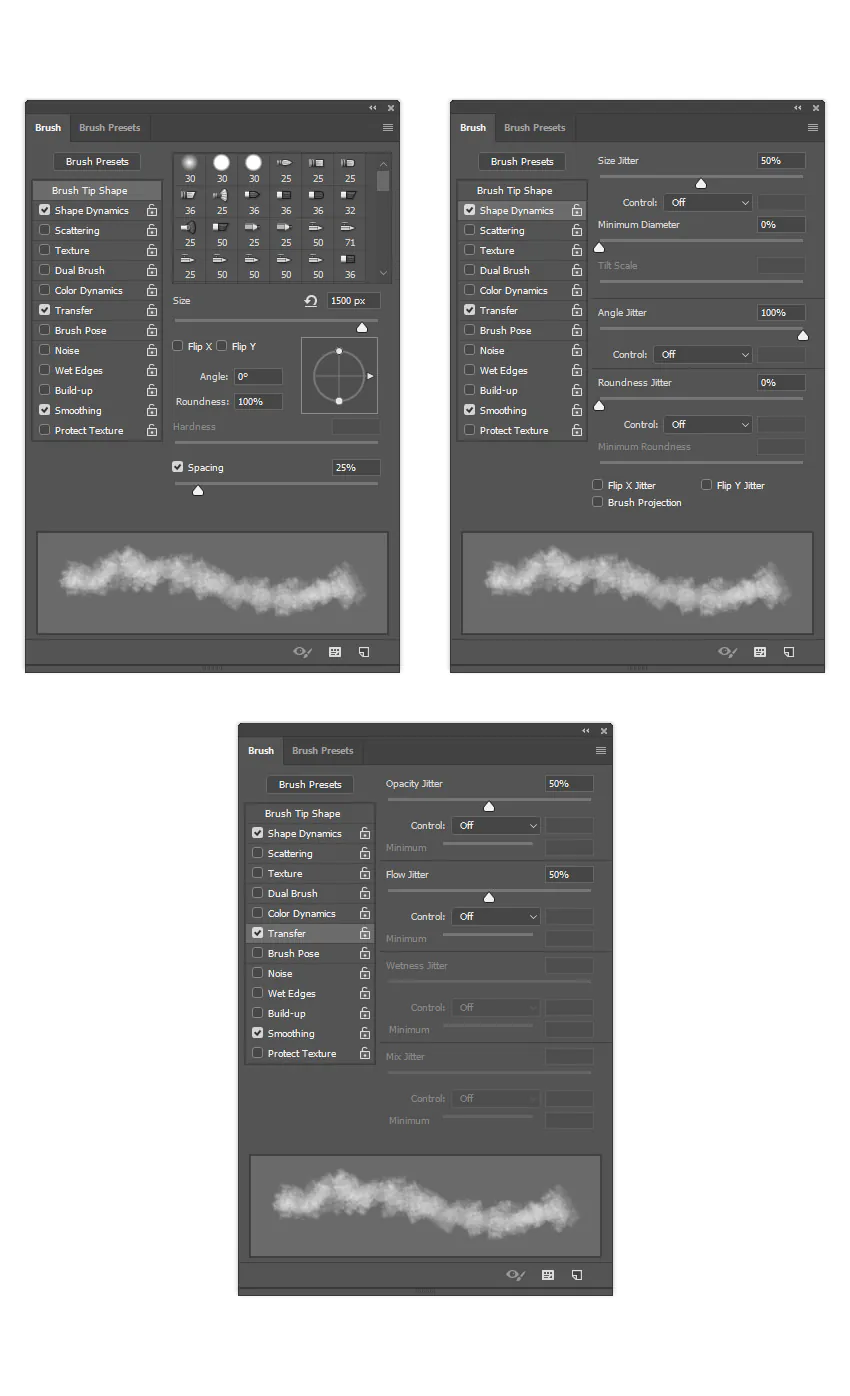
Step 2: Brush Selection Choose a brush with a textured edge that mimics the look of oil pastels. This will help replicate the unique texture in your digital artwork.
Step 3: Broad Stroke Application Apply broad strokes of base colors on the new layer. Focus on the main color areas of your subject, capturing the essence of the oil pastel technique.
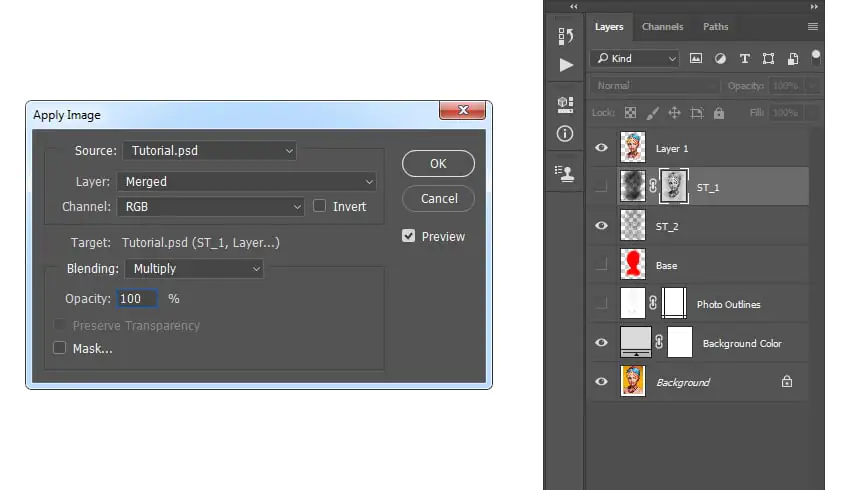
Step 4: Layer Blending Experiment with blending modes for the base color layer. Multiply or Overlay modes often work well to create rich, layered colors with depth.
Layering and Blending Colors
Step 1: Additional Layer Creation Add a new layer on top of the base color layer. This layering approach maintains the flexibility to adjust individual elements later.
Step 2: Color Selection Select a variety of colors that correspond to the different areas of your subject. This range will contribute to the depth and vibrancy of your artwork.
Step 3: Applying Color Layers Use the textured brush to apply colors on the new layer. Focus on building depth by layering colors that gradually shape the contours of your subject.
Step 4: Blending Techniques Experiment with blending modes to achieve the desired effect. Multiply and Overlay modes, among others, can create captivating color interactions.
Step 5: Fine Detail Layers Introduce additional layers for finer details like facial features and textures. This layering approach maintains the distinction between different elements.
Detailing Facial Features
Step 1: Facial Feature Layer Create a new layer dedicated to detailing the facial features. This layer isolation allows for precise adjustments and enhancements.
Step 2: Feature Observation Zoom in on the image to focus on facial details like eyes, lips, and skin textures. Analyze these features to replicate them realistically.
Step 3: Brush Customization Adjust the brush settings to a smaller size and lower opacity. This modification enables you to work on intricate details with precision.
Step 4: Feature Enhancement Use short, controlled strokes to define features. Capture the essence of eyes’ reflections, lips’ textures, and other distinct elements.
Step 5: Gradual Build-up Build up details gradually, layer by layer, adjusting the opacity as needed. This approach creates depth and realism in your digital artwork.
Emulating Oil Pastel Texture
Step 1: Texture Overlay Layer Create a new layer specifically for adding an oil pastel texture overlay. This overlay will enhance the tactile quality of your digital artwork.
Step 2: Texture Selection Choose a texture image that resembles real oil pastel strokes. This could be a scanned image of actual strokes or a digital texture preset.
Step 3: Overlay Application Place the selected texture image on the overlay layer. Adjust the placement and size to cover the entire artwork effectively.
Step 4: Blending Mode Adjustment Experiment with blending modes like Soft Light or Overlay for the texture layer. This will integrate the texture with your portrait seamlessly.
Step 5: Opacity Fine-tuning Fine-tune the opacity of the texture overlay to achieve the desired level of texture. Subtle adjustments ensure the texture enhances without overpowering.
Adding Shadows and Highlights
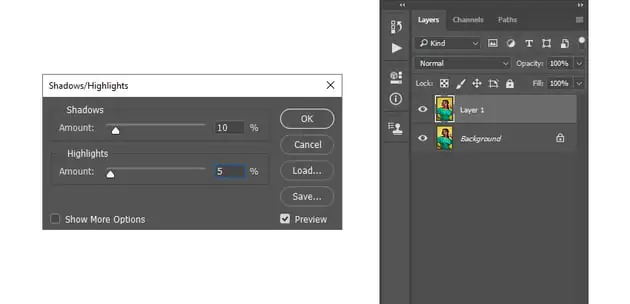
Step 1: Shadow Layer Creation Generate a new layer specifically for adding shadows. Keeping shadows separate allows for precise adjustments and control.
Step 2: Darker Color Selection Choose colors slightly darker than the base colors for creating shadows. This distinction enhances the three-dimensional effect.
Step 3: Shadow Application Use a soft brush with low opacity to apply shadows to areas where light doesn’t directly hit. Build up shadows gradually for a natural look.
Step 4: Highlight Layer Addition Create another new layer for highlights. This layer separation ensures that highlights don’t interfere with existing elements.
Step 5: Lighter Color Choice Select colors a bit lighter than the base colors for highlights. These highlights will mimic areas where light reflects.
Step 6: Highlight Placement Apply highlights strategically to areas that catch light, like the nose bridge, forehead, and cheekbones. These highlights add depth and luminosity.
Step 7: Opacity and Blending Adjustments Fine-tune the opacity of both shadow and highlight layers. Experiment with blending modes to achieve a balanced and realistic lighting effect.
Refining Background and Composition
Step 1: Background Assessment Evaluate the existing background of your portrait. Consider whether it complements the subject or if adjustments are necessary.
Step 2: Color and Texture Modifications Adjust the colors and textures of the background to align with your artistic vision. Subtle changes can significantly enhance the overall composition.
Step 3: Background Blurring Apply a slight blur to the background to create a depth-of-field effect. This technique emphasizes the subject and adds a sense of realism.
Step 4: Composition Balance Ensure the background doesn’t overpower the main subject. Maintain a harmonious balance between the subject and its surroundings.
Step 5: Test Variations Experiment with different background colors, textures, or even malistic settings to find the composition that best accentuates your portrait.
Color Adjustments
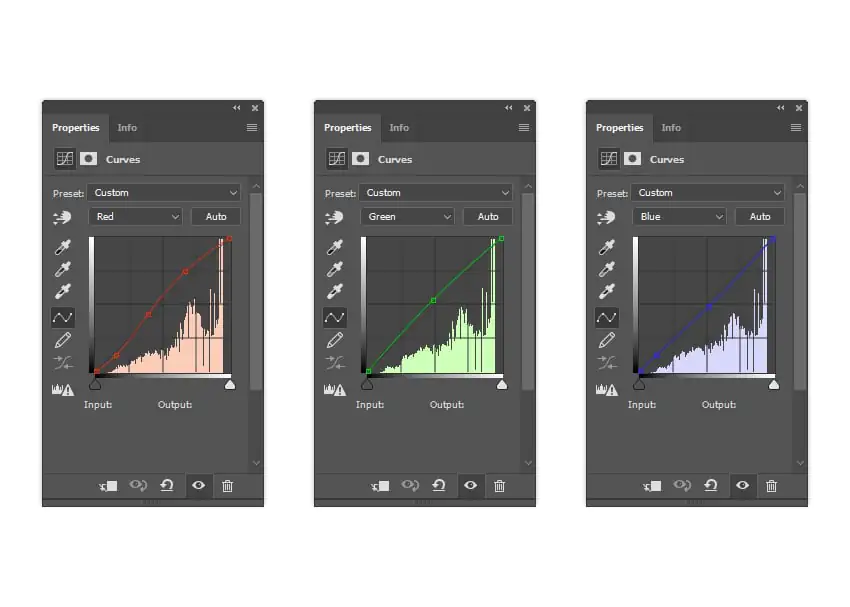
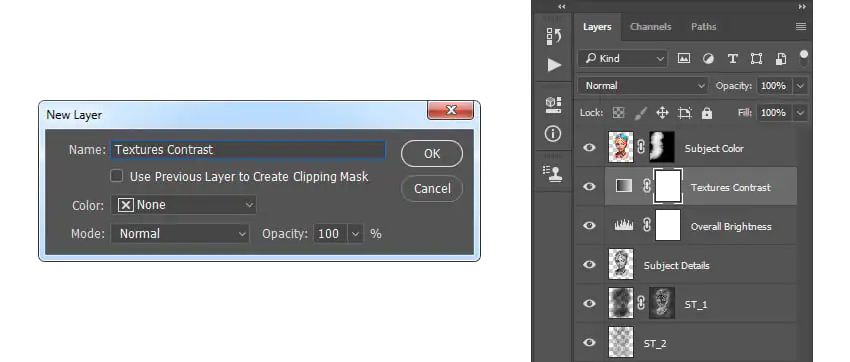
Step 1: Create Adjustment Layers Generate adjustment layers to make color changes. This approach preserves the original image while allowing non-destructive adjustments.
Step 2: Color Balance Adjust the color balance to achieve a harmonious palette. Tweak the levels of red, green, and blue to fine-tune the overall color tone.
Step 3: Saturation Enhancement Increase or decrease saturation selectively to add vibrancy or subtlety to specific color areas. This enhances the mood of your portrait.
Step 4: Contrast Enhancement Adjust the contrast to ensure that the colors and tones stand out effectively. Balanced contrast adds depth and dimension to your artwork.
Step 5: Test and Refine Experiment with different color adjustments while considering the emotions you want to evoke. Make adjustments until you achieve the desired visual impact.
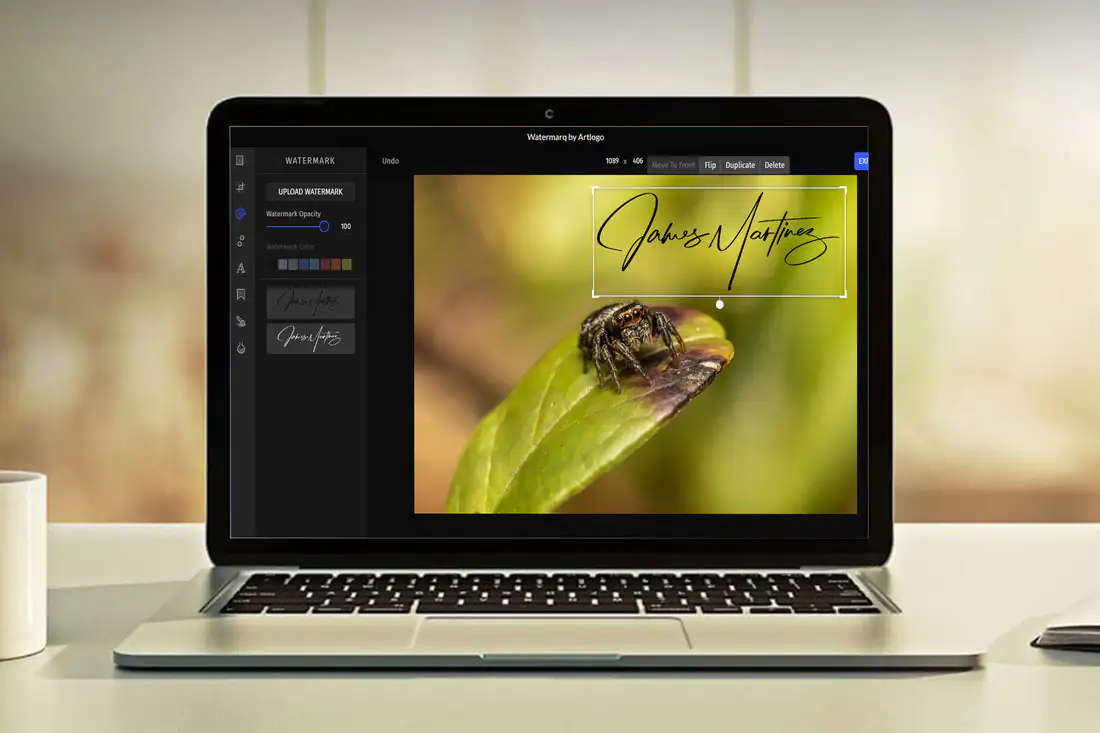
Final Details and Signature
Step 1: Zoomed-in Examination Zoom in on your portrait to meticulously inspect the finer details. Pay attention to edges, textures, and any areas that might need refinement.
Step 2: Detail Refinement Use a smaller brush with controlled strokes to refine details further. Adjust highlights, shadows, and textures to achieve a polished look.
Step 3: Signature Placement Add a discreet signature or watermark to your artwork. Place it strategically so that it doesn’t detract from the overall composition.
Step 4: Overall Assessment Zoom out and take a holistic look at your portrait. Ensure that all elements work harmoniously together and that no area feels neglected.
Step 5: Fine-tuning Make any final adjustments necessary to perfect your artwork. Fine-tune colors, contrasts, and details until you’re satisfied with the result.
Save and Share
Step 1: File Format Selection Choose an appropriate file format for saving your artwork. Formats like JPEG or PNG are commonly used for sharing digital artwork online.
Step 2: High-Quality Export Export your portrait in high resolution to preserve the details and vibrancy. This ensures your artwork looks stunning when viewed by others.
Step 3: Blog and Social Media Share your masterpiece on your blogs or social media platforms. Write a detailed caption that includes insights into your creative process, emotions, and inspiration.
Step 4: Engage with Your Audience Engage with your audience by responding to comments and feedback. Share your experiences and engage in discussions related to your artwork.
Step 5: Reflect and Learn Take time to reflect on your creative journey. Consider what you learned, what you enjoyed, and how you can apply these insights to future projects.
Conclusion
In conclusion, oil pastel portraits exemplify the harmonious blend of classic artistic techniques and cutting-edge technology. Through specialized image editing software, artists can recreate the allure of traditional oil pastels while harnessing the versatility of the digital medium. The process allows for intricate layering, vibrant color manipulation, and precise adjustments that breathe life into the artwork. As you work on oil pastel portraits, the steps mentioned above are a gateway to uncorking your imagination and sharing your unique perspective with a global audience. Ultimately, the fusion of tradition and innovation will guide your hands as you adept mesmerizing digital oil pastel portraits.
