How To Make A Doodle Picture
Doodle pictures summon exhilaration, surprise, and individuality due to their comedic effect. Depending on the artist’s style and objective, they can range from clean and simple forms to elaborate and complex patterns. They establish a sensation of unrestricted expression as we see how artists who draw doodles let their minds wander to express themselves without the limits of perfection or rigid restrictions. As a way to pass the time, Doodles exhibit joy and humor and can connect with audiences due to their lighthearted elements. Though Hand-drawn doodles were the initial forms of doodle images using pencil and other drawing tools, digital doodle tools gained more popularity and scope over time. Digital doodles offer a broad spectrum of capabilities, like diverse brushes and customization options, to create convoluted and eye-catching doodles. Moreover, doodles in digital form are exceedingly simple to share and copy. This post will review a few strategies for creating doodle pictures using Adobe Illustrator, a competent vector graphics application that will offer you excellence in less time.
Step 1: Open Adobe Illustrator
Launch the Illustrator application on your device. Adobe Illustrator offers a wide range of creative tools and features, making it ideal for designing and illustrating doodle pictures. Upon opening the program, you’ll be greeted with the welcome screen or a blank canvas, depending on your settings. If you have an existing file, you can open it by selecting “Open” from the “File” menu and navigating to the file’s location on your computer. Otherwise, you can create a new document by selecting “New” from the “File” menu or using the corresponding keyboard shortcut.
Step 2: Create a New Document
Click on the “File” menu at the top left of the Illustrator interface.
From the dropdown menu, select “New” or use the shortcut Ctrl/Cmd + N.
The New Document window will appear to specify the settings for your doodle picture.
Choose a preset or set the custom dimensions for your artboard. You can select presets for print, web, or mobile platforms or enter specific width and height values.
Set the color mode. RGB is commonly used for digital artwork, while CMYK is suitable for print projects.
Adjust any other settings like the orientation of your artboard or the number of artboards if you need multiple pages.
Once you’ve set all the desired parameters, click the “Create” button.
Illustrator will create a new document with the specified dimensions and settings, giving you a blank canvas to start your doodle picture.
Step 3: Select the Brush Tool and Customize Settings
Locate the toolbar on the left side of the Illustrator interface.
Click on the Brush Tool icon, which looks like a brush or paintbrush (shortcut: B).
Once selected, the Brush Options will appear at the top of the interface. Here, you can adjust various settings to achieve the desired brush style for your doodle.
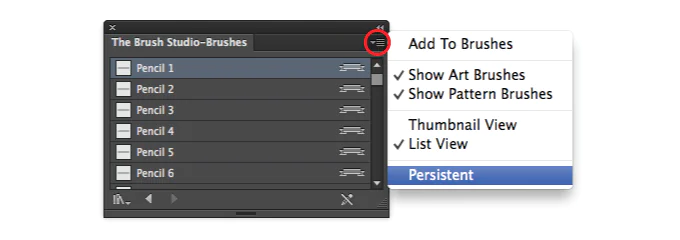
Select a brush from the Brush Presets panel on the right, or click the Brush Libraries icon to access additional brush collections.
Try different brushes to find one that suits your doodle style. You can set the brush size, opacity, and other settings in the Brush Options to fine-tune the appearance of your strokes.
Modify additional settings such as brush hardness, shape dynamics, scattering, or texture to add creativity and variation to your doodle.
Take advantage of the Stroke panel (Window > Stroke) to customize stroke properties like color, weight, and alignment to achieve the desired visual effect.
Step 4: Start Doodling and Create Your Artwork
Position your cursor over the artboard, the white canvas in Illustrator, where you’ll create your doodle.
Click and drag the mouse or use a drawing tablet to make your first stroke. Illustrator will create a path based on your brush movement.
Continue drawing lines, shapes, and patterns on the artboard, letting your imagination guide your doodle. Try different brush sizes, pressures, and strokes to achieve the desired effects.
Hold down the Shift key while dragging the mouse or stylus to draw straight lines. That constrains the brush stroke to a straight path.
Utilize keyboard shortcuts such as [ and ] to decrease or increase the brush size on the fly, enabling you to create varying line weights and shapes.
Remember that Illustrator’s vector-based nature allows you to modify your doodle anytime. You can adjust the position, shape, color, and stroke properties using the selection and editing tools.
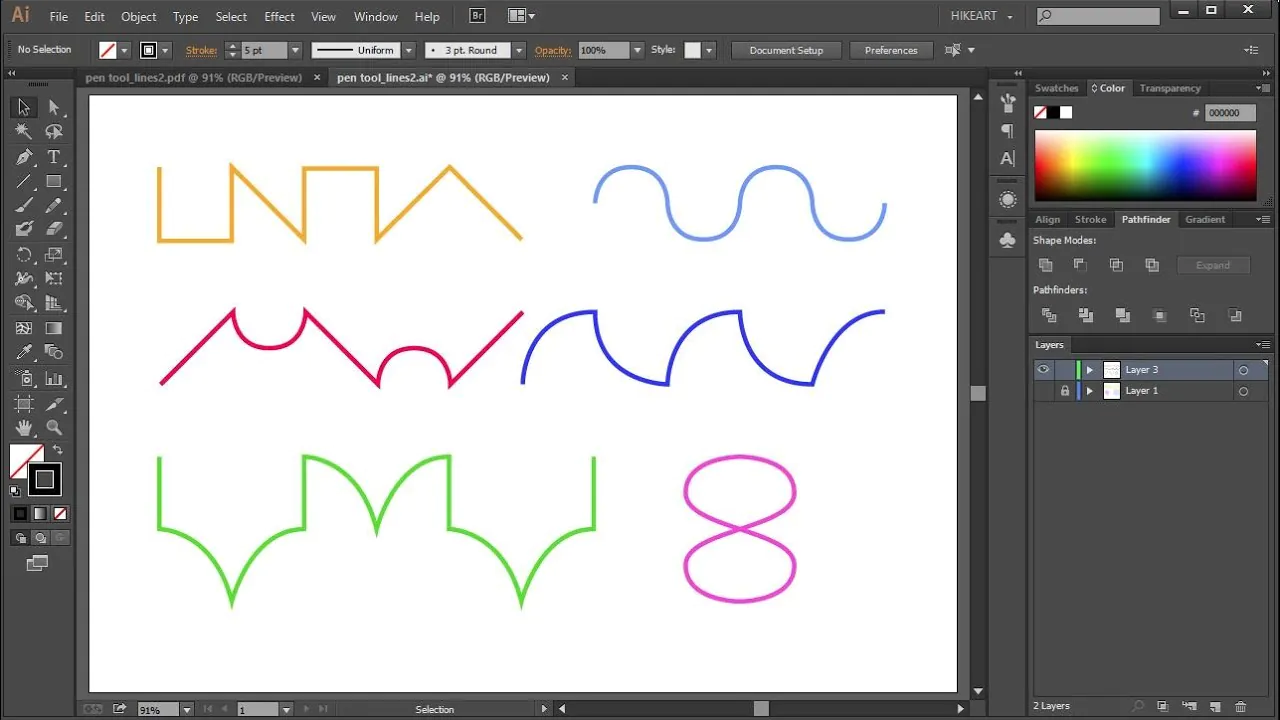
Explore the various tools and features in Illustrator, like the Pen Tool for precise curves and the Shape Tools for predefined shapes, to add more complexity and detail to your doodle.
Step 5: Customize Stroke and Fill, and Add Details

Select the doodle element(s) you want to modify using the Selection Tool (shortcut: V). Click and drag around the elements to create a selection box, or click on individual components when holding the Shift key to select multiple items.
Click the Stroke color swatch in the toolbar or the Color panel to change the stroke color. Select a new color with the help of the color picker, swatches, or gradients.
Adjust the stroke weight by typing in a specific value in the Stroke panel or using the Stroke Weight slider. It controls the thickness of the stroke.
If you want to remove the stroke entirely, click the “None” option in the Stroke panel or set the stroke weight to 0.
Similarly, you can customize the fill color of your doodle elements. Click on the Fill colour swatch in the toolbar or the Color panel, and select a new color.
You can experiment with Illustrator tools like the Blob Brush, Pencil, or Shape to add intricate details or texture.
Step 6: Utilize Layers to Organize and Edit Your Doodle
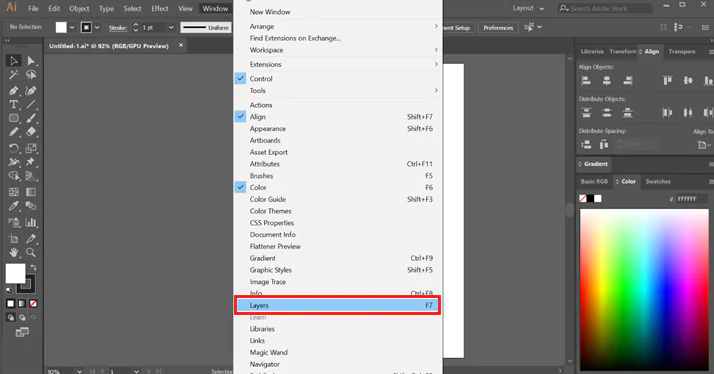
Open the Layers panel by clicking “Window” in the menu bar and selecting “Layers” from the dropdown menu.
Tap the “New Layer” icon underneath the Layers panel to create a new layer. You can also choose “New Layer” from the menu icon in the top-right corner of the Layers panel.
Rename your layers to reflect the content they contain. Double-click on the layer name to edit it.
Arrange your doodle elements by dragging and dropping them onto specific layers. That allows you to separate and manage different parts of your artwork.
To control the visibility of a layer, click on the eye icon with the layer name. That enables you to focus on specific elements while hiding others.
To modify the stacking order of layers in the Layers panel, drag them up and down. Layers at the top will appear in front of layers below them.
Select the corresponding layer in the Layers panel when editing a specific element. That isolates the selected element, making it easier to make changes without affecting other parts of your doodle.
Step 7: Refine Your Doodle with Effects and Filters
Select the doodle element(s) you want to apply effects using the Selection Tool (shortcut: V). You can choose multiple elements by holding the Shift key while selecting.
Go to the “Effect” menu in the menu bar and explore the various effect categories, such as Stylize, Distort, or Texture. Each category contains different effects that can be applied to your doodle.
Choose an effect that aligns with your creative vision. For instance, you can add a drop shadow, a Gaussian blur, or a warp effect to give your doodle a unique look.
Adjust the settings of the selected effect in the dialogue box that appears. Intensity, angle, or scale can be modified to achieve the desired result.
Preview the effect before applying it by checking the “Preview” box to fine-tune the effect settings until you’re satisfied with the result.
Click “OK” to apply the effect to your doodle element(s). The effect will be displayed on the artboard, and you can further customize or modify it as needed.
If you’re not satisfied with the effect, you can remove it by selecting the element(s) and choosing “Clear Appearance” from the “Appearance” panel or by clicking on the “None” option in the “Effect” menu.
Step 8: Save and Export Your Doodle Picture
To save your Illustrator file for future editing, Select “Save” from the “File” menu or use the shortcut Ctrl/Cmd + S. Choose a location on your computer and enter a file name for your artwork.
To share your doodle online or with others who may not have Illustrator, you’ll need to export it as a different file format. Navigate to the “File” menu and select “Export” or “Save for Web.”
Choose the desired file format in the Export window, such as JPEG, PNG, or SVG. Consider the purpose of your doodle and the quality you want to maintain.
Customize additional export settings based on your specific requirements, such as resolution, transparency, or color profile.
Specify the destination folder and enter a file name for your exported doodle picture.
Click “Export” or “Save” to finalize the process. Illustrator will generate the file in the chosen format and save it to your location.
Conclusion
To summarise, doodle images are a bizarre yet creative artistry that magnetizes spectators with its random and raw character and tapestry. With the increasing importance of technology in today’s culture, even handmade doodles are being swiftly replaced by digital doodle pictures, which are more easily manipulated and present you with an abundance of drawing alternatives. Digital doodle images are noteworthy because of their simplicity of usage and versatility. You can customize the brush, color, or effects options in any professional software, such as Illustrator, and create more extensive and complicated doodle pictures.
