How To Edit Microscopic Images in Photoshop
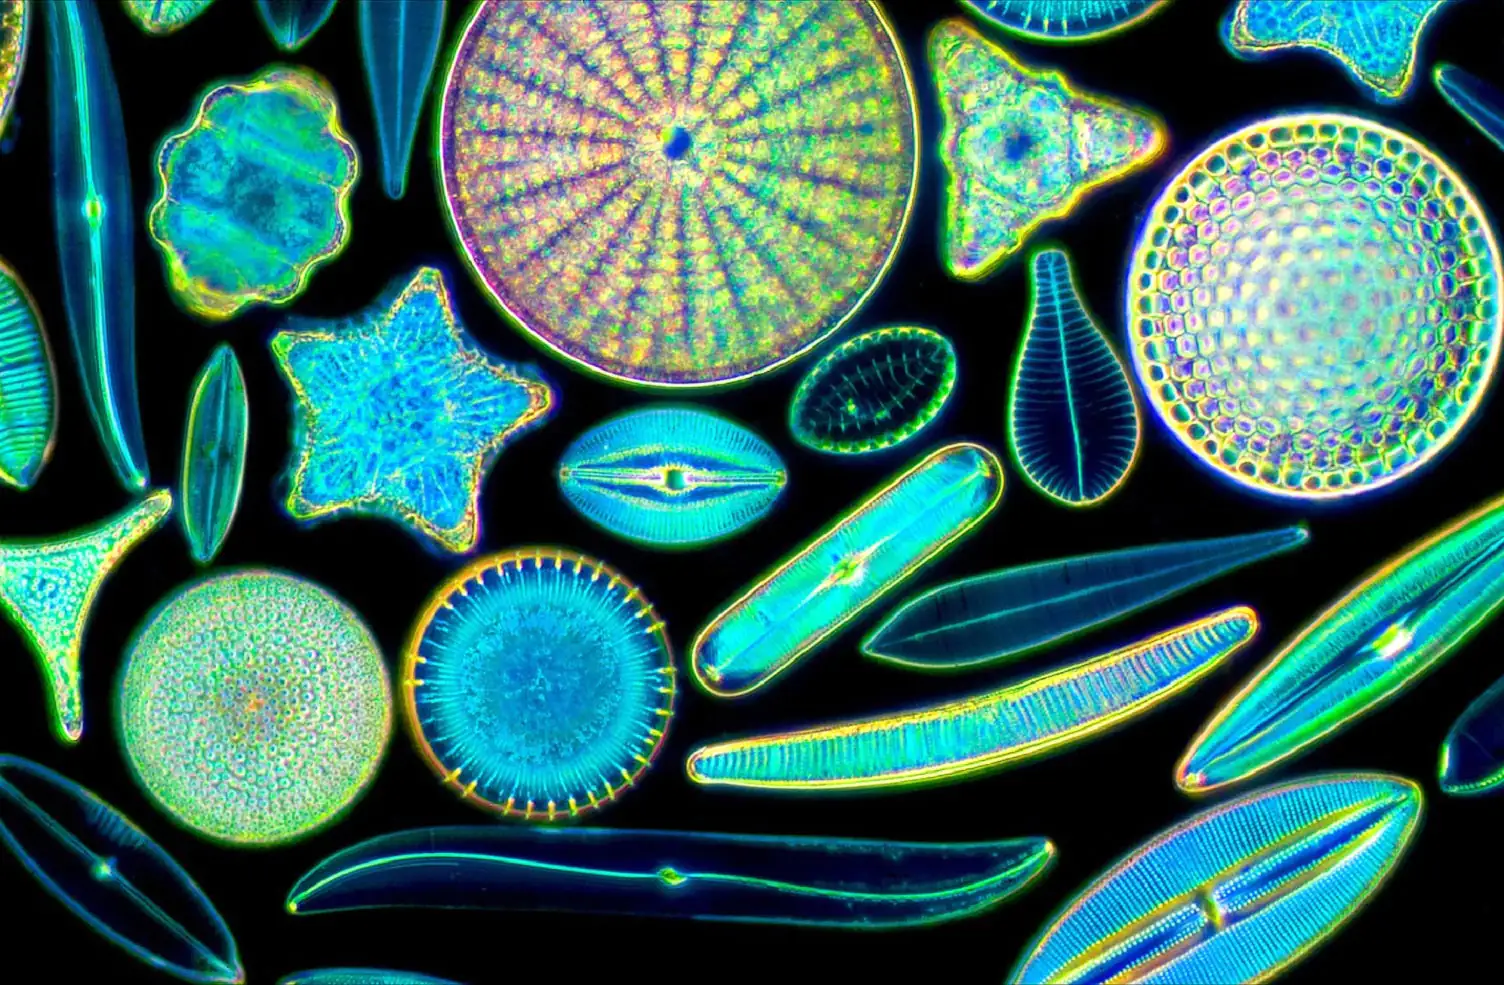
Microscopic images portray the hidden world inside objects or specimens that are obtained using a microscope. The microscopic imaging of micro-objects around us, which we cannot see directly through our eyes, is a magnified view of fine details, structures, and features. These images are vital tools in scientific research for magnifying and analyzing nano-objects like cells, microorganisms, crystal structures, etc. Since the discovery of the first microscope in 1665, a sundry array of microscopes has been developed; some of the more frequent ones are light microscopes, electron microscopes, STM, and AFM. Each of these microscopes has specific powers of magnification and resolution. However, despite giving their best clarity and resolution, the images produced by these microscopes still sometimes need to upgrade their visual impactfulness to serve their purpose of research and study. Here comes the role of image editing techniques and tools. Advanced image editing applications like Photoshop can let you instantly edit microscopic images and enhance their features, including contrast, colour, saturation, and dimensions. This blog post displays steps and techniques you can adopt while editing microscopic photos using Adobe Photoshop, a well-known editing application.
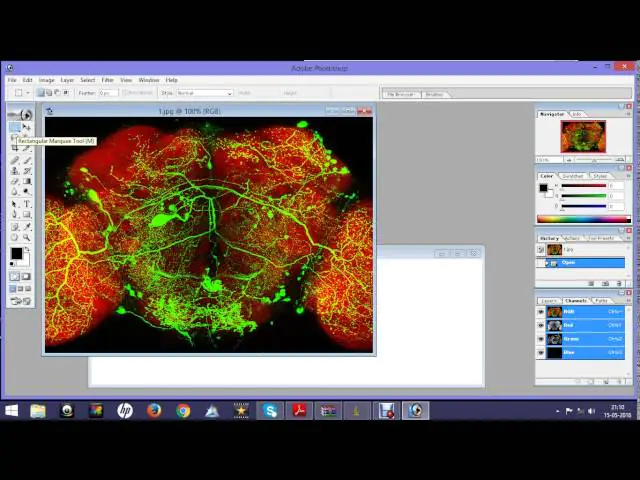
Step 1: Open the microscopic image in Photoshop.
Launch Adobe Photoshop and open the microscope image you want to revamp. To import an image, look for the “File” menu in the upper left edge of the Photoshop interface and select “Open.” Search the folders on your computer for the image file and click “Open.”
Be assured the image file you’re importing is in a friendly format, such as JPEG, TIFF, or PNG. Photoshop supports many usually used image formats for microscopic images.
Once the image is palmy-imported and appears in the Photoshop workspace, it is ready for editing and enhancement. Now, you can take the following steps to optimize and analyze microscopic images according to your scientific or educational needs.
Step 2: Correspond image brightness and contrast.

In this step, you have to go to the file menu and click “New Adjustment Layer,” then choose “Brightness/Contrast.” This layer-creation initiative helps set brightness and contrast for original image preservation before beginning the primary process.
Next, use the slider named “Brightness.” Maximize or minimize its level according to the visibility and clearance of your microscopic image.
Adjust the “Contrast” slider to better distinguish between light and dark areas of the image. Increasing contrast can reveal fine details that may be blurry or unclear.
Reshape these settings until you achieve the desired balance of brightness and contrast. Be careful of excessive adjustments to prevent loss of information or malformations.
Constantly evaluate your edits by toggling adjustment layer visibility on and off to compare with the original image.
Step 3: Take off noise and distortions

Closely observe the image by zooming in and out to count the area where noise or distortion calls for corrections.
Utilize Photoshop noise reduction-specific filters, named “Reduce Noise” and “Dust & Scratches. Applying these filters to damaged areas can effectively minimize noise.
For distinct distortions like dust particles or scratches, use a spot-healing brush so that you can intelligently turn it into the same as surrounding pixels.
For more challenging distortions, you can use the clone stamp tool. Just do an alt-click to select any surrounding clean region, and you can paste it by brushing on the noisy area.
Consider creating a mask while dealing with noise reduction to selectively apply the filter or tool only to the regions that require correction. That averts overprocessing in areas with essential details.
Properly adjust the settings of your noise reduction tools and filters. Maintaining the integrity of microscopic structures requires balancing noise reduction with image sharpness.
Remember to swap between the adjusted version and the original image regularly to confirm you’re getting the desired noise and contaminant reduction without sacrificing vital features.
Step 4: Set the image size.
Select the crop tool from the Photoshop toolbar. This tool symbol is a cropping frame or a closed box.
Now click and drag the cursor to capture the whole area you want to keep within your edited microscopic image. Adjust the cropped region size and proportion accordingly.
Use the handles at the corners and sides to fine-tune the crop area’s size and position.
To set up the crop, press “Enter” or click the tick mark in the choices bar at the top of the workspace. As a result, the image will be trimmed across the specified area.
To adjust the image’s dimensions or resolution for a particular output, go to “Image” > “Image Size.” You can control the adjustments like width, height, and resolution here. To avoid distortion, keep the aspect ratio constant.
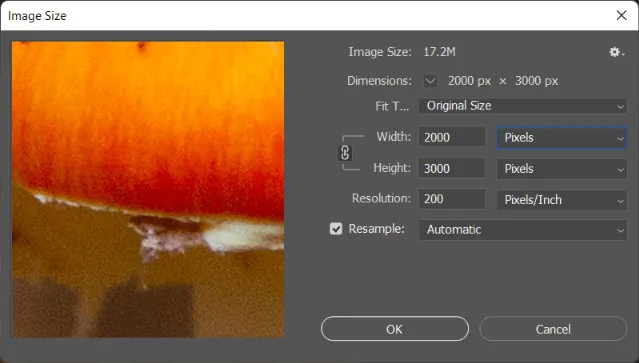
For a quality composition, choose the proper interpolation method when resizing, such as “Bicubic” for downsizing or “Bicubic Sharper” for upsizing.
At last, check the scaled image to verify your expected specifications. Once revised, confirm the changes by pressing the “OK” button.
Step 5: Ameliorate image sharpness
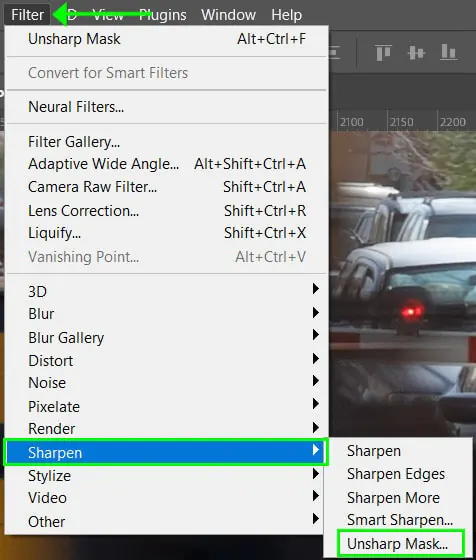
Before manipulating sharpness, compose the duplicate layer of your image to prevent the original image and ease up comparing both versions.
Activate the duplicate layer from the layer panel. Now start controlling sharpening effects using “Filter” > “Sharpen” > “Unsharp Mask.”
In the sharp mask dialog box, set the following:
Amount: Increase this value for a more substantial sharpening effect. Begin with a low weight and progressively increase it.
Radius: Customize it to see if the number of pixels around the edges is affected. Smaller values highlight finer details, while more significant values affect more expansive areas.
Threshold: This option eliminates sharpness in regions with low contrast. Sharpening doesn’t occur in the further areas when the value is increased.
Use the sneak preview window in the Unsharp Mask dialogue box to comply with the effect on your image. Edit the settings until you achieve your desired level of sharpness without introducing disruptions.
Finally, click “OK” to apply the Unsharp Mask filter to the duplicate layer.
Step 6: Regulate the final color settings
Check the colour balance of the image. Go to “Image” > “Adjustments” > “Color Balance.” Use the sliders to balance the primary colours (red, green, and blue).
For tackling specific colour channels, go to “Image” > “Adjustments” > “Channel Mixer.” Here, adjust the proportion of each colour channel (red, green, or blue) to the final image. Keep playing with these adjustments to attain naturalism.
Use the “Hue/Saturation” adjustment to rise or taper off specific colours. Navigate to “Image” > “Adjustments” > “Hue/Saturation.” Adjust the sliders for hue, saturation, and lightness to get the preferred colour effects.
For individual colour corrections, click the “Selective Color” adjustment. Calibrate the magnitude of individual colours, such as reds, greens, or blues, while leaving other colours unaffected. The colours should accurately represent the microscopic sample.
To administer colour distribution, use the “Levels” adjustment (Ctrl+L or Cmd+L). Adjust the input levels for each colour channel to redistribute tonal values.
If you have multiple microscopic photographs, the colour sampler tool can extract specific colours from an image and keep the colour representation consistent.
After editing the colours and channels, save the newly modified image.
Step 7: Annotate and label
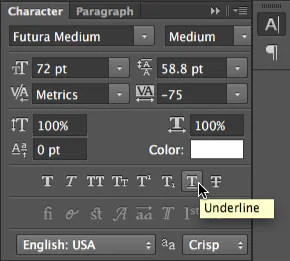
Use Photoshop’s text tool to add annotations, labels, arrows, or markers in keeping with the image. The latter is beneficial for explaining specific characteristics, structures, or findings within the material. Check that the text is legible and well-placed.
For your annotations, use a lucid and readable font style and size. Fix up the text colour to contrast appositely with the background and maintain clarity.
Save your edited image as a PSD file to preserve layers and annotations, supporting future edits without prompting the original image.
Finally, save a high-resolution version in formats like TIFF or PNG to sustain image quality for scientific analysis or archival purposes. At the same time, export a lower-resolution version in JPEG for presentations, publications, or online use and adjust the resolution to match display or publication requirements.
Conclusion
In summary, as a must-have component of scientific research, the power of microscopic images is undeniable for discovering the unseen aspects of tiny, invisible materials or organisms. While the microscope itself is a requisite device, the art of image editing goes even further, enhancing the optic collision and clearness of these crucial tools. Using handy editing tools like Photoshop, you can commove your microscopic images’ features and divulge afore-conjectured details. The process aims to explore the intricacies of the microcosm, revealing every minuscule aspect, thus expanding knowledge and discovery horizons.
