How To Do Projection Mapping
Projection mapping is a revolutionary technology that uses the physical properties of surfaces to generate compelling visual effects. This method boasts projecting photos, films, or animations onto three-dimensional surfaces and perfectly matching the projected material with the contours, textures, and characteristics of the objects in an image. Projection mapping creates the illusion of dynamic and immersive graphics by using the physical features of the surfaces, like their shape, texture, and size, which might convert commonplace things into dazzling works of art. The core elements of projection mapping entail selecting suitable surfaces, creating tailored visual content, precise alignment through calibration, and adjusting content using warping and masking tools to fit irregular surfaces. However, despite its potential, projection mapping presents challenges. Precise alignment and calibration demand technical expertise. To apprehend content that conforms with surfaces requires creativity and mapping knowledge. Lighting conditions and external factors can affect projection quality. For interactive elements, advanced programming skills are needed. In light of its potential to blend reality and imagination, projection mapping is an intriguing tool for creative expression and constantly developing images while supporting innovation across diverse industries.
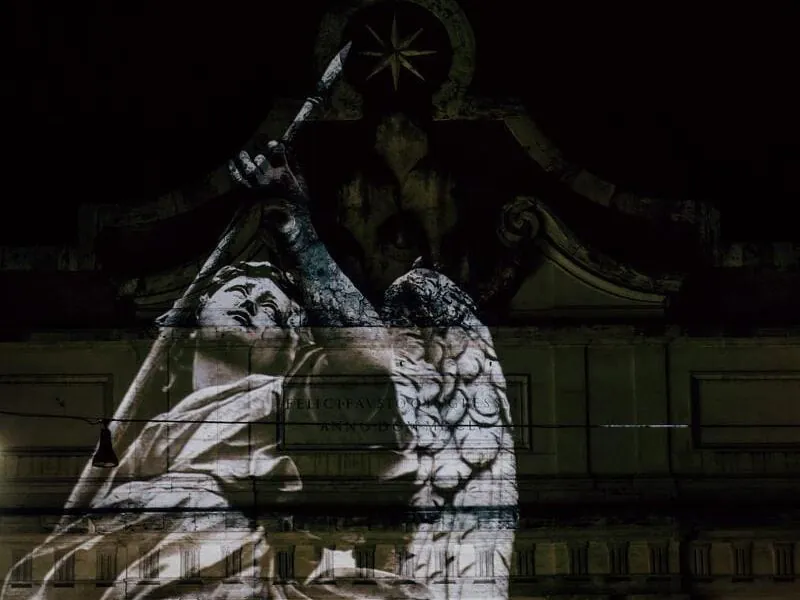
Step 1: Select an Image:
In the first step, choose an image with distinctive features and surfaces ready for projection mapping enhancement. Opt for an image with elements that can be emphasized, animated, or transformed through the projection mapping process. The selected image acts as your canvas, dictating where the mapping effects will occur. This initial decision lays the foundation for the visual storytelling that will unfold. Remember that images with clear lines, textures, and surfaces provide a more engaging starting point for projection mapping effects. This step is essential as it dictates your projection mapping project’s direction and creative potential.
Step 2: Gather Equipment and Software:
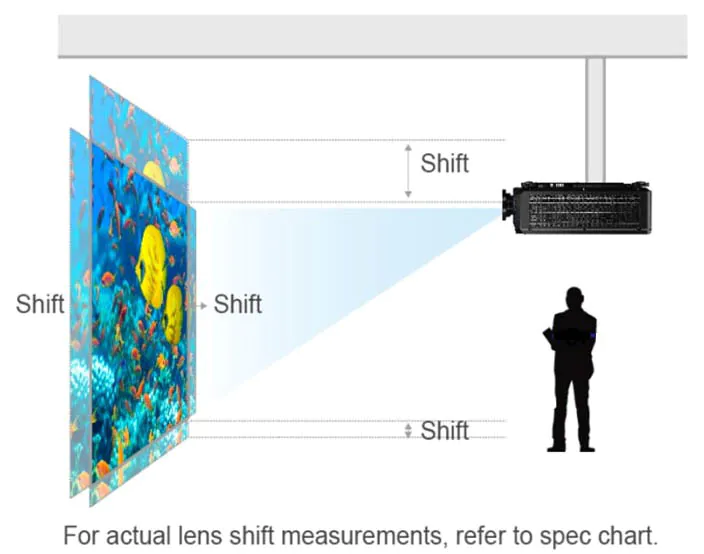
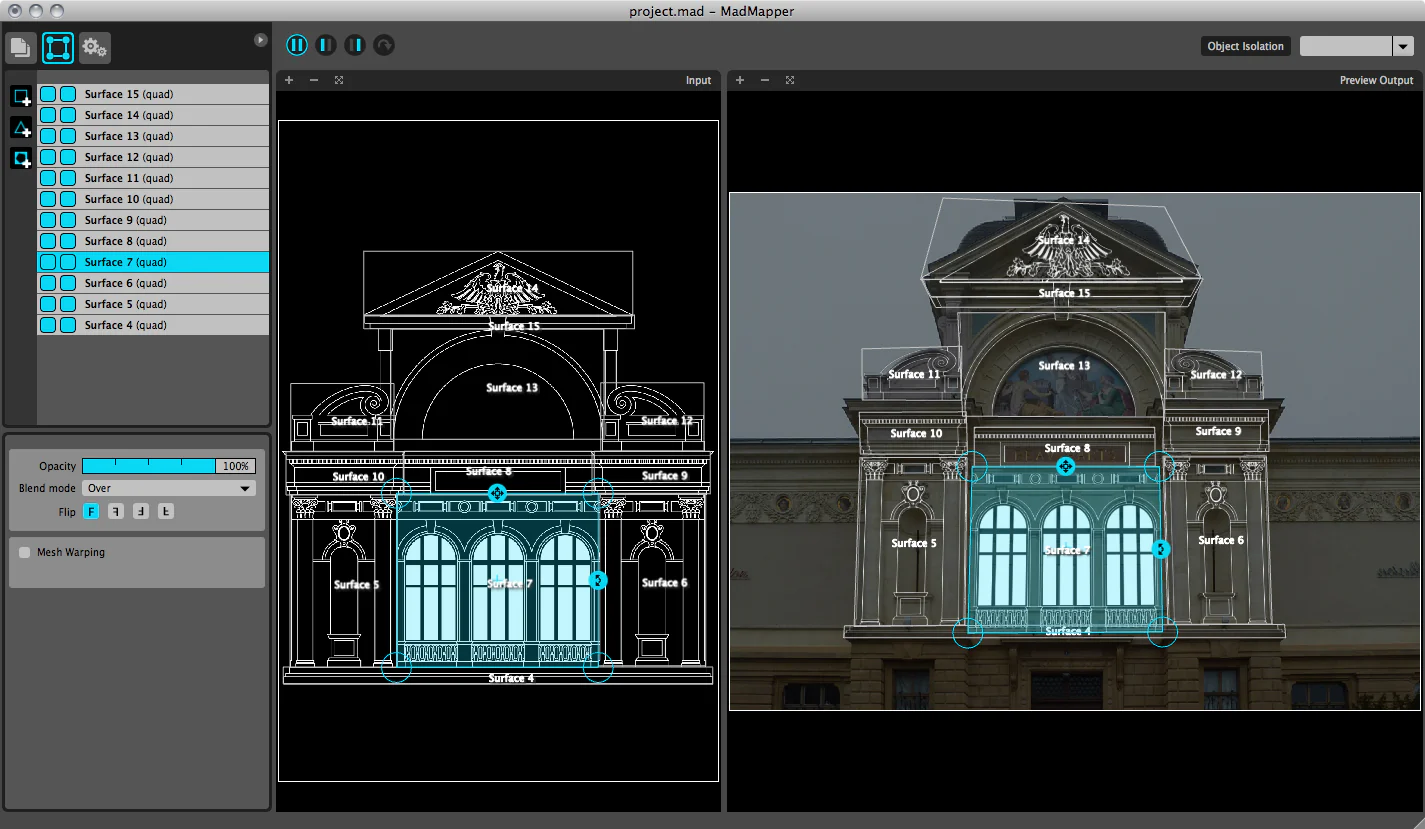
In this pivotal stage, assemble the tools and software to actualize your projection mapping aspirations. Begin by securing a projector that aligns seamlessly with the dimensions and specifications of your chosen projection surface. Simultaneously, ensure that your computer boasts the necessary capabilities to operate projection mapping software optimally. These software solutions, exemplified by Resolume or MadMapper, evolve into your creative arsenal, allowing you to manipulate and administer projection mapping effects with meticulous accuracy.
The intricate network of cables and connectors emerges as a cornerstone element, facilitating harmonious connections among your computer, projector, and supplementary peripherals. Depending on your setup, HDMI, VGA, or specialized cables may be required. Adhering to a reasonable selection and assemblage of these components culminates in the seamless realization of your projection mapping endeavor.
This phase delineates the technical foundation of projection mapping by orchestrating the proper confluence of equipment and software. Embracing this stage underscores the significance of possessing apt tools to transpose imaginative concepts into tangible visual realities. Through investment in quality equipment and reliable software, the gateway unfurls to explore the comprehensive spectrum of projection mapping potentials, enabling you to fashion enthralling effects that catapult your images into unprecedented dimensions.
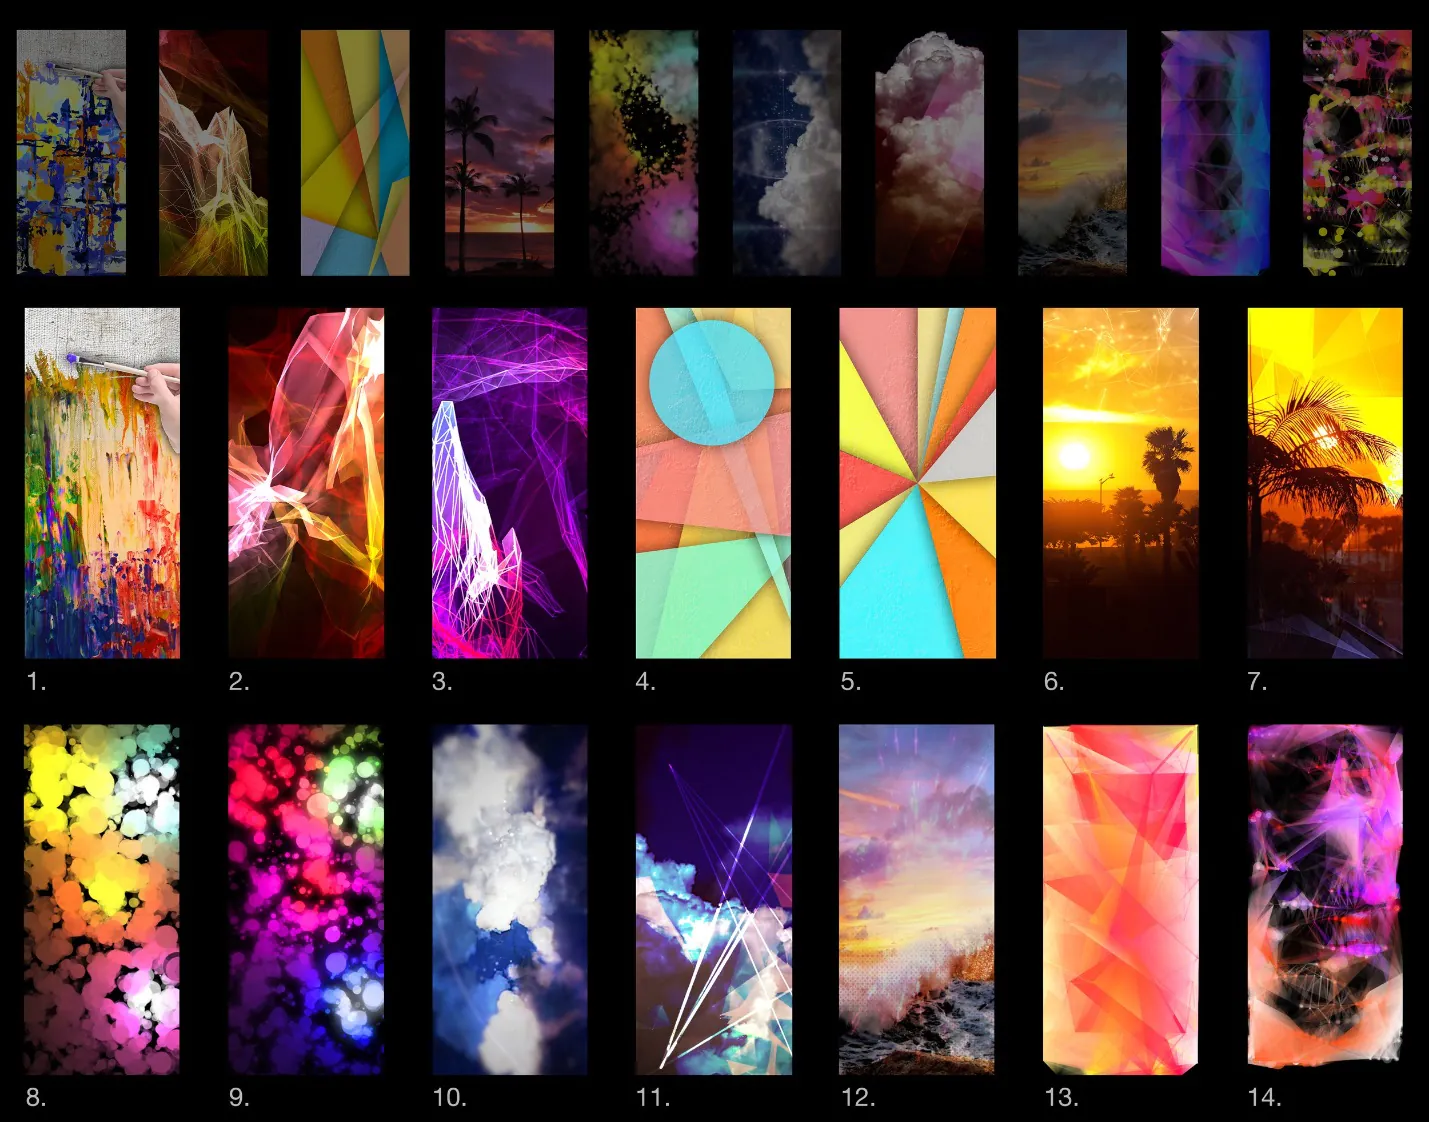
Step 3: Plan Your Mapping:
In this strategic phase, embark on meticulous planning to harness the potential of projection mapping on your chosen image. Survey the image with a discerning eye, identifying key areas that lend themselves to transformation or enhancement through projection mapping effects.
Consider the intrinsic characteristics of the image – its contours, textures, and surfaces. Delve into a creative dialogue with the image, envisioning how projection mapping could accentuate its inherent visual elements. Delineate specific regions or elements that can be dynamically altered, animated, or illuminated to convey your desired narrative or aesthetic.
By thoughtfully outlining the areas to be highlighted, the narrative to be communicated, or the mood to be established, you lay the conceptual groundwork for your projection mapping masterpiece. This strategic planning sets the tone for subsequent steps, dictating the scope and depth of the effects you’ll craft onto your image. The meticulous forethought invested in this phase catalyzes the visual transformation that projection mapping offers, ultimately shaping the unique story your image will narrate through light and motion.
Step 4: Prepare Your Image:
In this preparatory phase, your chosen image takes center stage as you ready it for the projection mapping process. Begin by importing your image into the projection mapping software you’ve chosen to use, whether it’s a specialized tool like Resolume or another suitable software.
Examine its contours, lines, and distinct features with your image loaded. These elements will guide you in aligning the projection mapping effects with precision. Depending on the software’s capabilities, you can create masks or layers corresponding to different sections or components of your image.
As you delve deeper into the software, explore any tools that allow you to manipulate the image – stretching, skewing, or rotating – to align seamlessly with the surfaces you’ve chosen for projection. This step involves a delicate interplay between the creativity of your original image and the technical adjustments required for projection mapping.
By meticulously preparing your image within the software, you can seamlessly integrate your creative vision and the projection mapping effects. This step serves as the bridge that connects your image’s aesthetic potential with the dynamic transformations projection mapping can bring to life, resulting in a harmonious fusion of art and technology.
Step 5: Add Effects and Align:
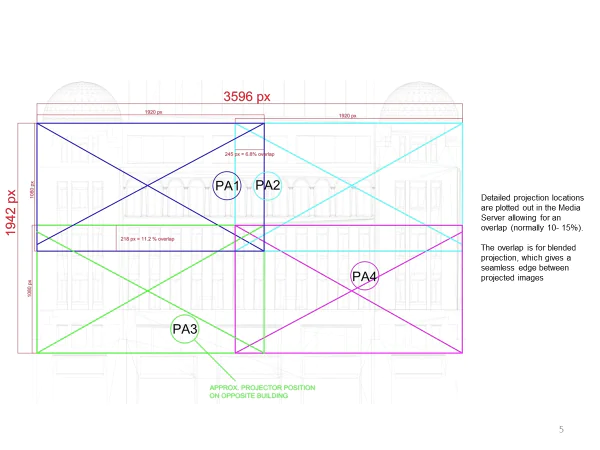
In this pivotal phase, your image transforms as you introduce captivating projection mapping effects. Utilize the capabilities of your chosen projection mapping software to apply effects, animations, and transformations to the prepared image.
Select the areas or elements you identified in Step 3 as targets for enhancement. Implement effects that dynamically alter these portions, making them appear to move, change color, or transition in imaginative ways. Use the software’s features to create engaging visual narratives within your image.
Simultaneously, fine-tune the alignment of the effects with the image’s contours and features. Utilize tools provided by the software to warp, mask, and precisely position the effects. This alignment process ensures that the effects seamlessly integrate with your image, giving the illusion that they are part of the original content.
You combine effects and alignment, weaving together creativity and technical precision. Your image becomes a dynamic canvas where light and motion converge to convey your desired message or evoke a specific emotional response. By thoughtfully orchestrating these elements, you harness the full potential of projection mapping to elevate your image’s impact and storytelling capacity.
Step 6: Test and Refine:
In this critical phase, your projection mapping creation takes its first tangible form as you test and refine the effects you’ve integrated into your image. Project the mapped image onto a suitable surface or simulation to see how the effects interact with the contours and features of the image.
Observe the projected result from different angles and distances, simulating various viewing scenarios. Pay close attention to how the effects align with the image and the surface, ensuring they create a seamless and cohesive visual experience. Look for any discrepancies, misalignments, or unintended distortions.
As you scrutinize the projection, make adjustments and refinements as necessary. Return to your projection mapping software to fine-tune the effects, realign sections, and address any discrepancies you’ve observed. Iterate this process until you achieve a visually harmonious outcome that matches your creative vision.
The testing and refinement phase is pivotal in ensuring the success of your projection mapping project. By actively engaging with the projected result, addressing any discrepancies, and honing the effects, you elevate the quality and impact of your creation. This phase embodies the iterative nature of the creative process, ultimately leading to a polished and captivating projection mapping masterpiece.
Step 7: Finalize and Showcase:
Your projection mapping creation is poised for its grand reveal in this culminating phase. With the effects aligned, tested, and refined, it’s time to finalize your image and prepare it for public display or sharing.
Double-check the alignment and synchronization of the effects with the image, making any last-minute adjustments to ensure a seamless visual experience. Confirm that the projected result aligns with your initial creative vision and narrative goals.
Once satisfied, prepare your projection mapping creation for showcasing. That could involve setting up the projection equipment in the actual venue or preparing the digital file for online sharing. Test the setup one final time to ensure everything works as intended.
When the moment arrives, activate the projection and let your dynamic image come to life. Whether it’s a live event, an art exhibition, or a digital showcase, your projection mapping creation will captivate and engage your audience with its interplay of light, motion, and storytelling.
Embrace this phase as the culmination of your dedication and creativity. By finalizing your projection mapping creation and presenting it to the world, you share your artistic vision and provide an immersive experience that sparks intrigue, inspiration, and conversation.
Conclusion
In a final say, projection mapping exalts the inherent structural aspects of surfaces by sculpting them into mesmerizing canvases of dynamic imagination. This transformative technique takes the physical dimensions, textures, and contours of surfaces and imbues them with a new dimension of aesthetic expression. It celebrates the harmonious interplay between creative vision and technical finesse, creating captivating displays that blur the lines between reality and fantasy. Through this transformative fusion, surfaces transcend mere backdrops and become portals to uncharted realms of imagination, inviting us to explore, engage, and be inspired by the arresting allure of projected narratives.
