How to Add a VHS Overlay to an Image
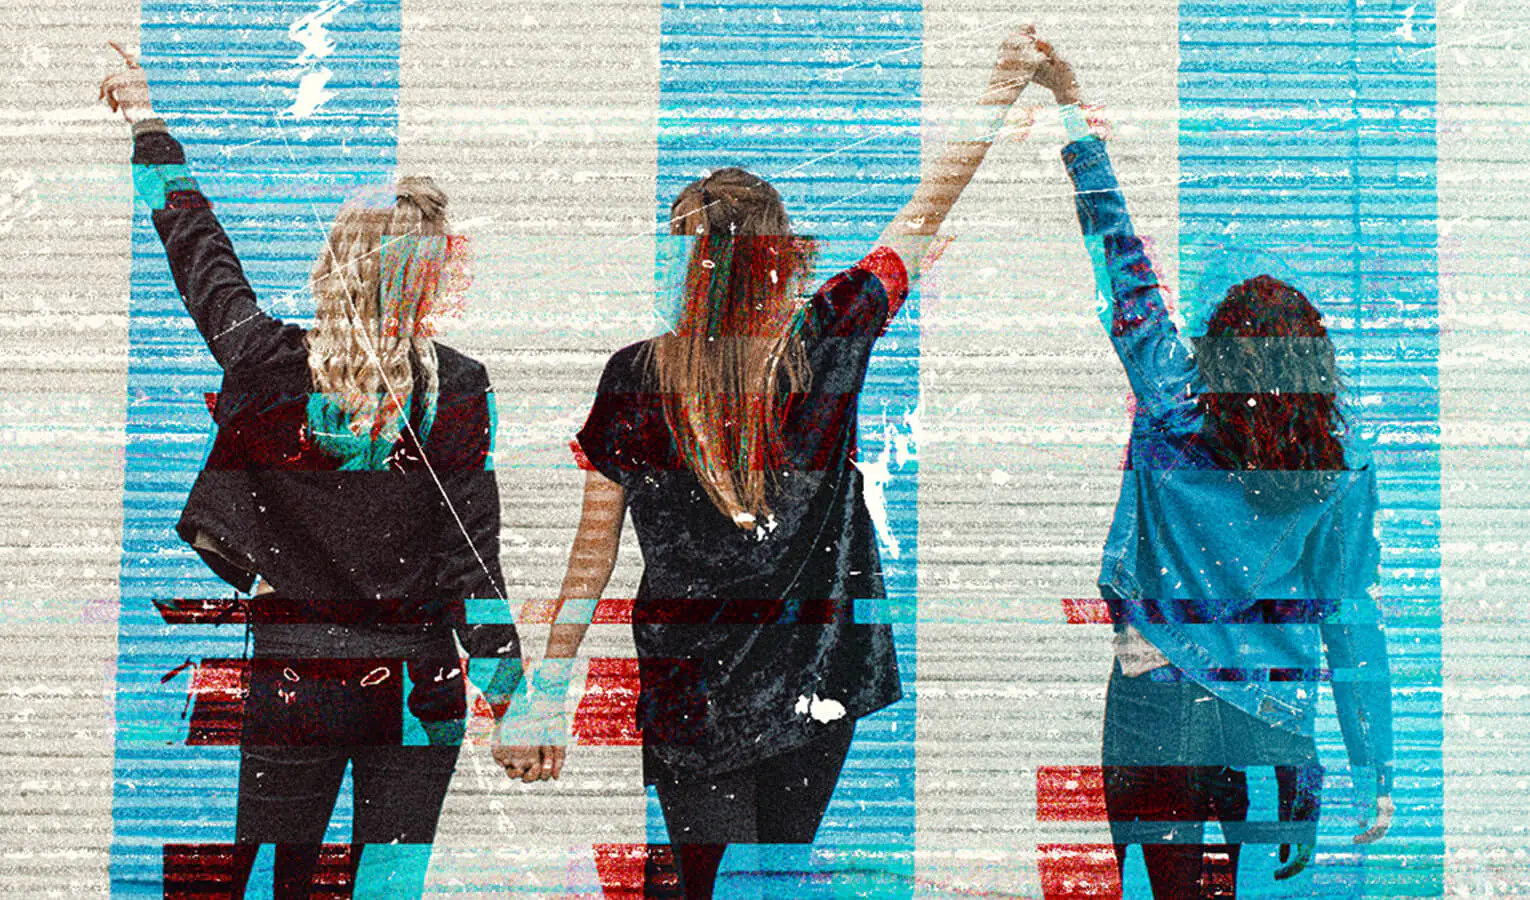
A VHS overlay is a visual technique that emulates the distinct attributes of the VHS (Video Home System) format, which gained popularity for home video recording and playback. When applied to digital images or videos, this effect recreates hallmark features like scan lines, noise, static, tracking errors, colour bleeding, and distortions—qualities inherent to analogue VHS tapes. The overlay infuses a sense of nostalgia and historical charm by incorporating these elements, recreating the temper of past media eras. This creative approach is often embraced by content creators aiming to infuse their work with a retro aesthetic, evoking feelings of nostalgia and originality within their visual content. The intentional inclusion of VHS overlay imperfections adds an authentic and human touch to digital visuals, connecting viewers to the tactile and imperfect nature of older media formats. This blog digs into the fascinating world of VHS overlays, taking you through the step-by-step process of incorporating a VHS overlay into your digital compositions, bringing fresh life to your graphics with a nostalgic style.
Step 1: Prepare Your Tools
Choose Your Image Select the image you opt to edit. Ensure it’s clear, well-lit, and aligned with your creative vision.
Find a Suitable VHS Overlay Search for a VHS overlay that complements your image. Consider the style you’re aiming for, like static or distortion.
Organize Your Workspace Create a dedicated folder for your project. Keep your original image, VHS overlay, and any additional resources organized.
Step 2: Choose Your Editing Software
Assess Your Options Evaluate the image editing software available to you. Popular choices include Adobe Photoshop, GIMP, or online tools like Canva. Consider your familiarity with the software and its capabilities.
Install or Open the Software If you already have the software installed, open it. If not, download and install the chosen software from the official website. Follow the installation instructions provided.
Familiarize Yourself with Basic Functions Before diving into the VHS overlay process, acquaint yourself with the software’s basic features. Learn how to open an image, create new layers, and adjust opacity. This foundational knowledge will help you navigate the editing process smoothly.
Explore Tutorials (Optional) If you’re new to the software, consider exploring online tutorials or guides specific to the software you’ve chosen. These tutorials can provide insights into various tools and techniques to enhance your editing experience.
Customize Your Workspace Most editing software allows you to customize your workspace. Arrange panels and tools to suit your editing style and preferences. This step can improve your efficiency throughout the editing process.
Step 3: Layer the VHS Overlay
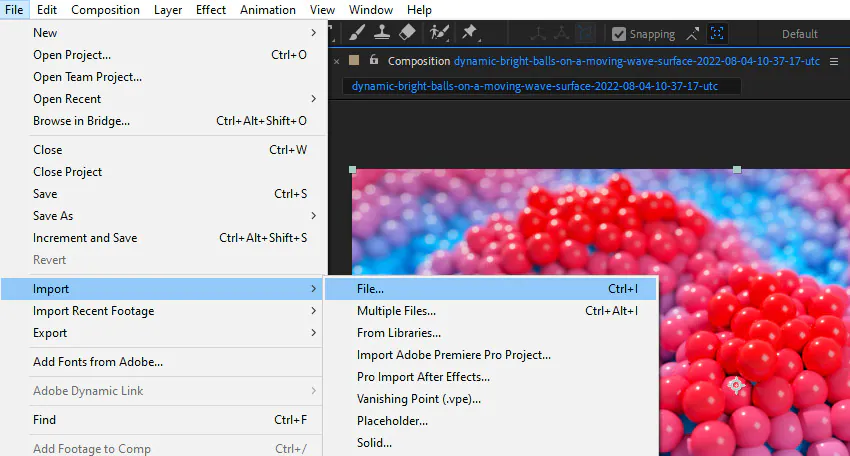
Open Your Image in the Software Launch your chosen image editing software and open the image you plan to edit. Go to the “File” menu and select “Open” to locate and load your image onto the canvas.
Import the VHS Overlay Using the software’s import or placement function, add the chosen VHS overlay to your image. That typically involves selecting “File” or “Import” and choosing the overlay file you’ve previously downloaded.
Resize and Position the Overlay With the overlay layer selected, use the resizing and transformation tools to adjust its size and position. Position the overlay to complement the image and achieve the desired visual effect.
Arrange the Layer Order In the layer panel, ensure that the VHS overlay layer is positioned above the image layer. This layer arrangement is crucial for the overlay to interact with the image effectively.
Fine-tune Opacity (Optional) If the VHS overlay appears too intense, you can adjust its opacity. Minimize the opacity of the overlay layer to create a more subtle and blended effect that enhances the overall aesthetic.
Save Your Progress Before moving on to the next steps, save your project. That ensures that you can revisit and make adjustments without losing your work.
Step 4: Blend and Integrate
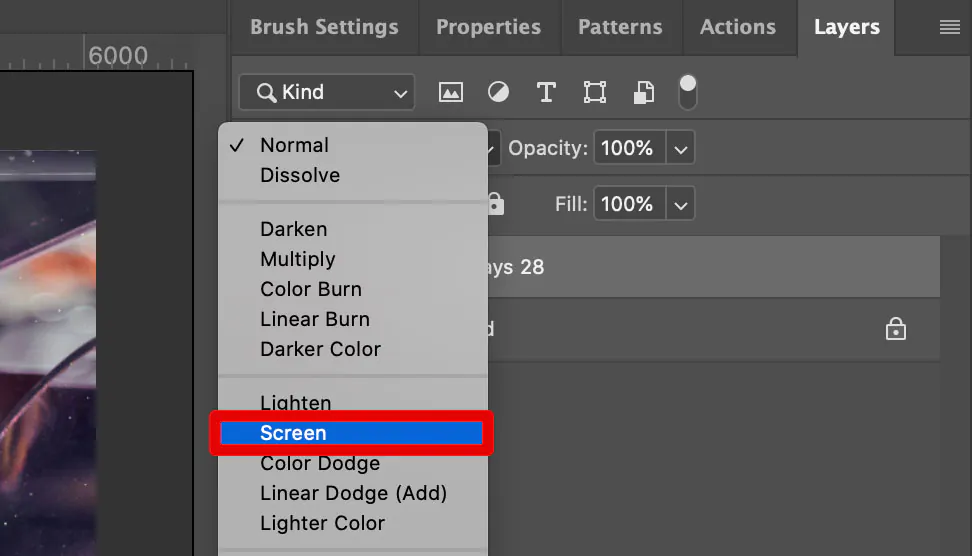
Experiment with Blending Modes Select the VHS overlay layer and explore different blending modes available in your editing software. Modes like Multiply, Overlay, or Screen can create interesting interactions between the overlay and the image.
Adjust Blending Opacity Fine-tune the blending effect by adjusting the opacity of the VHS overlay layer. This step allows you to control the intensity of the overlay’s impact on the image.
Refine the Look with Layer Styles Experiment with layer styles, such as adding a slight Gaussian blur or adjusting contrast, to further integrate the VHS overlay into the image. These subtle adjustments enhance the overall cohesion of the composition.
Mask Unwanted Effects (Optional) If parts of the VHS overlay are unwanted in certain image areas, use layer masks to reveal or conceal those portions selectively. This technique ensures a seamless blend between the overlay and the image.
Preview and Compare Regularly preview your work with your original image. This step helps you assess the progress and adjust for the desired outcome.
Save Iterations As you experiment with blending modes and adjustments, save different versions of your project. This practice allows you to backtrack if needed or compare various edits.
Step 5: Enhance with Distortions (Optional)
Duplicate the Overlay Layer Create a duplicate of the VHS overlay layer. This duplicate will introduce controlled distortions without affecting the original overlay.
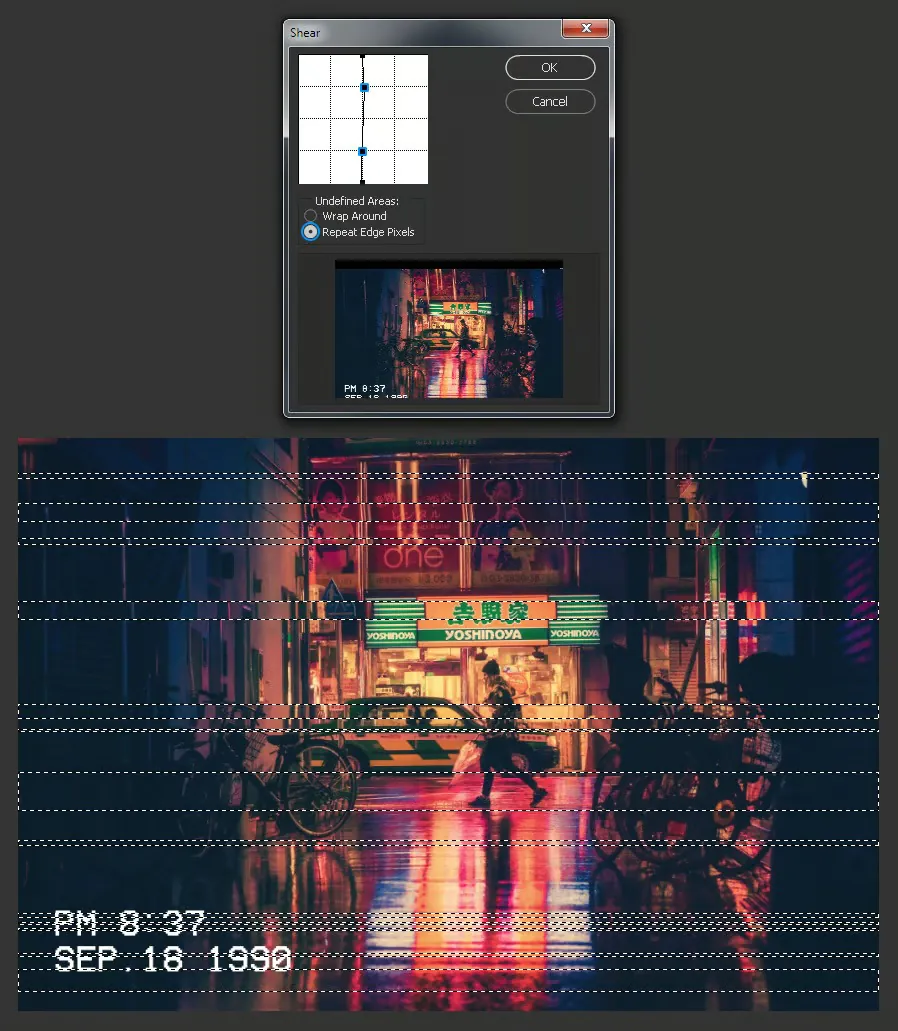
Apply Distortion Filters (Optional) Experiment with distortion filters available in your editing software. Filters like Liquify or Warp can add subtle irregularities and imperfections that mimic the vintage VHS look.
Adjust Distortion Strength Fine-tune the distortion strength to achieve the desired level of authenticity. Avoid excessive distortion that may overpower the image.
Mask Distortion (Optional) Use layer masks to apply distortions selectively. If certain areas of the image shouldn’t be distorted, mask those regions on the duplicated overlay layer.
Blend Distorted Layer Adjust the blending mode and opacity of the duplicated, distorted overlay layer. That helps blend the distortions more organically with the original image and overlay.
Compare and Evaluate Regularly compare your distorted overlay with the original image to ensure the effects enhance the overall aesthetics. Subtle distortions can contribute significantly to the vintage charm.
Save Progress Save different versions of your project as you experiment with distortions. That allows you to backtrack if needed or choose the most appealing outcome.
Step 6: Infuse Vintage Vibes with Color Grading
Create a Color Grading Adjustment Layer Add a new colour grading adjustment layer above all other layers. This adjustment layer will be used to fine-tune the colour palette of the composition.
Adjust Color Balance Experiment with the colour balance settings within the adjustment layer. Enhance warm or cool tones to evoke the desired vintage atmosphere. Consider subtle shifts towards sepia, teal, or faded hues.
Enhance Saturation and Contrast Tweak the saturation and contrast settings in the adjustment layer. Increasing saturation can amplify the retro feel while adjusting contrast adds depth and dimension.
Utilize Curves for Fine-tuning Access the curves adjustment within the colour grading layer. Gently manipulate the curves to create unique tonal variations that enhance the nostalgic mood.
Preview and Refine Regularly toggle the visibility of the colour grading adjustment layer to preview its impact. Make subtle adjustments as needed to achieve the desired vintage colour palette.
Merge and Compare If satisfied with the colour grading, merge the colour grading adjustment layer with the rest. Compare the edited image with the original to assess the transformation.
Save Iterations Save versions of your project as you adjust colour grading. That lets you compare different colour schemes and choose the one that resonates most with the retro theme.
Step 7: Finalize and Export
Review the Composition Take a moment to review your edited image thoroughly. Pay attention to integrating the VHS overlay, blending effects, distortions (if applied), and colour grading. Ensure everything aligns with your creative vision.
Crop or Resize (Optional) If necessary, crop or resize the image to enhance its visual impact. Consider eliminating any distractions and focusing on the key elements of the composition.
Revisit Distortions (Optional) If you applied distortions, revisit them to ensure they enhance the vintage feel without becoming too overpowering. Subtle adjustments can make a significant difference.
Fine-tune Details Zoom in to inspect finer details. Adjust any imperfections, alignment issues, or minor distractions that could detract from the overall quality.
Save the Final Version Save the final version of your edited image in a high-resolution format. Create a separate folder to store your edited images for easy access and reference.
Consider Variations Create additional variations of your edited image with slight differences in blending, colour grading, or distortions. That lets you explore different creative possibilities.
Export and Share your final image in a format suitable for your intended use, such as JPEG or PNG. Share your creation on your blog, social media, or portfolio, and proudly showcase your innovative VHS overlay editing skills.
Conclusion
To sum up, VHS overlays are time-travel tools that add a cover of vintage allure to digital images, bathing them in the nostalgia and temperament of analogue VHS tapes. This approach brings us back to an age marked by unique defects, including ingredients such as scan lines, noise, static, colour changes, and distortions. These intentional imperfections provide authenticity and a human touch, linking the current digital environment with the tactile elements of previous media mediums. It’s not just about manipulating photographs; you inject the soul of a bygone period into your digital works.
