How To Do Photogrammetry
The photogrammetry technique produces accurate 3D models of objects in 2D photographs by analyzing and working with images captured from different angles of the same subject. Certain software tools are designed specifically for image photogrammetry. These digital tools evaluate the geometric aspects of a set of images and reproduce a unified 3D image that covers all the details within that bundle of images. It assists viewers with the convenience of experiencing multiple features and dimensions found in an array of images; just watching a single photogrammetry image covers them all. Photogrammetry can compute each snapshot’s position, orientation, and scale and subsequently rebuild a comprehensive 3D depiction of the scene by detecting common points and features in the photographs. It opens the door to precise measurements, visualization, and analysis of real-world objects and environments by converting 2D photos into 3D models, providing vital insights for research, design, and decision-making processes. The steps mentioned in the following blog tutorial can be highly insightful for a detailed process of doing photogrammetry to your images.
Step 1: Image Import and Alignment

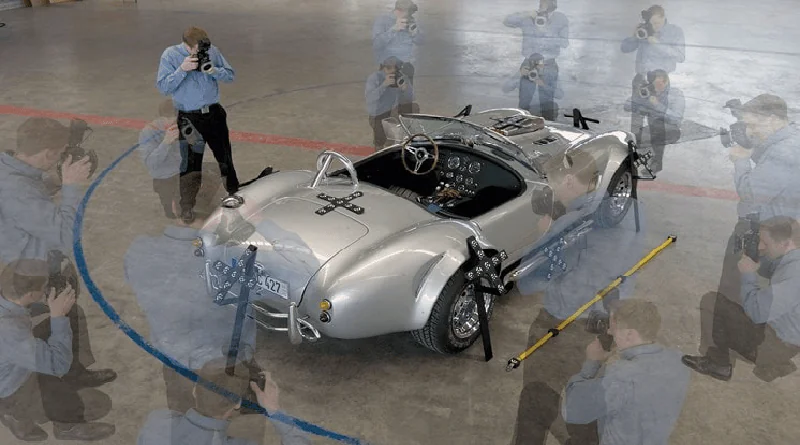
At the outset of the photogrammetry process, we delve into the crucial image import and alignment step. This pivotal phase is the bedrock for transforming 2D images into intricate 3D models. Begin by curating a series of images that comprehensively capture the subject from diverse angles, ensuring adequate overlap for comprehensive coverage. Regardless of the software you opt for, this step remains a cornerstone of photogrammetry.
Seamlessly import these images into your chosen software’s interface following the image selection. The software will guide you through this process, facilitating the incorporation of your images. Once integrated, leverage the alignment feature to automatically pinpoint common points among the images, effecting precise alignment. This alignment procedure forges the initial connections between corresponding points, forming a preliminary point cloud. The meticulous alignment of images is paramount, as it lays the groundwork for ensuing stages, empowering the software to orchestrate the effective transformation of your 2D images into a tangible 3D model. This inaugural step acquaints you with the vital practice of curating and aligning images, a vital prelude to prosperous photogrammetry endeavors, irrespective of your chosen software.
Step 2: Depth Map and Point Cloud Generation
Having successfully aligned your images, the next pivotal step in photogrammetry involves generating depth maps and constructing a point cloud. This phase delves into creating a foundational representation of the subject’s three-dimensional structure.
With your aligned images in place, the software employs intricate algorithms to calculate the depth of each pixel in the images, generating depth maps. These maps delineate the varying distances between the subject and the camera for every pixel, forming a crucial element for 3D reconstruction.
Subsequently, the depth maps are aggregated to formulate a point cloud—a visual assemblage of 3D points corresponding to the subject’s surface. This point cloud serves as an intermediary between the images and the final 3D model, capturing the subject’s shape in a rudimentary manner.
The accuracy of the point cloud heavily relies on precise alignment and well-captured images. It’s vital to scrutinize the point cloud for inconsistencies or irregularities, as they could propagate into the subsequent stages of reconstruction. This stage provides a critical glimpse into the subject’s spatial layout, laying the groundwork for more intricate detailing and texture mapping in the subsequent phases of the photogrammetry process.
Step 3: Mesh Creation and Refinement
As you progress through the photogrammetry journey, the focus now shifts to creating and refining a surface mesh—a pivotal stage that adds depth and structure to your 3D model.
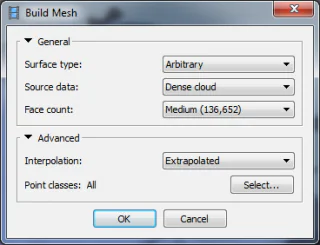
With the point cloud generated, the software employs sophisticated algorithms to construct a mesh—a network of interconnected triangles that approximates the subject’s surface geometry. This mesh serves as the framework upon which the final 3D model will be built.
The software analyzes the point cloud’s spatial relationships during this process to connect points and generates a cohesive mesh representation meticulously. The resulting mesh provides a more tangible structure, offering depth and volume to your model.
To enhance the mesh’s fidelity, it’s crucial to fine-tune its geometry. This refinement process involves smoothing irregularities, removing noise, and optimizing the overall structure. Ensuring a clean and well-defined mesh paves the way for improved accuracy and realism in the final model.
Upon achieving a satisfactory mesh, you’re one step closer to realizing your 3D model’s full potential. The mesh forms the essential scaffold upon which subsequent stages, such as texture mapping and detailing, will be built. This stage marks a pivotal juncture in photogrammetry, transitioning your digital representation from point-based data to a tangible surface with depth and structure.
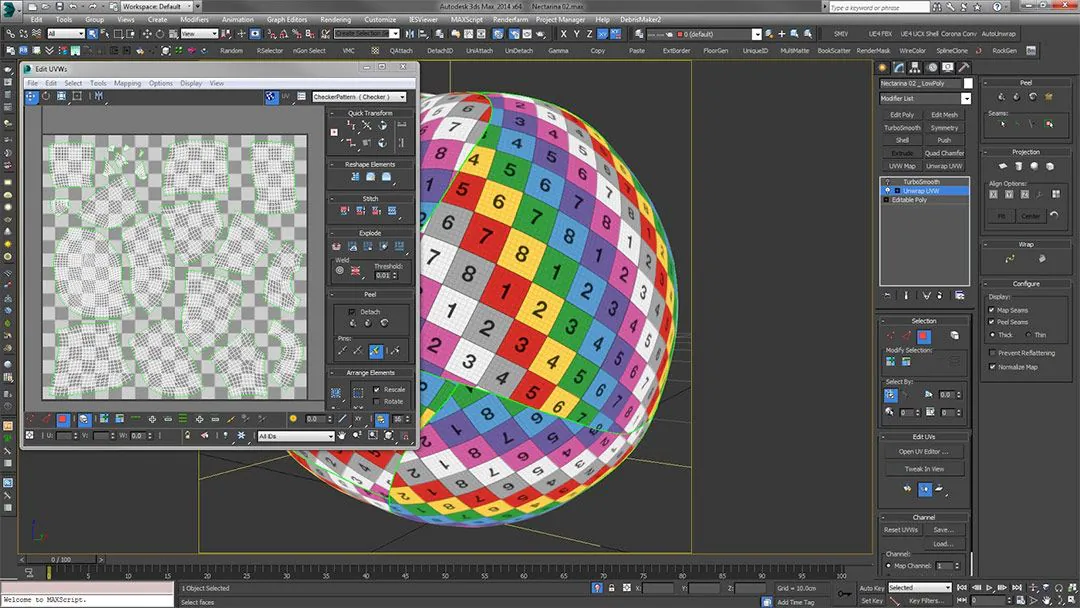
Step 4: Texture Mapping and Realism Enhancement
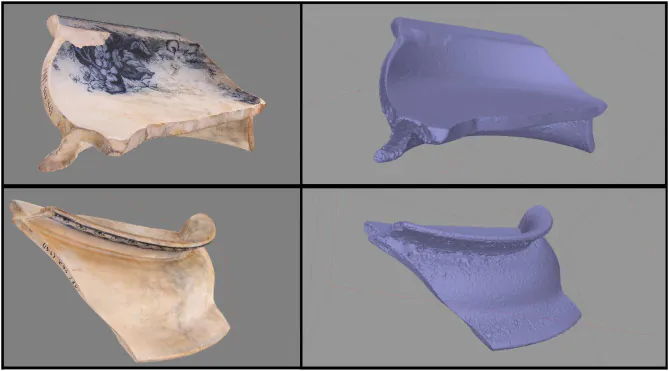
Continuing the photogrammetry journey, we delve into the captivating realm of texture mapping and the enhancement of realism in your 3D model. This phase transforms the surface mesh into a visually appealing and lifelike representation.
With the refined mesh at hand, it’s time to add a layer of realism by projecting the original images onto the mesh’s surface. This process, known as texture mapping, involves transferring the colors and patterns from the images onto the corresponding areas of the mesh. As a result, your 3D model gains intricate detailing and visual authenticity.
The software meticulously aligns the images with the mesh’s geometry, ensuring accurate mapping and maintaining the spatial relationship between the images and the model. This alignment guarantees that textures adhere seamlessly to the contours and features of the mesh.
You can refine and edit textures during this stage, enhancing their quality and addressing discrepancies. By fine-tuning textures, you heighten the realism of your 3D model, capturing subtle nuances that breathe life into the digital representation.
Combining the refined mesh and meticulously mapped textures brings your 3D model to life, imbuing it with realism that closely mirrors the subject captured in the original images. This stage marks a significant stride toward achieving a visually captivating and immersive final result in the photogrammetry process.
Step 5: Model Inspection and Optimization
As your photogrammetry project unfolds, the focus shifts to inspecting and optimizing your 3D model. This stage is essential to ensure your reconstructed model’s accuracy, quality, and coherence.
With the textured 3D model in hand, thoroughly examine it for any anomalies, artifacts, or imperfections. Conduct a meticulous inspection to identify any irregularities that might have emerged during the texture mapping and refinement phases. This scrutiny helps maintain the integrity of the model’s visual fidelity.
Upon detecting any issues, embark on the optimization journey. That involves fine-tuning the model’s geometry, refining textures, and adjusting surface normals to ensure consistent lighting and shading. Optimization seeks to eliminate any remaining inconsistencies and enhance the overall visual appeal.
Furthermore, address any gaps or holes in the model’s geometry. These gaps can result from imperfections in the image capture or reconstruction process. Filling these gaps contributes to creating a complete and cohesive surface.
Throughout this step, adopt an iterative approach. Continuously refine the model, iterate on adjustments, and rigorously evaluate the results. By doing so, you ensure that your 3D model meets the highest standards of quality and accuracy.
The model inspection and optimization phase bridges data capture and the final, polished 3D representation. This meticulous attention to detail guarantees that your photogrammetry project yields a stunning and authentic outcome that captivates viewers and serves many purposes.
Step 6: Finalization and Export
In the final leg of your photogrammetry journey, the focus turns toward finalization and export. This exciting phase brings your meticulously crafted 3D model to fruition and prepares it for various applications.
With your optimized and refined 3D model, it’s time to prepare it for its intended use. Begin by selecting an appropriate file format for export. Choose a format that aligns with your project’s requirements, whether for visualization, analysis, or sharing with others.
Ensure textures are correctly packaged with the model for accurate rendering in other software or platforms. That ensures that the intricate textures and visual details you’ve worked hard to refine are preserved during export.
Consider the level of detail you wish to retain in the exported model. Adjust the level of detail settings based on the intended purpose and the platform on which the model will be utilized. Striking the right balance between detail and performance is crucial.
Verify that the exported model aligns with the correct coordinate system, ensuring seamless integration into different environments. Including relevant metadata adds valuable context and documentation to the exported model.
Before finalizing the export, take a moment to preview the model in a suitable viewer to ensure it meets your expectations. This step allows you to catch any last-minute discrepancies and make necessary adjustments.
The finalization and export stage marks the culmination of your photogrammetry journey, transforming a collection of images into a captivating and functional 3D model. This versatile model is now poised to serve as a valuable asset across various fields, from design and entertainment to research.
Conclusion
Photogrammetry can vividly convert a random set of 2D images into precise 3D models and grant the subject an unimaginable essence. Besides, you are not just documenting but also eternalizing moments in the dimensional brocade of photogrammetry. The photogrammetry-friendly digital tools skillfully assess the geometry of images to create a unified 3D presentation that conveys detailed and catchy concepts to audiences. Whether about accurate measurements or intricate visualizations, photogrammetry’s impact reverberates across many disciplines. Converting flat 2D photographs into involute 3D models exposes new horizons for researchers, designers, and photo composers.
