How To Do Image Slicing Using Photoshop Slice Tool
The image-slicing technique is abundantly used in web development and graphic design for single-image segmentation purposes, with each segment or slice holding the identity of an individual image, which can be loaded separately. Image slicing can also be applied to everyday images, like creating collages, photo grids, image optimization, social media posts, etc. You can make your images become zoomable, where different segments represent various levels of detail that boost the visual representation of the photographs. To do image slicing to your images, you can use Adobe Photoshop, the popular choice for image manipulation and enhancement. Photoshop’s dedicated slice tool best serves image slicing by drawing intricate shapes around your chosen segments of an image and accurately converting them into individual images. The slice tool on the left side of the Photoshop window has an icon like a scalpel; just clicking on it makes it ready for your image slicing process. You can review the steps in this blog article for detailed instructions on using the Photoshop slice tool for image slicing.
Open the Image in Photoshop:
Launch the Photoshop application on your computer to open an image in Adobe Photoshop. Then, go to the “File” menu at the top left corner and select “Open.” Alternatively, you can go for the keyboard shortcut “Ctrl + O” (Windows) or “Cmd + O” (Mac).
This action will open the file explorer or finder window, where you can navigate to the location of the image you want to edit. Select the image file and click “Open.” The image will now appear in the Photoshop workspace, ready for you to perform various editing tasks, including image slicing using the Slice Tool.
Select the Slice Tool:
To select the Slice Tool in Adobe Photoshop, locate the toolbar on the left side of the Photoshop window. The Slice Tool icon resembles a scalpel or knife. If the toolbar is not visible, you can make it visible by going to the “Window” menu at the top and selecting “Tools.”
Click on the Slice Tool icon in the toolbar, and it will become active. Alternatively, you can use the keyboard shortcut “C” to quickly select the Slice Tool.
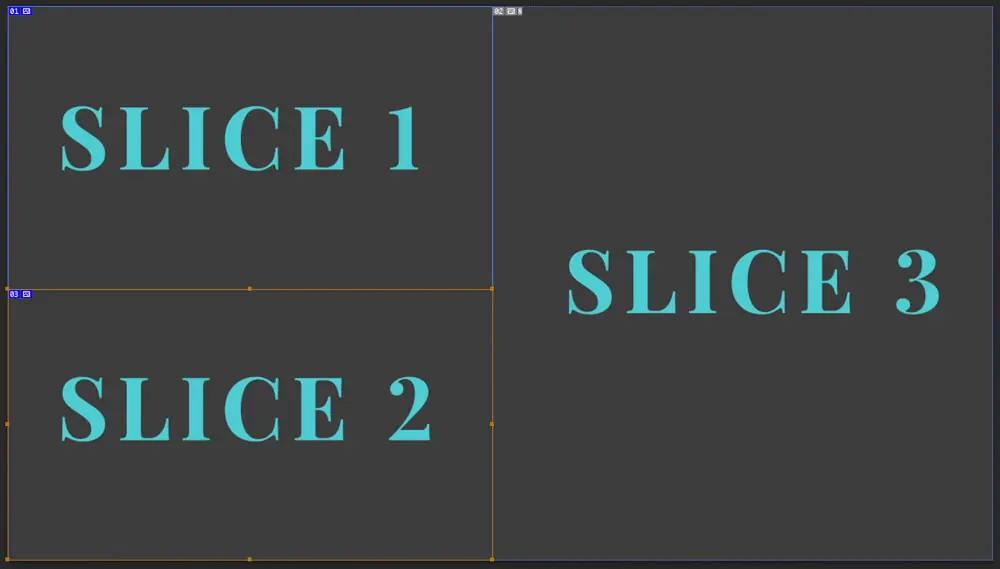
Once the Slice Tool is selected, you can start drawing rectangles or custom shapes around the areas you want to slice in the image. Each shape you create with the Slice Tool will be an individual segment that can be optimized and exported separately.
Define Slices:
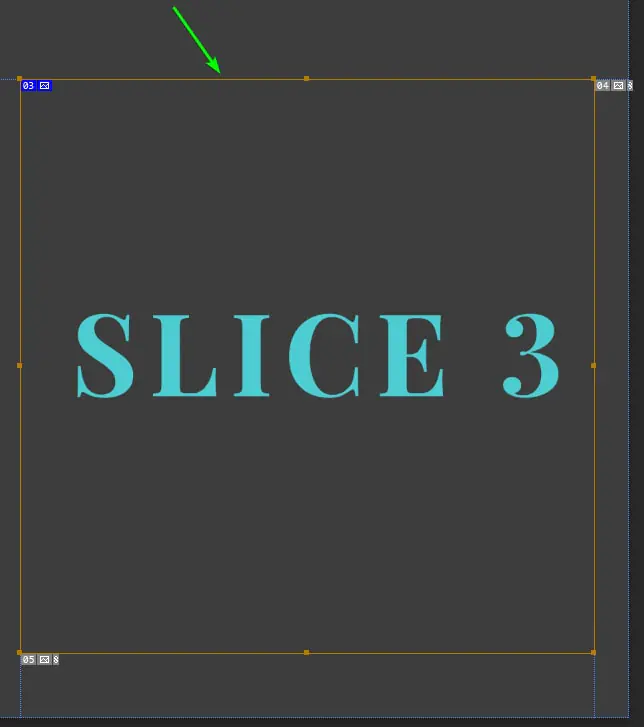
In image editing and web design, “slices” refer to the individual segments or sections created using the Slice Tool in Adobe Photoshop. When you use the Slice Tool, you draw rectangles or custom shapes around specific areas of an image that you want to treat as separate entities.
Each slice represents a distinct portion of the original image and can be optimized, exported, and utilized independently. Slicing an image is especially useful for web design because it allows you to divide large images into smaller, more manageable parts, reducing loading times and improving web page performance.
Once you define slices, you can assign properties to each segment, such as assigning hyperlinks, specifying alternative text (alt text) for accessibility, and controlling optimization settings. Slices offer greater control over the individual components of a design, enhancing interactivity and web page layout efficiency.
Adjust Slice Properties:
After defining slices using the Slice Tool in Adobe Photoshop, you can adjust each slice’s properties to customize its behaviour and appearance.
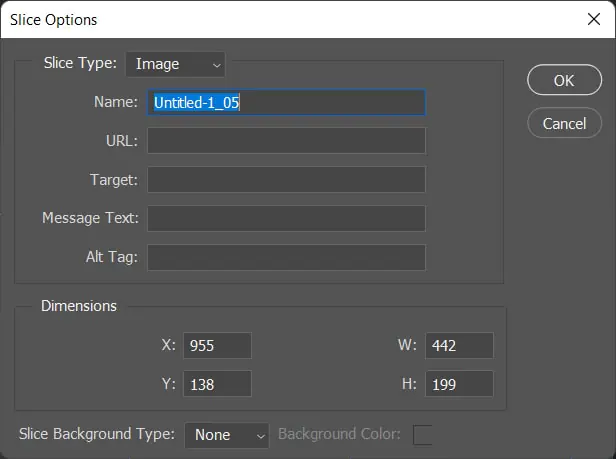
To adjust slice properties, click on a slice to select it, and a dialogue box will appear. In this dialogue box, you can:
Name the Slice: Give the slice a descriptive name to help with organization and identification.
Assign a URL (Hyperlink): If you want the slice to be clickable and lead to another web page or resource, you can specify the URL it should link to.
Add Alternative Text (Alt Text): Include alt text for each slice, which provides a text description of the image for accessibility purposes and SEO optimization.
Optimization Settings: You can adjust the image format, quality, and other optimization settings specific to each slice.
Save for Web:
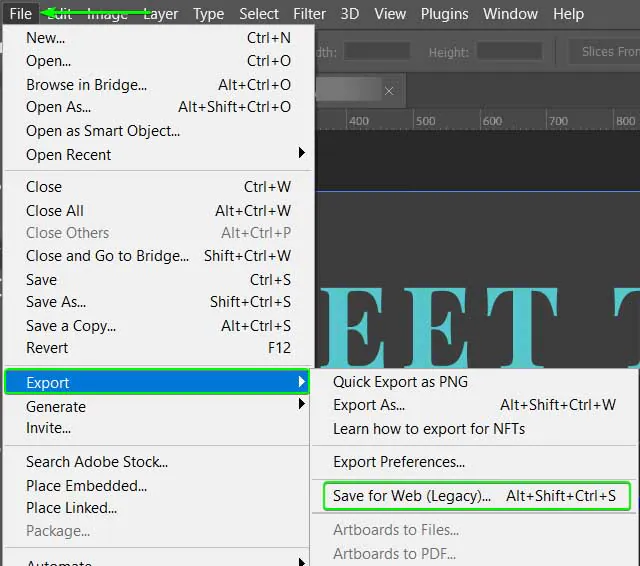
After defining and adjusting the slices in Adobe Photoshop, the next step in the image slicing process is to use the “Save for Web” feature. This feature allows you to export individual slices as optimized image files suitable for web use.
To access the “Save for Web” option, go to the “File” menu at the top left corner of Photoshop and choose “Export” > “Save for Web (Legacy).” You can also use “Ctrl + Shift + Alt + S” (Windows) or “Cmd + Shift + Option + S” (Mac).
The “Save for Web” dialogue box will preview the sliced image and its segments. You can choose which slices to save, adjust optimization settings, and select the file format (such as JPEG or PNG) for each segment from this dialogue. That ensures that each slice is optimized for web use, resulting in faster loading times and a more efficient web design. Once selected, click the “Save” button to export the individual slices.
Choose Slices to Save:
In the “Save for Web” dialogue box in Adobe Photoshop, you can choose which slices you want to save as individual image files. This flexibility allows you to export only the necessary slices and optimize them for web use, reducing file sizes and improving loading times.
In the “Slices To Save” section on the right side of the dialogue box, you will see a list of all the defined slices for the image. Each slice will have a checkbox next to it. By default, Photoshop will save all the slices that you have created.
To choose specific slices to save, simply uncheck the boxes of the slices you want to exclude from the export. This way, you can export only the relevant segments needed for your web design.
After selecting the desired slices, you can adjust individual optimization settings for each slice while maintaining optimal web performance. Once satisfied with your selections, click the “Save” button to export the chosen slices as separate image files for use in your web design or interactive elements.
Select File Format and Settings:
After choosing the slices you want to save in the “Save for Web” dialogue box in Adobe Photoshop, the next step is selecting the appropriate file format and adjusting each slice’s optimization settings.
In the “Slices To Save” section, you’ll notice that each slice has a dropdown menu next to its name. Click on the dropdown menu to get the desired file format for each slice. Common formats include JPEG, PNG-8, and PNG-24, each with the advantages of image quality and file size.
Additionally, you can adjust the optimization settings for each slice, such as adjusting the image quality, selecting the number of colours, or choosing dithering options. These settings allow you to find the right balance between image quality and file size, ensuring that your web pages load quickly without compromising visual appeal.
Once selected, click the “Save” button to export the chosen slices with the selected file formats and optimization settings.
Save and Export:
You can save and export the sliced images after selecting the appropriate file format and optimization settings for the individual slices in Adobe Photoshop’s “Save for Web” dialogue box.
Click the “Save” option in the “Save for Web” dialogue box, and a new window will appear, prompting you to choose the destination folder on your computer where you want to save the exported images.
Give the exported files a suitable name, and ensure they are saved with the appropriate file extension, such as .jpg for JPEG or .png for PNG files.
Finally, click the “Save” or “Export” button to initiate the saving process. Photoshop will now generate and save each slice as a separate image file in the specified location. The individual image files are now ready for your web design.
Implement Sliced Images:
To implement the sliced images on your website or web design, follow these steps:
HTML Structure: Create a structure with appropriate HTML tags to display your HTML file’s images and interactive elements.
Image Tags: Use the <img> tag to insert each sliced image into its designated location on the web page. Specify the file path and attributes like alt text for accessibility.
Image Maps (Optional): If you assign hyperlinks to certain slices during the slicing process, you can use HTML <map> and <area> tags to create image maps. That enables clickable areas on the image that lead to other web pages or resources.
CSS Styling: Apply CSS styling to position and style the images and interactive elements according to your design requirements.
Testing: Test your web page to ensure the sliced images load correctly and the interactive elements function as intended.
By implementing the sliced images in your web design, you can achieve faster loading times, improve user experience, and create visually engaging and interactive web pages.
Conclusion
To conclude, despite its main role in web development and graphic design, image slicing works beyond the digital realm. You can apply this technique to your daily life images. For instance, when using it for social media accounts content, each image segment adheres to your posts’ authorized dimensions or aspect ratios, generating precise and impressive content and multiplying followers. Moreover, the Photoshop slice tool makes your image-slicing process more elastic and accurate. You can also edit and frame adjustments to your images separately after slicing them out of the main image, adding perfection to even minute details.
