How To Do Color Mixing In An Image
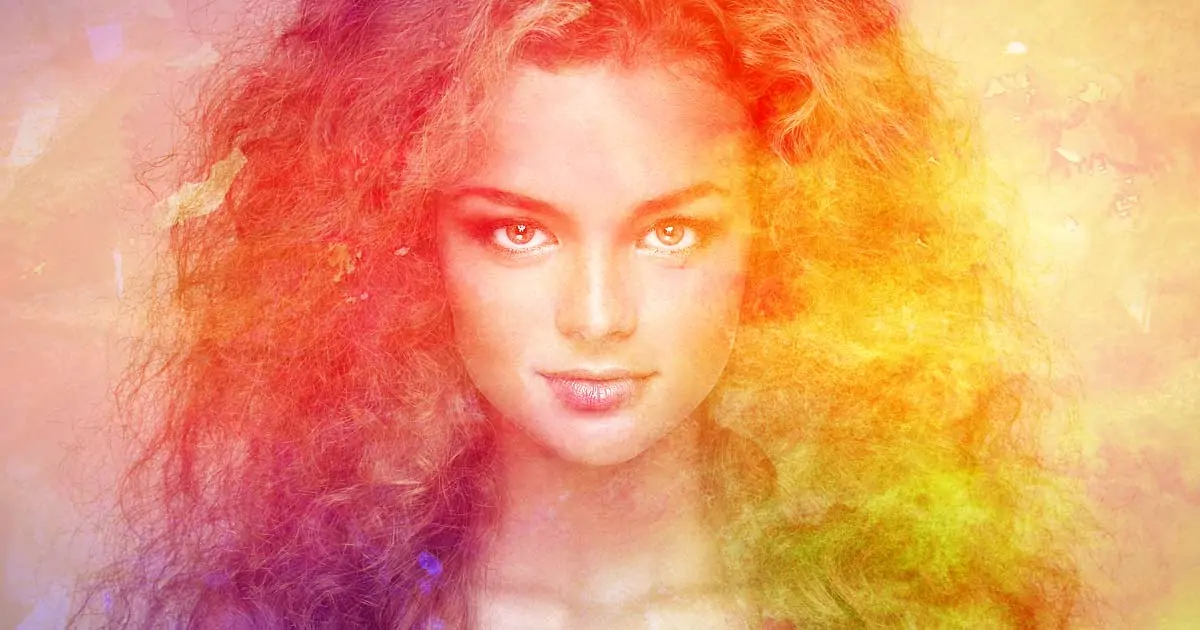
Color mixing in images is a refined technique that implicates blending mixed tints, dyes, and styles to create visually adorable designs. It depends diligently on codes of color theory, which expresses the manners in which different colors correspond to each other and how viewers sense them. Recognizing color theory is important for digital artists and image editors to make wise judgments about color preferences and mixtures. Various contemporary image editing apps include tools and highlights devised explicitly for color mixing. Some prominent segments include color balance settings, hue/saturation sliders, and gradient maps. Using these tools, among others, artists can exactly handle the color composition of an image, reaching the desired effects and maximizing its prevailing aesthetic pizzazz. Moreover, the color mixing approach can also assist in creating new colors and acquiring symmetry and proportion within photos. With a calculated combination of colors and management of color interactions, the images can prompt distinct perspectives and effectively express the undercover narrative. This blog post will further guide you about color mixing in an image using seven simple steps.
Step 1: Comprehending Color Spaces
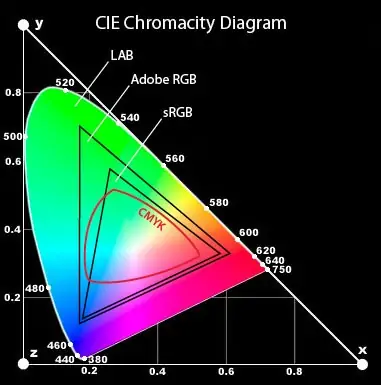
Examine your photo to confirm whether it includes the RGB, CMYK, or further color models. Usually, RGB is preferred for digital pictures, and CMYK is ideal for printing.
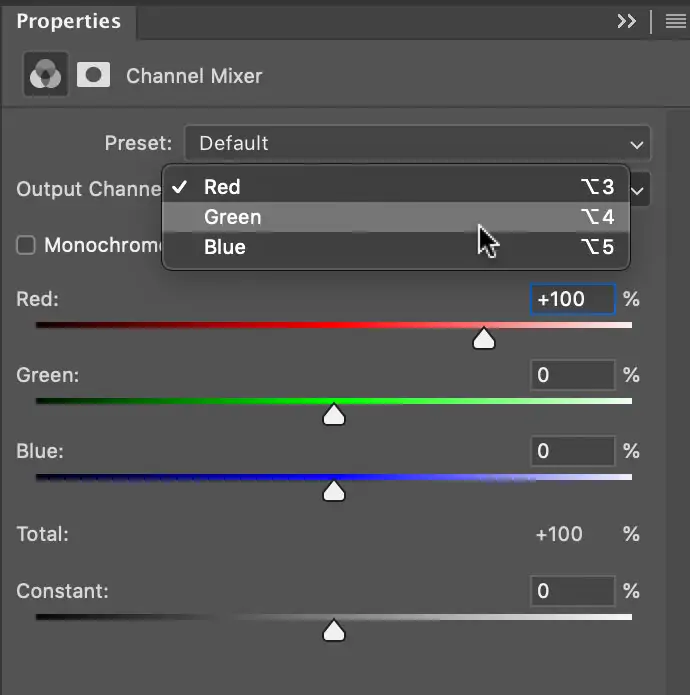
Get it that distinctive blends of red, green, and blue light within the RGB model make varying shades. The color channels possess ranges from 0 to 255, in which 0 stands for no magnitude and 255 is for the highest intensity.
You must understand that the red, green, and blue channels speak to the essential colors of light, and controlling these channels permits exact color alterations.
As RGB color mixing includes more light, an increase in the brightness shifts the color toward white, whereas subtracting light darkens the color.
Assess the range of colors expressed in the chosen color space. Various gadgets and mediums may have shifting color gamuts, influencing how colors show up.
Investigate color profiles related to the chosen color space, like sRGB or Adobe RGB, to guarantee reliable color generation over distinctive gadgets and stages.
Step 2: Maintaining Color Harmony
Find any recognizable color casts in the picture that may show undesirable tints or tones. Standard color casts comprise warm (reddish/yellowish) or cool (bluish) tones.
Assess the general white balance of the picture by evaluating how impartial colors show up. Alter the white balance if vital to guarantee precise color depiction.
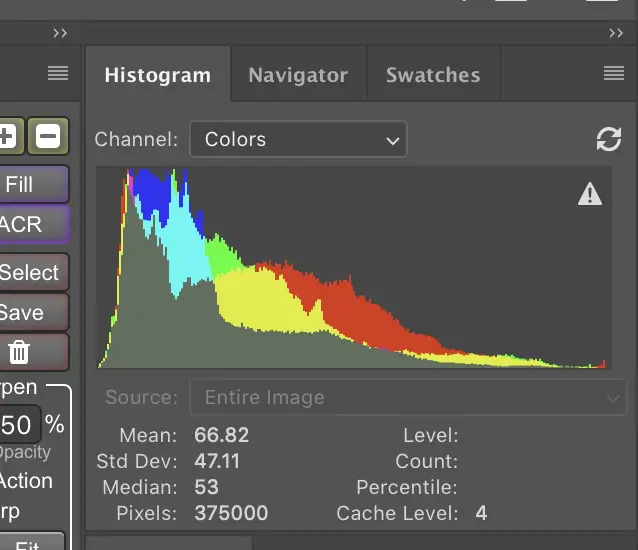
Utilize histograms to envision the conveyance of tones within the picture. Attend to spikes or crevices in particular color channels, which may show misproportion that require adjustment.
Review the lighting conditions of the picture that was captured. Distinctive light sources impact color discernment and may require alterations to attain precise color adjustment.
Collate the picture to reference images or color swatches to decide if the colors look precise and consistent.
Regulate the color temperature and tint settings to direct the warmth or coolness of the overall picture and address particular color inclinations.
Address the skin tones so that they show up natural and lifelike. Alterations may be essential to avert skin tones from showing up excessively warm or overly cool.
Step 3: Enhancing Curves And Levels
Get the know-how of level adjustment tools, which permit you to control the brightness and contrast of a picture.
Scan the image’s histogram to distinguish the distribution of pixel values over the tonal range. The vertex within the histogram denotes the zones of greater pixel concentration, demonstrating the presence of shadows, midtones, and highlights.
Alter the black point slider to characterize the darkest zones of the photo. It helps improve contrast and develop shadows while avoiding the loss of detail in dim zones.
Adjust the white point slider to regulate the brightest zones of the picture. It can correct the brightness and guarantee highlights are not too exposed or clipped.
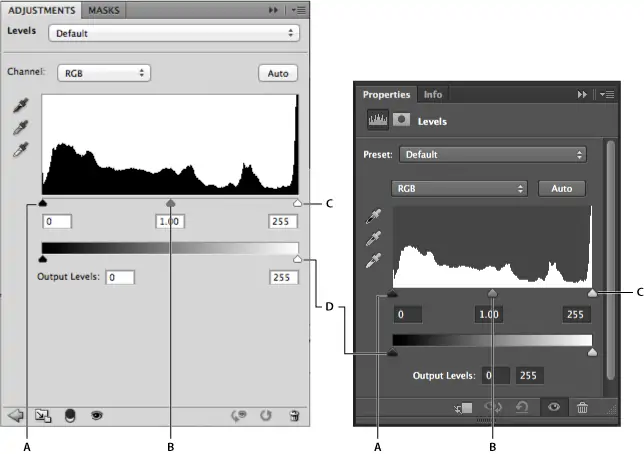
Elevate the midtone slider to alter the tonal balance of the picture and the prevailing brightness and contrast.
Play with curve adjustment options for more progressed control over tonal alterations. Curves permit you to alter particular tonal ranges, such as highlights, midtones, and shadows, with more noteworthy exactness.
Frequently audit your modifications while making changes to guarantee they contribute positively to the general appearance of the picture.
Step 4: Modifying Hue And Saturation

Find the hue and saturation alteration highlights in your image manipulation program. These highlights are for exact control of individual color tints and their intensity.
Utilize the hue slider to move the overall color balance of the photo along the color spectrum. That will be valuable for accomplishing inventive impacts or redressing color casts.
Alter the saturation slider to control the concentration of colors within the image. Expanding saturation makes colors more dynamic and distinctive, whereas minimizing saturation desaturates colors for a quieted or grayscale impact.
Utilize specific color adjustments to target and alter particular hues inside the picture. That permits tuning separate colors without influencing others, giving more prominent control over color balance.
Be careful not to oversaturate colors, which will lead to unnatural-looking outcomes. Look for an adjusted saturation level that exalts the energy of colors without overwhelming the viewer.
Step 5: Employing Color Grading Tools
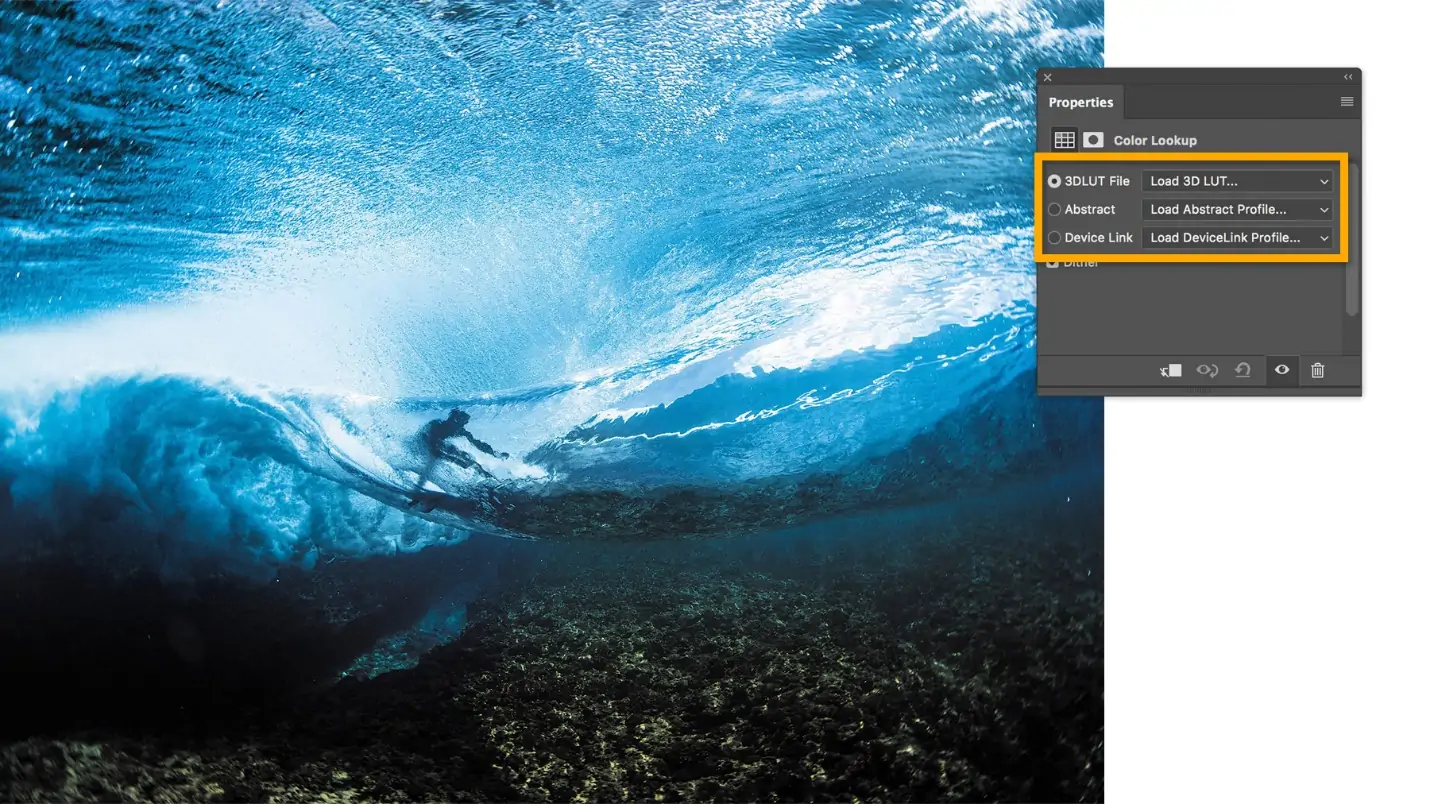
Select from an assortment of color grading tools accessible in your image editing program, including color lookup tables (LUTs), color balance settings, or gradient maps.
Decide the disposition or climate you need to communicate within the picture. Distinctive color grading methods can inspire different feelings and improve narrating.
Investigate pre-made color grading presets or filters to rapidly apply stylized looks to your picture. Alter the concentration or opacity of presets to fine-tune their impact.
Edit color grading impacts by changing hue, saturation, and luminance parameters. That privileges personalized alterations custom-made to the particular necessities of the image.
Keep color grading consistent over different images, mainly if they belong to the same project or series. It benefits by setting up a cohesive visual fashion and improving general coherence.
Step 6: Including Selective Color Settings
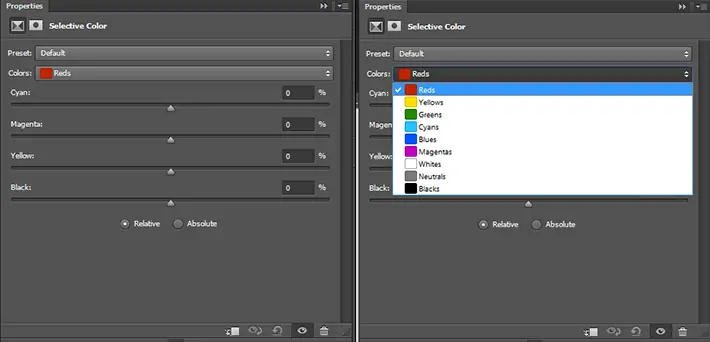
Distinguish particular regions or colors within the picture that require specific color rectification. That includes adjusting skin tones, setting the color of objects, or fine-tuning individual components.
Utilize selection tools such as masks, brushes, or color range selections to confine the ranges you need to redress. That helps to focus on color changes without influencing the rest of the image.
Include adjustment layers, like selective color or hue/saturation adjustments, to the chosen ranges. These layers permit non-destructive editing, empowering you to fine-tune alterations afterward if required.
Hone your selection masks to guarantee smooth moves between rectified and uncorrected regions. Techniques like Feathering or refining mask edges can help blend adjustments consistently into the image.
Frequently audit your specific color corrections to guarantee they contribute absolutely to the general image. Make alterations as required to attain a natural and adjusted appearance.
Simplify your workflow by successfully assembling selective color correction layers and masks. That simplifies overseeing and adjusting numerous corrections while preserving clarity and alliance.
Step 7: The Final Tweaks
Evaluate the general effect of the color mixing alterations on the image. Look at how the changes have upgraded or transformed visual magnetism and temperament.
Guarantee uniformity in color reproduction over distinctive parts of the image. Attend to how colors interact and mix, pursuing a unified and adjusted appearance.
Execute any fundamental refinements or alterations to advance the progress of the picture. You can tweak color balance, saturation levels, or selective color corrections to attain the required impact.
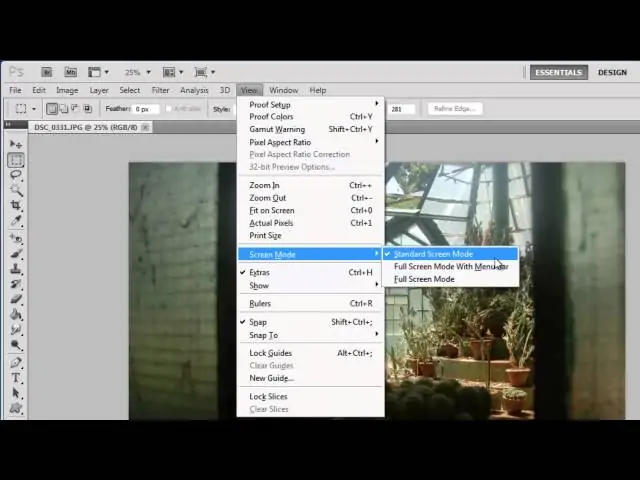
Audit the image in different viewports, like full-screen mode, zoomed-in display, or different color profiles. This way, you can recognize potential issues or disparities that may not be clear at first peek.
Look for input from peers or clients to pick up additional viewpoints on the color blending alterations. Consider their input and make corrections appropriately to meet their desires.
After you are pleased with the results, save your work and document the color mixing alterations applied to the image. It confirms that the changes can be effectively replicated or adjusted later.
Conclusion
In conclusion, color mixing is paramount to image enhancement and correction. It mostly requires a firm comprehension of color theory and the color channels to handle the color intensities in your images as desired and as they look appealing to the viewers. When included in an image editing process, the color mixing techniques also necessitate command in using editing tools and options with the specific editing practices. After having a rich understanding and practice of color-mixing-related skills and techniques, you can effortlessly manipulate the colors of your photographs and create irresistible compositions with elevated narratives.
