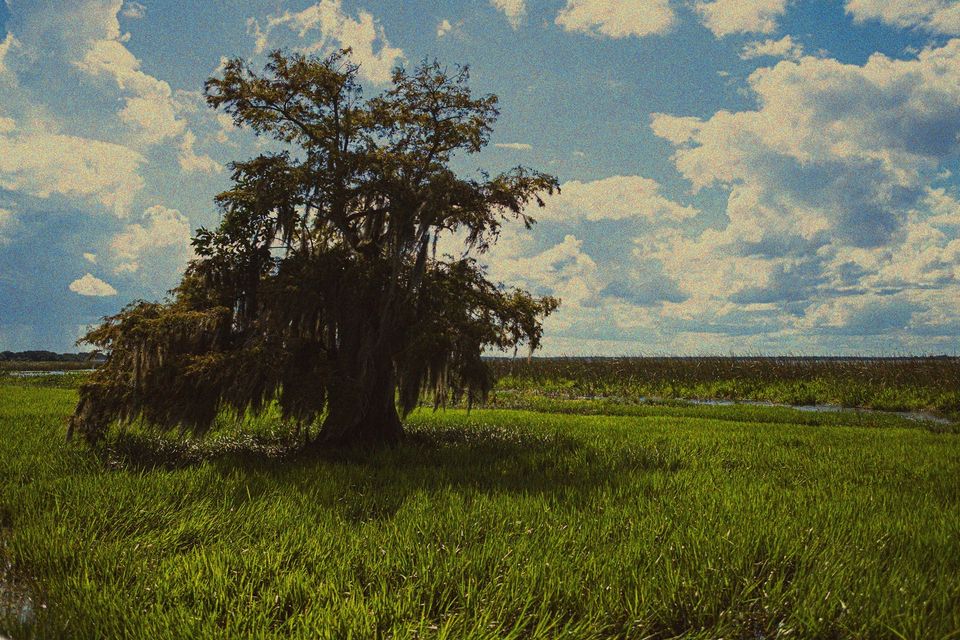
How to Create Pictorialism Effect in Your Images
The pictorialism effect refers to the movement of photography during the late 19th century, which pursued giving images an artistic or painting-like look instead of showing the dreary and monotonous reality. At that time, photographers used to depend on manipulating lenses and light sources, some soft-focus filters in cameras, and some contemporary printing approaches to develop a romantic atmosphere of pictorialism effect in photos. With the evolution of photography and image editing techniques creating pictorialism in your images has become more convenient and accessible. Even without wholly relying on the camera settings and light source effect, you can add this effect to your ordinary photos, making them adopt a subjective pictorial expression. You can add pictorialism effects to everyday photographs using various digital editing tools. Though it is not comparable to snapping a pictorialist picture with a camera, current image enhancement techniques can use filters and adjustments to indicate the attributes and mood associated with pictorialism. Here are some methods for creating a pictorialism look with editing software.
Step 1: Soft Focus
Soft focus is a technique used to create a dreamy and romantic atmosphere in your images, evoking the essence of pictorialism. Here’s a practical approach to achieving a soft focus effect:
Open your image in post-processing software like Adobe Photoshop or Lightroom.
Duplicate the image layer to preserve the original.
Apply a Gaussian blur filter to the duplicate layer. Go to the Filter menu, choose Blur, and select Gaussian Blur. Adjust the radius until you achieve the desired level of softness.
Apply a layer mask to the blurred layer. Use a soft brush with a low opacity setting to reveal the sharper areas from the original layer selectively.
Fine-tune the soft focus effect by adjusting the blurred layer’s opacity or modifying the mask.
Remember to retain some areas with a sharp focus to maintain visual interest and engagement.
By following these steps, you can create a soft focus effect that adds a touch of artistry and emotion to your images, aligning them with the pictorialism aesthetic.
Step 2: Tone and Contrast Adjustment
Tone and contrast adjustments are crucial in creating a softer, more painterly appearance in your images, contributing to the pictorialism effect. Here’s a practical approach to this step:
Open your image in your preferred editing software.
Assess the tonal range and contrast of the image. Pictorialist images often have a softer contrast compared to typical photographs.
Adjustment tools like Levels, Curves, or Tone curves modify the tonal range. Lower the contrast slightly by pulling the highlights and shadows towards the midtones, creating a more gentle transition between light and dark areas.
Experiment with the individual color channels to fine-tune the tonal adjustments and achieve the desired mood. For example, reducing the intensity of blues or increasing the warmth of yellows can enhance the pictorialism effect.
Consider adding a subtle vignette to draw attention to the central subject and create a vintage feel. Use a vignetting tool or create a new layer, apply a radial gradient, and adjust its opacity to achieve the desired effect.
Continuously evaluate the image’s overall appearance during adjustment, aiming for a harmonious and cohesive aesthetic that aligns with your pictorialism vision.
By following these steps, you can effectively adjust the tone and contrast of your images to create a softer, more painterly appearance that contributes to the desired pictorialism effect.
Step 3: Color Treatment
Color treatment is a vital aspect of creating a pictorialism effect that enhances the mood and aesthetic of your images. Here’s a practical approach to achieving the desired color treatment:
Open your image in your preferred editing software.
Evaluate the existing colors in the image and determine the mood you want to convey. Pictorialist images often feature a muted or slightly desaturated color palette.
Adjust the saturation levels to create a more subdued and vintage look. Gradually decrease the saturation or selectively desaturate specific colors that may appear too vibrant.
Add subtle color tints to evoke a specific mood or enhance the artistic effect. Use color balance, selective color, or hue/saturation adjustment layers to add a hint of warmth, coolness, or other tonal shifts to the image.
Pay attention to the color relationships within the image. Adjust the balance between different color channels to create a more harmonious and cohesive color palette.
Continuously evaluate the image’s overall appearance and compare it to your intended artistic vision. Adjust to achieve the desired color treatment that aligns with the pictorialism aesthetic.
By following these practical steps, you can effectively manipulate the colors in your image to create a subdued, vintage-inspired color treatment that enhances the pictorialism effect you aim for.
Step 4: Texture Overlay
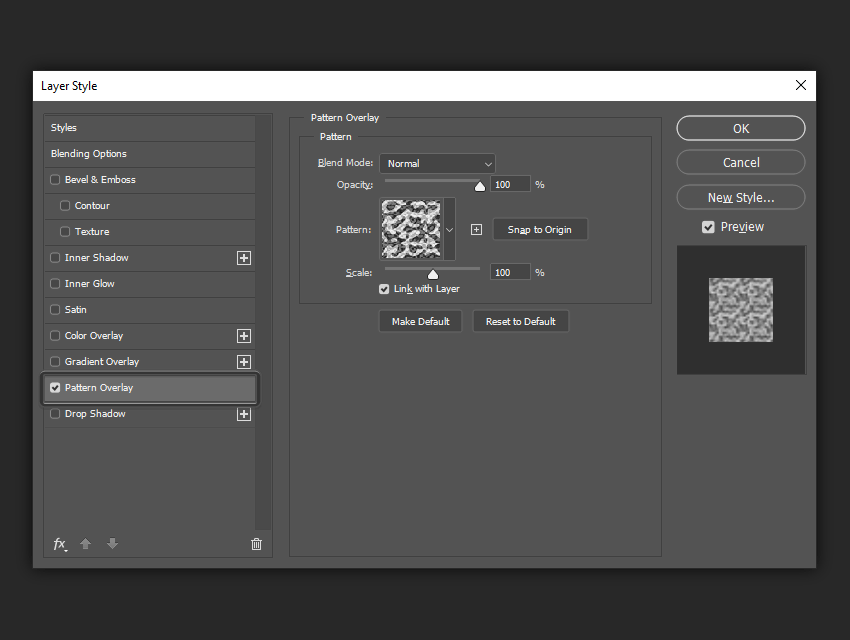
A texture overlay can bring visual interest and tactile quality to your images, contributing to the overall pictorialism effect. Here’s a practical approach to incorporating texture overlays:
Find or create texture images that align with the mood and aesthetic you want to convey. Look for textures like paper, fabric, or distressed surfaces.
Open your main image and the chosen texture image in your editing software.
Drag the texture image onto your main image as a new layer.
Resize and position the texture layer to cover the entire image or specific areas where you want to add texture.
Experiment with blending modes to seamlessly integrate the texture into your image. Overlay, Soft Light, or Multiply blending modes often work well for texture overlays.
Set the opacity of the texture layer to control the intensity of the texture effect. Aim for a subtle and complementary texture that enhances the overall artistic feel without overpowering the image.
Use layer masks to selectively reveal or hide parts of the texture layer, focusing on areas that benefit from added visual interest or depth.
Fine-tune the texture effect by applying additional adjustments like levels, curves, or color adjustments to the texture layer.
By following these steps, you can effectively incorporate texture overlays into your images, adding depth, visual interest, and a tactile quality that contributes to the pictorialism effect you seek to achieve.
Step 5: Composition and Cropping
Composition and cropping are essential in creating visually appealing and harmonious pictorialist images. Here’s a practical approach to this step:
Assess the composition of your image and determine if any adjustments are needed to create a balanced and engaging visual arrangement.
Consider compositional techniques such as the rule of thirds, leading lines, or symmetry to guide your cropping decisions.
Open your image in your editing software and experiment with cropping ratios and compositions using the crop tool.
Pay attention to the placement of the main subject within the frame. Ensure it is positioned thoughtfully to create visual interest and convey your intended message.
Evaluate the negative space in your image. Negative space can enhance the overall composition and emphasize the subject. Adjust the cropping to include or minimize negative space as desired.
Continuously review the impact of each cropping adjustment on the image’s visual flow and balance. Consider multiple iterations and compare the different compositions until you find the most compelling result.
By following these steps, you can refine the composition of your image through cropping, ensuring a visually pleasing arrangement that supports the pictorialism effect. Remember to experiment and trust your artistic intuition to find the composition that best captures the desired mood and engages the viewer.
Step 6: Final Touches
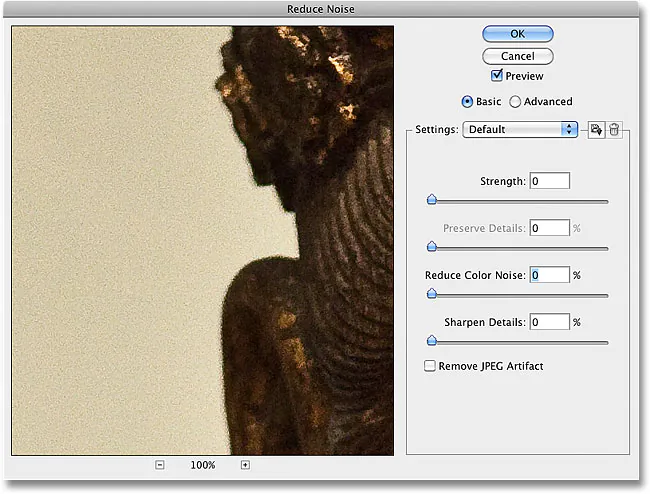
In the final step, you’ll apply the finishing touches to enhance the overall pictorialism effect of your image. Here’s a practical approach to the final touches:
Review your image and make any necessary adjustments to ensure it aligns with your artistic vision.
Consider adding subtle vignettes to draw attention to the central subject and create a vintage feel. Use a vignetting tool or create a new layer, apply a radial gradient, and adjust its opacity to achieve the desired effect.
Fine-tune the sharpness or noise levels if needed to create the desired visual impact. Apply sharpening selectively to preserve important details and maintain the softness in other areas.
Experiment with additional artistic filters or overlays to further enhance the overall mood and aesthetic of the image. Use them sparingly and ensure they complement the pictorialism effect rather than overpower it.
Continuously evaluate the image’s overall appearance and compare it to your artistic vision. Make adjustments as necessary to achieve the desired final result.
When you’re satisfied with the image, save it in the appropriate format and resolution for your intended use.
By paying attention to the final touches, you can polish your image and ensure that it effectively captures the pictorialism effect, evoking the desired emotions and engaging the viewer visually.
Conclusion
Finally, pictorialism is a lovely alternative to regular photography since it allows you to infuse your photographs with your aesthetic perspective and personal perception of the natural world. The target is to communicate your artistic vision while also provoking a response from the observer and establishing an image that transcends mere documentation. Moreover, using symbolism and narrative element associated with the pictorialism effect, you can free your creativity from strict realism and recreate the pictorial image bestowed with ethereal and hazy qualities.
