
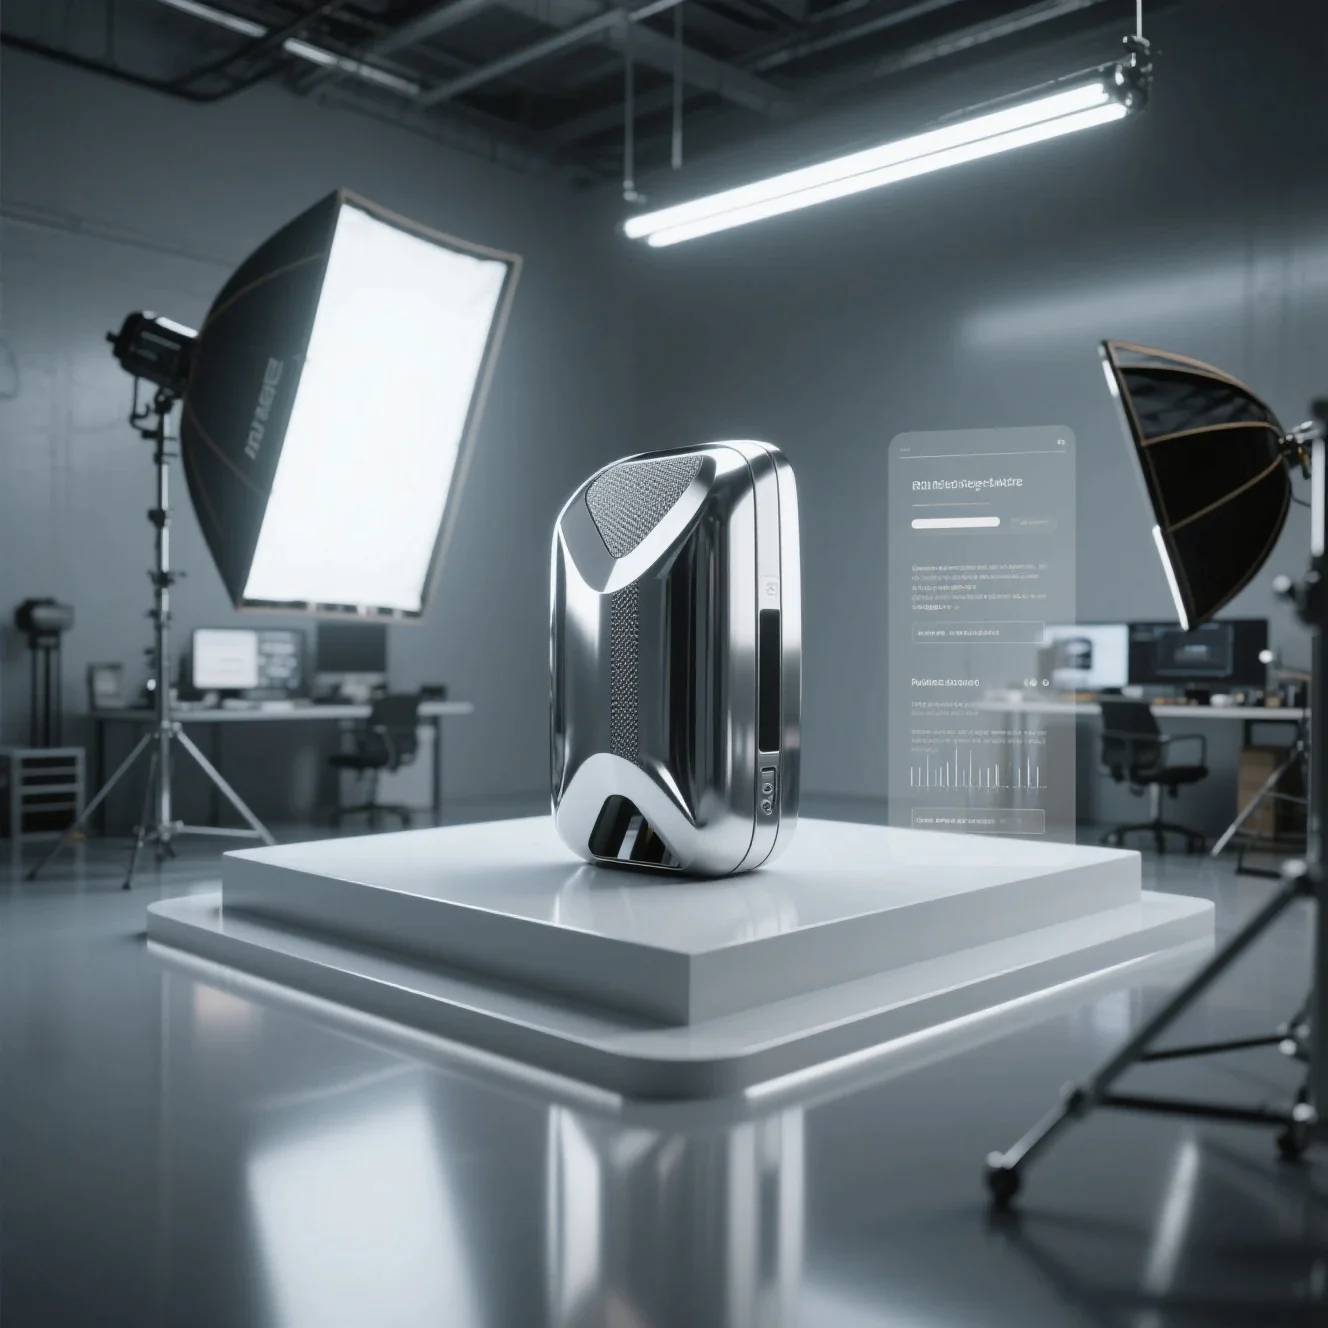
How to Create Photorealistic 3D Product Models
In the modern competitive digital market, it is important to have product imagery as real as the actual physical photography, and 3D product modeling enables designers and business owners to come up with digital images of the products that appear so beautiful and realistic that a brand can be seen before it is physically produced. Through a combination of accurate geometry, physically-based rendering (PBR) materials, high-resolution textures, and more advanced lighting effects like HDRI environments, product modeling in 3D can be used to recreate objects in the real world even at the smallest detail.
This workflow is particularly treasured for e-trade, advertising, AR/VR applications, and product prototyping, as it reduces fees, quickens production, and improves patron engagement. Novices regularly face challenges, including models appearing faux, materials behaving incorrectly, or lights generating unnatural shadows.
It is a step by step workflow in 3D modeling of products, including reference collection and modeling up to the UV mapping, texturing, setting up the materials, lighting, rendering and post processing. Through these steps, you will be able to produce digital models of photorealistic 3D and high standards that will be profitable in the digital market.
Step 1: Gather References & Plan

To get a 3D product model, which can be considered as photorealistic, you first have to get references and plan your workflow. It is important to take the steps as illustrated below.
1. Collect High-Quality Reference Images
Get or borrow numerous pictures of the product in various positions- front, back, top, side and close-ups of the material.
Store the pictures in a different folder named explicitly to get it easily.
2. Note Real-World Dimensions
Measuring the height of the product, width and depth.
Record any unique features or proportions.
This guarantees your 3-d model fits the actual product.
3. Observe Material Properties
Identify the type of surface: metal, glass, plastic, fabric, or a combination.
Note reflectivity, glossiness, and texture patterns.
High-quality references help you set up PBR materials later.
4. Plan Camera Angles
Choose what angles you are interested in capturing in the end shots.
Take e-commerce shots, advertisements or AR/VR.
5. Organize Your References
Make folders for different things, like images, sizes, notes about the material, and camera.
When you’re modeling, make sure to name files clearly so you can find them easily.
Why This Step Matters
Planning and getting references before you start modeling will save you time, make fewer mistakes, and make sure that your 3D product modeling workflow gives you photorealistic results. To get the right geometry, textures, and lighting in later steps, you need to do the right preparation first.
Step 2: 3D Modeling
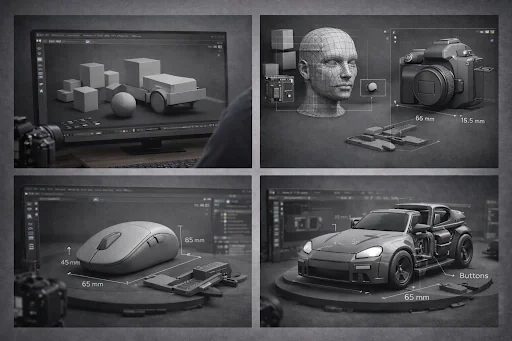
Now that you’ve got your references and workflow sorted out, it’s time to dive in and start building your 3D model. Getting the details right really makes all the difference every little thing changes how your textures, materials, and lighting show up when you finally hit render. And honestly, this is where the magic happens.
1. Start with Simple Shapes
Just start with the basics cubes, cylinders, sphere.
Don’t jump straight into complicated shapes; you’ll just trip yourself up.
Work those simple forms, tweak them, and before you know it, they’ll start to look like the real thing. Keep it easy at first, and you’ll make way fewer mistakes
2. Maintain Clean Topology
If you want smoother surfaces, stick with quads instead of triangles
Keep your edge loops consistent, especially around curves or spots that might deform.
Good topology helps your textures and PBR materials look right when the lighting hits.
3. Work with Real-World Scale
Take the real measurements you got in Step 1—height, width, and depth—and use them for your model.
Getting the scale right makes all the difference. Your model ends up looking real under HDRI lighting, and textures actually work the way they should.
4. Gradually Add Details
Start with the basic shape, don’t get lost in the tiny stuff just yet. Once you’ve got the main form looking right, then go ahead and add in those little details like grooves, buttons, or labels.
Seriously, don’t make it complicated from the start. Nail the foundation first, and all those fine touches will fall into place later.
5. Recommended Tools
Blender:It’s free, super easy to pick up, and honestly, you can do just about anything with it.
3ds Max / Maya:These are the go-to tools if you’re serious about product modeling and want to work at the industry level.
Modo :Great when you need really precise modeling, especially for those tricky, complex shapes.
ZBrush (optional) :Perfect for adding tons of detail with sculpting, if you want to go all out.
6. Tips for Beginners
Frequently save iterations to avoid losing progress.
Keep reference images visible in the viewport for better accuracy.
Honestly, start simple. Boxes, bottles, stuff that doesn’t make your brain melt. You can get weird with the complicated shapes later.
Also, don’t wait until the last minute to see if your model looks good from other angles or in different lighting.
Why This Step Matters
PBR materials and HDRI lighting will look right when you use them if you pay close attention to the details, keep the topology clean, and make sure the scale is right. This will give you photorealistic results that are good for e-commerce, advertising, or AR/VR apps.
Step3:UV Mapping & Texturing
After you complete your 3D model, it’s time to get into UV mapping and texturing; this is what really makes your project stand out. Proper UV mapping makes sure the textures are applied correctly, so everything fits as intended. Next, when you add PBR materials and use HDRI lighting, your model doesn’t just look impressive, it appears lifelike.
1. Unwrap UVs Properly
Take your model, section by section, and carefully unwrap the UVs.
Make sure no UV islands overlap or become distorted; you’ll regret it down the line.
For complicated shapes, check the alignment to ensure your textures fit perfectly.
2. Apply High-Resolution PBR Textures
Go with physically-based rendering (PBR) textures if you want things to look real:
Diffuse or Albedo Map: This gives you the main colors, any patterns, and logos.
Normal or Bump Map: It fakes all those little dents and bumps, so you get texture without making your model heavier.
Specular or Roughness Map: This one handles how shiny or matte your surface looks, think reflections and highlights.
Displacement Map (Optional): If you need real depth and extra detail, turn this one on. It actually pushes and pulls the surface for a more dramatic effect.
3. Organize Materials by Type
Match textures to materials based on how they behave in real life:
Metal: Give it a shiny, reflective surface.
Plastic: Think semi-gloss smooth, but not mirror-like.
Glass: Let it be see-through and add that bending-light effect.
Consistency ensures materials interact correctly with lighting.
4. Common Mistakes to Avoid
Stretching textures: Stretching textures: Always take a look at the UV layout before you start texturing. Trust me, it saves a ton of headaches later.
Incorrect material type: Double-check the reflectivity, roughness, and transparency. They should match what the real product looks like don’t just guess and hope for the best.
Low-resolution textures: Blurry textures just ruin the whole thing. Use high-resolution textures if you want your renders to actually look sharp.
5. Recommended Tools
Substance Painter: This one’s the gold standard when it comes to PBR texturing. Pretty much everyone uses it.
Photoshop or GIMP: Great for tweaking and fine-tuning your textures. They’re the go-to apps for making those little adjustments.
Quixel Mixer: Totally free and honestly, it’s fantastic for creating PBR textures from scratch.
Why This Step Matters
Nail those, and your textures and materials will properly respond to HDRI lighting reflecting light, casting accurate shadows, and highlighting all the fine surface details. But if you rush through this step, or skip it entirely, even the most well-made models will end up looking completely artificial.
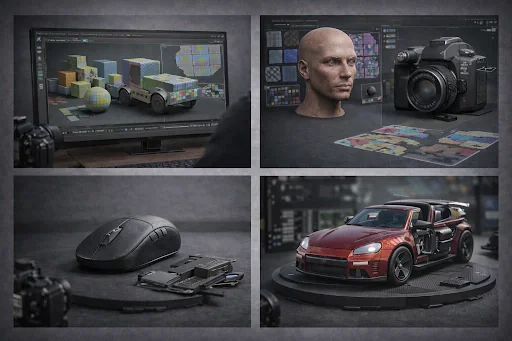
Step 4:
Alright, once your UV maps and textures are set, it’s time to move on to your materials. This is the stage where your 3D model really starts looking seriously lifelike because choosing the right materials makes everything interact with light perfectly. That’s the key to achieving those photorealistic renders everyone’s after.
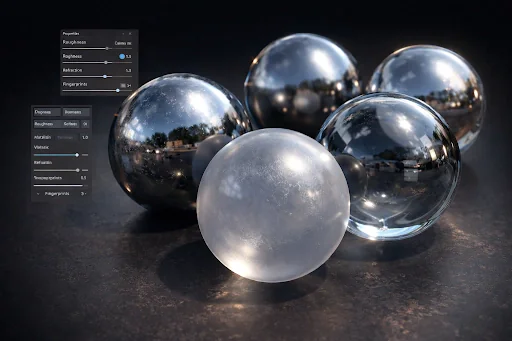
1. Use Physically-Based Rendering (PBR) Materials
PBR materials mimic how things actually look and feel in the real world think shine, surface texture, and transparency.So, choose the material settings to fit what you’re creating:
Metal: Make it really shiny. Get those sharp, bright reflections just right.
Plastic: Aim for a soft sheen, with a bit of texture.
Glass: Keep it see-through, but remember how it bends light.
2. Apply Materials to Model Parts
Assign each material to its correct spot on your model.
Double-check the textures to make sure they’re really matching up with those UV maps.
Check out a few preview renders. You’ll see how your materials react when you add HDRI lighting.
3. Adjust Material Properties
Experiment with the roughness, metallic, and reflectivity sliders until the material starts to look genuinely realistic.
Introduce subtle imperfections like tiny scratches or barely-there fingerprints just enough to make it convincing, but not so much that it looks exaggerated.
4. Common Mistakes to Avoid
Flat or fake-looking materials: Flat, artificial-looking materials stand out in all the wrong ways. Use some good PBR textures and roughness maps—they really make a difference.
Overly shiny surfaces:If something’s overly shiny, tone it down. Real-world objects don’t reflect light perfectly. Add a few imperfections, like scratches or smudges, whatever fits.
Ignoring transparency/refraction: Remember transparency and refraction, too. Glass, water, anything transparent they all need the right refraction index to look convincing.
5. Recommended Tools
Substance Painter: lets you jump straight into material editing and work with PBR like an expert paint, adjust, and get immediate feedback.
Blender / 3ds Max / Maya: In Blender, 3ds Max, or Maya, you can assign materials, tweak shader settings, and really control how your models appear
Photoshop: Then there’s Photoshop, where you dive in to create or refine texture maps when you want that extra bit of realism.
Why This Step Matters
Getting your materials right is crucial. Even if your geometry and textures are perfect, everything can look off if the materials aren’t set up correctly. Quality PBR materials make all the difference; they add realistic reflections, lifelike shadows, and make surfaces respond convincingly to HDRI lighting. That’s what makes your 3D product modeling start to look real.
Step 5: Lighting & Environment
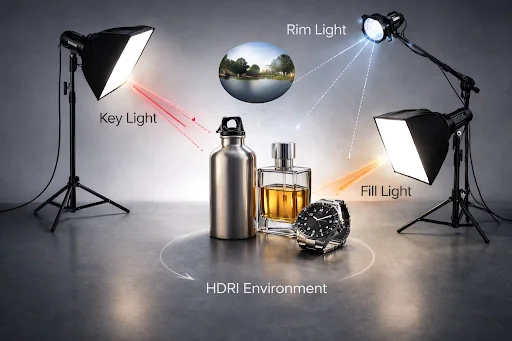
Get your materials organized excellently. Now it’s time to pay attention to lighting and your scene. This is where your 3D product starts to come to life. Proper lighting sets the atmosphere, highlights your textures, and gives your model a realistic feel. Don’t overlook this step if you want your final render to appear believable.
1. Use a Three-Point Lighting Setup
Key Light: This is your primary light source. It defines the subject and highlights key features.
Fill Light: Use this light to reduce strong shadows and create a more balanced look.
Rim / Back Light: This light traces the outline of the subject, making it stand out from the background.
Arrange your lights depending on how you want to present your product whether it’s for an online shop, an advertisement, or something interactive like AR or VR.
2. Apply HDRI Environment Maps
If you want your 3D scenes to appear realistic, use some HDRI maps.
They provide natural light and reflections, especially on surfaces like metal, glass, or anything shiny.
Looking for free HDRIs? Try HDRI Haven or Poliigon. They have a huge selection.
3. Adjust Light Intensity and Color
Choose a light color that complements both the material and the mood you want to create.
Reduce any strong or unnatural shadows, since they can disrupt the overall look.
Experiment with lighting from multiple angles until the scene is evenly illuminated.
4. Common Mistakes to Avoid
Don’t rely on just one light source add some fill and rim lights to bring real depth to your scene.
Be careful with overly bright reflections. Lower the intensity on reflective surfaces so they don’t appear washed out.
And really, don’t forget HDRI. Without it, your reflections and ambient lighting will look unnatural.
5. Recommended Tools
Blender / 3ds Max / Maya: Blender, 3ds Max, and Maya all let you experiment with light placement and add HDRIs to really enhance your scene’s realism.
KeyShot / V-Ray / Arnold / Redshift: If you’re looking for realistic lighting, KeyShot, V-Ray, Arnold, and Redshift all handle accurate light simulation really well.
HDRI Maps: For HDRI maps, take a look at HDRI Haven or Poliigon—both sites offer tons of high-quality environments you can drop straight into your project.
Why This Step Matters
Lighting is crucial for photorealistic 3D product models. When done correctly, materials and textures stand out, shadows appear natural, and reflections fit seamlessly. But if lighting is neglected, even the finest model will look flat or completely artificial.
Step 6: Rendering
Rendering is the final stage of 3D product modeling, where all your modeling, materials, lighting, and textures come together to produce a photorealistic image. A good render engine translates your work into high-quality visuals suitable for e-commerce, advertising, and product marketing.
3. Increase Sampling for Noise-Free Renders
Sampling controls how clean your final image looks:
Aim for a high number of samples anywhere from 200 up to 1000 or more, depending on what your engine requires.
Enable denoising so you can reduce noise while preserving the details.
Don’t just settle on a single sample value; experiment with several options until you find the best balance between quality and speed.
4. Enable Ray Tracing Features
Global Illumination (GI): This ties everything together, letting light bounce around as it does in real life.
Caustics: If you have glass, metal, or water, enable this for those awesome, lifelike light effects.
Soft Shadows: Shadows look much nicer when they’re not just harsh, simple outlines.
Accurate Reflections & Refractions: For things like shiny metal or clear water, this makes them look correct.
Ambient Occlusion (AO): Adds depth so your scenes don’t look flat.
These features make your product look grounded and real.
5. Optimize Camera Settings
Choose a 35mm or 50mm lens if you want your product photos to appear natural and true to life.
Enable Depth of Field it’ll give your photos that sleek, professional look.
And remember, your camera angle should match what you typically see in real product images. Keeping this consistent makes everything look authentic.
6. Common Rendering Mistakes to Avoid
Not enough samples Your images end up noisy.
Got the wrong camera FOV Suddenly, your product appears strangely stretched or squashed.
If the lighting is too flat, realism goes out the window and your render just feels dull.
Skip denoising and you’re stuck with a grainy mess.
Low resolution? Say farewell to sharp textures and clear logos.
Fixing these improves clarity, realism, and presentation quality.
7. Why This Step Matters
Rendering is the stage when your 3D product model truly comes to life. This is where you achieve those sharp details, realistic reflections, and natural-looking shadows.
With a quality render, your product appears polished and professional, something people actually want to purchase.It helps build trust and increases sales.
Honestly, even a simple product can look premium when you get the rendering right.
Skip denoising and you’re stuck with a grainy mess.
Low resolution Say farewell to sharp textures and clear logos.
Step 7: Post-Processing
So, you’ve completed your render, but the image still seems a bit flat. That’s where post-processing steps in. It’s the final stage in 3D product modeling, and it truly brings your work to life enhancing color, contrast, sharpness, and making everything stand out. This is how your render begins to resemble real product photography, rather than just another digital image.
1. Adjust Basic Exposure & Contrast
Increase the brightness slightly, you’ll notice extra details instantly.
Add some contrast as well, so the products stand apart from each other.
Just be careful not to overdo it. If the image is too bright, you’ll miss out on those subtle material textures.
Make sure skin tones and light surfaces appear natural, not overly bright or too intense.
2. Fix Color Balance
Adjust the colors to correct odd lighting whether it’s too warm, too cool, or anything else that looks off.
Ensure the colors accurately represent the real thing. Brand accuracy is important.
Remove any strange color casts from HDRI lighting. Those shouldn’t interfere with the shot.
3. Enhance Details With Subtle Sharpening
Apply slight sharpening to highlight edges and surface textures.
Avoid heavy sharpening; it introduces noise.
Sharpen only specific areas like logos, labels, or product features.
Sharpness improves clarity and gives a professional finish.
4. Add Depth of Field (DOF) & Lens Effects (Optional)
Slightly blur the background using depth of field to help the product stand out.
If it matches the product’s style, you can add a hint of lens bloom, vignette, or glare but only a little.
Too many effects can make things look messy, so keep it simple and neat.
5. Clean Dust, Noise & Artifacts
Remove accidental speckles, fireflies, or render artifacts.
Use denoise filters for smooth surfaces.
Fix jagged edges with anti-aliasing.
This step is essential for premium-quality marketing images.
6. Export in High Quality
Export final images in PNG or TIFF for maximum clarity.
If you plan to use them online, create an optimized JPEG as well it will load more quickly
Keep a high-resolution master file in case you need it in the future
Exporting sharply ensures your colors remain accurate and your images never appear pixelated.
Why This Step Matters
Post-processing elevates your renders from good to great. It enhances the lighting, secures true-to-life colors, and helps your 3D product models seamlessly blend with real product photos you see in ads or online shops. If you skip this step, your render can look unfinished even if the modeling itself was perfect.
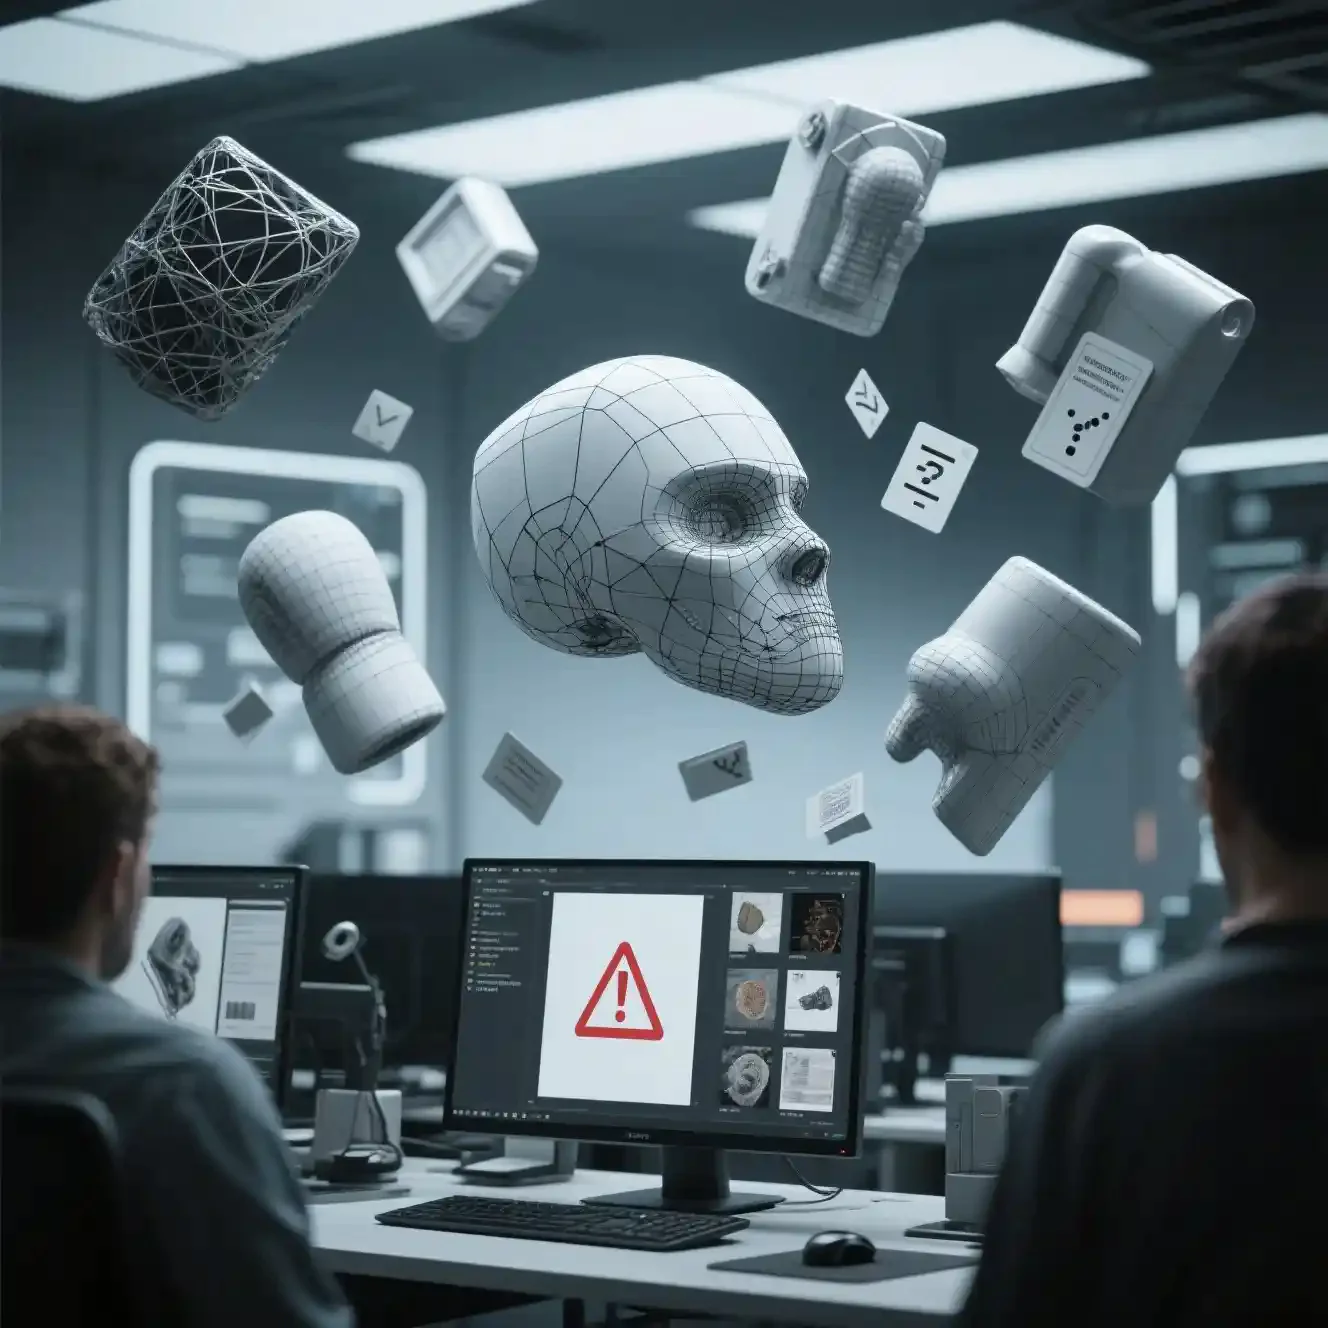
Common Mistakes in 3D Product Modeling
Mistake 1: Modeling Without Real-World Scale
Many people choose the cheapest service available. It might seem like a smart move at first, but soon the problems start off with measurements, strange-looking textures, messy topology, or sluggish models that barely work in AR or on the web. In the long run, those budget models require constant fixes and waste plenty of time and effort. What seems inexpensive initially can end up costing you much more down the road.
Mistake 2: Not Providing a Clear Project Brief
Many clients overlook crucial details when submitting requests.
Things like precise measurements, clear reference photos, the type of PBR textures they prefer, or the specific file format they need GLB, FBX, USDZ, and so on
When briefs are this vague, you often get 3D models that don’t function properly, or worse, can’t be used at all.
Mistake 3: Ignoring the Portfolio Quality
Let’s be honest, most people judge a provider based on their website instead of looking at their actual work. But you should review their portfolio.
Check for clean mesh flow, realistic quality, good use of PBR workflows, and how they manage lighting and rendering.
If you ignore this, you’re pretty much asking for disappointment.
Mistake 4: Not Defining the Use Case
Clients almost never specify where they’ll use the model. One day it might be for an e-commerce site, the next it could be in an AR viewer, or maybe a WebGL platform, Unreal or Unity engine, or even a product animation video.
Here’s the thing: Each use case has its own demands. Poly count, texture resolution, file type all of these shift depending on the final destination of the model. There’s no universal solution.
Mistake 5: Overlooking Revision & Delivery Policies
Clients rarely specify exactly where they intend to use the model.
Sometimes it’s for e-commerce product pages, other times for AR viewers, WebGL, Unreal or Unity engines, or even product animation videos.
Each of these requires its own setup—different poly counts, texture sizes, and file formats. So, you really need to ask them upfront, or you’ll end up guessing.
Conclusion:
To create lifelike 3D product models, you have to perfect every step of the process. Begin by making precise models, and make sure your UV mapping is clean. Set up your PBR materials so they really stand out, and pay close attention to realistic lighting. It truly makes a huge difference. Aim for top-notch renders and don’t rush the post-processing. When you handle each step well, your models turn out accurate and match industry standards. Plus, they’re ready for anything e-commerce, AR/VR, marketing, whatever you need. You’ll avoid extra fixes down the line and everything.
