How To Create A Cuneiform Artwork
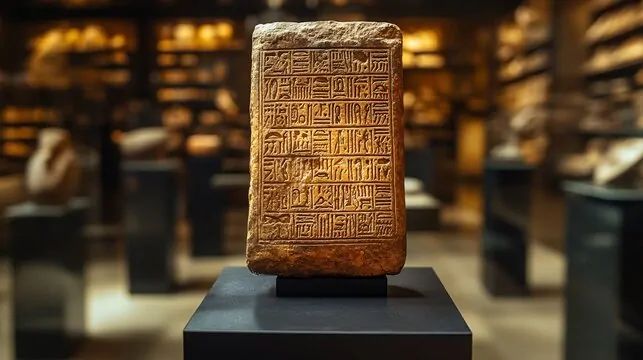
Cuneiform is one of the ancient writing systems, consisting of wedge-shaped markings pressed into clay. The earliest known writing was most likely created by the Sumerians, who lived in large towns with centralized economies in the region that is now southern Iraq and dates back to approximately 3000 B.C.E. The oldest tablets with written inscriptions are likely those from huge temple institutions, and they show the administrative task of monitoring the distribution of rations or the transportation and storage of products. The ancient cuneiform compositions, though started for documenting financial matters, continue to inspire the present generations of the digital world. Modern artists are creating alluring antique cuneiform pieces using digital tools, which are then used for various purposes like logos, product design, textures, and even backgrounds of images. Various digital tools and techniques can help to create digital cuneiform artworks that imitate the actual cuneiform compositions well enough to fascinate the viewers with their antique and historical charm. The following steps can help you create your own digital cuneiform artwork.
Step 1: Researching Ancient Cuneiform

Start by enlightening yourself with the history of cuneiform composing, its essence in ancient Mesopotamia civilization, and its development over time.
Gather an assortment of pictures of cuneiform tablets, engravings, and academic articles. Online databases, galleries, and educational websites can be amazing sources.
Concentrate on particular cuneiform characters or words that intrigued you. Be considerate of their shapes, sizes, and how they are constructed.
Check out how the wedge forms are shaped. Try understanding the angle, pressure, and spacing utilized by ancient scribes when shoving the stylus into clay.
Search for common designs and symbols within the cuneiform script. It will assist you in making your characters precisely and aesthetically.
Assemble your discoveries into a reference sheet. Incorporate outlines or printouts of the cuneiform characters you want to reproduce.
Research how modern artists have consolidated cuneiform into their work for more motivation.
Step 2: Software Choice
Decide whether you need to form a vector or raster design. That will facilitate you in selecting the most fitting program for your project.
Evaluate utilizing Adobe Illustrator or Inkscape in case you like working with scalable vector illustrations. These programs permit you to form neat lines and exact shapes.
If you need to work with photos and surfaces, select Adobe Photoshop or GIMP. These tools are fabulous for painting, drawing, and enhancing raster images.
For a more explicit practice, Procreate on the iPad could be a user-friendly application that permits you to draw instantly on the screen.
If you’re inquisitive about making 3D representations, consider utilizing Blender. that can assist you model cuneiform characters and imprint them onto virtual textures.
Before beginning, search for instructional exercises particular to the software you select. Acquaint yourself with its tools and highlights to boost your productivity.
Install your chosen software on your device, ensuring you have any essential updates and extensions to improve your workflow.
Step 3: Construct Initial Forms

Initiate the preferred digital tool and create a new project together with your wanted canvas size.
Acquaint yourself with the drawing apparatuses accessible within the program. If using vector programs, select the pen or shape tool, and for raster programs, choose the brush or pencil feature.
Begin by making fundamental wedge shapes that characterize cuneiform writing. Center on changing the size and angle to reflect genuine strokes.
Put your reference sheet closer to guarantee precision while you draw. Frequently compare your shapes with real cuneiform illustrations.
Make numerous layers for diverse characters or components. It will permit you to alter each component independently without influencing others.
Regularly save your work to avoid renouncing any progress. Utilize incremental save alternatives to preserve diverse stages of your work of art.
Step 4: Merging Basic Shapes

Begin by choosing the person wedge shapes you’ve made. Utilize the grouping option in your software to keep related components together.
Organize the grouped shapes to make whole cuneiform characters or words. Utilize guidelines or alignment apparatuses to guarantee appropriate dividing and arrangement.
As required, utilize transformation tools like rotate, scale, or skew to modify the shapes to fit the specified design and imitate genuine cuneiform arrangements.
If using a vector program, utilize the pathfinder or connect functions to blend overlapping shapes into a single cohesive character. For raster software, utilize layers to stack and blend shapes together.
Play with diverse character combinations and formats. That will permit you to explore different creative translations while keeping up the integrity of the cuneiform fashion.
Audit your combined shapes to guarantee they recall the conventional characteristics of cuneiform writing, keeping up consistency in size and stroke fashion.
After you are pleased with the arrangement, conclude each character by grouping them into bigger components or readying them for texturing in the next phase.
Step 5: Applying Textures

Select or make a texture that resembles clay, stone, or ancient materials. You’ll be able to find free surface pictures online or make your own utilizing a photo editing app.
Import the texture file into your project. If you’re utilizing vector software, you’ll have to convert it into a pattern or fill.
Place the surface layer above your cuneiform characters. Alter its size and orientation to conform to the shapes underneath.
Play with blending modes such as Overlay, Multiply, or Soft Light in your software to coordinate the surface together with your cuneiform artwork. It may have a more lifelike effect.
Utilize a layer mask to specifically apply the surface only to the regions of your cuneiform shapes, guaranteeing the fundamental design stays clear and sharp.
Adjust the opacity of the surface layer to attain the required grade of detail and subtlety. You need it to upgrade the artwork without overpowering the characters.
Once done with the surface, flatten the layers if fundamental, but don’t forget to keep a backup of the initial layers in case you need to do alterations afterward. It prepares your artwork for the coming step of applying depth impacts.
Step 6: Enhancing Depth

Select the layer, including your cuneiform characters and texture. Guarantee it is dynamic for altering.
Utilize the layer styles or effects feature in your program to apply an embellish or incline effect. It will make a raised or indented appearance, recreating the appearnce of engraved marks.
Alter the settings for depth, angle, and size to attain the specified level of prominence for the cuneiform characters. Try with diverse values to find what seems most convincing.
Include drop shadows to provide your characters with more profundity. Revise the angle, distance, and opacity of the shadow to upgrade the 3D impact. You can also include highlights for better contrast.
In the raster program, you’ll utilize blending choices to form shadows or highlights manually by sketching them in on separate layers. Soft brushes work satisfactorily for this pursuit.
Vary the opacity of the impacts and the texture to guarantee they blend well with the overall work of art. Aim for a natural impression that keeps up clarity.
Frequently preview your work to see how the profundity effects are associated with the general plan. Make any vital adjustments to guarantee the ultimate work of art satisfies your vision.
Step 7: Finals Review And Export

Thoroughly assess your cuneiform artwork and scan for any irregularities, arrangement issues, or zones that require improvement.
If required, make final changes to colors, surfaces, or depth impacts. Guarantee that all components conform well together.
In the event that you haven’t already, bunch or manage your layers for sounder administration. That will make it simpler to access particular components in prospective edits or adjustments.
Make sure your composition is at the fitting resolution for its aimed usage. In case it is for print, a least 300 DPI is prescribed. Likewise, in web use, 72 DPI is typically adequate.
Select the proper export settings based on where you want to use the artwork. In case of web use, consider exporting PNG or JPEG, and for vector use, SVG or PDF formats are excellent.
Export the ultimate form of your artwork and review the output file to guarantee it looks as anticipated.
Conclusion
Overall, cuneiform is a very significant part of history for a variety of reasons. It has influenced how archaeologists view literature, history, religion, and human behaviour. The significance of cuneiform is still being discovered today, as fresh interpretations and historical ideas are developed based on this crucial piece of evidence. Additionally, as we discussed earlier, modern artists, in their artworks and illustrations, are also integrating cuneiform themes. Due to cuneiform’s ancient charm, these digital versions are equally appealing to a wide range of audiences, reviving the culture and traditions of a bygone period and making one wonder about the unseen past.
