How To Create Light Painting Photos
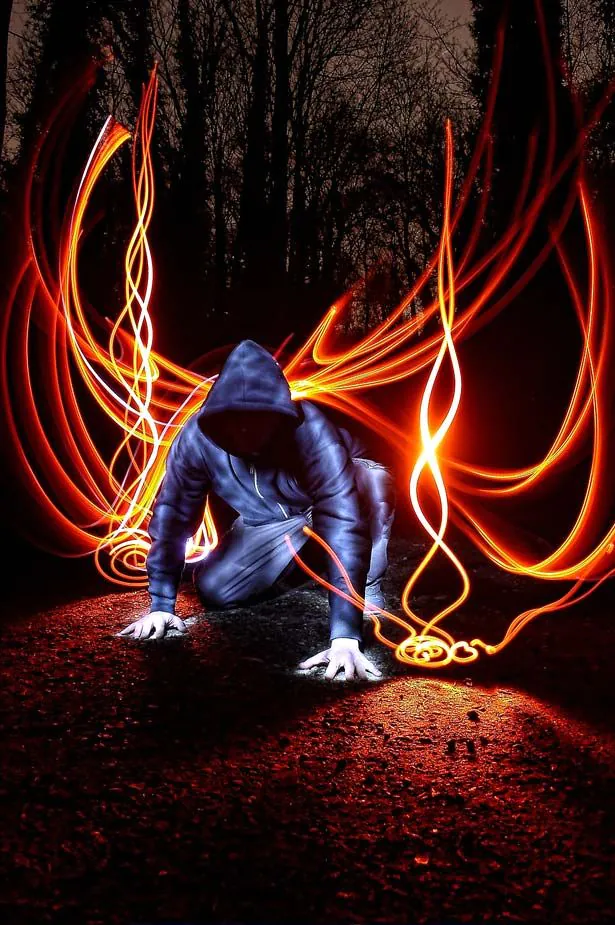
Light painting has a knack for producing an atmosphere of sparkling charm and enigmatic fancy in your images by depending just on the varied intensity of light from different sources. By controlling the movement of light to illuminate a thing, person, or background details, photographers can capture ethereal, mystical, and artistically striking photographs through a careful selection of color and light manipulation. To capture a light painting shot, a photographer mounts the camera on a tripod and uses a lengthy exposure period, which can range from a few seconds to several minutes. Additionally, the use of various light sources like flashlights, LED lights, or sparklers creates wondrous light streaks, patterns, or shapes. During the lengthy exposure, the interplay of light and time results in unique and visually arresting images. Anyhow Light-painted images depend on not only the capture of the initial image but also its enhancement and tune-up through post-processing. Here’s how to edit light painting photographs step by step:
Step 1: Importing and Selecting the Magical Image
The first step in editing light painting photos is to import and select the image that embodies the magic captured through the captivating light trails. This initial stage sets the foundation for the editing process, allowing you to bring out the full potential of the light painting masterpiece.
First, open your preferred editing software and import the chosen light painting photo. Take a moment to appreciate the ethereal beauty captured in the image—every streak of light, every illuminated detail telling its own story. Carefully select the image that best represents the essence of your creative vision.
Step 2: Adjusting Basic Settings for the Perfect Tone
After importing and selecting the mesmerizing light painting image, it’s time to embark on the journey of refining its overall tone. In this crucial step, you’ll adjust the basic settings to achieve the perfect balance and enhance the visual impact of the photograph.
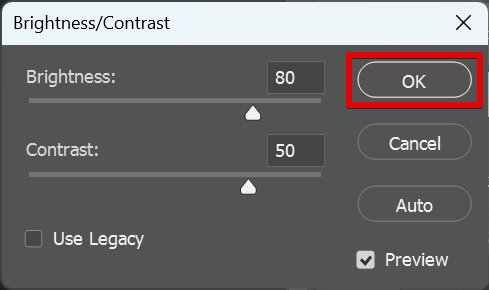
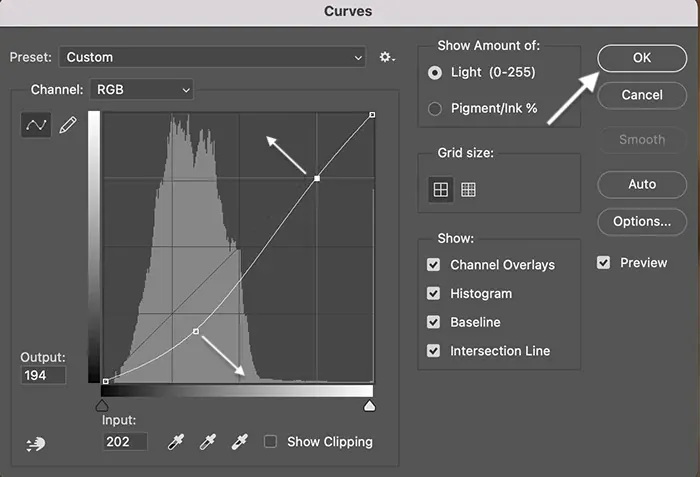
Begin by assessing the exposure and brightness levels. Adjust the exposure slider or curves to ensure the image retains the desired brightness level without sacrificing details in the light trails or other elements. Fine-tune the contrast to add depth and make the light painting pop.
Next, focus on the highlights and shadows. You can strike the right balance with careful adjustments, preserving the delicate details in the brightest areas while ensuring the shadows retain depth and dimension. Make subtle tweaks to the whites and blacks, refining the tonal range for a harmonious overall appearance.
Throughout this process, aim to maintain the integrity of the light painting effect. Keep a keen eye on the balance between light and dark, ensuring that the chosen adjustments enhance the enchanting qualities of the image without overwhelming its inherent magic.
Step 3: Fine-tuning the Vibrancy and Mood
With the basic settings adjusted, it’s time to infuse the light painting photo with the perfect vibrancy and mood. This step allows you to enhance further the colors and atmosphere captured within the image, creating a visually captivating and emotionally evocative result.
Begin by adjusting the color temperature to set the desired mood. Experiment with warmer tones to create a cozy and inviting ambiance or cooler tones for a more ethereal and mysterious feel. Find the balance that resonates with the emotions you want to convey through the light painting.
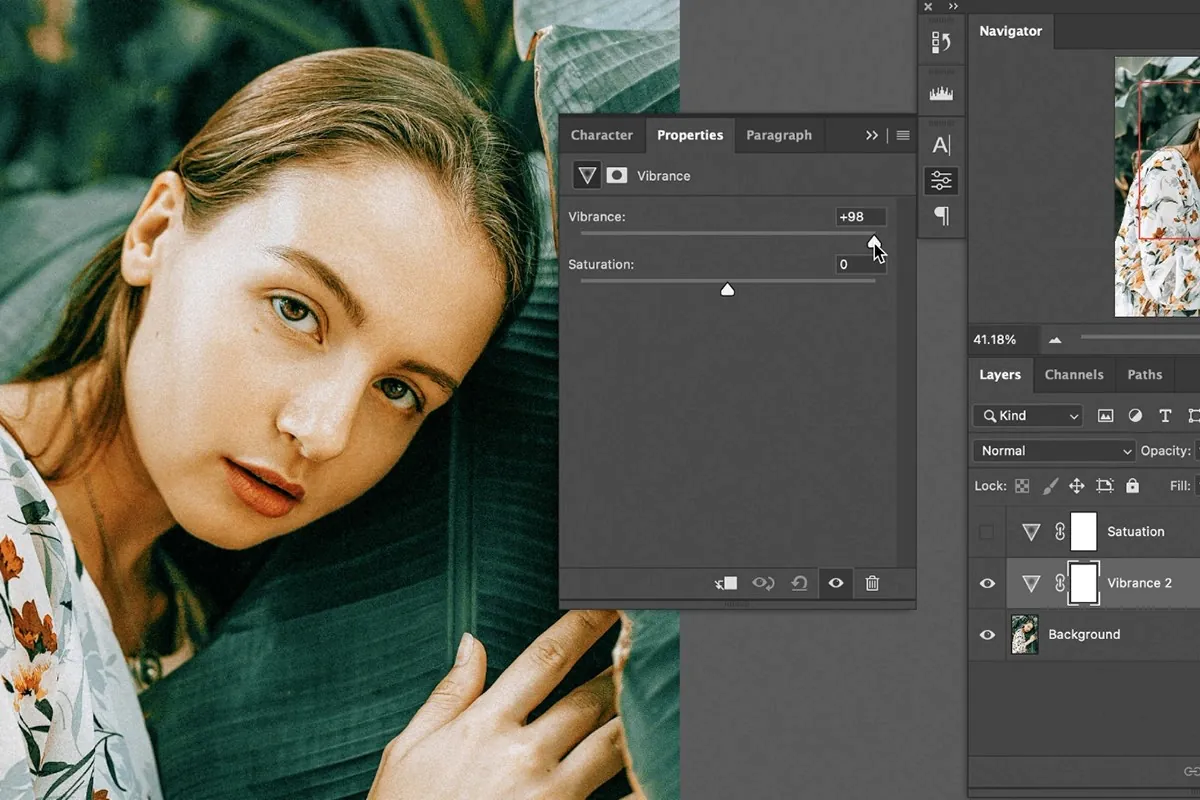
Next, fine-tune the saturation and vibrance of the colors. Carefully enhance the vibrancy of the light trails, bringing out their inherent beauty without overwhelming the composition. Be mindful of preserving the natural tones in the rest of the image, allowing the light painting to take center stage.
Consider using selective adjustments or adjustment brushes to target specific areas. By selectively enhancing certain colors or details, you can further amplify the impact and visual interest of the light painting.
Throughout this step, remember the story you want the image to tell. Use color adjustments to evoke the desired emotions, whether a sense of wonder, excitement, or tranquillity. Strive to achieve a harmonious and balanced color palette that enhances the overall impact of the light painting photo.
Step 4: Enhancing Contrast and Bringing Light Trails to Life
Adjust the contrast to strike the right balance between the light trails and the surrounding elements. Increase the contrast to make the light trails stand out, accentuating their ethereal glow. Be cautious about doing it sparingly, as excessive contrast can lead to losing details or introducing artifacts.
Next, explore techniques to enhance the details within the light trails. Consider using the clarity slider or local adjustments to bring out the intricate textures and nuances of the light painting. By selectively emphasizing the details, you can amplify the mesmerizing qualities of the image.
Keep a watchful eye on the overall composition, ensuring that the enhanced contrast and details complement the light painting rather than overshadow it. Strive for a harmonious balance that allows the light trails to take center stage while maintaining a cohesive visual experience.
Throughout this step, remember to preserve the integrity and magic of the original light painting. The goal is to enhance the impact and bring out the best in the captivating light trails, capturing the viewer’s attention and leaving them in awe of the luminous beauty within the image.
Step 5: Dodge and Burn Techniques for Dimension

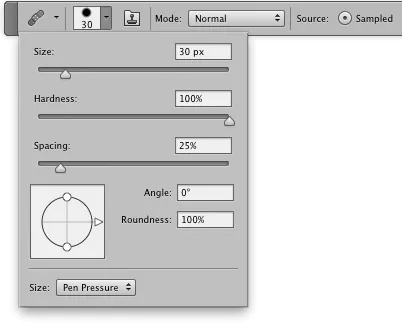
Employ dodge and burn techniques to add dimension and depth to your light painting photo. You can selectively brighten and darken specific areas to guide the viewer’s attention and create a more dynamic visual experience.
Begin by using the dodge tool to brighten areas that require emphasis gently. That can include the brightest parts of the light trails or the main subject within the composition. By subtly increasing the exposure in these areas, you draw the viewer’s gaze and add a sense of luminosity to the image.
Next, utilize the burn tool to darken and add depth to other areas. That can involve deepening shadows or reducing the exposure in less essential parts of the photograph. By doing so, you create a contrast between light and dark, further enhancing the three-dimensional feel of the light painting.
Exercise caution when applying dodge and burn techniques, as subtle adjustments are often more effective than drastic changes. Pay close attention to the overall balance and ensure that manipulating light and shadow enhances the image’s mood and storytelling.
Step 6: Removing Unwanted Elements from the Light Painting Scene
In this crucial step, you will focus on removing any unwanted elements that may have inadvertently found their way into the light painting scene.
Start using the spot healing brush or clone stamp tool to eliminate distracting objects or blemishes. Carefully select areas needing attention and clone or heal them with nearby pixels to seamlessly blend the corrections into the surrounding environment.
Take special care when removing unwanted elements from the light trails themselves. Preserve the integrity of the original light painting by removing only factors that disrupt the overall composition or detract from the captivating effect.
Remember to zoom in and review your edits pixel-level to ensure a flawless outcome. Pay attention to details and make necessary adjustments to maintain the natural flow and continuity of the light trails.
Step 7: Applying Creative Effects to Elevate the Magic
Play with various creative filters or presets specifically designed for light painting photography. These can add dreamy atmospheres, ethereal glows, or otherworldly textures that complement the already captivating light trails.
Consider adding vignettes to draw focus to the center of the frame and create a sense of depth. Softening or blurring certain areas can enhance the overall ethereal ambiance, allowing the light painting to stand out more prominently.
Feel free to explore other creative possibilities, such as adding light leaks, bokeh effects, or even playing with double exposures. Each effect should harmonize with the original light painting and contribute to the overall narrative or mood you wish to convey.
As you apply creative effects, remember to strike a balance that enhances the image without overwhelming or overshadowing the core magic of the light painting itself. Each effect should be a compliment, further accentuating the visual impact and improving the viewer’s experience.
Step 8: Polishing and Perfecting the Artwork
Carefully review the image and make any necessary adjustments to fine-tune the tonal range, colors, and overall composition. Pay attention to small details and ensure everything aligns with your artistic vision.
Consider performing a final check for any distractions or imperfections that may have been missed in previous steps. Use spot healing tools or clone stamp techniques to eliminate blemishes or sensor dust spots.
Evaluate the overall balance and coherence of the light painting photo. Make subtle adjustments to highlight the key elements, refine the contrast, or enhance the details to ensure they align with your original intention.
Before finalizing, view the image to ensure it conveys the desired mood and captures the essence of the magical light trails.
Once satisfied, save your resultant image in the desired format and resolution. Consider creating multiple versions for different purposes, such as web sharing or printing.
Conclusion
In sum, light painting is a photographic technique that focuses on the beauty of different light intensities. The subsequent effects of manipulating light are striking patterns and streaks that convey a dream-like impression to your images. Combining light painting shooting skills like exposure control, camera sensor, light source distance, etc., with editing techniques, you can dexterously correct technical imperfections and give your photos a more professional touch. So your images will have an overall improved and polished outlook, making them more accessible for presentation or publication.
