
How To Create Levitation Photography Images
Levitation photography creates images that give off the illusion of subjects defying gravity and floating in the air. Levitation images inspire awe and curiosity by arousing emotions, giving viewers a solid aesthetic aura. As per their unusual nature, levitation images express etherealism, turning ordinary images into otherworldly spectacles. However, levitation photography is not all about displaying the individuals or objects subjected in mid-air; it also demands a convincing integration of the subject and the background so that with a fantastic combo of levitation techniques and creative skills, you can exude a persuasive yet imaginative look to your images. The enchanting world of levitation photography doesn’t solely rely on capturing levitation-setting shots directly from the camera. It is also possible to convert simple photographs into levitation using advanced software tools. You can create levitation by selecting and isolating a subject from a picture, removing all supporting elements, and then setting the subject into another image having the desired background. Using editing techniques and following basic steps, you can metamorphose your images into levitation images that challenge sanity.
Step 1: Image Import
Launch your preferred photo editing software (e.g., Adobe Photoshop).
Choose a high-resolution image suitable for the levitation effect.
Select an image featuring a subject in a pose that could be transformed into a floating position.
Opt for a plain background or a background that contrasts nicely with the subject for easier editing.
Ensure the image has enough detail to achieve a realistic levitation effect.
Import the chosen image into the editing software, ready to transform the subject’s pose into an enchanting levitation scene.
Step 2: Duplication and Preparation
Duplicate the original image to create a working copy for editing while preserving the integrity of the original.
Prepare the duplicated image by making necessary adjustments to enhance its overall appearance.
To refine the image, perform basic edits, such as adjusting brightness, contrast, and color balance.
Remove any imperfections or distractions from the duplicated image, focusing solely on the subject’s levitation transformation.
By duplicating and preparing the image, you ensure a safe space for experimentation and creativity without altering the original.
This step sets the stage for the subsequent transformation, where you’ll turn the static pose into a captivating levitation scene while retaining the flexibility to revert to the untouched original if needed.
Step 3: Subject Selection
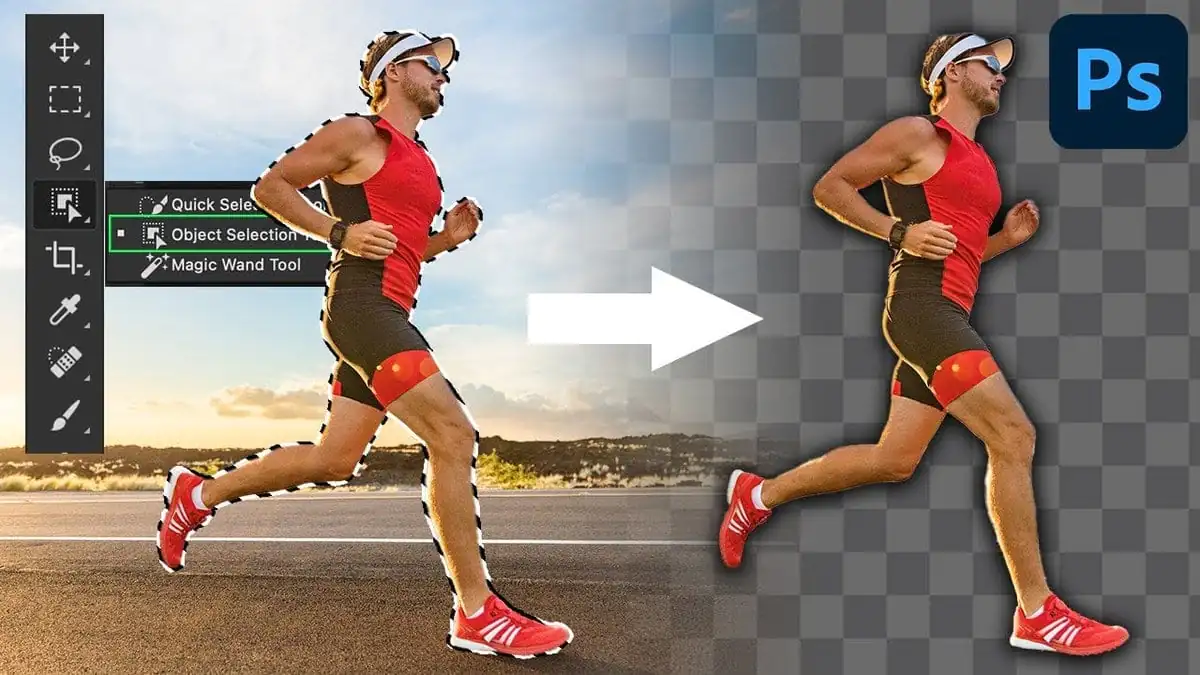
Use precise selection tools in your photo editing software, such as the Pen or Lasso tools, to isolate the subject from the background carefully.
Pay close attention to details, ensuring a well-defined selection that includes all the subject’s edges and intricate features.
The success of the levitation effect relies on the accuracy of this selection, so take your time to achieve the desired result.
Ensure no unwanted elements or distractions are included in the selection that may compromise the levitation illusion.
Once you’ve selected the subject, proceed to the following steps, where you’ll create the illusion of levitation by blending the subject into a floating position.
Remember that precision and attention to detail during subject selection contribute significantly to the overall realism and impact of the final levitation photography image.
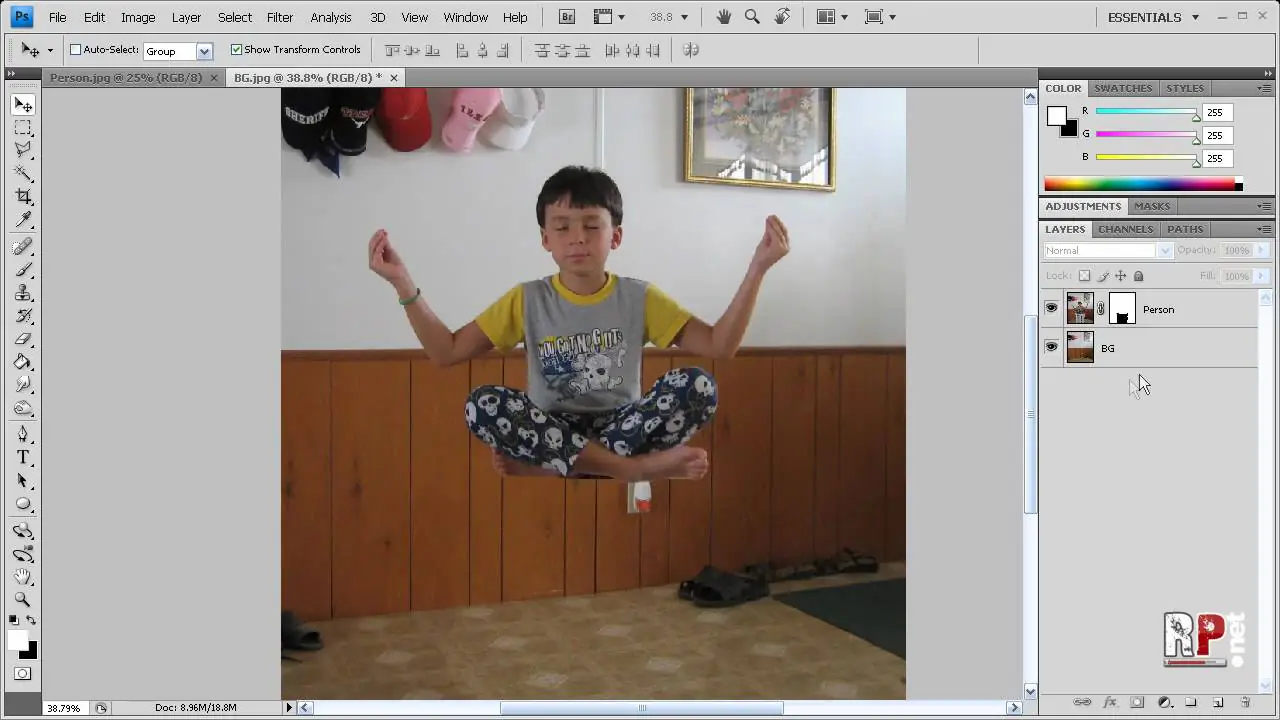
Step 4: Layer Masking and Levitation Effect

Add a layer mask to the duplicated image layer, allowing you to reveal or hide parts of the subject and create the illusion of levitation.
Carefully apply the layer mask to hide any supporting elements, making it appear that the subject is floating or defying gravity.
Pay special attention to refining the mask around the subject’s edges and intricate areas to achieve an immaculate blend with the background.
Experiment with different brush sizes and opacities while refining the mask for precise control over the levitation effect.
As you work on the layer mask, continuously review the overall composition to ensure the levitation effect appears natural and visually captivating.
With the successful application of the layer mask, your subject should now appear floating in the image, ready for further adjustments and enhancements in the subsequent steps.
Step 5: Artistic Repositioning and Floating Pose
Utilize the Move tool in your photo editing software to artistically reposition the subject and create the illusion of floating.
Experiment with various positions and angles to find the most visually compelling levitation pose.
Pay attention to the subject’s body posture and positioning to ensure a natural and captivating floating effect.
Consider the composition and balance of the overall image as you position the subject, considering the background and any other elements present.
To enhance the levitation illusion, slightly tilt or angle the subject, simulating the dynamics of floating in mid-air.
Refine the subject’s placement until you achieve a result that evokes a sense of wonder and magic in the levitation photography image.
Step 6: Mask Refinement and Seamless Integration
With the subject in the desired floating position, carefully refine the layer mask to blend the levitating subject with the background seamlessly.
Use a soft brush with varying opacities to smooth out any remaining harsh edges, ensuring a natural and convincing levitation effect.
Pay close attention to areas where the subject interacts with the background, such as shadows or reflections, to achieve a harmonious integration.
Continuously zoom in and assess the fine details to achieve a flawless transition between the subject and the surrounding elements.
Take time to meticulously refine the mask, as this step significantly impacts the levitation photography image’s overall realism and artistic quality.
Strive for a coherent and enchanting final result where the subject appears effortlessly floating in a world of imagination and wonder.
By achieving a seamless integration, you breathe life into the levitation concept, leaving viewers captivated by the magic captured within the image.
Step 7: Enhanced Realism
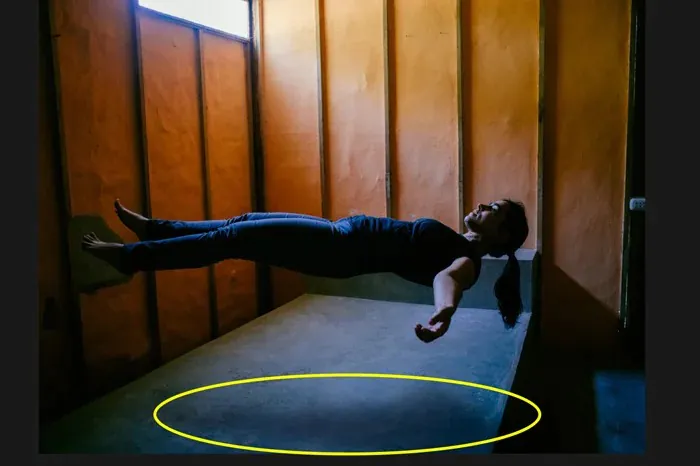
Consider incorporating a subtle shadow beneath the levitating subject for an added touch of realism.
Create a new layer beneath the subject’s layer and paint the shadow with a soft brush with low opacity.
Position the shadow to match the direction and intensity of the light source in the image.
Adjust the shadow’s opacity to achieve a natural and believable effect, making the subject’s levitation appear grounded in the environment.
Refrain from overemphasizing the shadow, ensuring it complements the levitation effect without overpowering the overall composition.
The addition of shadows adds depth and dimension, enhancing the illusion of the subject’s weightlessness in the levitation photography image.
While optional, this step can significantly enhance the realism of the levitation effect, captivating viewers with a sense of wonder and awe.
Step 8: Color Harmony and Lighting
In this step, focus on achieving a harmonious blend of colors and lighting between the levitating subject and the background.
Ensure the subject’s color tones complement the surrounding environment, maintaining a consistent atmosphere in the image.
Set the brightness, contrast, and saturation of the subject and background layers to achieve a unified visual appeal.
Pay attention to the direction and intensity of light sources, ensuring the subject’s lighting aligns naturally with the background’s lighting conditions.
Consider using adjustment layers or filters to refine color tones and lighting, seamlessly integrating the levitating subject into the scene.
Strive for a cohesive and balanced image where the levitation effect appears as an organic and captivating part of the overall composition.
A well-executed color harmony and lighting enhancement elevate the levitation photography’s visual impact, evoking the viewer’s emotions and curiosity.
Step 9: Creative Polishing
In this final step, fine-tune the overall composition to achieve a polished and visually compelling levitation photography image.
Review the entire artwork, ensuring that all elements, including subject placement, lighting, and color, harmoniously come together.
Make additional adjustments to refine the levitation effect and enhance the image’s aesthetics.
Adjust the contrast and brightness to add depth and emphasize the subject’s levitating pose.
Experiment with creative filters or effects to add a unique touch or mood to the image, aligning with your artistic vision.
Continuously assess the image from different perspectives, seeking to create a captivating visual narrative that captivates and intrigues viewers.
Trust your artistic instincts and creativity, allowing yourself to explore different possibilities and expressions in the final composition.
With careful attention to detail and a touch of artistic finesse, the levitation photography image comes alive with enchanting magic and storytelling.
Step 10: Final Touches and Reflection
Make any last-minute adjustments to ensure the image aligns with your artistic vision and conveys the intended message.
Seek feedback from peers or fellow artists to gain valuable insights and perspectives on your work.
Embrace constructive criticism and use it to refine and elevate the image further.
Consider experimenting with different cropping options to find the most impactful composition.
Save your final masterpiece in the desired file format, preserving the culmination of your artistic endeavors.
Take pride in your achievement and use this experience to inspire and challenge yourself in future creative projects.
Reflect on the entire process, appreciating the growth and learning throughout creating a captivating levitation photography image.
Conclusion
Levitation photography is such a mysterious art form that defies rationality bounds, taking you beyond regular or traditional photographic concepts. Views of floating items in levitation images ignite stupor and hypnotism in the minds and hearts of those who see them. Through digital software, you can bring the levitation effect to ordinary photos into levitation photographs where dreams intervene with reality, venturing minds far off from known towards captivating beauties of insanity. For precise instructions to use digital tools for levitation effects, you can follow the steps mentioned above and imbue accuracy and fineness to your edited levitation photography images.
