How To Create Fisheye Lens Effect
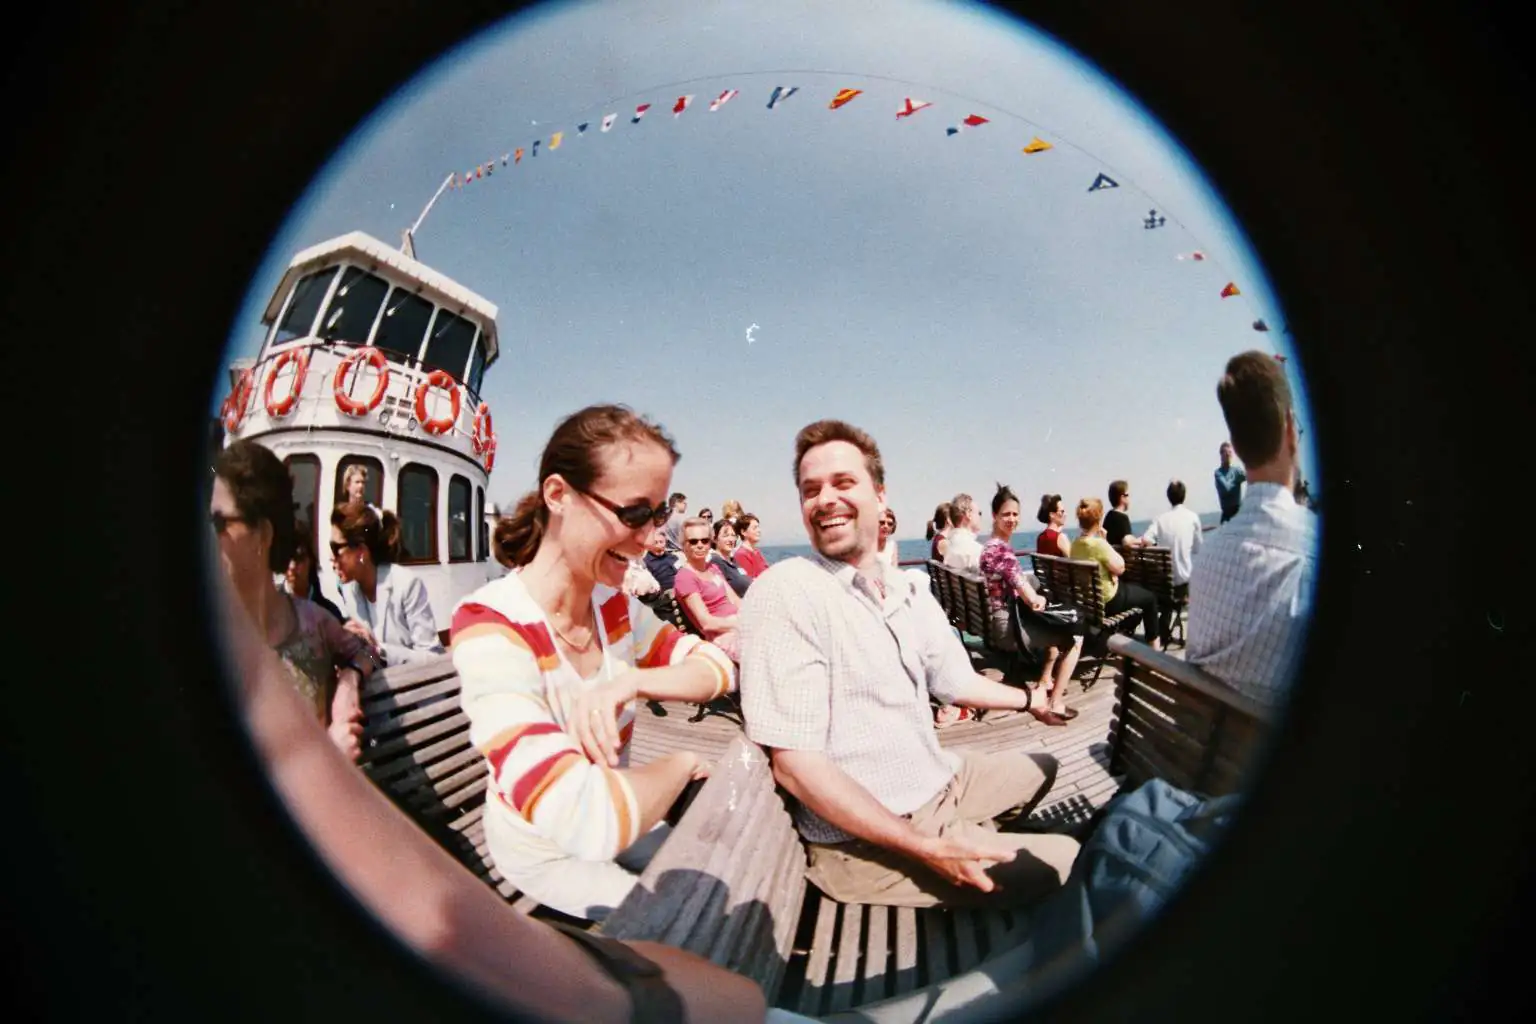
The fisheye lens effect brings about distinctive wide-angle aberrations and distortions in images. The lens’s unique construction allows it to shoot a large field of view while twisting straight lines inwardly to create a particular curved look. Fisheye lenses are extensively recognized in photography for their tendency to shoot immersive and sweeping scenes. For images already captured with ordinary lenses or if specific fisheye lenses and apparatus are unavailable, the advanced photo editing tools also offer unique features, including filters and effects that can induce the fisheye lens effect in every shot. You just need to be proficient and creative enough to play with various image manipulation highlights related explicitly to distortions, and you can compose unique visuals with innovative additions that are more appealing than their original versions. The following is a detailed description of steps to take when applying the fisheye effect to an image:
Step 1: Image Import
Launch the photo editing program on your computer, initiating the altering process.
Get to the file menu inside the program interface, which serves as the portal to different functions.
Coordinate your attention to the top of the interface, finding the “File” menu for foundational operations.
In the “File” menu, choose the function that allows opening or importing image files.
A subsequent window rises, inciting you to explore the exact directory lodging your desired picture file.
Affirm your selection by executing the ultimate step and clicking the designated “Open” or “Import” button.
The software will respond to the command, loading and displaying your chosen picture inside its editing workspace.
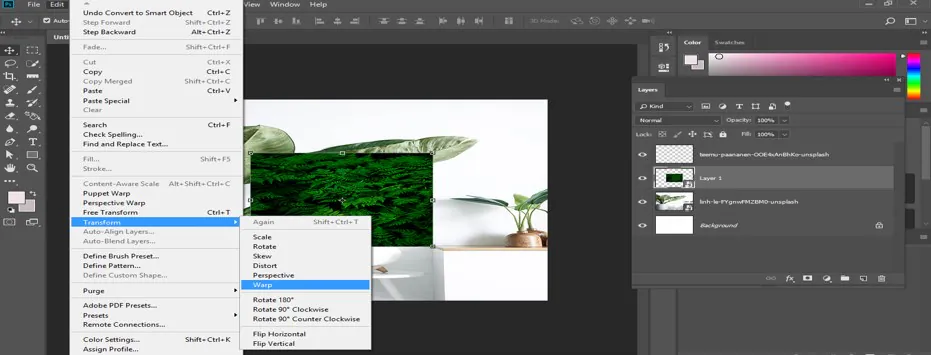
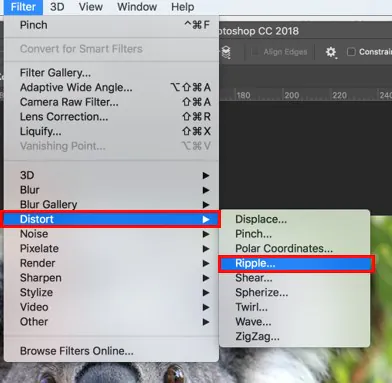
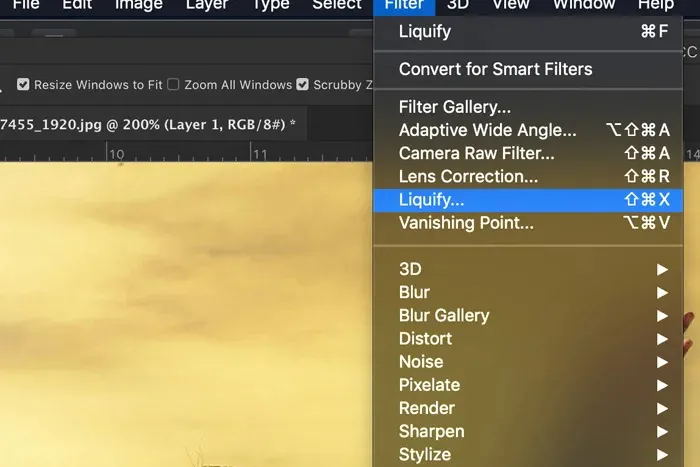
Step 2: Distortion Option Selection
Within the second step, analyze the intricacies of your chosen image editing program to control the visual characteristics of your picture.
Browse the software’s menu options at the top of the interface to find the specialized distortion or warp tool.
On occasion, this tool is labeled as “Lens Distortion,” “Warp,” or “Fisheye” within the software’s array of highlights.
This tool is the portal to changing your image, permitting you to bend and reshape its components.
Upon finding the distortion options, concentrate on the pivotal task of adjusting its settings in the consequent step.
The settings control imperative parameters such as intensity, curvature radius, and flow, which act as the levers of control for the fisheye impact.
This step is significant in fitting the visual impact of the distortion with your creative vision.
With these settings, you gain the power to determine the effectiveness and characteristics of the fisheye effect, subsequently influencing the general style of your image.
Step 3: The Parameter Modification
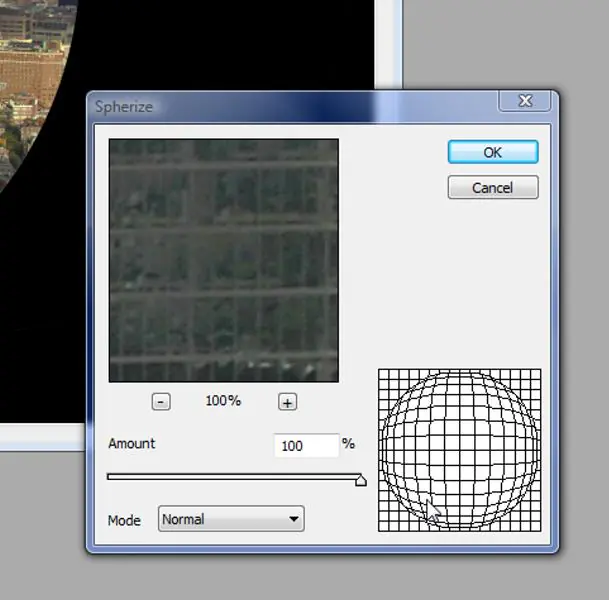
In this step, you need to regulate your chosen distortion tool settings for exact control over the fisheye effect in your picture.
Find out parameters such as intensity, radius, and curvature inside the tool’s interface, as these determine the degree and nature of the distortion.
The intensity setting decides the effectiveness of the fisheye effect, impacting how pronounced the curvature shows up in your composition.
Radius alterations influence the spread of the distortion from the central point, permitting you to tailor the reach of the fisheye impact.
Curvature, another critical parameter, impacts the overall shape of the distortion, empowering you to attain particular visual results.
Try with these settings to strike the proper harmony so that the fisheye effect matches your creative notion.
Accuracy in altering these parameters is vital, as it directly impacts the interesting visual character the fisheye effect gives to your composition.
This step customizes the distortion’s characteristics, making a typical shot into an inventively improved artwork.
Step 4: The Central Point Identification
Continue to emphasize the fisheye effect on a particular central point inside your photo.
Recognize the central component that will serve as the beginning of the distortion so that it adjusts with your inventive aim.
This central point is where the fisheye effect will exude, impacting the entire composition and visual symmetry.
Accurate centering is significant for achieving an agreeable and enjoyable result because it manages how the distortions interrelate with the image’s components.
Confirm that the chosen central point resounds with your composition’s general story or visual accentuation.
The distortion’s center holds a significant position in directing the viewer’s consideration and upgrading the overall effect of the fisheye effect.
Take a minute to assess the arrangement and consider how the targeted distortion contributes to the specified visual narrating or expression.
Step 5: The Distortion Application
Having centered the fisheye impact, continue to apply the distortion to your photo inside the software.
Find the function or button assigned for applying the distortion impact, often found in the same menu as the tool.
Execute the application, activating the change in your photograph and agreeing to the balanced distortion settings.
Depending on the program, this may include a straightforward button tap or an intuitive process of dragging sliders to control the application intensity.
The application stage is where the carefully designed distortion settings come to life, shaping the whole visual effect of the fisheye artwork.
Be mindful of the prompt changes happening in your picture, permitting you to survey the beginning result of the connected fisheye impact.
This step speaks to the summit of your inventive choices, as the distortion gets to be a fundamental portion of the picture composition.
Step 6: The Final Fine Tuning
Acutely assess the result and head to regulate the distortion further if required.
Explore the accessible refinement tools or choices inside the software to form exact modifications to the distortion’s characteristics.
Some tools also include sliders, numerical inputs, or extra settings that are to tune parameters like intensity, radius, or curvature post-application.
The precise calibration is fundamental for accomplishing an outwardly harmonious and aesthetically pleasing fisheye effect that fits with your inventive idea.
Concentrate on subtle elements and unobtrusive subtleties, considering how alterations affect the entire composition and visual aspect of the composition.
Take the time to play with distinctive alterations, finding the ideal equilibrium between distortion and the image’s unique components.
Fine-tuning can primely distill the fisheye impact, lifting your altered composition’s visual effect and coherence.
Step 7: Image Export and Sharing
This conclusion step is about saving your final composition utilizing the image editing software’s save function.
Go to the software’s “File” menu or its identical, where you’ll discover alternatives for saving or exporting your altered composition.
Select a suitable file format based on your intended usage, such as JPEG or PNG, considering variables like picture quality and record estimate.
Select a destination folder on your PC where you need to store the edited image, guaranteeing it’s effortlessly accessible for future utilization.
Give a pertinent and descriptive filename, supporting identification and organization within your file storage framework.
Affirm your save settings and execute the save command, finalizing the process of protecting your image with the fisheye effect.
The saved picture presently typifies the outwardly captivating fisheye effect, ready for presentation or encourage inventive endeavors.
Conclusion
The fisheye lens effect, a unique addition, can be valuable to remodel photographs, particularly those related to sports or action scenes, raising their vibrancy. The deliberate distortions can take images away from traditional polished and formal compositions, adding a sense of energy and excitement. For realistic architects, promoters, or anybody interested in visual communication, the fisheye effect is a powerful tool to grab the viewer’s attention and create a persuasive visual. For realistic architects, promoters, or anybody interested in visual communication, the fisheye effect is a beneficial technique to flaunt their designs or products in an innovative and dazzling way.
