How To Create Dark Fantasy Art In Photoshop
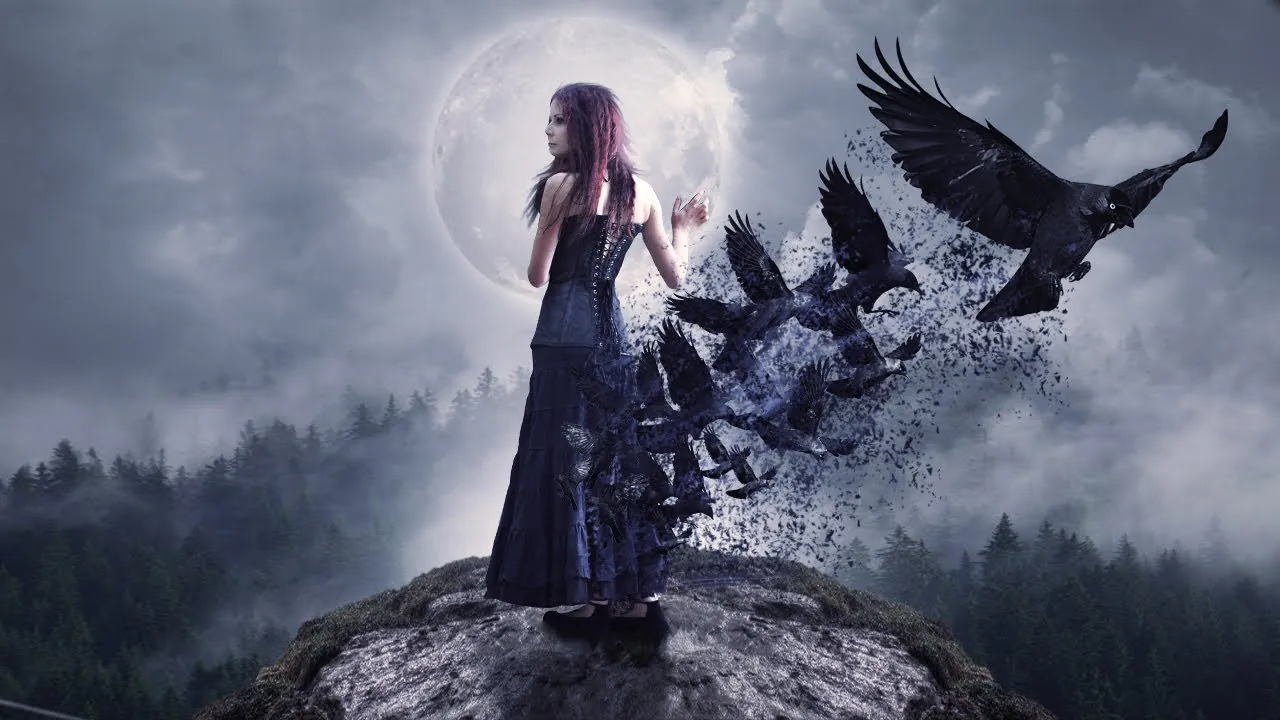
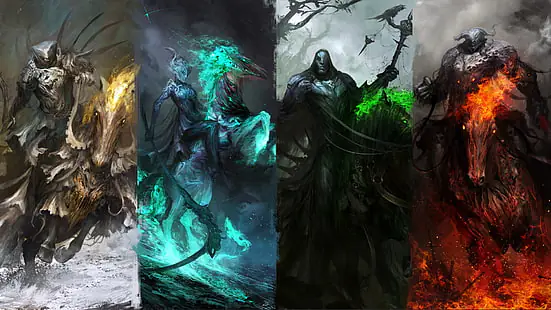
Dark fantasy art is a gloomy and dreadful setting that puts on show the darkest aspects of human imagination. Other features of this art encompass scenes of otherworldly charms, senses of apprehension, and supernaturalism. It also includes elements like gothic architecture, mythical creatures, misty, eerie landscapes, and many more. Dark fantasy art compositions provoke mystery and fantasy lovers to indulge in the magical aroma of ghostly and evocative imagery that addresses human perception’s dark and serene realms. The central manipulation technique involved in this supernatural art is the lights and shadows interplay, which is skillfully modified to stimulate nightmarish emotions and take the souls into dark yet calming, peaceful fantasies. Various software options can be employed to create dark fantasy art, including Adobe Photoshop, Corel Painter, Procreate, and Clip Studio Paint, each with its strategies for light-shadow adjustments. This blog will present the inclusive steps and manipulation approaches to make fantastic dark fantasy art. We will use Adobe Photoshop as a primary tool for a more comprehensive process.
Step 1: Invent Your Themes
Decide on a clear theme for creating inspiring dark fantasy art. Invest some time to engross yourself in the feel of that world you intend to represent. Consider the spooky settings, odd individuals, and supernatural themes that will characterize your work. Construct a mental image of the mood, emotions, and chronicle you wish to portray.
Draw your concepts on paper or a digital canvas to solidify your vision. You don’t need to spend much time on this initial structure; capture the core details. Consider the composition, character, object placement, and the artwork’s overall layout.
Seek references such as photos, artwork, or text corresponding to your dark art theme. These references can be a source of inspiration and guidance as you move forward.
Step 2: Position Your Canvas

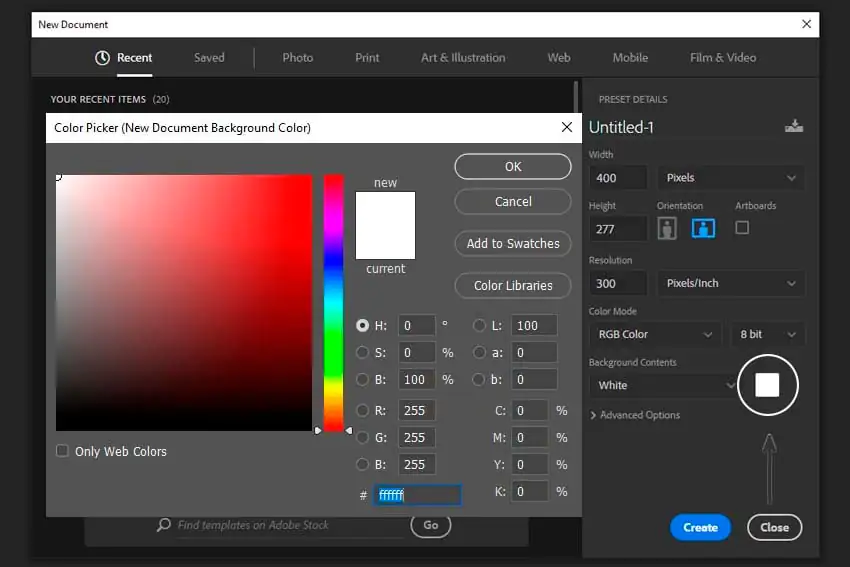
Figure the size of your canvas. Evaluate how much detail you want in your artwork. A larger canvas allows for more elaborate work, but a smaller canvas may be appropriate for a faster production.
Select a resolution that fits your idealized result. Higher resolutions are prime for prints, while digital sharing works reasonably well in lower resolutions.
If your artwork is meant for digital display, use RGB color mode; otherwise, use CMYK for print. RGB provides a spacious range of colors for digital screens, whereas CMYK is better suited for efficient printing.
Choose between a translucent backdrop and an initial background color. This decision can be affected by whether you propose to add a specific background later.
Organize your canvas with layers. Create separate layers for the background, characters, and any additional elements you plan to include. This layer structure will make it convenient to work on different aspects of your artwork.
Step 3: Uphold the Background and Surrounding
In this phase, you have to create a dark art backdrop. Based on your imagination, it can be a foggy woodland, a lonesome castle, or a frightening extraterrestrial environment. Set the mood with brushes, textures, and color tweaks.
Reckon the amount of light in your scene. Stark contrasts between light and shade are common in dark fantasy. Correctly positioning light sources and calculating how they communicate with the environment can instill a sense of depth and mystery.
Check out adjustment layers in Photoshop to fine-tune the overall feel of the background. Levels, curves, and color balance can all help you achieve the ideal look and atmosphere.
Browse blending options for a smoother blend of your backdrop items. Overlay, multiply, and screen modes can be exceptionally advantageous in attaining your desired final result.
Augment textures and details to perfect the realism and depth of your background. You can add foliage, rocks, or architectural elements depending on your setting.
Step 4: Design Your Dark Art Figures
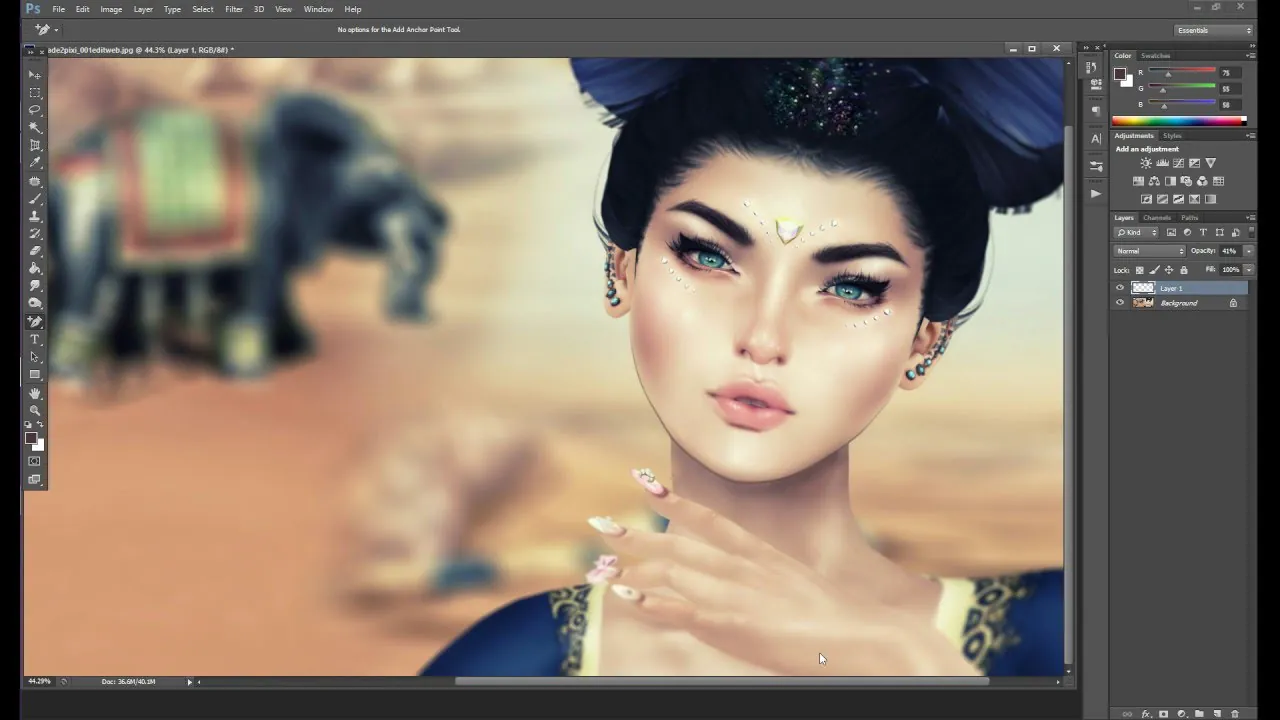
Figure out the personalities, roles, and backstories of your characters. Are they protagonists, anti-heroes, or bandits? What role do they play in your dark fantasy existence?
Draw preliminary shapes of your characters with pen and pencil tools, focusing keen attention on their positions and proportions. Play with various places and expressions to catch those figures’ spirits.
Design their outfits to fit the dark fantasy theme. Photoshop’s selection tools can help design detailed costumes, while layer styles and blending modes can add texture and depth to clothing.
Use brush and pen tools to express faces and trace strokes. A character’s face is the window to their emotions, and you can create a feeling of fear, mystery, or seduction with accurate details.
Focus on anatomical exactitude using Photoshop’s measurement and mesh tools. These tools work for correcting proportions. Layer masks and adjustment layers can be used to refine anatomical details.
Make sure your characters match in with the background. To achieve a symphony, use layer masks and lighting effects.
Step 5: Manipulate Light and Shadow Settings
Find out where your existing light sources are in the scene. Look for ways to add multiple light sources to create complex and attractive lighting effects.
Produce individual layers for shadows and highlights to conform and fine-tune independently.
Use a soft brush for smooth shifts between light and shadow. Play with blending modes like Overlay, Multiply, and Screen to attain distant lighting effects.
Set the opacity and flow of your brush to direct the level of your lighting and shadowing. Low levels create mild effects, while increased levels are more dramatic.
Keep up the consistency in your lighting course all through the craftsmanship. Consider how it impacts the temperament and character of your scene.
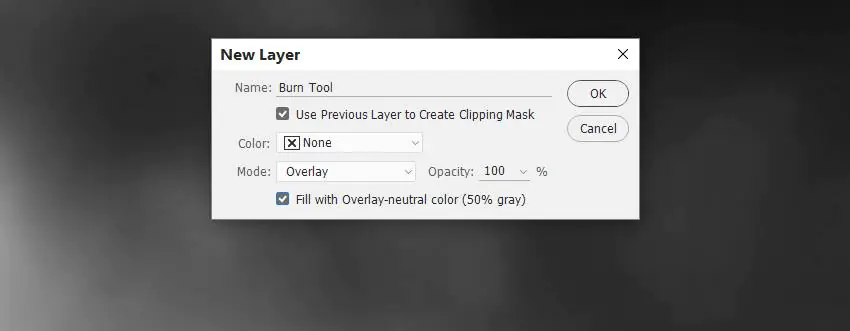
Persistently refine your highlights and shadows to attain the required profundity and authenticity. Dodge and Burn tools can be supportive for fine-tuning.
Include glow or atmosphere effects around light sources to upgrade the climate and draw enthrallment to critical components.
Coordinate light with surrounding components like fog or mist to raise profundity and enigma.
Step 6: Use Texture Modifications
Aim at surrounding points of interest like foliage, rocks, or structural components. Photoshop brushes can help you add natural-looking surfaces.
Be attentive to the character’s subtle aspects. Upgrade clothing and extras with texture manipulations and refine facial highlights for more authenticity.
Try the texture overlays option. Insert textures to specific components, such as dividers or clothing, trying blending modes and layer masks to control their levels.
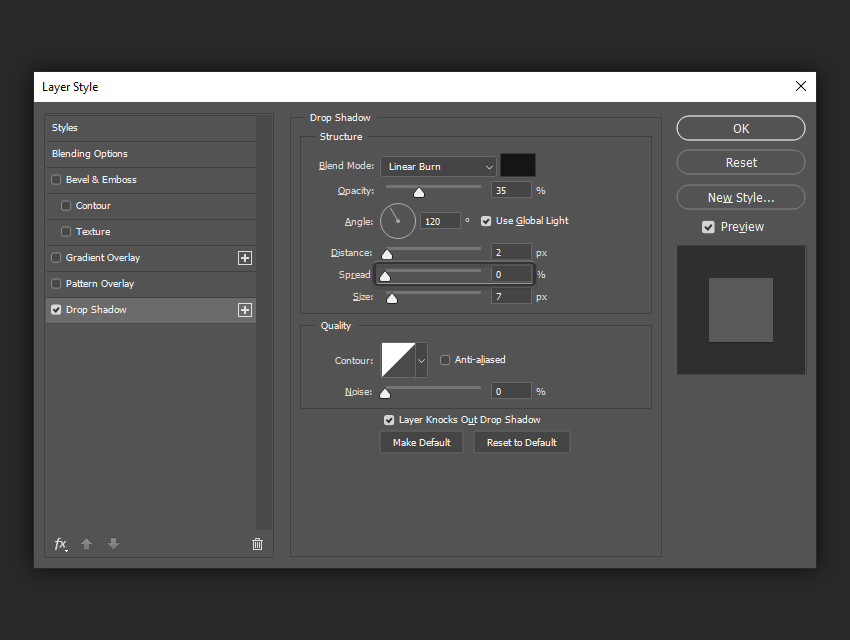
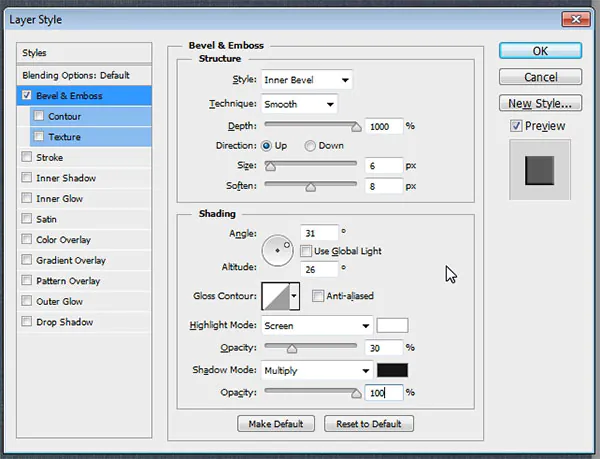
Try layer styles for speedy and customizable impacts. Bevel and Emboss, Inner Shadow, and Pattern Overlay can induce more profoundness.
Set your brushes for the intended textures. Alter brush hardness, dividing, and shape elements to coordinate your ideas.
Consolidate textures specifically into the background. Overlaying textures on your environment can make a sense of vintage and chronology.
Keep up consistency in your details and textures throughout the composition. Verify that newly added textures complement the general temperament.
Remember to be mild in your adjustment moves; subtle settings give more impactful outcomes.
Step 7: Expand Supernatural Atmosphere
Use Photoshop’s layer styles and brushes to add light or supernatural auras around magical objects or characters. Tweak the opacity to achieve the desired enthusiasm.
Generate the illusion of magic by adding convoluted patterns, texts, or symbols around characters or magic items. Tune layer blending modes to give these elements a mystical look.
Make characters’ eyes paranormal by including a soft shine or changing their color with the help of adjustment layers. This impact can make characters appear charmed or had.
If your composition specifically highlights enchanted things, apply layer styles to let those things glimmer with an otherworldly sparkle. Try the inner glow or outer glow layer effect.
Improve the climate with fog or mist manipulation. Soft brushes and layer blending modes can evoke a strange and powerful environment.
For natural subjects like fire or water, use brushes, layer styles, and adjustment layers to imitate their appearance and development.
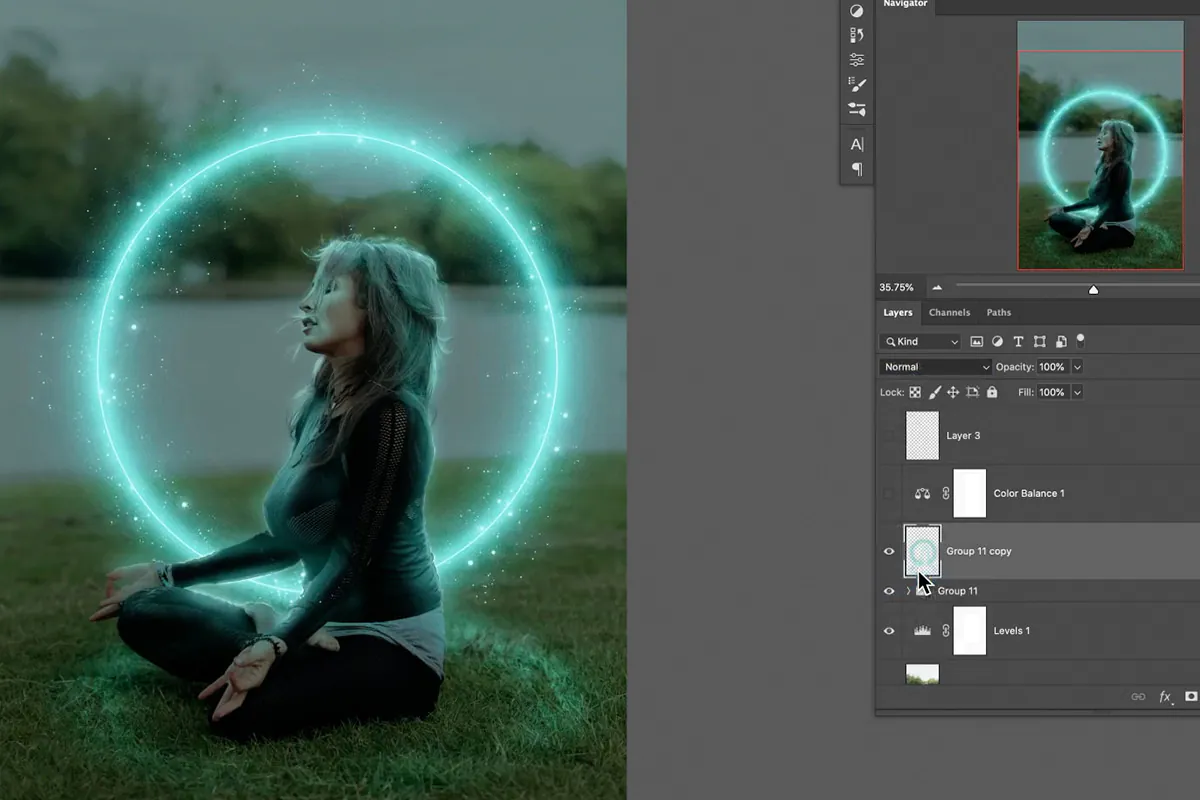
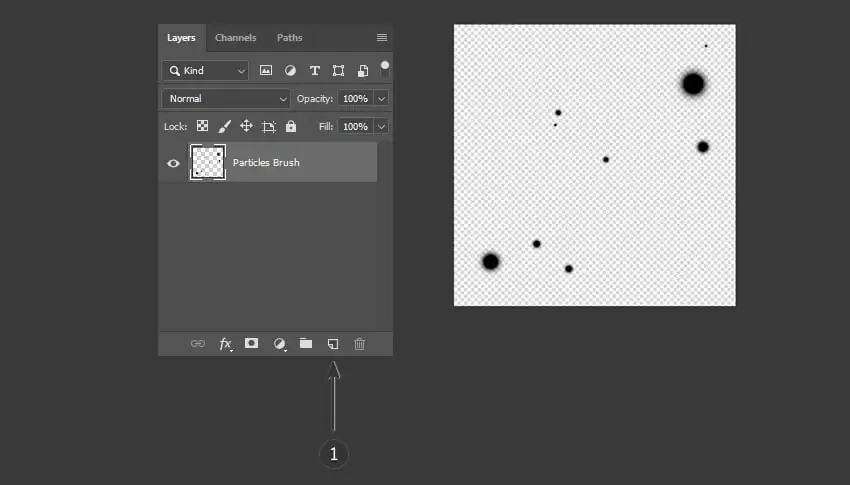
Include particle effects like flashes, fireflies, or glowing circles to implant your composition with enchantment and persona.
Ceaselessly audit your special effects to ensure they coordinate with the general composition and contribute to the required temperament.
Step 8: Finish Your Dark Fantasy Art
Revise your artwork thoroughly. Verify that the narration and atmosphere conform to your unique concept.
Edit color balance, saturation, and contrast. Alter hues to improve the environment or make a particular passionate reaction.
Try different filters and effects to include a wrapping-up touch. Gaussian blur adds more depth, whereas noise or grain can consist of texture and genuineness.
Refine the subtle elements, like character features, background components, and any uncommon impacts, ensuring their reliability and refining.
Ensure that your dark fantasy art effectively coordinates with your perceived ideas.
Consider how viewers will see your work of art. Confirm your areas of focus are eye-catching.
Look for feedback from peers or mentors and make vital alterations. Polishing at this last stage can lead to noteworthy changes.
Finally, share your dark fantasy with the world through popular social platforms, including Instagram, Facebook, Twitter, and online art communities.
Conclusion
To sum up, dark fantasy art is a magical representation of the darkest human imagination that is quite rebellious to the commonly assumed elegances related to everyday artwork. It opposes conventional trends and sets out on an offbeat entry into the spooky and the wonderful, where gothic architecture casts long shadows, legendary animals wander untamed, and scenes covered in fog ooze a supernatural charm. This art provokes the standards of creativity, digs deep into human darkest sentiments and interests in the obscure, and grabs the attention of onlookers with alluring symbolism, just like the aesthetics in art do.
