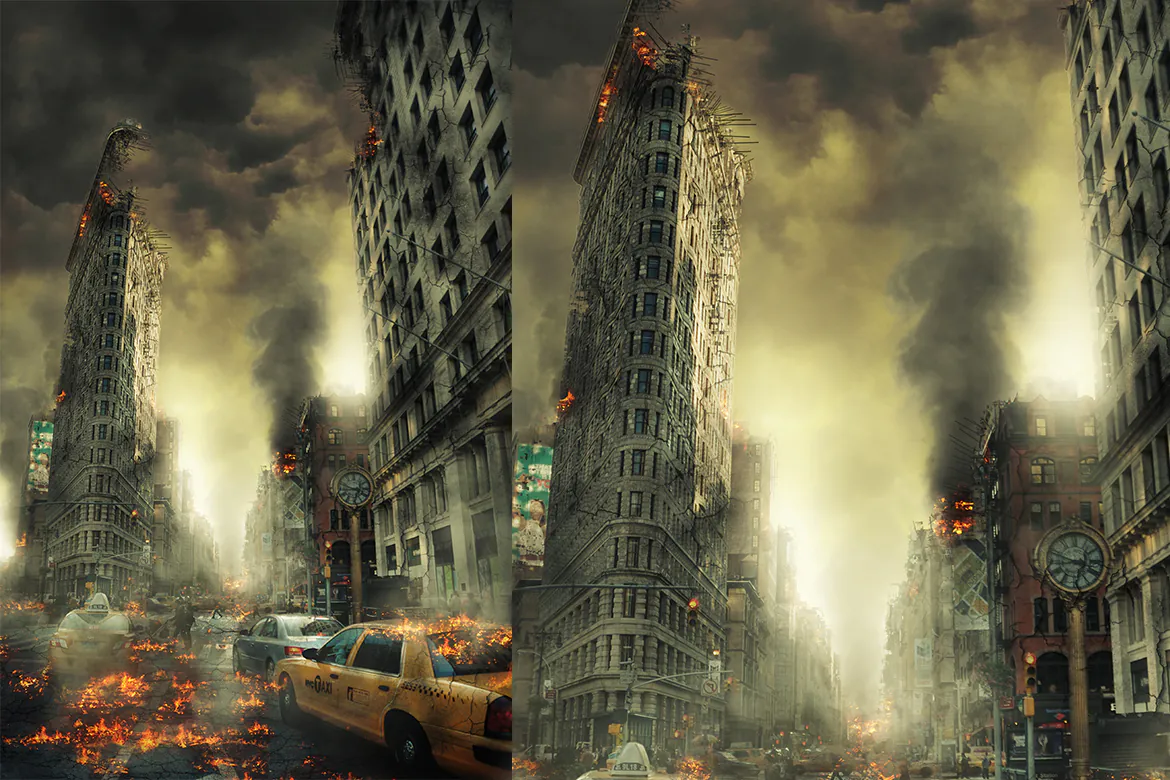
How To Create A Post-Apocalyptic Effect In Photoshop
The post-apocalyptic effect pleasantly transforms the appearance of photos by injecting the atmosphere of catastrophic events, like natural disasters or the visual prophecy of the world after a nuclear attack. It calls forth a nightmarish feeling of desolation and uninhibitedness, giving the images a highly imaginative and dreamy aura. This breakaway from sweet, colourful, and alluring editing effects mysteriously attracts minds and eyes, as this effect of decay and oppression is too unforeseen for the onlookers in this civilized and progressing world. The common editing factors involved in the post-acrylic effect are desaturated colours, grunge textures, increased contrast levels, and the addition of outer elements that increase the gloomy temperament of the image. These photographs often show vacant buildings, decaying infrastructure, an overcast sky, extensive lightning, overgrown wild vegetation, or various other elements representing the devastation of a disaster. To create wondrous post-apocalyptic photographs, you need to perfect the essential techniques and steps presented in this tutorial, and you can compose grabby visuals.
Step 1: Selecting And Duplicating The Image
Select the image, considering it can carry post-apocalyptic effects and will get a vivid visual enhancement.
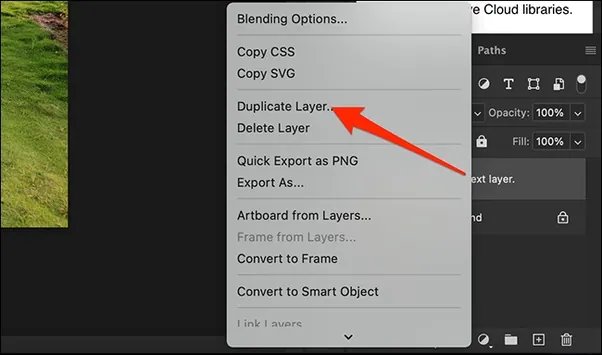
Open the chosen image in Photoshop and create its duplicate layer. For this, you have to click on the background layer in the layer panel, then on “Duplicate Layer”.
After duplicating, you should name your layer; click on the layer name that is automatically saved and rename it to your choice of title.
Duplication ensures non-destructive editing, as your original image is saved. The duplicated image copy also works as a canvas for you to test your creativity more confidently.
Step 2: Image Desaturation For The Foundation
Open the post-apocalyptic base image you duplicated in the previous step.
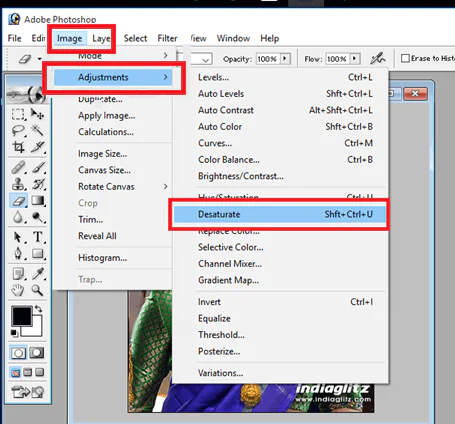
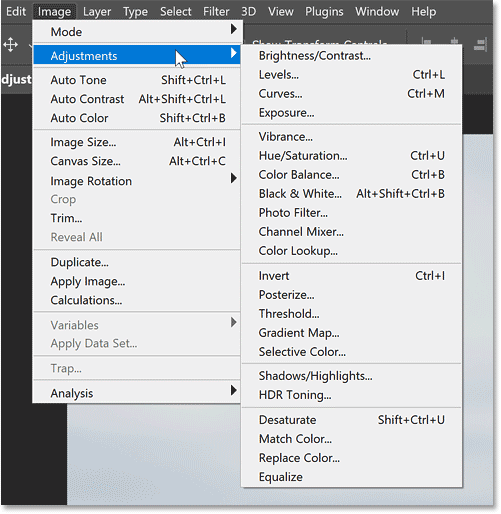
Navigate to the image menu, usually at the software interface’s top.
In the image menu, click “Adjustments” and then choose “Desaturate. These alterations extract colours from your image and turn it into a grayscale image.
Consider the desaturated image for a split second. It has acquired a more subjugated black-and-white appearance.
Desaturation is essential to creating the post-apocalyptic effect since it sets and defines the mood for subsequent changes.
Step 3: Addition Of Grunge Texture
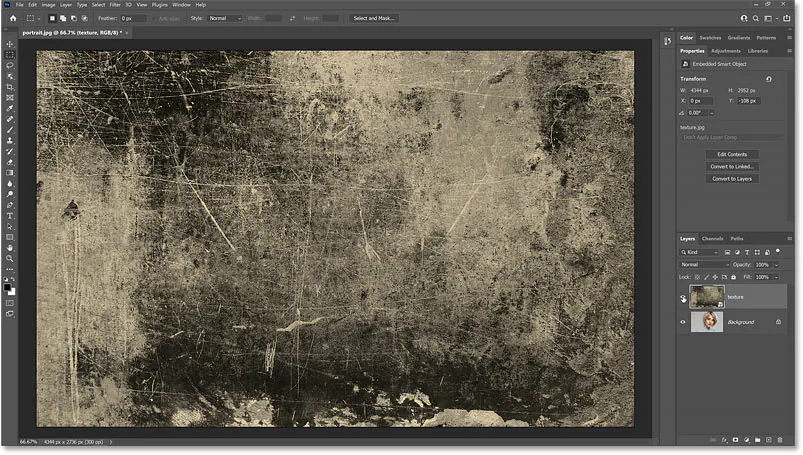
To introduce natural aspects into your post-apocalyptic edit, add grungy textures to stimulate a wear-and-tear look.
Search for an appropriate grunge texture picture. Such textures can be found on stock picture sources or created using a camera or scanner.
To integrate the grunge texture into your project, head to “File” > “Place Embedded”.
Adjust the texture layer’s size and position to cover the full image. Enable the Transform tool by clicking its icon or pressing the shortcut key Ctrl/Cmd + T.
Try using blending mode options like “Overlay,” “Multiply,” and “Soft Light” for your grunge-textured layer.
Calibrate the opacity setting, with higher levels for solid effects and decreased levels for mild effects.
To eliminate grunge texture from certain spots, use layer masks or the Eraser tool to erase them selectively.
Step 4: Modifying The Brightness And Contrast
Click “adjustment layer”, and a drop-down menu will appear from where you should select the “Brightness/Contrast” option.
Drag the contrast slider right to maximize contrast. That will boost the darkness of darker areas and the brightness of bright regions.
Drag the brightness slider the same way to improve the overall brightness of your photograph.
Observe the effect of the brightness and contrast modifications on your image. Ascertain if they correspond to the desired echo of your post-apocalyptic scene.
You can always return to the adjustment layer to execute additional adjustments.
This phase enables you to create a more intense and compelling aesthetic by accentuating the image’s dark, grungy facets while keeping your grip on the overall lighting.
Step 5: Adding A Vignette Effect For Emphasis
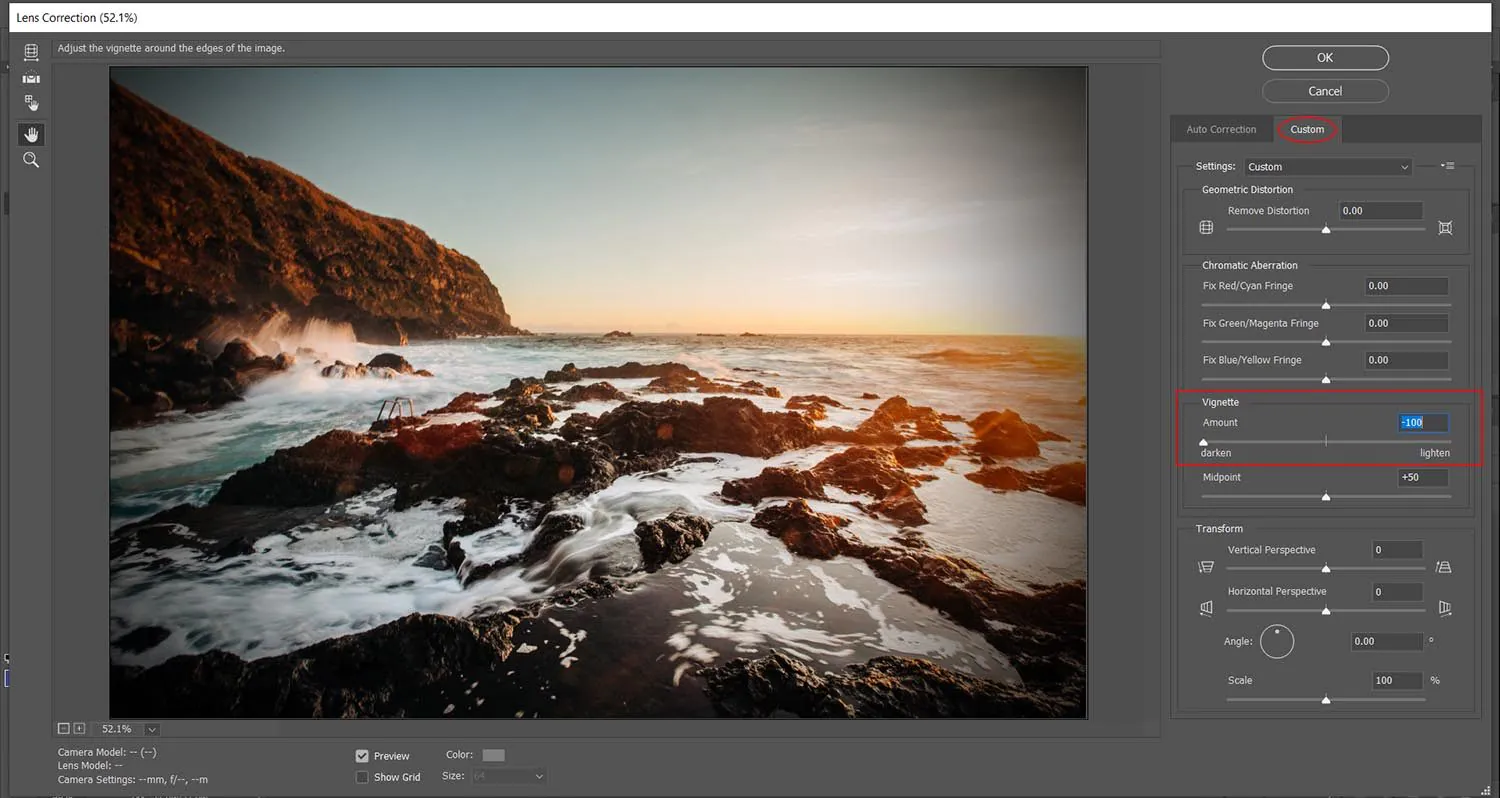
Create a new layer for putting in the vignette effect.
From the Photoshop toolbar, select the Elliptical Marquee Tool. It appears to be oval.
Create an oval selection in the centre of your image by clicking and dragging with the Elliptical Marquee Tool. That is the region that will be untouched by the vignette.
After selecting the centre, head towards the select menu and click “Modify” > “Feather.”
To soften the outer edges of your selection, choose a value between 50 and 150 pixels.
Set the foreground colour to black using the Paint Bucket tool. Fill the oval selection with black by clicking inside it, darkening the corners of your image and bringing attention to the centre.
In the end, modify the feathering or opacity again if needed; reduced opacity is recommended for vignetting.
Step 6: Including Elements Of Desolation
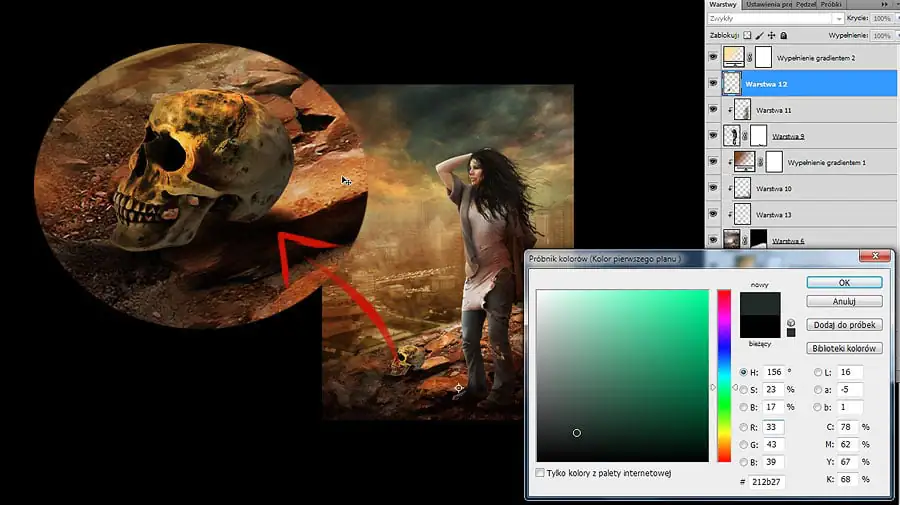
To intensify the post-apocalyptic appearance, include elements of damage and decay, select brushes, and create textures to generate these aspects. You can also browse these textures online or design custom-made.
Pick the “Create a New Layer” option in the Layers panel. It will create a new layer over the previous layers to keep added elements separate and editable.
Apply the chosen brushes or textures to your image on the new layer by painting or stamping them onto the parts where you’d like the damage and decay to appear.
For the damage layer, try out blending modes, such as “Multiply” and “Overlay”, to naturally merge these elements into your image.
Check your brush’s or texture elements’ visibility and intensity, and regulate their opacity and size.
Use the eraser tool and layer masks to correct overdone modifications or eliminate specific degradation agents from particular regions.
Step 7: Setting The Tone Using Colour Grading
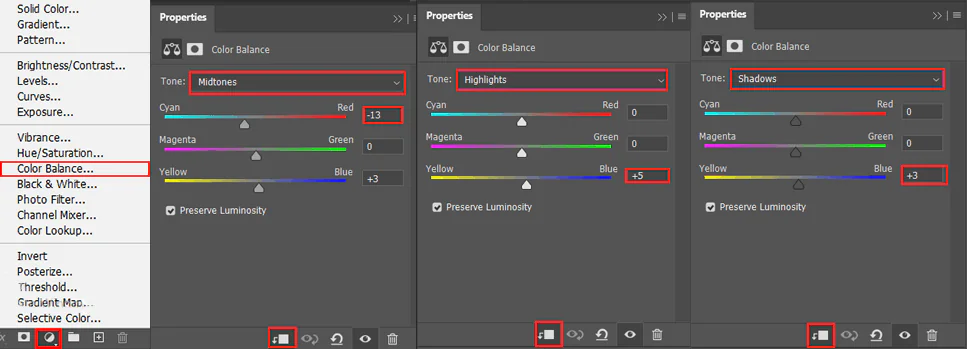
Create a new colour adjustment layer by selecting the “Create New Fill or Adjustment Layer” and then selecting a suitable adjustment layer, such as “Curves” or “Colour Balance.”
For a post-apocalyptic colour palette, experiment with the colour channels. Adjusting the RGB curves or colour sliders under “Colour Balance” might help you achieve the desired setting.
Reduce the image’s saturation to dim the colours and produce a more forlorn effect. To proceed, click the saturation slider in the adjustment layer,
Consider adding modest colour tints or filters to highlight the post-apocalyptic attitude further. Add a new layer, fill it with a particular colour, and tune its blending mode and opacity.
Keep evaluating your photograph while tweaking the colour grading, affirming if it fits your envisioned post-apocalyptic environment and feeling.
Step 8: Final Tuning Of The Image
Zoom in on your image so you can see the details. Look for areas that should be modified or enhanced.
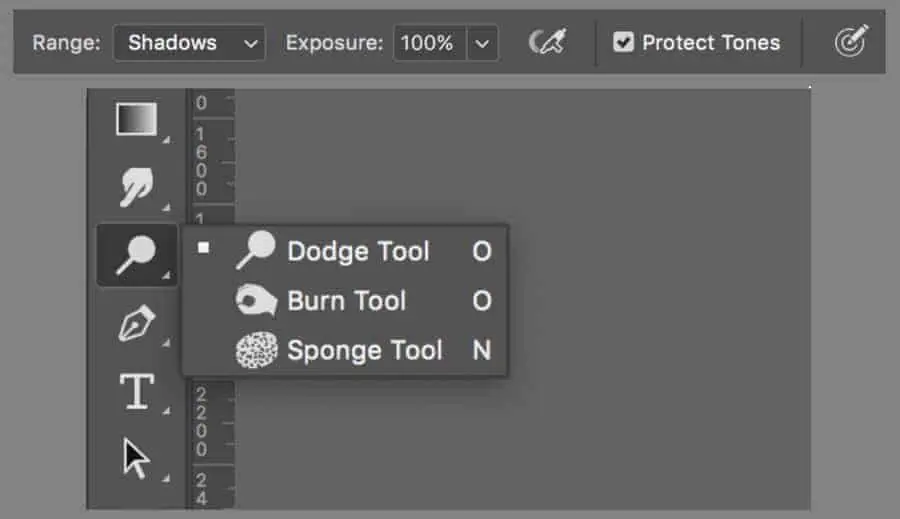
Pick the Dodge and Burn tools from the Photoshop toolbar to highlight or darken certain portions of your image.
Set the Dodge tool to “Highlights” in the options bar. This tool has multiple functions, including brightening individual regions, adding highlights, and improving contrast.
Shift to the Burn tool and click “Shadows” from the menu. Use this tool to darken areas in your post-apocalyptic landscape, developing shadows and dimensionality.
Tune the intensity of the Dodge and Burn tools using the slider in the settings bar. Lower levels have more modest effects; however, greater levels have more noticeable impacts.
Use paint techniques like Dodge to boost light sources and Burn to deepen shadows in ruined structures to adjust regions in your post-apocalyptic composition.
Zoom out to see the complete image and compare it to close-up details to check the contribution of alterations to the overall authenticity.
Step 9: Saving Your Post-Apocalyptic Finalized Image
Choose the best file format for your shot. Consider formats such as JPEG, PNG, TIFF, or PSD, Photoshop’s inner-built format for optimal quality and flexibility.
If you choose a compressed format, such as JPEG, set the compression rate and image quality for a balance of file size and image clarity.
Make a descriptive filename for your post-apocalyptic effect image and select a location on your PC to save your post-apocalyptic image.
Optionally, you can shield your layered Photoshop project, move to “File”, then click “Save As.” Save a copy of your work in PSD format to secure all layers for later editing.
If you’re ready to share or publish your post-apocalyptic gem, go to “File” > “Export” or “Save for Web” to generate a version optimized for the platform you’re using.
After a final glance, click the “Save” or “Export” button to save your image to the given destination.
Conclusion
The post-apocalyptic effect is a sublime invention of digital art that recounts unexpected desolation and atrophy in such a dreamy way that even the gloomy atmospheres successfully capture attention. Employing a capable image editing app like Adobe Photoshop, you can create an entirely fresh composition or choose plain images that can be converted into frightening, dramatic, and evocative landscapes that tell stories of a world gone wrong with precise edits. Momentarily, the viewers are introduced to an ampleness hidden in destruction and bareness that they have never imagined before.


