How To Create A Spotlight Effect
Spotlighting is the most effective technique to dramatically grab the viewer’s attention to the primary subject. Spotlights are utilized in various events, including musical concerts, theatrical productions, and the biggest TV award presentations. Moreover, in the field of image editing, a spotlight effect can be fruitful in bringing attention to the vital components or highlighting the main subject. The editing process involves the precise enhancement of light and shadows in an image, as well as adding additional lighting or shadow effects to it. This approach is eminently useful in single-subject photography, like portraits or other images with a single main subject, where the significance of spotlighting is incredibly articulated. Similarly, at the commercial level, for enhancing product photography, spotlight effects can quickly grab viewers’ attention, making them appreciate the product and prompting their willingness to participate in purchases. This blog will proceed with working on image enhancement with spotlight effects to make your image’s vital areas quickly catch attention.
Step 1: Image Upload
Start by loading your photo editing program, like Adobe Photoshop, GIMP, or any other tool of your preference. Move to the File menu and click Open to browse your pc for the picture you need to alter. Select the photo file and press Open to load it into the program.
Once the photograph is imported, it’ll show up in your workspace as the primary project. Study the image and guarantee it’s the right one you need to work with. Consider modifying the picture size or resolution by reaching to the Image menu and deciding on Image Size or Canvas Size. This modification can be significant if you intend to print or utilize the picture for particular digital designs.
Before you move, reconfirm that your picture is properly saved in a format that supports layers, like PSD in Photoshop. It permits you to make alterations without changing the initial file. Save your project frequently so as not to lose your progress.
Step 2: Image Duplicating
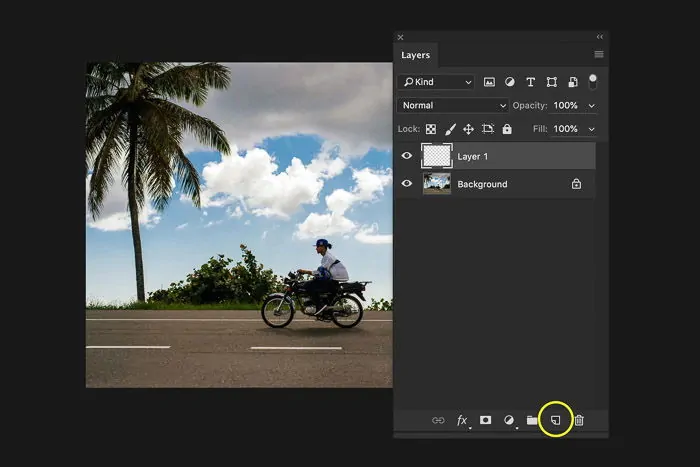
For the spotlight effect application, you need to work on an isolated layer to keep the effect non-destructive. In your photo editing program, discover the Layers panel, often found on the right side of the workspace. If the Layers board isn’t visible, you can stimulate it by attending to the Window menu and choosing Layers.
Within the Layers panel, click on the New Layer option, which often arises as a sheet of paper symbol at the bottom of the panel. Otherwise, you can utilize the Layer menu and select New, followed by Layer. As a result, a dialog box may appear inviting you to title the new layer; you can title it something expressive like Spotlight Effect.
After the new layer is made, it will be put over the initial image layer. Be sure that this layer is selected, as any transformations or effects you apply will influence this layer and not the picture itself. This partition permits you to alter or remove the spotlight impact afterwards without modifying the initial picture.
Step 3: Selection Specification
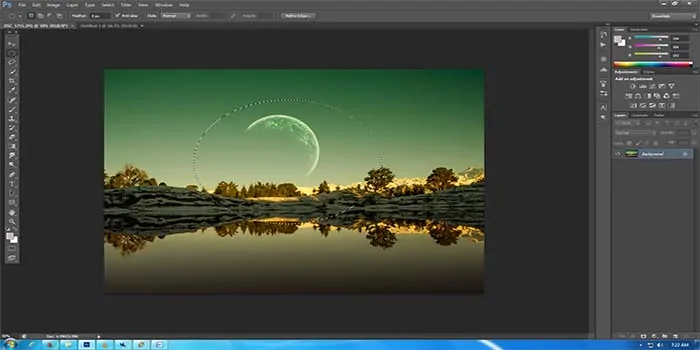
To form the spotlight effect, you need to choose a particular range of the picture where the spotlight will be added. Initiate by selecting the Elliptical Marquee Instrument from the toolbar. In most photo editing apps, this tool can be found by tapping on and holding the Rectangular Marquee Tool to reveal additional selection choices, including the Elliptical Marquee Tool.
After the Elliptical Marquee Tool is chosen, tap and drag on your picture to form an elliptical selection. Place the cursor where you need the centre of the spotlight to be and drag it outward to characterize the size and form of the selection. The selection ought to generally cover the zone you need to highlight with the spotlight effect.
To alter the shape or size of the selection, use the Shift key to constrain proportions or hold down the Alt key to pull the selection from the centre. You can move the selection by clicking inside it and carrying it to the specified location. If required, touch up the selection by utilizing the Select and Mask option or identical options to soothe the edges for a more natural spotlight effect.
Step 4: Coloring The Selection
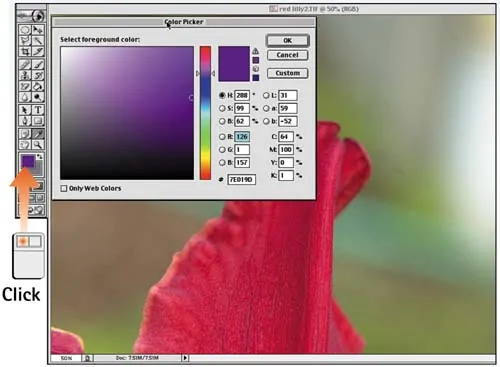
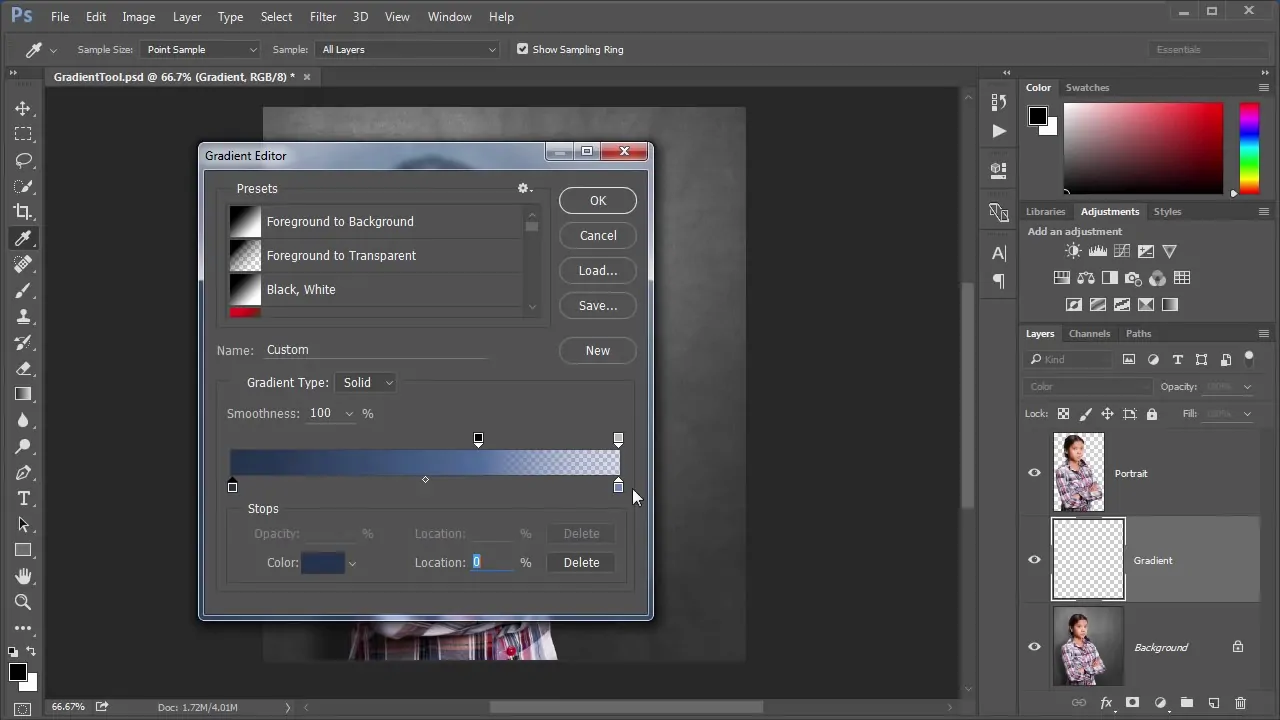
Together with your elliptical selection active on the new layer, you’ll now fill it to build the spotlight effect. To begin with, select a gradient or colour to utilize for the spotlight. For a realistic spotlight effect, utilize a radial gradient that moves from a light colour within the centre to a darker colour or transparency at the rims.
To fill out the selection with a gradient, choose the Gradient Tool from the toolbar or press G on your keyboard. Within the options bar, select a radial gradient, which typically begins from a central point and fades outwards. If you do not see the gradient tool options, tap on the gradient preview box to tailor the gradient. Tap and drag inside the selection to apply the gradient. The dragging direction and length will influence the gradient’s formation. Play in different directions to get the specified spotlight effect.
If you favour a solid colour, select the Paint Bucket Tool from the toolbar or use key G and select the solid colour fill choice. Tap inside the selection to fill it with the desired colour.
After the selection is filled, you can regulate the effect by altering the layer’s opacity or applying extra effects to mix the spotlight flawlessly with the basic photograph.
Step 5: Blending The Effects
To create a natural-looking coordinate of the spotlight effect together with your image, you need to alter the layer’s blending mode.
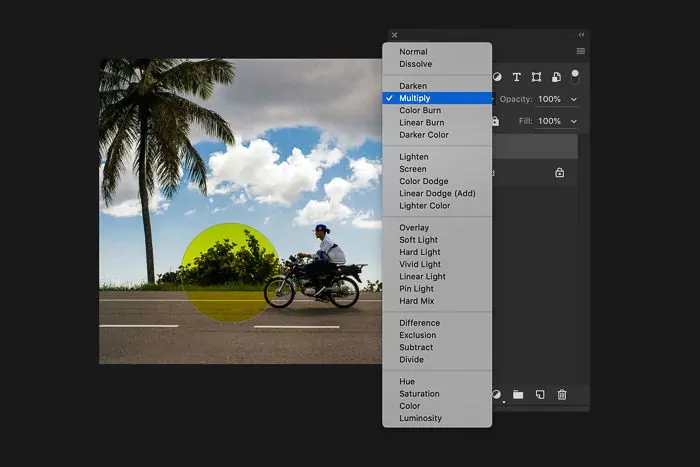
Within the Layers panel, find the drop-down menu that shows the existing blending mode, ordinarily assigned to Normal by default. This menu is situated over the list of layers.
Press on the drop-down menu to uncover an inventory of blending modes. For a spotlight effect, standard options include Overlay, Soft Light, or Multiply. Each mode influences how the spotlight layer blends with the image:
Using Overlay, you can upgrade contrast and make the spotlight impact more articulated; Soft Light lets you make a fine, delicate highlight with a gentle mix, and Multiply can darken the image while emphasizing the spotlight region, which is valuable for a more startling effect.
After selecting a blending mode, alter the layer’s opacity slider to manage the level of the spotlight development. Bringing down the opacity will make the spotlight less ardent while advancing it will make it more notable.
Reconsider the impact and alter the blending mode and opacity as required to attain the specified spotlight look. You can moreover utilize the Eraser Tool or a layer mask to refine the spotlight edges more.
Step 6: Final Refinements
To make the spotlight effect more natural, smooth its edges. Utilize the Eraser Tool with a soft brush to delicately delete the external edges of the spotlight effect on the layer. On the other hand, include a layer mask and utilize a soft brush to paint with black on the mask to steadily wither the impact.
If the spotlight effect looks overly harsh or doesn’t blend well, you can alter the gradient or colour utilized. Double-click the layer thumbnail to again open the gradient tool, or utilize the Color Picker to select a different colour and re-fill the selection.
Utilize layer styles like Gaussian Blur or Inner Glow for further betterment. Gaussian Blur can smoothen the spotlight edges, whereas Inner Glow can include an inconspicuous halo effect around the spotlight spot.
Revisit the layer’s opacity and blending mode settings to create any final alterations. Bringing down opacity or changing blending modes can blend the spotlight effect immaculately with the rest of the image.
Step 7: Final Analysis And Export
Use Zoom in and out to look at the spotlight effect from distinctive viewpoints. Guarantee it improves the focal point viably and coordinates satisfactorily with the rest of the picture.
Confirm that the effect is uniform with the lighting and shadows within the photo. Ensure that the spotlight looks realistic and adjusts with the prevailing composition.
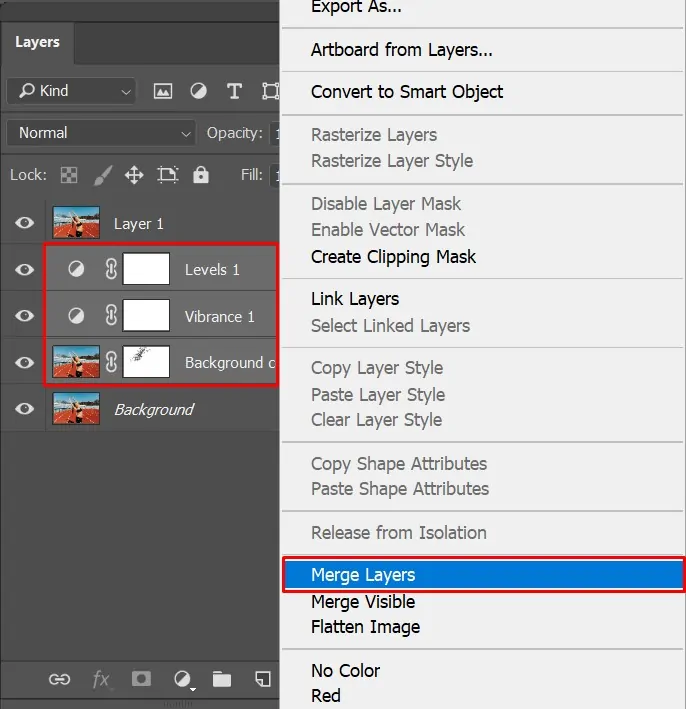
If you’re contending with the spotlight effect and no longer need to alter it separately, you can combine the spotlight layer with the image layer. Right-click on the spotlight layer within the Layers panel and choose Merge Layers.
Save your altered image in a format that maintains quality. Utilize File > Save As to select a fitting file format.
If you need the picture for particular purposes, export the image by clicking File, then Export, and choosing the fitting settings for your needs.
Conclusion
Ultimately, a spotlight effect proves to be a remarkable technique for image modification. You can grow the visual persona of your photographs by just paying a little attention to specific photo manipulation techniques, as mentioned earlier. Your final image’s clarity, tone, emotion, and a group of other factors can all be impacted by the direction and quality of the light. Considerably, a spotlight effect can always be a worthwhile tool to emphasize the key features and how you want them to be displayed in your images, whether you’re editing a portrait or product shot.


