How To Create A Lino Cut Effect
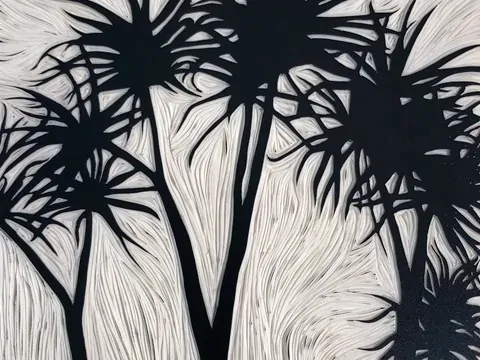
The conventional lino cut work involves carving some art or design onto a linoleum block, then printing ink is applied to the craved surface to get a print onto paper. Creating a linocut work requires minimum resources, most commonly a linoleum surface, the craving tool, printing ink, and a few others. The aesthetic charm of this printing technique is associated with the hard work of artists as they go through a meticulous craving, closely addressing the envisioned design in the composition under carving. This approach has now prevailed as formal learning content and is now frequently used to teach schoolchildren printmaking because it is simple to cut and lacks grain. Furthermore, with the development of digital art, lino cut is also employed as an art feature in creating or enhancing images. Various software provide tools and features comparable to linocut works to create digital compositions. In this blog, we are going to address a step-by-step process to get a lino cut effect into digital images. We will use Adobe Photoshop as a primary tool for its adaptability and user-ease aspect.
Step 1: Load Your Base Image
Initiate the Photoshop app on your PC to get to the editing workspace.
Press on File within the top menu and tab on Open. Proceed to the folder that contains your chosen photograph.
Tap on the photo file you want to alter, and after that, press the Open option. That action will bring the shot into Photoshop.
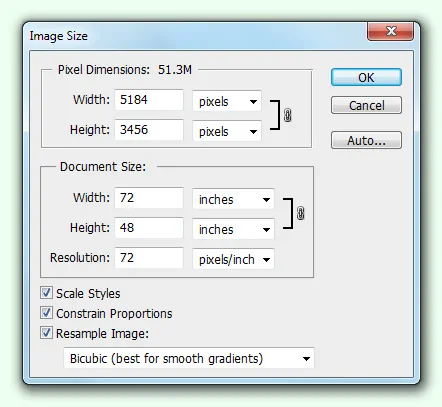
After the picture is loaded, look at its dimensions by going to Image > Image Size. If vital, alter the resolution to guarantee adequate quality in your conclusive print.
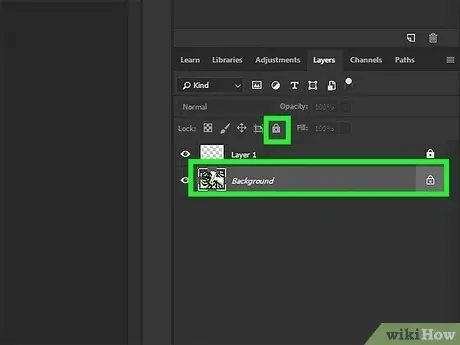
In case you see that the picture layer is locked, which is often characterized by a padlock symbol within the Layers area, double-click the layer to unclose it. It permits you to create edits independently.
To keep the initial picture intact, right-click on the layer within the Layers panel and choose Duplicate Layer. Toil on this duplicate to protect the initial image for future usage.
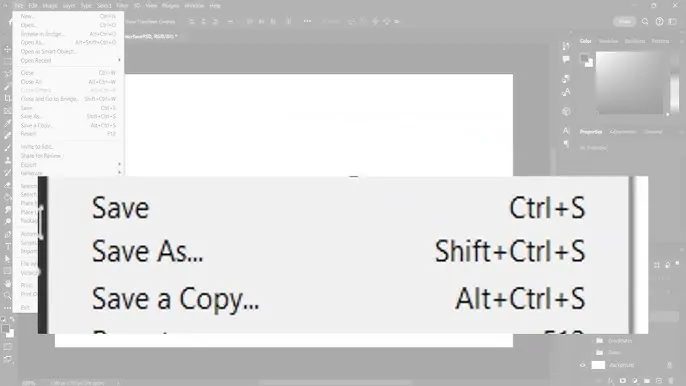
Proceed to File > Save As to save your project with a new title, guaranteeing you do not overwrite the initial file.
Step 2: Turn The Image To Grayscale
Guarantee that the duplicate layer you made in Step 1 is dynamic within the Layers area.
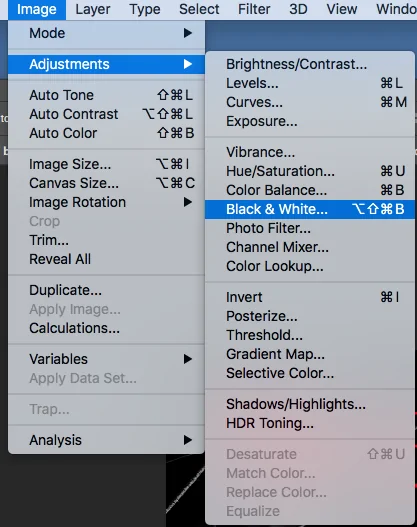
Move to the top menu and press on Image, go to Adjustments. Choose Black & White from the dropdown menu alternatives.
You will see a dialog box show up with different sliders for colors including Reds, Yellows, Greens, Magentas, Cyans, and Blues. Alter these sliders to upgrade contrast and make a dynamic range between light and dull ranges. Opt for a substantial distinction between components within the picture.
Inspect the preview box to observe how your alterations influence the image in real-time. That will help you envision the effect of each slider on the ultimate result.
After you are done with the grayscale conversion, press Ok to apply the modifications to the picture.
Keep in mind to save your work by selecting File > Save or Save As to guarantee your changes are retained. It provides a solid foundation for the next steps in accomplishing the linocut effect.
Step 3: Use The Cutout Filter Feature
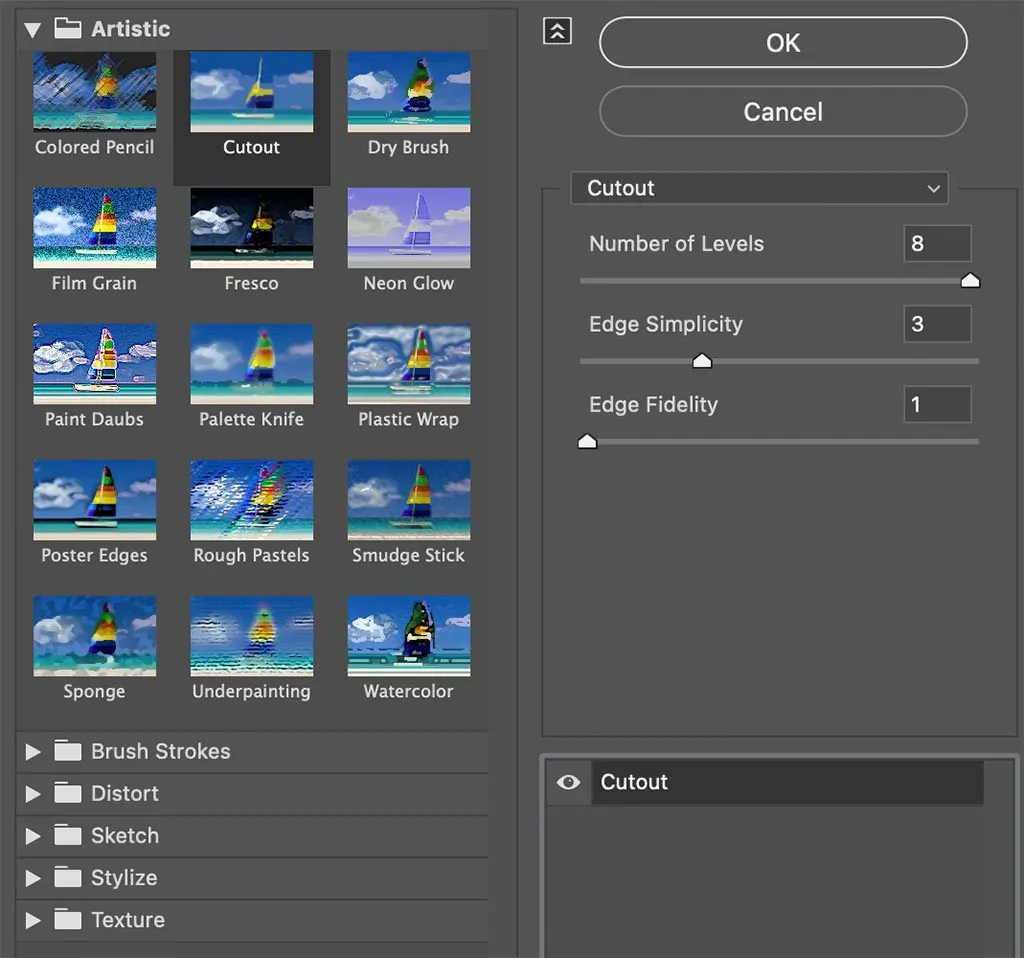
After re-ensuring that the grayscale picture layer is still chosen, go to the top menu and press on Filter. On seeing the dropdown menu, choose Filter Gallery.
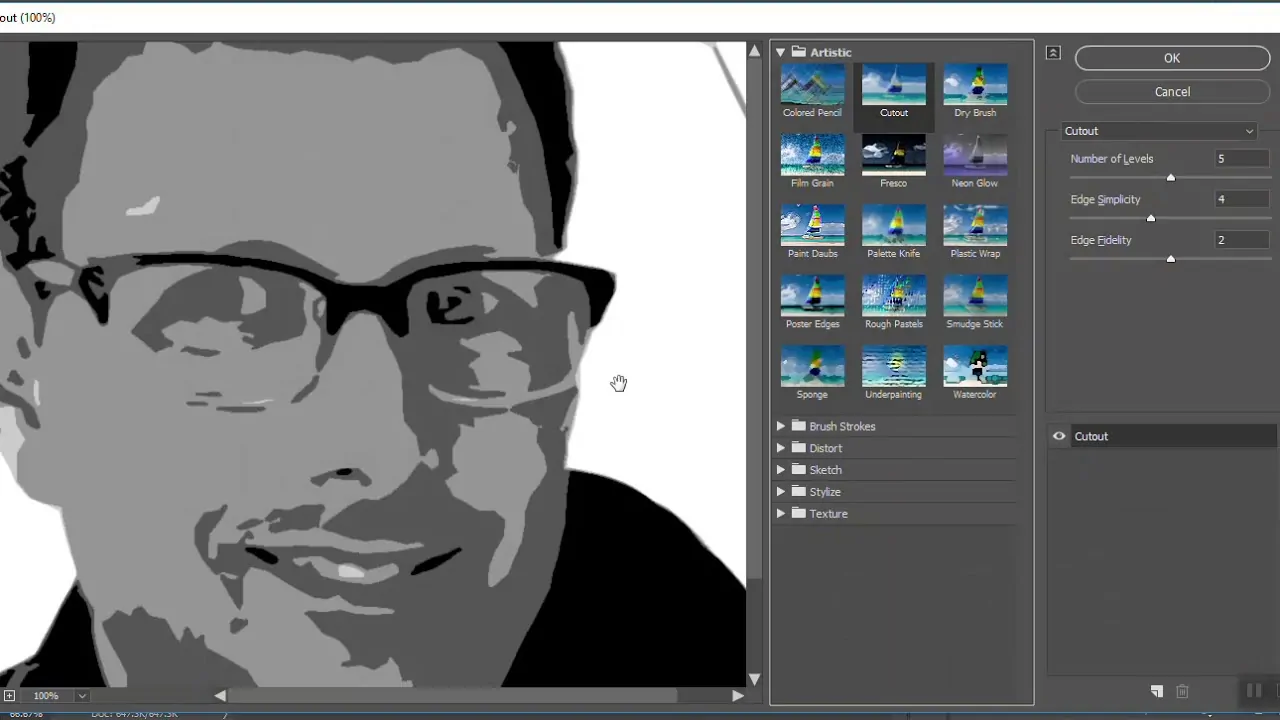
Within the Filter Gallery window, unlock the Artistic folder if it is not already open. After that, locate and pick the Cutout filter. that filter streamlines your picture by decreasing the number of colors and making a striking graphic impact.
You can alter Filter settings with:
Number of Levels to regulate the number of color levels within the conclusive picture. You ought to diminish this value to form a more simplified impression.
Edge Simplicity to decide how smooth the edges show up. Decreased values deliver sharper edges, whereas higher values make gentler edges.
Edge Fidelity manages how the filtered picture follows the initial image’s edges. Alter it to adjust detail and abstraction.
Make sure that the Preview box is checked to see real-time upgrades as you adapt the sliders. That helps you envision how each change influences the image.
After you acquire the specified impact, tap Ok to apply the Cutout filter to your picture.
Step 4: Create A Texture Impact
Within the Layers panel, press on the New Layer symbol at the bottom. That will make a new, blank layer over your filtered picture layer.
Choose the Paint Bucket Tool from the toolbar then select a neutral color from the color picker. Tap any place on the new layer to fill it with the chosen color.
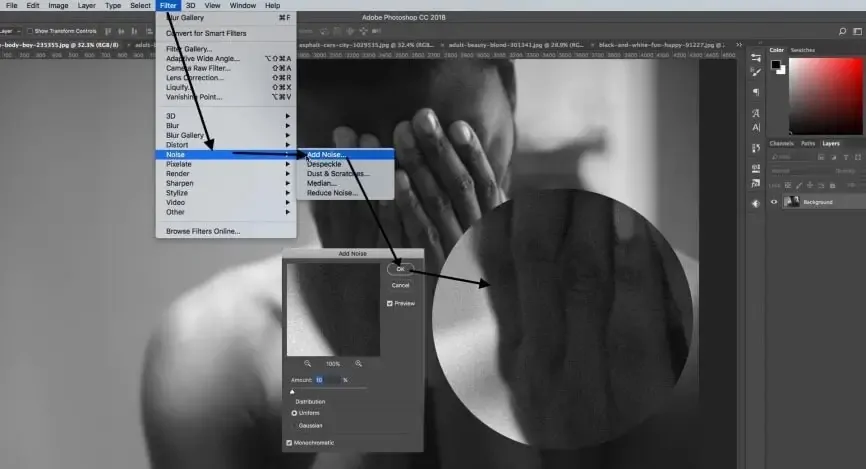
Move to the top menu and click on Filter, then Noise > Add Noise.
Alter the Amount slider to include a grainy impact. have a look at the Monochromatic choice to guarantee the surface is in grayscale. Click Ok to spread the noise.
Within the Layers panel, alter the blending mode of the surface layer. Play with modes such as Overlay, Soft Light, or Multiply to examine which gives the leading result. It will blend the texture with the basic picture.
In case the surface shows up too solid, decrease the opacity of the texture layer by sliding the Opacity slider within the Layers panel. Opt for a natural impact that improves the linocut look without overpowering the picture.
After you are done with the texture impact, save your work by choosing File > Save to protect the changes before proceeding to the following step.
Step 5: Apply An Outline Effect
Within the Layers panel, right-click on the image layer that is holding the Cutout impact and choose Duplicate Layer. That will keep the initial layer intact for future alterations.
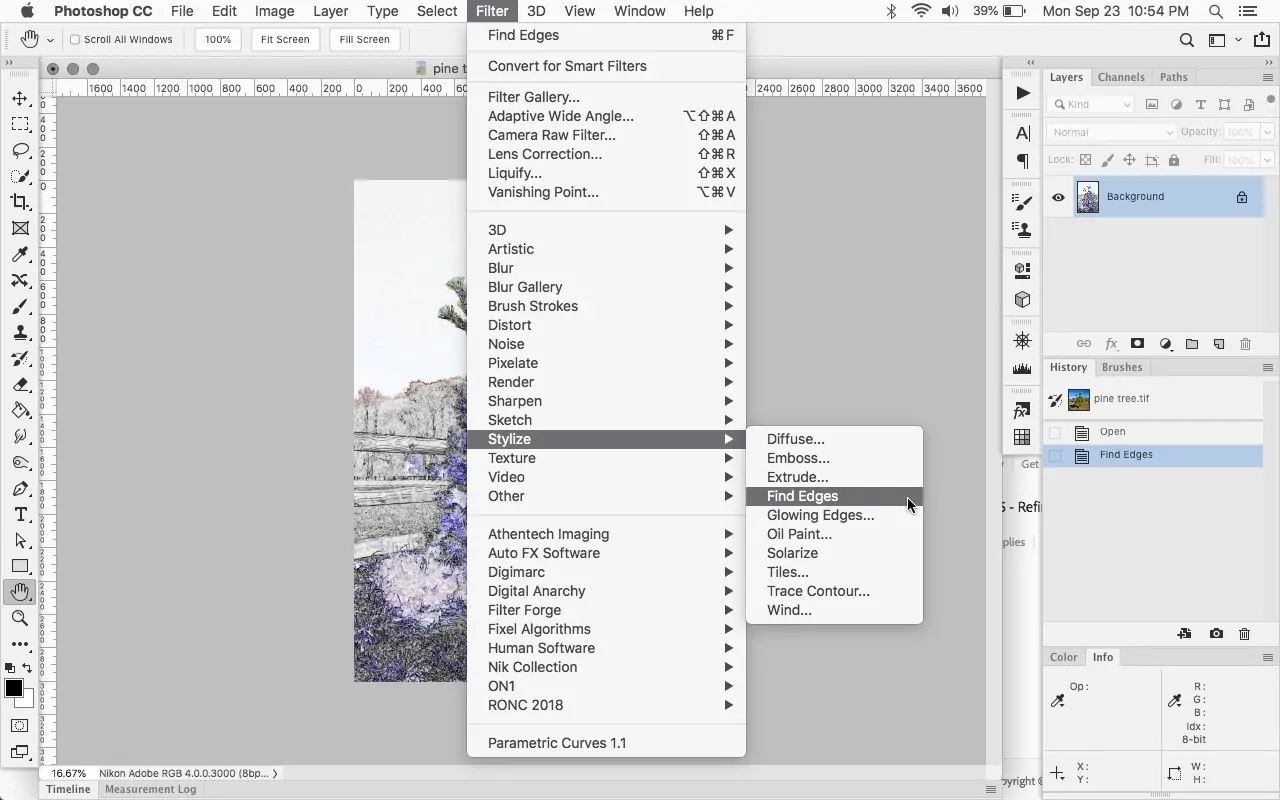
Choose the duplicate layer, move to the top menu and tap on Filter. Head to Stylize and select Find Edges. that filter can emphasize the edges in your picture.
To make a more vivid layout, you’ll need to modify the colors. With the edge-detected layer still chosen, tab Ctrl + I to alter the white outlines to dark and the backdrop to white, improving the contrast.
Within the Layers zone, alter the blending mode of the edge layer to Multiply, which overlays the outlines on the textured picture underneath, permitting the details to blend consistently.
In case the outlines are too strong, decrease the opacity of the edge layer utilizing the Opacity slider within the Layers panel. It aids in attaining an even appearance where the outlines conform to the picture without overwhelming it.
As required, you’ll further polish the appearance of the outlines by applying extra filters or utilizing the Eraser feature to specifically remove ranges of the outline layer.
Step 6: Perform The Final Tweaks
Once the layered image is concluded, head to follow Image > Adjustments > Levels. It will unlock the Levels adjustment dialog.
Utilize the sliders to alter the black, gray, and white levels. Drive the black and white sliders inward to improve the contrast and make your picture pop. Monitor how this influences the particulars and outlines.
In case you need to keep some color, you can proceed with Image > Adjustments > Curves. Alter the curve to improve particular tones within the picture, polishing its overall impression.
Consider making a vignette impact. Make a new layer and fill it with dark. Utilize the Elliptical Marquee option to choose an oval range within the middle of the picture.
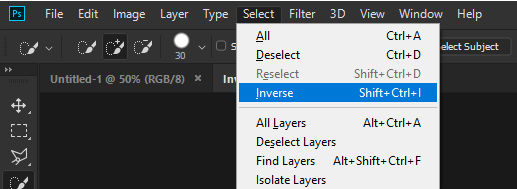
After that, you can invert the selection using Select > Inverse and hit delete. Alter the opacity of the layer to ease the impact.
Make a new layer over all others.
Utilize the Rectangular Marquee Tool to pick a region just inside the edges of your canvas.
Fill this chosen area with a contrasting color or utilize a stroke impact by going to Edit > Stroke.
Use Zoom in and audit your picture for any final alterations required. Review the symmetry of texture, outlines, and colors.
Step 7: Preserve The Final Image
Tap on File and select Save As to prevent overwriting the initial photograph. It will guarantee that your original project remains unaffected, giving you the adaptability to form future modifications as required.
Give a clear, expressive title and select a fitting format, such as JPEG for web use with a smaller file size, PNG to hold high quality and transparency, or PSD if you need to keep all layers intact for further altering.
If you are saving it in JPEG, alter the quality slider to 80 to 100 percent for consonance between file size and picture clarity. Next, choose the destination folder where you need to reserve the ultimate image, whether it’s on your PC, an outside drive, or in cloud storage.
After clicking Save, recheck the saved file to confirm it appears as aiming. Survey the ultimate yield, and as needed, get back to Photoshop to create any last tweaks or alterations before considering the project complete. That will make sure that your work is scheduled for sharing or printing at the most noteworthy quality.
Conclusion
In summary, lino cut stands as an adored art that combines minimalism with boldness of expression. From its tangible as well as traditional use in actual printmaking to its digital versions, it is always an inspirational approach to evoke artists’ longing to create. Both physical and digital lino-cut art requires an almost similar level of skillfulness and attention to detail. Likewise, the ultimate piece is going to be treasured by all art lovers equally. Following the techniques highlighted in the above blog, you can create awesome artwork and also edit your images with a lino cut modification.


