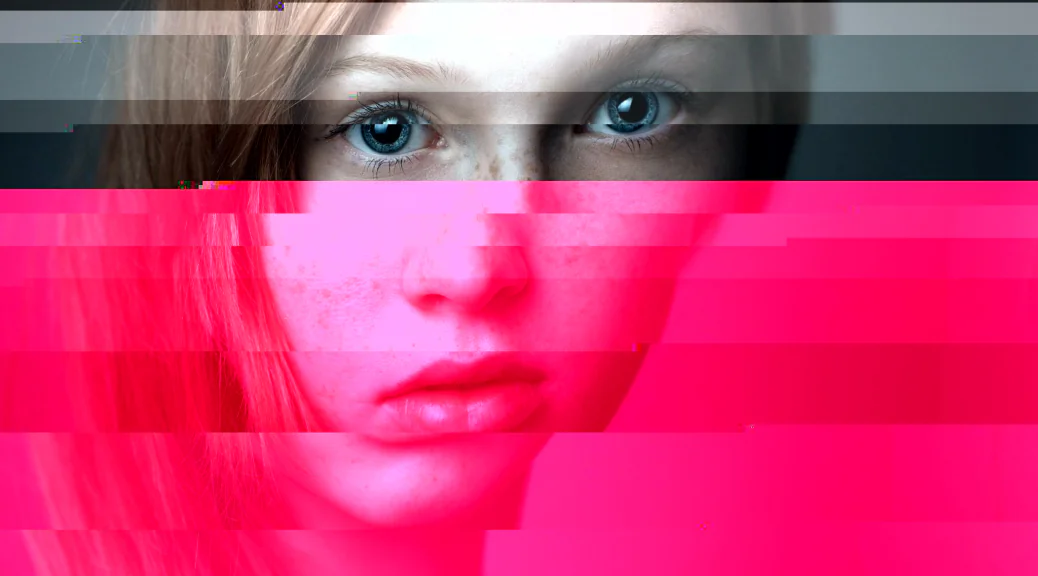
How To Create A Datamoshing Effect In Photoshop
The unusual distortions and pixel manipulations simulated by datamoshing can offer inviting visual chaos, which can excite the viewers. These distortions include purposeful glitches, irregular patterns, color aberrations, and pixel variations that can disrupt the standard image data, thus steering away from the expected notion of refinement and perfection regarding digital images. The datamoshing technique introduces creative opposition and unconventional aesthetics By Going against the static and refined nature of photographs, which trigger those emotions that typically keep on experiencing the alleged exquisite art effects. Thus, amid many elaborate visual effects, datamoshing effects carve out a distinct identity and garner a devoted fan base. It also integrates the optical illusions of surrealism in the images or footage, which intensifies the narrative and communicative dimensions, helping artists deliver their ideas more effectively and naturally. This blog post highlights the comprehensive procedures for adding a datamoshing effect using Adobe Photoshop, one of the most popular editing programs.
Step 1: Making A Copy Of The Original File
Launch Adobe Photoshop and open the image you’ve chosen for datamoshing. Tap on “File” within the menu bar, select “Open,” and browse to your picture file.
Once the image is on the Photoshop canvas, confirm its preservation by making a copy layer. Tab on the background layer within the Layers menu and select “Copy Layer.”
This duplication step is vital because it safeguards the original picture from changes, giving a safety net for experimentation. The copy layer serves as the canvas for your datamoshing attempts.
To preserve an organized workflow, consider naming your layers suitably. Right-click on the copied layer, select “Layer Properties,” and relegate a graphic title, helping clarity as you navigate the inventive process.
Layer duplication, ensuring a non-destructive approach to your image control inside the Photoshop environment. The duplicated layer, presently ready for investigation, could be a canvas equal to the application of glitch impacts and intentional data control within the ensuing steps of the process.
Step 2: Converting To The Smart Object
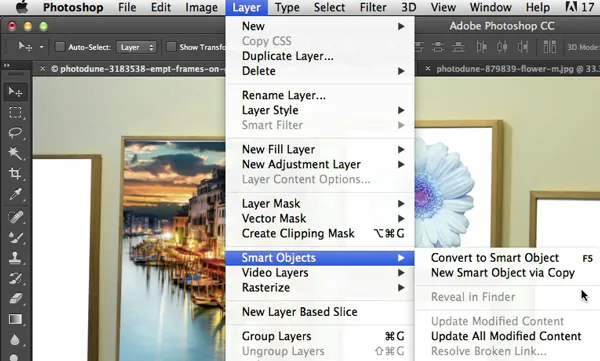
Once you’ve copied the image layer in Photoshop, changing it into a Smart Object is the next significant step. This transformative activity includes a layer of adaptability to your altering process, permitting non-invasive modifications and alterations.
To change the copied layer into a Smart Object, right-click on the layer within the Layers menu. A relevant menu will show up; from this menu, select “Convert to Smart Object.” This activity encases the copied image, turning it into a manageable entity.
The advantage of utilizing Smart Objects lies in their adaptability. They protect the initial image data, preventing irreversible changes. That implies you’ll be able to apply filters, alterations, and changes to the Smart Object without harming the astuteness of the primary photo.
Smart Objects, too, empower you to return to and fine-tune your alters at any point within the imaginative creation. Double-clicking on the Smart Object layer opens it as an isolated document, permitting you to modify and customize your data moshing impacts absolutely.
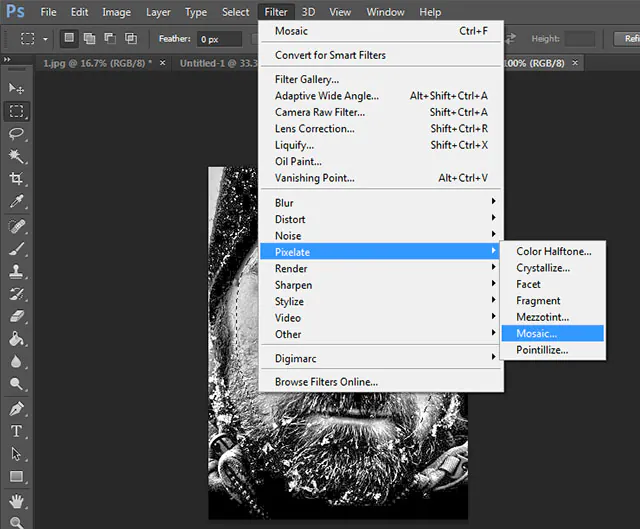
Step 3: Including The Glitch Effect
To begin with a glitch application, head to the Smart Object layer to confirm it is chosen within the Layers menu.
To start glitch effects, explore the choices accessible in Photoshop’s broad toolkit. Consider utilizing filters, adjustment layers, or experimental plugins that present pixel controls, color abnormalities, or mutilations.
Play with the “Filter” menu options like “Pixelate,” “Distort,” or “Stylize.” Alter the parameters to witness real-time changes, and do not waver in combining numerous filters for an interesting visual effect.
Then again, use adjustment layers to change color settings, contrast, or saturation. The “Hue/Saturation,” “Color Balance,” and “Curves” adjustment layers can present sensational shifts, contributing to the glitch style.
Keep a careful eye on the overall composition as you apply glitches. It’s an energetic process, and inconspicuous alterations can make a critical difference. Remember that the Smart Object’s nature permits non-destructive altering, enabling you to try valiantly and return changes if needed.
As you work through this step, revel in the flexibility to embellish your image with captivating glitches, transforming it into an outwardly striking representation of controlled chaos.
Step 4: Manipulating The Data Within The Smart Object Layer
After your image is implanted with initial glitch effects, continue with the data control inside the Smart Object layer. This step intentionally distorts the image data to present purposefulness and captivating twists.
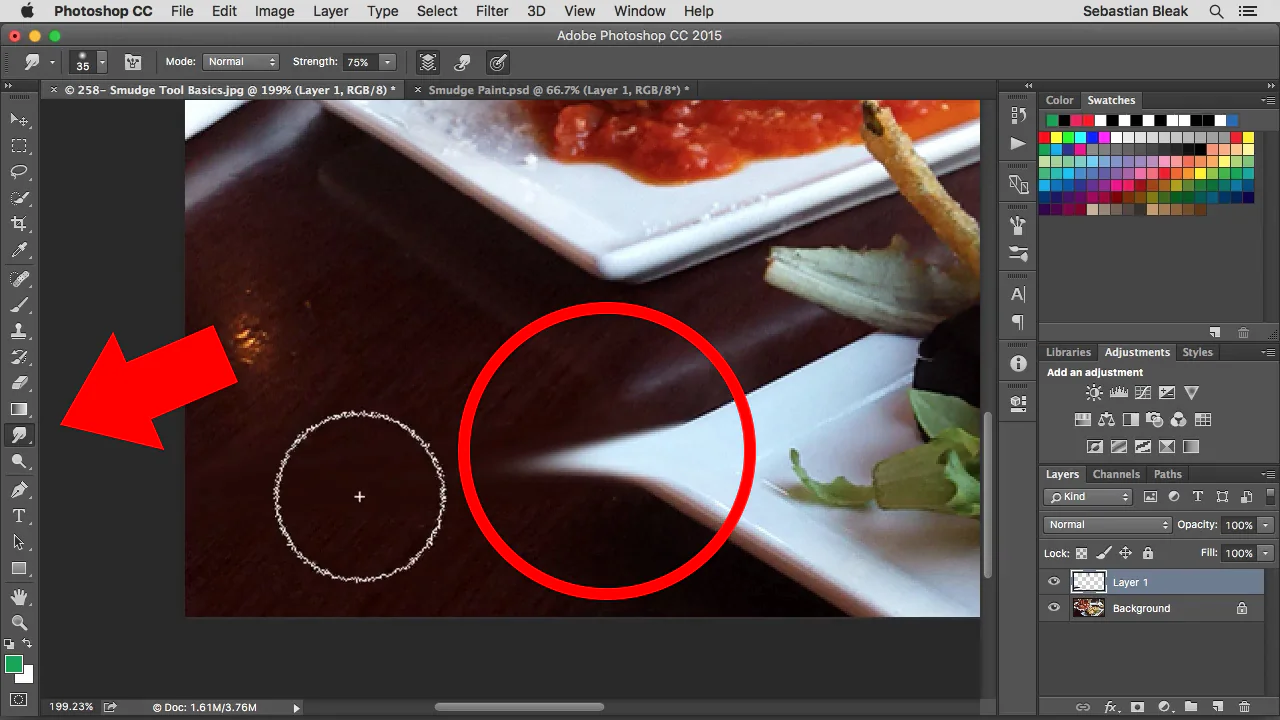
To influence pixels specifically, utilize the “Smudge” tool or the “Liquify” filter. These tools permit you to drag, warp, and whirl portions of the photo, making potent distortions that aid the overall datamoshing style.
Accuracy is vital in this stage. Specifically, target ranges to emphasize or lessen the glitch effects. The nuanced application of data manipulation tools includes profundity and complexity to the visual story, reforming the general effect of your datamoshed creation.
Play with distinctive brush sizes, shapes, and pressure sensitivity settings to attain varying levels of distortion. Grasp the random nature of the process, permitting the controlled chaos of datamoshing to shape the ultimate result.
As you handle the data, watch how the image changes, advancing into a thrilling and outwardly compelling representation, where deliberate distortions breathe life into the advanced canvas.
Step 5: Playing With Compression Alternatives
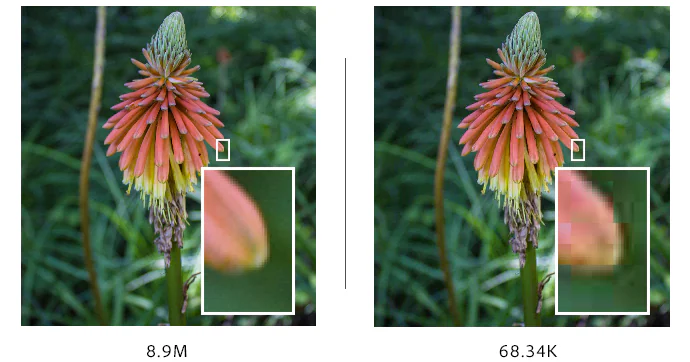
After initial glitch effects and manipulating data into your digital canvas, the next phase includes exploring compression strategies to recreate artifacts reminiscent of video compression.
Start by considering the visual components you need to improve or distort further. Consider exporting the current state of your artwork and re-importing it to initiate compression-like peculiarities. This strategy imitates the artifacts commonly seen in videos experiencing compression, including an additional layer of energetic visual intrigued to inactive images.
You can also look into Photoshop’s video compression features. Convert your project into a video timeline by applying keyframes and playing with compression settings. This strategy permits dynamic changes over time, contributing to an enthralling visual account within a single image.
Keep up a balance between nuance and affect as you present compression-inspired effects. The objective is to bring out the substance of digital distortion without overpowering the onlooker. Survey your progress, occasionally altering compression settings and techniques to coordinate with the specified visual story.
Grasp the flexibility of compression procedures, permitting your artwork to reverberate the riveting aesthetics born from the world of video manipulation.
Step 6: Blending The Layers
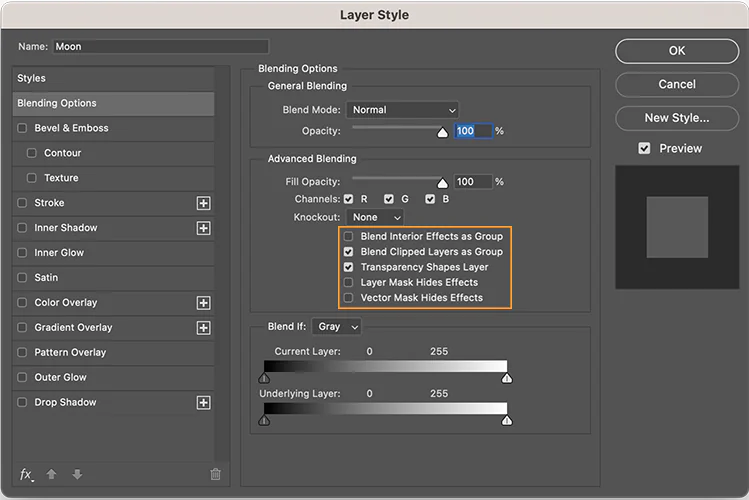
Move to the Layers panel and select the layers containing your glitched and controlled data. Try blending modes such as “Overlay,” “Screen,” or “Multiply.” Each blending mode confers a particular impact, affecting how the layers connect and contribute to the composition.
Alter layer opacity to control the intensity of individual layers, finding the ideal balance between the initial image and the presented glitches. This nuanced approach permits you to form a concordant combination of components, creating a compelling result.
Combine multiple layers with changing blending modes to attain complex and energetic impacts. Grasp the inventive possibilities that emerge from the collaboration between glitched layers and the primary image, enhancing the visual account of your datamoshed work of art.
Intermittently audit your composition, fine-tuning blending modes and opacities to refine the overall appearance. This step complements the controlled chaos characteristic of datamoshing, changing your composition into an enchanting tapestry of glitched components consistently joined with the initial visual establishment.
Step 7: Giving A Final Evaluation And Exporting
With your datamoshed composition taking shape, concentrate on checking on, fine-tuning, and planning for the ultimate export. This significant step guarantees that your inventive vision is realized while providing an opportunity for fastidious adjustments.
Start by scrutinizing the complete composition. Zoom in to examine points of interest and how the glitch effects interact with the source image. Take note of zones requiring advanced refinement or where the specified effect can be increased.
Utilize Photoshop’s cluster of tools to create accurate adjustments. Whether refining the edges of manipulated components or tweaking color balances, this stage ensures that each aspect adjusts to your creative expectations.
Consider looking for feedback from others or taking a moment away from your work. New points of view can uncover subtleties or ranges for advancement that will have been neglected amid the inventive handle.
Once fulfilled with the ultimate composition, it’s time to send out your datamoshed perfect work of art. Explore the “Record” menu, select “Trade,” and select your favored arrangement. Ensure that the export settings protect the integrity of the glitches and overall display.
The export marks the culmination of your datamoshing activity. Share your creation with the world, whether on digital stages, on social media or inside your artistic portfolio. Celebrate the combination of controlled chaos and inventiveness that reflects your intriguing commitment to the domain of datamoshed art.
Conclusion
The datamoshing effect of purposeful distortive inclusion in images sets them apart from commonly perceived artistic notions. In an array of widely employed outstanding visual effects, datamoshing is a distinctive and rejuvenating visual sensation that excites the eyes with its striking characteristics. Compared to other image manipulation techniques, which often strive for perfection and orderliness, this one aims to break the barriers of typically symmetrical arrangements. Surrealism is a compelling addition to the datamoshing effect that transforms usual photographs into unusual yet pleasantly surprising art compositions that the viewers favorably relish and welcome.
