How To Create A Colored Pencil Sketch Effect
Colored pencil artworks have a rich history dating back to the time when 16th-century artists started using colored chalk and pastels. In the early 18th century, Faber-Castell, a German company, produced the first-ever colored pencils. Since then use of these art tools has kept on expanding in art as well as educational institutions. With time, the advancement in manufacturing techniques and the raw material used further improved their quality, which also led to elaboration in art techniques as the artists started using more creative approaches like layering and blending in their colored pencil sketches. Today, this art tool is still recognized among artists, and they are using colored pencils in combination with other art aids like graphites, inks and watercolors, creating more aesthetic and charming pieces. Besides, the visual effects featured in these artworks are also employed by digital illustrators and image editors. Various digital tools and techniques are utilized to create endearing sketches that mimic colored pencil effects or enhance existing compositions or images. This blog will address those techniques in detail to add colored pencil effects to images.
Step 1: Install Your Software And Import The Image
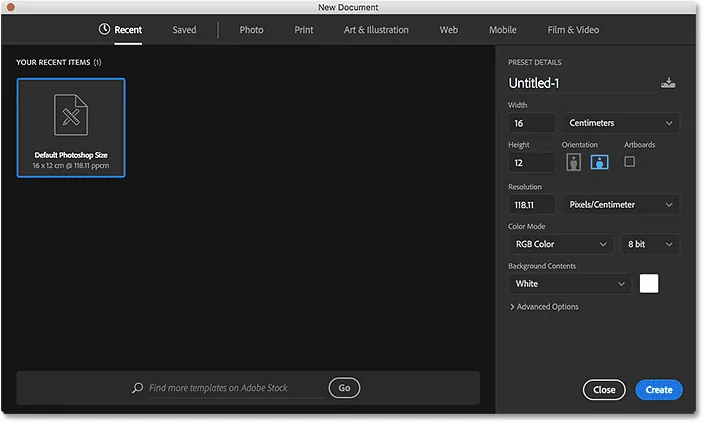
Start Photoshop or any of your favored photo editors and load the image you need to remake. Be sure that it contains a high resolution for the most excellent results.
Survey the picture for any fundamental preparatory alterations, like cropping or essential color correction, to guarantee a tidied starting point.
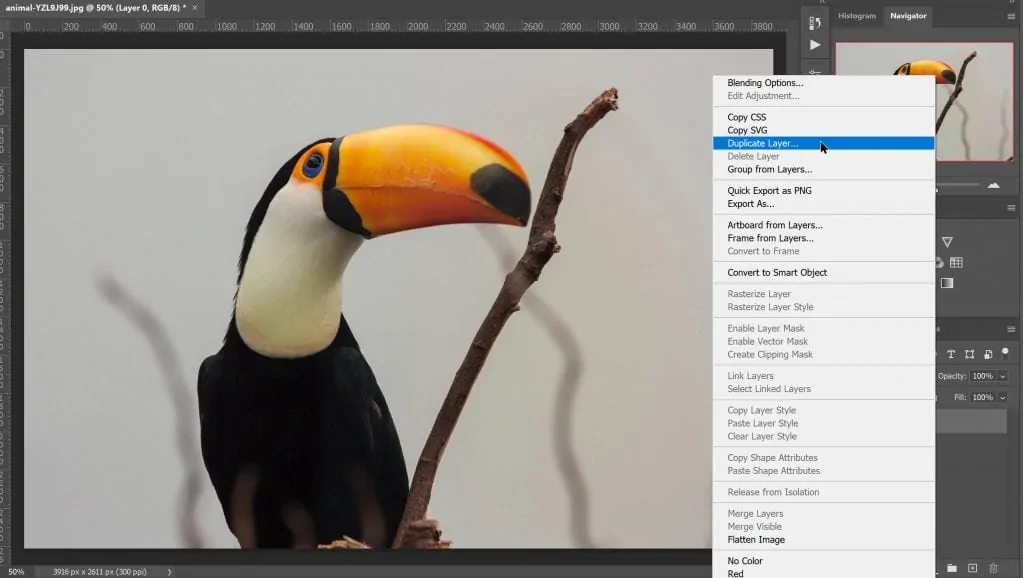
Within the Layers panel, right-click on the initial photograph layer and tap on Duplicate Layer. It will preserve the initial shot for reference and lets you perform non-destructively.
To remain organized, title the new layer something such as Sketch Base. It will help in distinguishing it from other layers you will make afterward.
Affirm that the duplicated layer is over the initial within the Layers zone. This format is fundamental for applying consequent impacts without modifying the base image.
Step 2: Covert The Image To Grayscale
Press on the duplicated layer, or the one you named as Sketch Base, within the Layers panel to confirm that you are applying modifications to the proper layer.
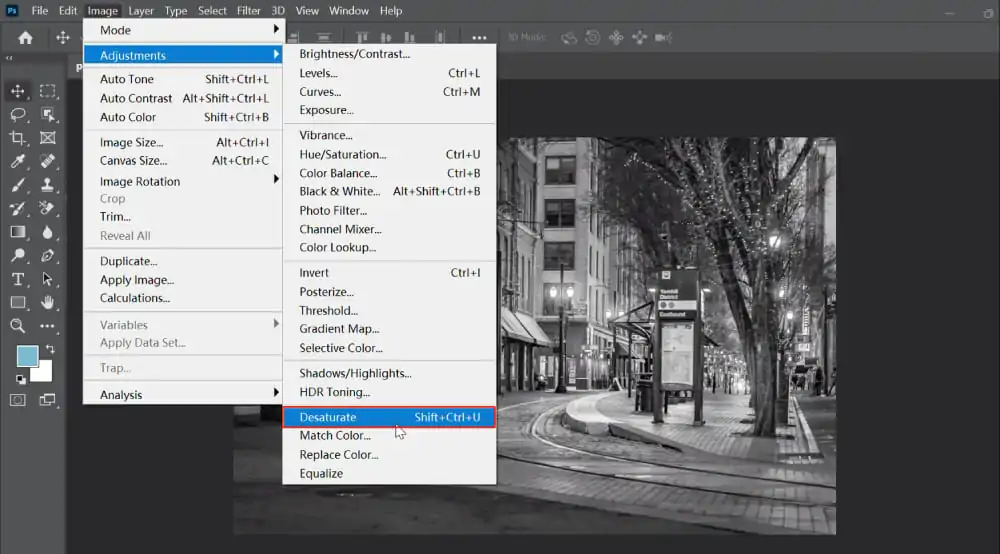
Proceed to the top menu and follow Image > Adjustments and Desaturate. It will remove all color, turning the photograph to grayscale.
For a speedier strategy, tap on Shift + Ctrl + U. It will help you accomplish the same result as utilizing the menu in a minimum time.
Make sure that the picture presently appears in black and white. It ought to hold all the particulars but not show any color.
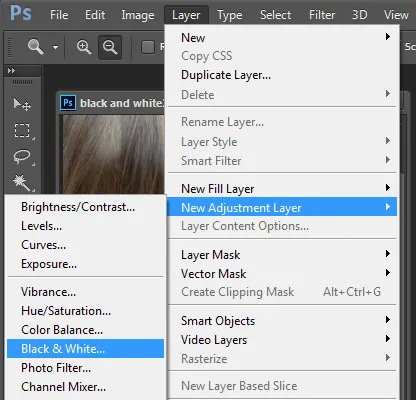
On the off chance that more control is required, utilize Image > Adjustments > Black & White instead, which lets you help in getting customized grayscale adjustments according to the color channels.
Step 3: Invert The Grayscale Values
Press on the desaturated layer in the Layers zone to affirm you are working on the proper layer.
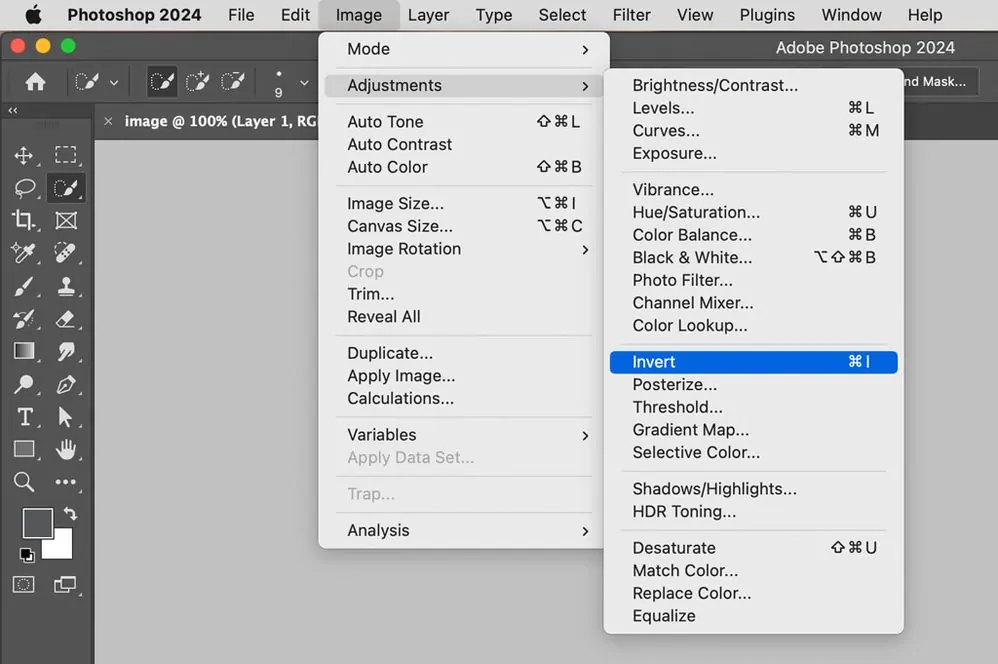
Move to the top menu to choose Image > Adjustments > Invert. That move will invert the grayscale values, shifting light ranges to dark and dark zones.
Utilize Ctrl + I for Windows or Command + I for Mac to get a fast inversion.
The picture should now appera like a photo negative, with highlights showing up as shadows and so on. This step is vital for making the base of the colored pencil sketch.
If the inversion seems over-intense, you can decrease the layer’s opacity slightly to relax the effect, relying on your image’s detail.
Step 4: Soften The Inverted Picture Using Gaussian Blur
Make sure that the inverted layer is in action by clicking on it within the Layers panel.
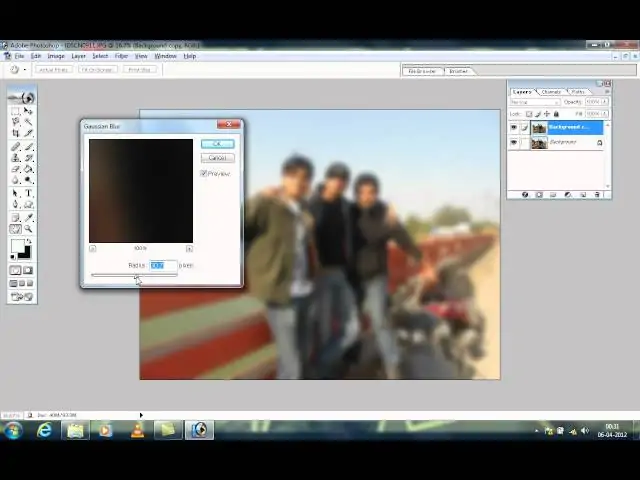
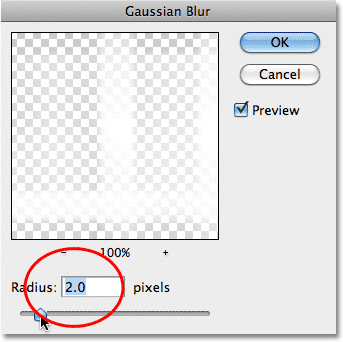
Head to the top menu and click on Filter > Blur > Gaussian Blur. These actions will soften the inverted picture, making the basis for the colored pencil sketch impact.
Within the Gaussian Blur dialog box, specify the Radius value. Usually, a range between 10 and 25 pixels operates sufficiently, though it may shift depending on the picture resolution and craved sketch intensity.
Utilize the Preview box to catch the modifications in real time. Alter the radius till you see the picture incorporates a smooth, delicate formation without losing fundamental details.
Once you are satisfied with the blur level, press Ok. The blurred layer ought to now seem soft and nearly metaphysical, with light details merging into the background.
Step 5: Blend The Image With Color Dodge
Make sure that the layer on which you just applied Gaussian Blur is dynamic within the Layers panel.
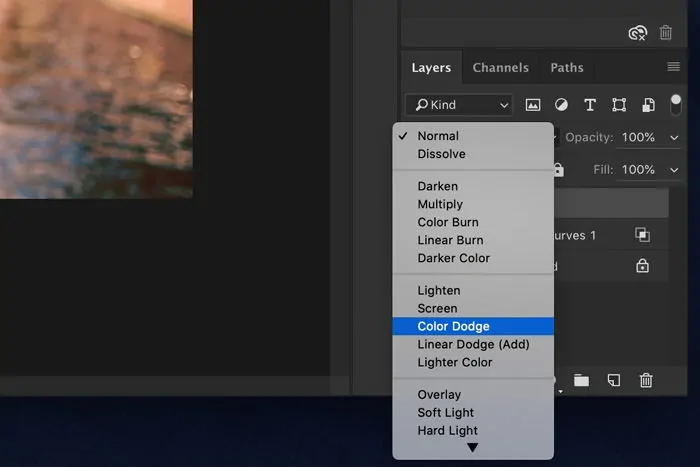
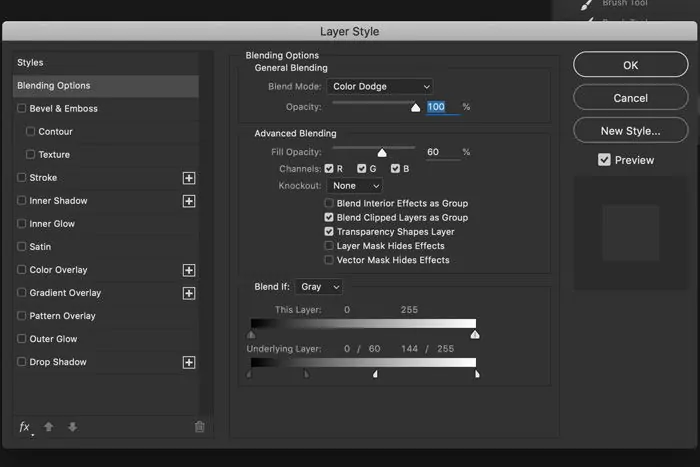
Inside the Layers panel, find the dropdown menu that displays Normal by default. Press it and choose Color Dodge from the index of blending modes.
The picture ought to presently show up mostly white, with light pencil-like lines evident. This mode improves the contrast between light and dark regions, which is significant for the sketch effect.
In the event that the effect is excessively intense, decrease the layer’s opacity by dragging the Opacity slider in the Layers panel. It will help regulate the visibility of the lines.
In case regions look over bright or washed out, you will reconsider the Gaussian Blur radius or alter brightness/contrast to attain a more proportional appearance.
Step 6: Utilize The Colored Pencil Filter
Tap the New Layer icon at the bottom of the Layers panel to include a blank layer on top of your present layers.
Choose the new layer, and move to Edit > Fill, select White, then click OK. That layer will act as the base for the texture.
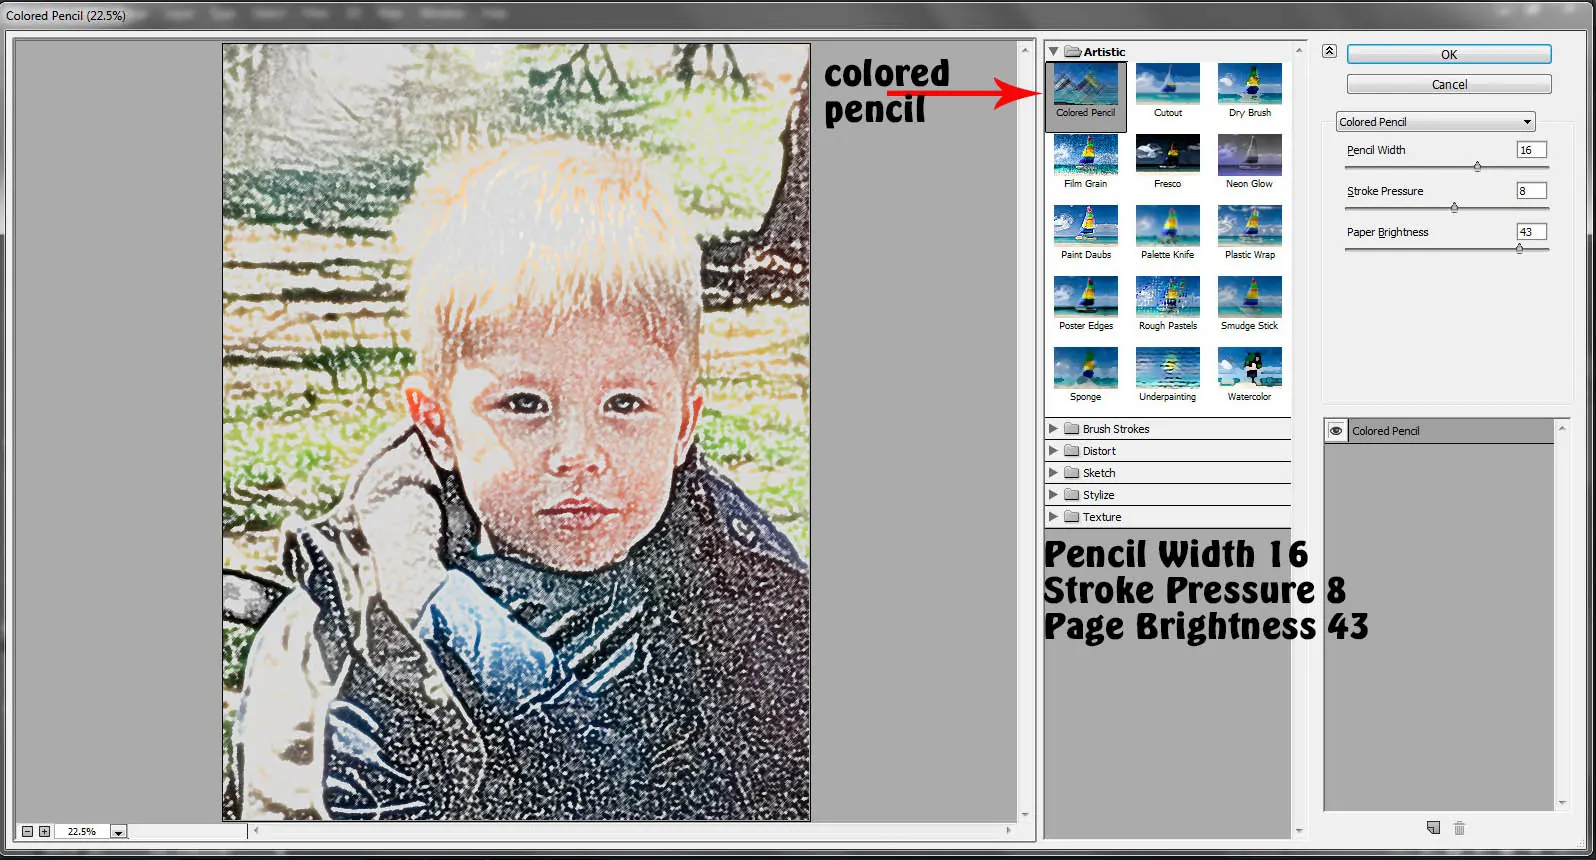
After the new layer is chosen, proceed to Filter > Filter Gallery. Locate to the Artistic section to choose Colored Pencil.
Within the Colored Pencil dialog, put the Pencil Width, Stroke Pressure, and Paper Brightness to your preferred levels. Usually, a Pencil Width of 5-10 functions well.
Alter the blending mode of this surface layer to Multiply, which will unite the pencil surface with the underlying sketch.
Reset the Opacity of the texture layer to retain its intensity, guaranteeing it blends naturally with the existing sketch effect.
If the texture looks too strong in some zones, utilize a soft Eraser Tool or a Layer Mask to regulate and remove undesirable elements.
Step 7: Finalize The Artwork
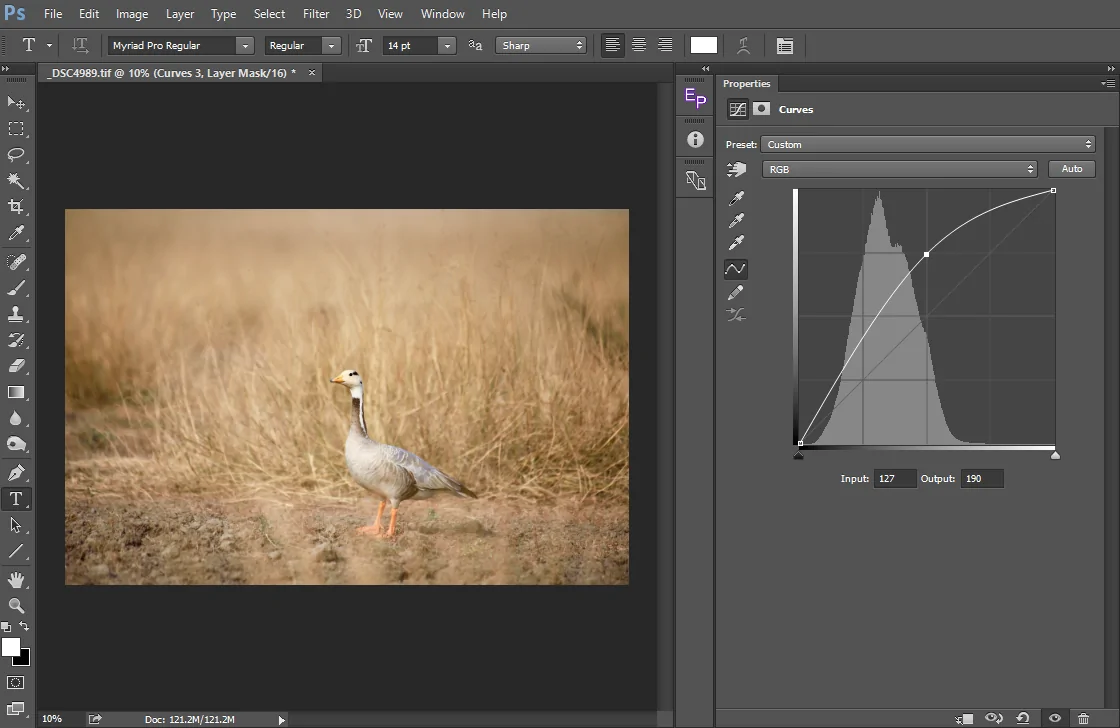
If the composition feels excessively dark or light, employ Image > Adjustments > Levels or Curves to polish the brightness and contrast. Modifying the input levels can help reestablish depth to the sketch effect.
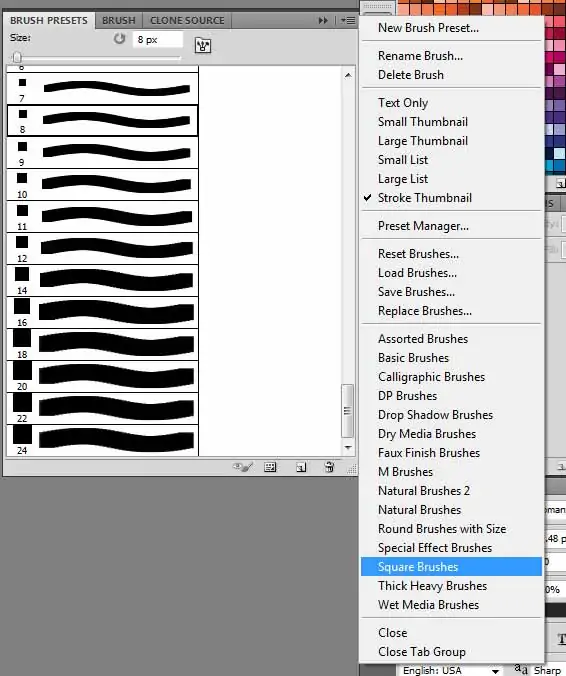
To present nuanced color to the sketch, make a new layer over all others. Pick a soft brush with low opacity, and choose a light hue that matches the palette of your original photo. Delicately paint over zones where you need color accents, like shadows or highlights.
Put the color layer to a blending mode such as Soft Light or Overlay to make the color merge innately into the pencil effect, making a more natural, aesthetic formation.
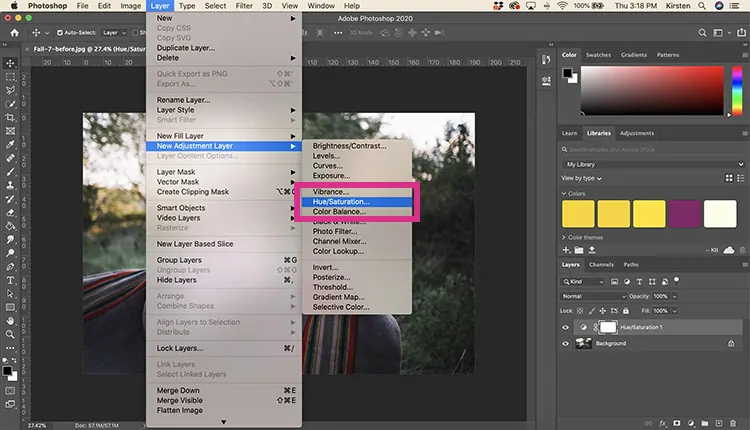
After adding colors, head to Image > Adjustments > Hue/Saturation to expand or reduce the saturation until the colors look natural and do not dominate the pencil texture.
Use the Zoom in feature to review details, polish edges, and erase any extra color that may have dribbled over into undesirable ranges. Ensure all components are well-integrated to preserve a cohesive look.
After you are satisfied with the result, save the final image in your choice of format. In case you plan on making further alterations afterward, save a duplicate in a PSD format to hold all layers and flexibility.
Conclusion
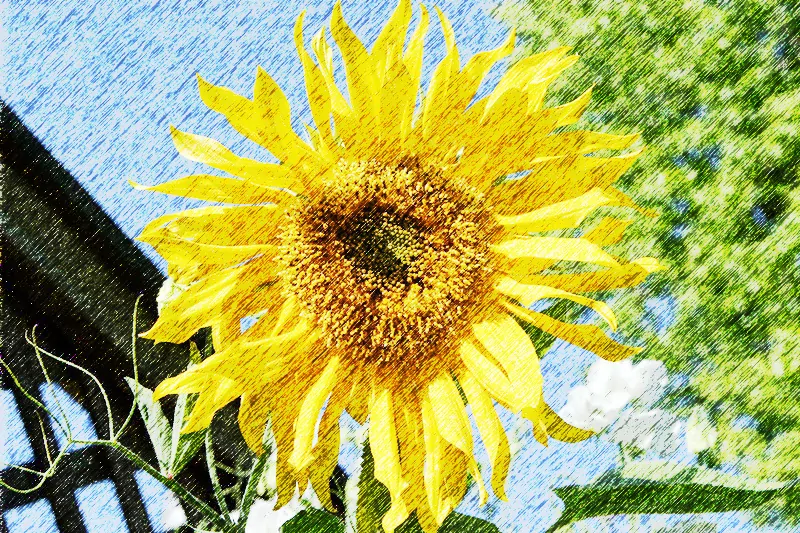
In summary the employment of colored pencil sketch effects to enhance digital images can create fascinating art pieces identical to hand-drawn sketches. Nevertheless, the charm and influence of handmade artworks, which demand manual efforts and take time with the deliberation of artistic proficiency, seem to stay in trend. Digital versions of various art forms, including a colored pencil effect, are equally getting recognition among artists and art lovers. These versions can propose almost similar compositions with no detailed resources required, and in less time, they offer accurate outcomes. Also, you can enhance a variety of images with this effect to re-new their visual settings.


