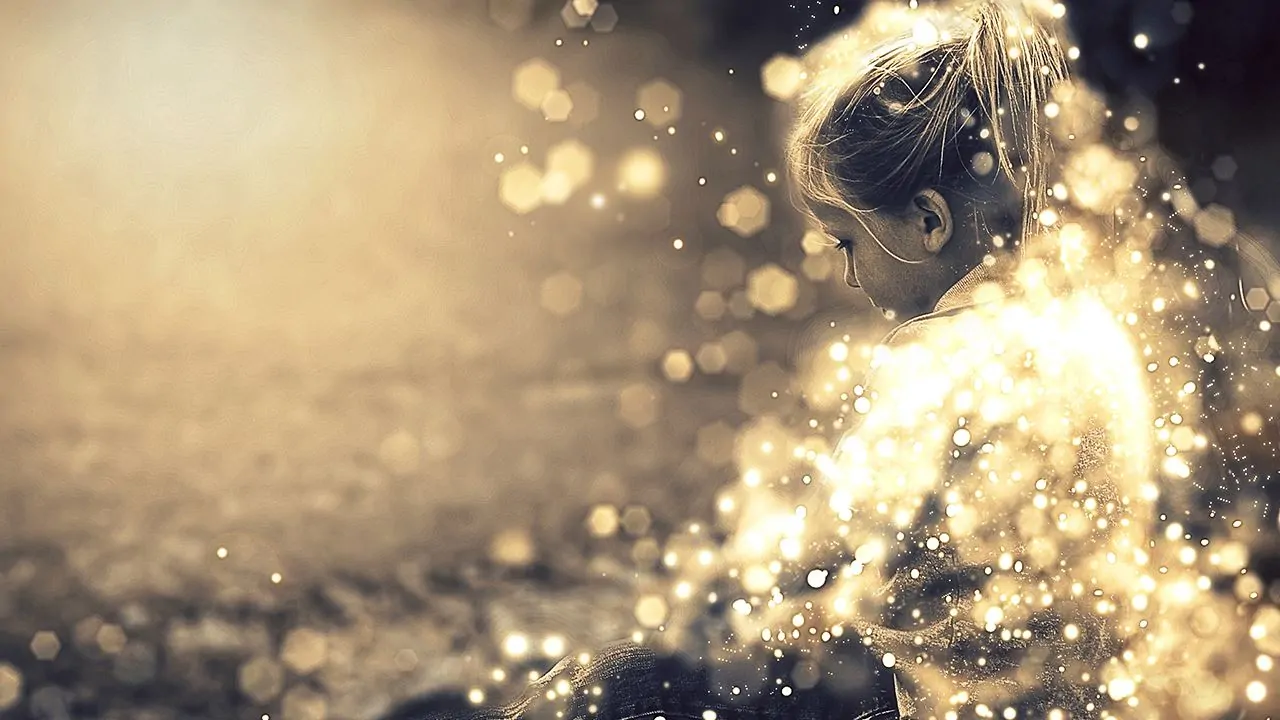
How To Create A Shimmer Effect
The shimmer effect is a superb way to imbue your pictures with more glitz. Also, it produces a more intriguing appearance than a simple, effect-free image. The effect creates an illusion of a glimmer of light flowing across the image, giving your photos a little glitter and increasing their visual enticement. The images manipulated with the use of shimmer effects pose a reflective appearance, just like a glass or metallic surface behaves as light rays strike into it. Besides images, a shimmer effect can also be employed to enhance graphics, artworks, logos, texts, product imaging and many others. Whatever the application is intended for this image-adorning approach, the final results are always flaunting a sense of elegance, luxury and a kind of etherealism. The editing techniques involve the use of gradients, object selection tools, shadows and highlight adjustments, blend modes and opacity settings, use of textures and optionally some animation effects to boost the photo’s dynamic aspect. The following steps will go through the detailed process of enhancing images with a shimmer effect.
Step 1: Selecting The Specific Area
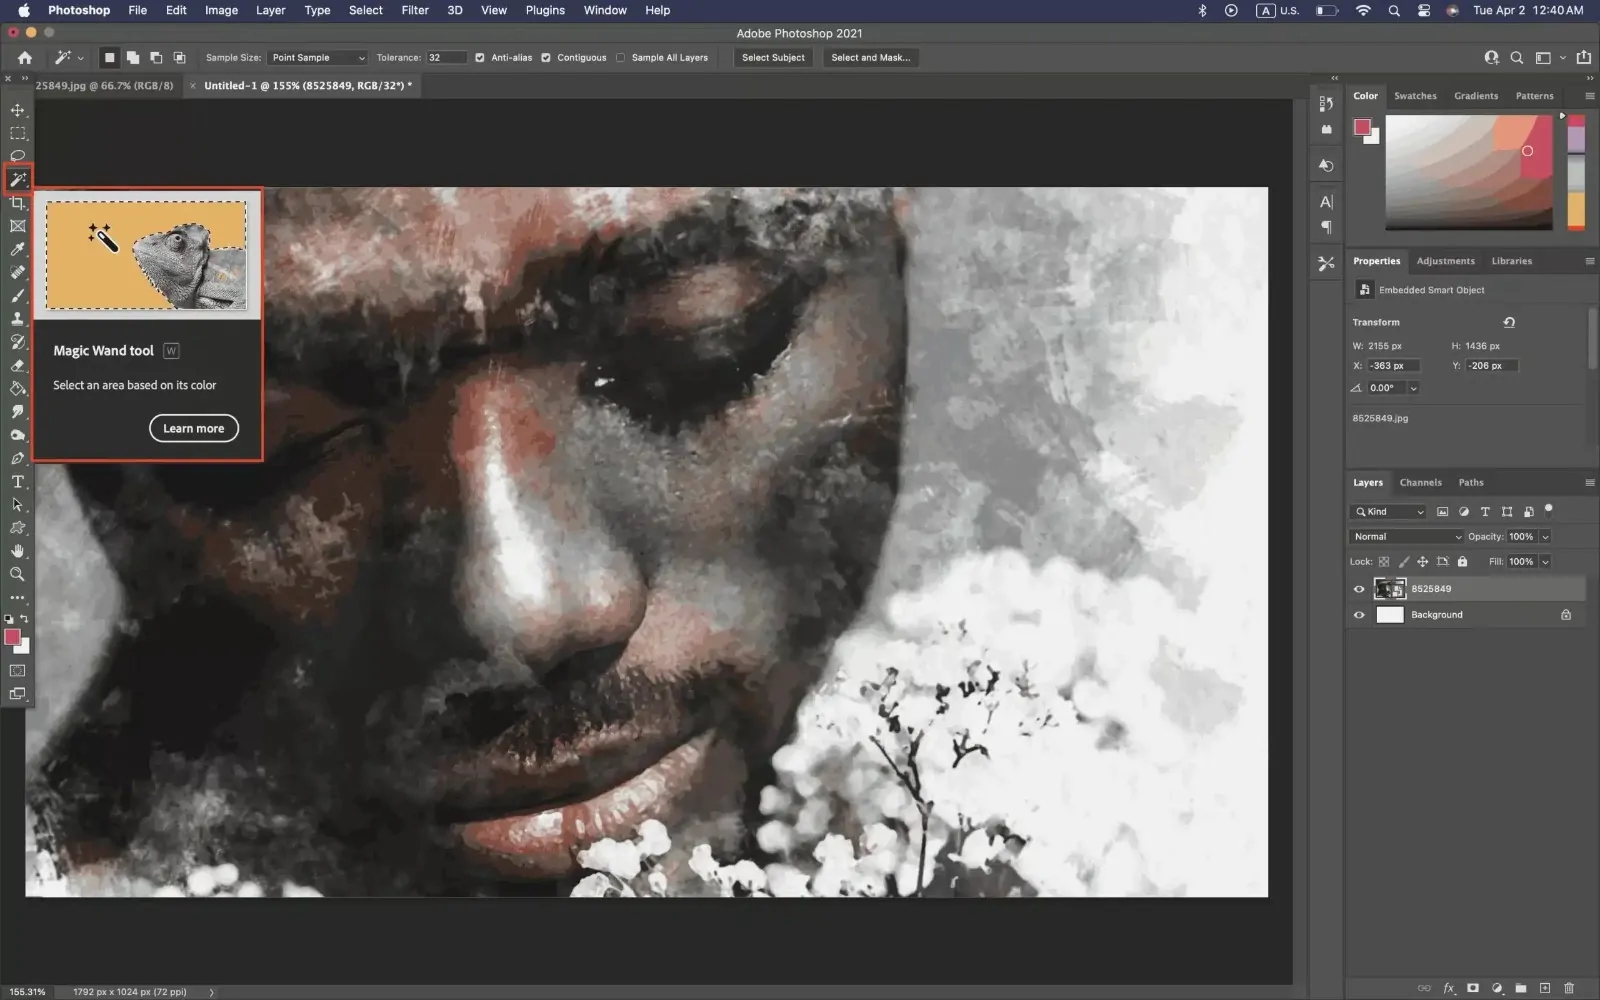
Start by choosing which part of the photo will be most suitable to add a shimmer effect. You can also consider text, logos, metallic objects, jewelry, fabric items, or any reflective surface that needs improvement.
Use tools such as the Lasso, Magic Wand, or Quick Selection to separate the particular range. Make sure to attain accuracy around the edges to avoid influencing unintended regions of the image.
Once done with the selection, refine the edges to guarantee a clean and natural change. Use feathering on the edges slightly to help blend the impact consistently with the rest of the photo.
Duplicate the chosen zone onto a new layer. It will permit non-destructive editing, giving you the adaptability to alter or remove the effect without modifying the initial picture.

Employ a layer mask to handle where the shimmer shows up more selectively. It is particularly advantageous in case you need to make a gradual or partial shimmer effect on the area.
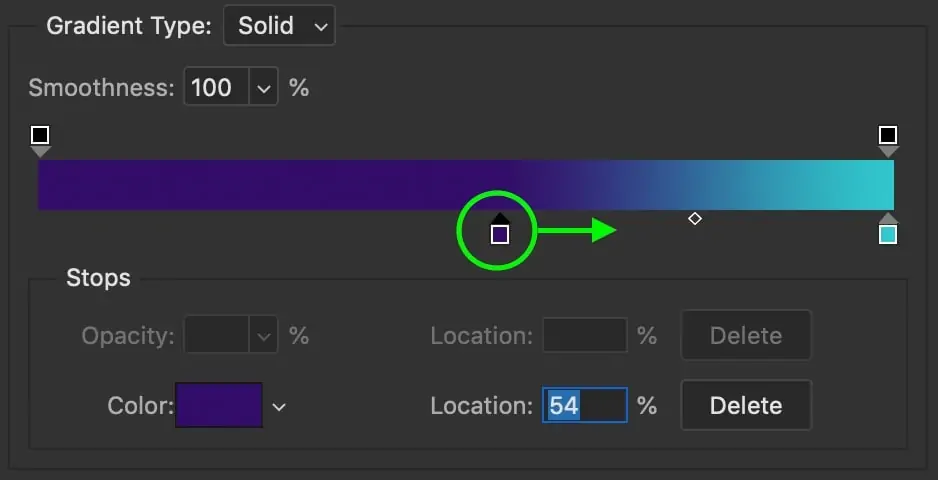
Step 2: Utilizing Gradient Overlays
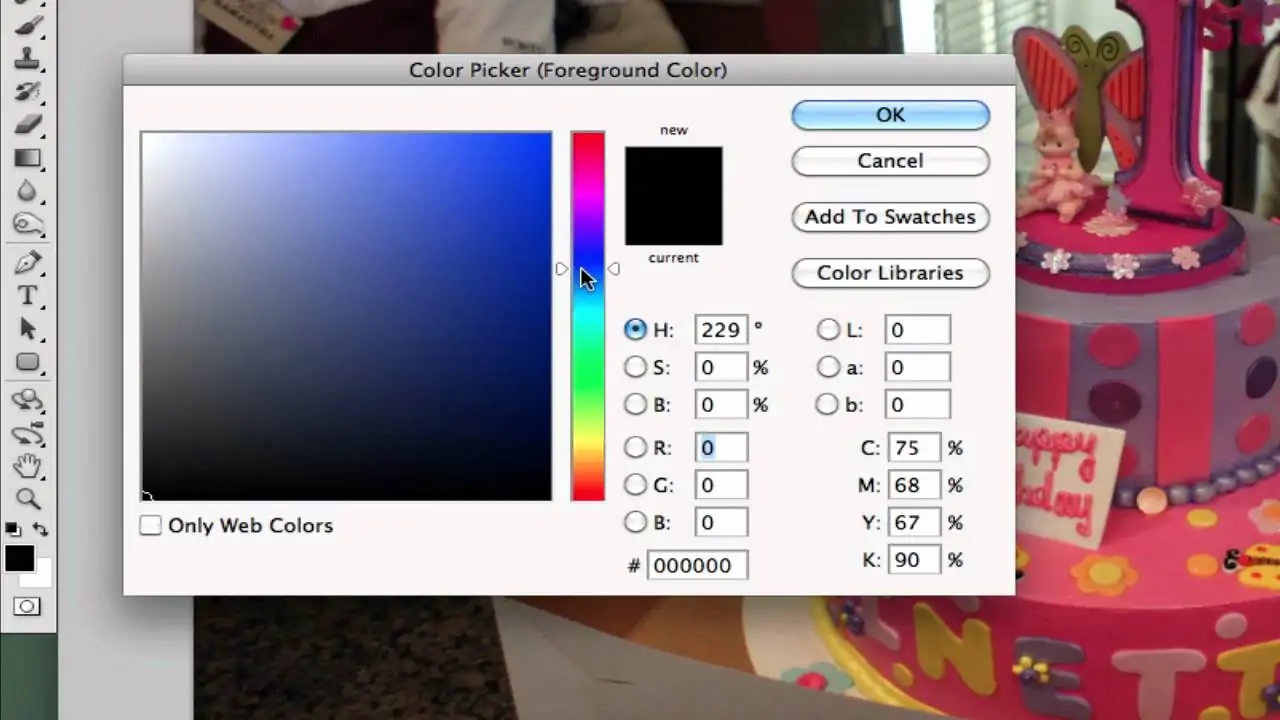
Choose colors that simulate natural light reflections, like white, soft gold, silver, or pastel styles. The color choice hinges on the chosen surface’s material. For instance, metallic surfaces aid from cool tones, while warmer shades work okay for clothes or skin.
Include a new layer over the chosen object. It will guarantee non-destructive altering, permitting adjustments without modifying the original photograph.
Utilize the Gradient Tool and select a linear or radial gradient based on the shape of the object’. Drag the gradient over the chosen zone, beginning from where the light source would naturally strike, making a realistic move from light to dark.
Rotate or scale the gradient to adjust with the outlines of the object’ or the direction of light. This action improves the illusion of depth and genuineness.
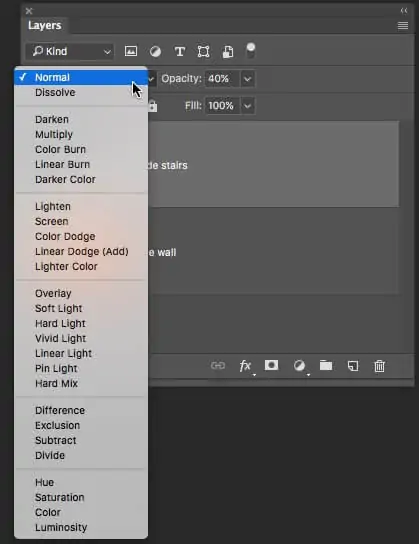
Specify the layer blend mode to alternatives such as Screen, Overlay, or Soft Light to coordinate the gradient with the base image. Alter the layer opacity to control the level, guaranteeing a nuanced, natural shimmer effect.
Step 3: Adding Glows And Highlights
Include a new layer over the gradient overlay. That layer will include the highlights, guaranteeing non-destructive altering and simple adjustments.
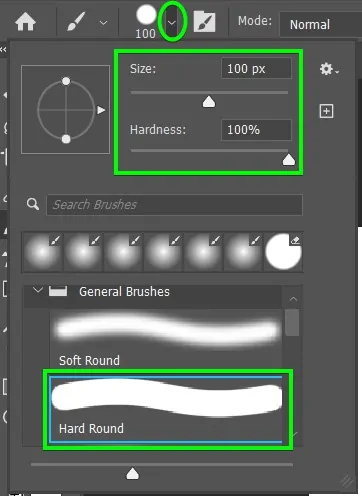
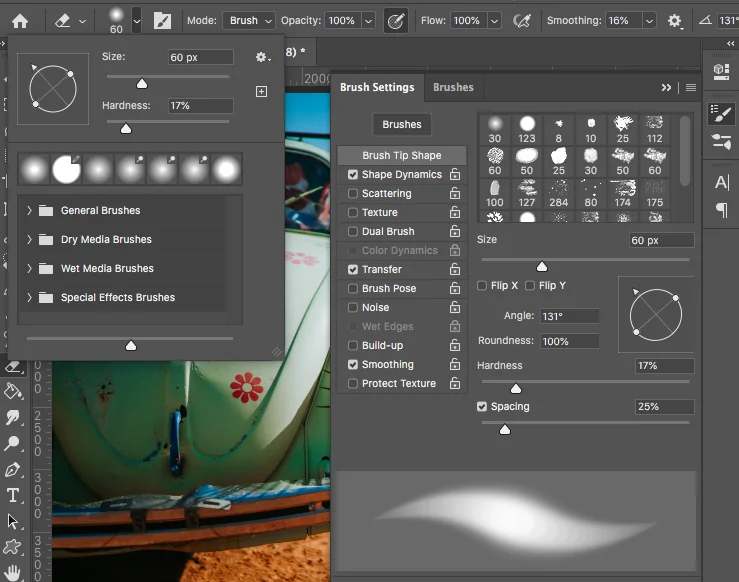
Choose a delicate, round brush with a low opacity of 20 to 30% and put the color to white or a light hue that fits the gradient. It makes delicate, natural highlights without drastic edges.
Paint delicate highlights onto the zones where light can naturally reflect, including the edges, curves, or prominent highlights. Concentrate on high points or regions where light could catch most powerfully.
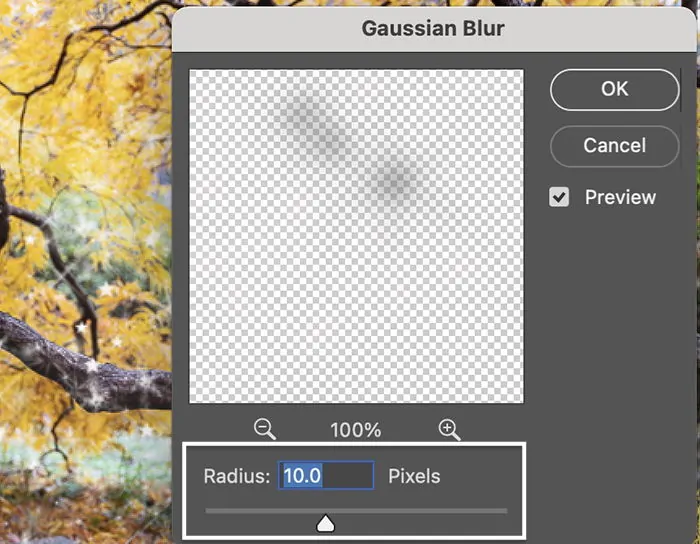
To get an additional glow, copy the highlight layer and spread a Gaussian Blur onto the duplicate. That will diffuse the light, making a soft, brilliant glow. Alter the blur radius to prevent the spread.
Decrease the opacity of both the highlight and glow layers as required to guarantee the effect remains modest. Unduly much intensity can overpower the image, whereas a mild glow enriches realism and depth.
Step 4: Applying Noise And Texture

Include a new layer over the highlights and glow to add the noise or texture. Name the layer for effortless identification.
Use a neutral color to fill the new layer. It will make a ground for applying noise and keeping the effect non-destructive.
Proceed to Filter > Noise and Add Noise while modifying the settings accordingly. Utilize a low value of 5 to 10% and choose Gaussian for distribution with the Monochromatic option empowered to evade undesirable color.
Alter the blend mode of the layer to Overlay or Soft Light to mix the noise into the picture naturally. This stage guarantees that the texture blends consistently with the shimmer effect.
Decrease the opacity of the layer, controlling the intensity of the noise. A nuanced texture includes realism, while over-the-top noise can make the effect appear bizarre.
Utilize a layer mask or the Eraser option to remove commotion from parts of the picture where it is not needed, making sure that the texture upgrades only the specified ranges.
Step 5: Blending Modes And Opacity Settings
Identify the essential layers included in creating the shimmer effect, like the gradient, highlights, and noise layers. This phase centers on uniting them consistently with the base picture.
Go through blend modes, including Screen, Overlay, Soft Light, or Lighten. Each of these modes will interact distinctively with the underlying layers, improving the shimmer by modifying the mixing of light and colors.
Examine how each blend mode modifies the appearance. Screen mode functions well for bright highlights, while Overlay infuses contrast. Adapt the blending based on the material or object. For instance, reflective surfaces aid from lighter modes, while softer components may require subtle mixing.
Alter the opacity of each shimmer layer to regulate its strength. Decrease the opacity for a modest, realistic shimmer; grow it for a more prominent or expressive effect. An accommodated opacity ensures the effect enhances instead of overwhelms the photograph.

In case you are utilizing multiple shimmer layers such as gradients and highlights, adjust their opacity and blend modes in reference to each other. It will confirm the depth and coherence, averting the effect from looking dull or disconnected.
Step 6: Finalizing And Exporting
If you are opting for a static composition:
Audit the shimmer effect to ensure smoothness and consistency over the chosen zone. Confirm the blending of highlights, gradients, and noise with the initial photograph.
Use the Zoom in option and review edges and transitions. Utilize the Eraser Tool or a layer mask to tidy up any undesirable shimmer spill out. Polish brush strokes or gradient placements for a tended, realistic wrap-up.
Make sure that the shimmer harmonizes with the overall lighting direction of the image. Include more or soften the existing highlights as required to preserve a cohesive appearance.
In case you need some animated effects:
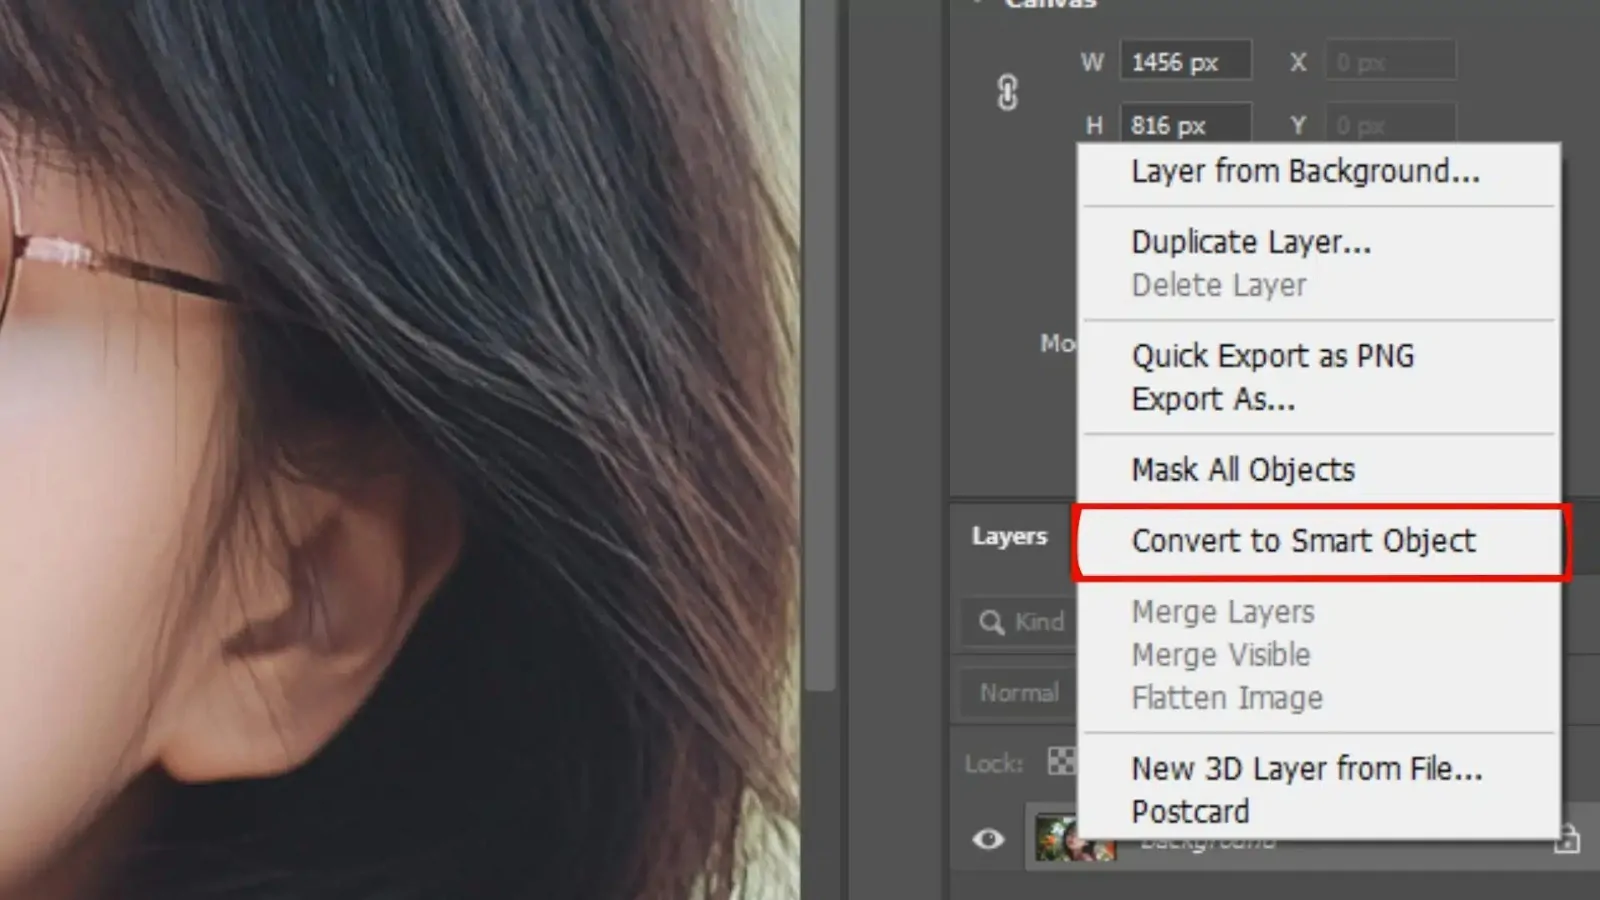
Using an editing program like Photoshop or After Effects, convert your shimmer layers to Smart Objects and move to the timeline. Establish keyframes to regulate the position and opacity of the shimmer over time.
Reposition the gradient or highlight layers over the object frame by frame. A delicate, sweeping motion makes a vibrant shimmer, simulating light floating over the surface.
Confirm that the animation goes naturally by relaxing the movement at the beginning and ending. Do not introduce any kind of abrupt changes to attain a realistic and visually delightful shimmer.
Once you are pleased with your shimmer effect composition, move to the exporting phase, in which you can choose formats like JPEG or PNG for high-quality static images.
On the other hand, if you have an animated one, export it in GIF or MP4 formats to preserve the dynamic shimmer effect as you share over diverse platforms.
Conclusion:
In summary, the shimmer effect is popular in modern image editing practices as it can instantly transform your photographs from boring to breathtaking. This image-enhancing strategy is an excellent complement to any photograph, grasping the natural characteristics of light as it hits mirror-like surfaces. Your photographs can be converted from a collection of everyday photos to extraordinary, magical-looking compositions with a skillfully applied shimmer effect. You can add shimmer surface overlays to cover the whole image or target selected areas of images to create a magical aura that brings forth unique narratives.
