How To Create A Blacklight Effect
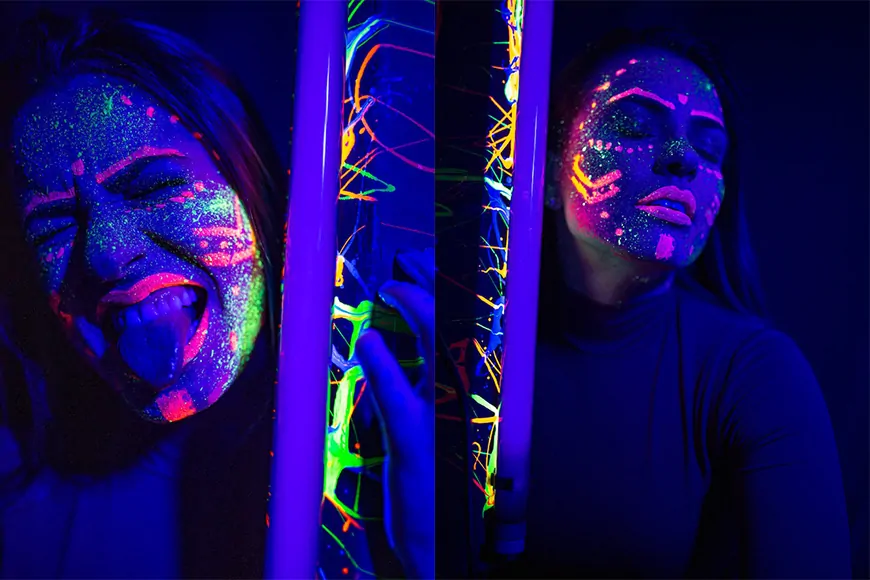
The traditional blacklight design is simply a fluorescent lamp. Electricity is passed via a tube that contains an inert gas and a fraction amount of mercury to create light in fluorescent lights. Mercury atoms radiate energy in the form of light photons when they get excited. They release some photons of visible light, but the majority of these are in the ultraviolet (UV) wavelength range, which causes the phosphor coating surrounding the tube to shine and emit visible light. Though blacklights are used in blacklight photography to shoot images in actual nightclubs, more recently, they have been used to portray artworks or capture everyday life events in a style that resembles a nightclub. Furthermore, with the advancement of image editing techniques and tools, blacklight effects can now be applied to photographs that are captured in normal lighting conditions. The primary modifications involve manipulating hue, saturation and contrast within an image. Different layering styles and glowing effects are also employed. This blog will spotlight the steps to enhance everyday images so that they look like the products of blacklight photography.
Step 1: Expand The Saturation Of Your Chosen Photo
Start by expanding the saturation of your chosen photo, concentrating on the colors that are usually fluorescent, such as bright pink, blue, green, and yellow. That will make these colors more spirited and dynamic, imitating how UV-reactive hues show up beneath blacklight.
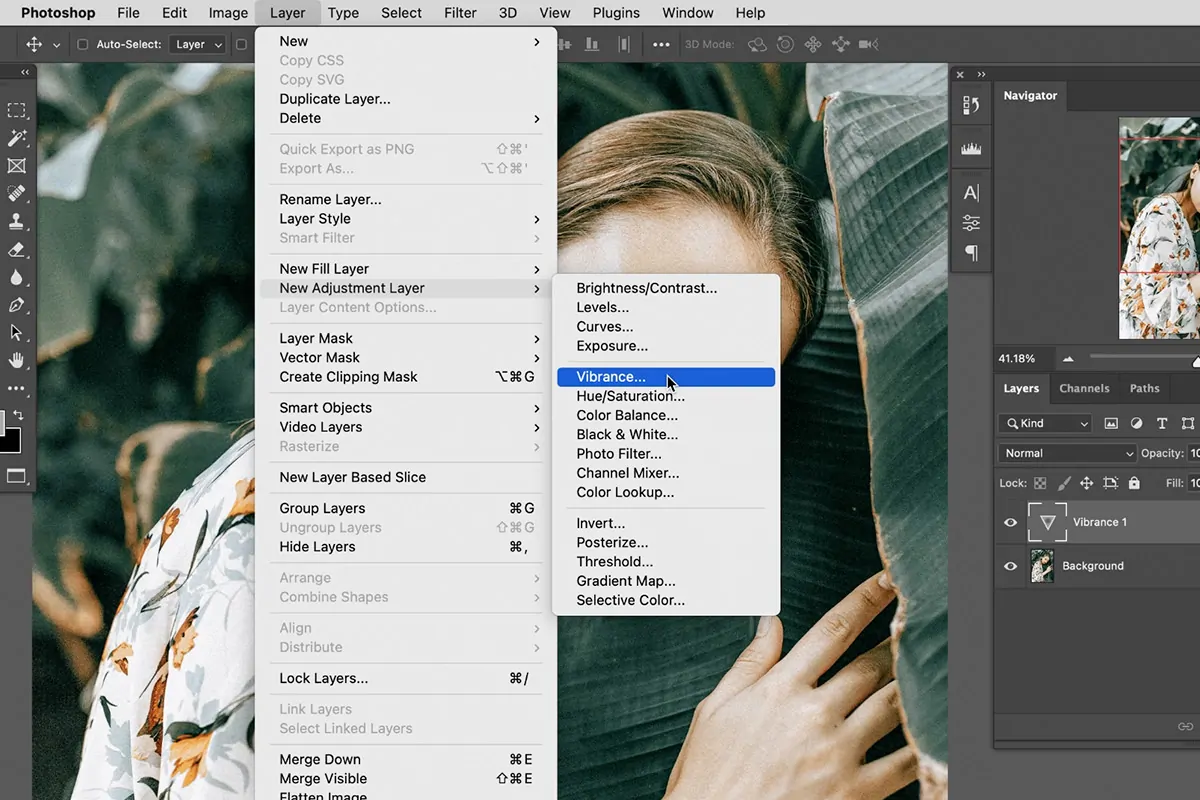
Enhance vibrance to upgrade colors, particularly in photos with skin tones or neutral ranges. It will selectively boost the intensity of less saturated colors without excessively saturating skin tones or natural tints, permitting the luminous components to stand out without mutilating other zones.
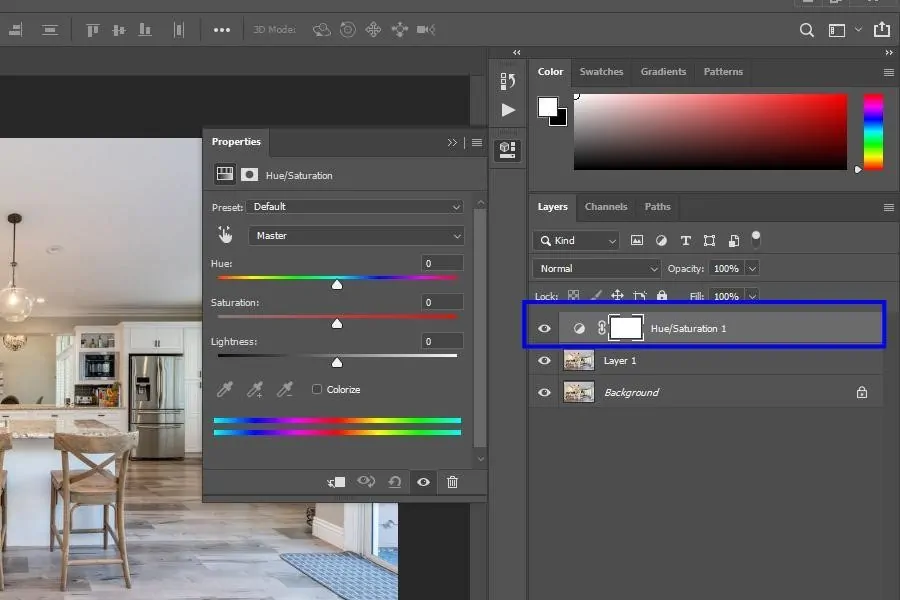
If you need individual colors, like neon green or pink, to shine more intensely, use selective color alterations. In Photoshop, you can utilize the Hue/Saturation layer and target particular colors to improve them further.
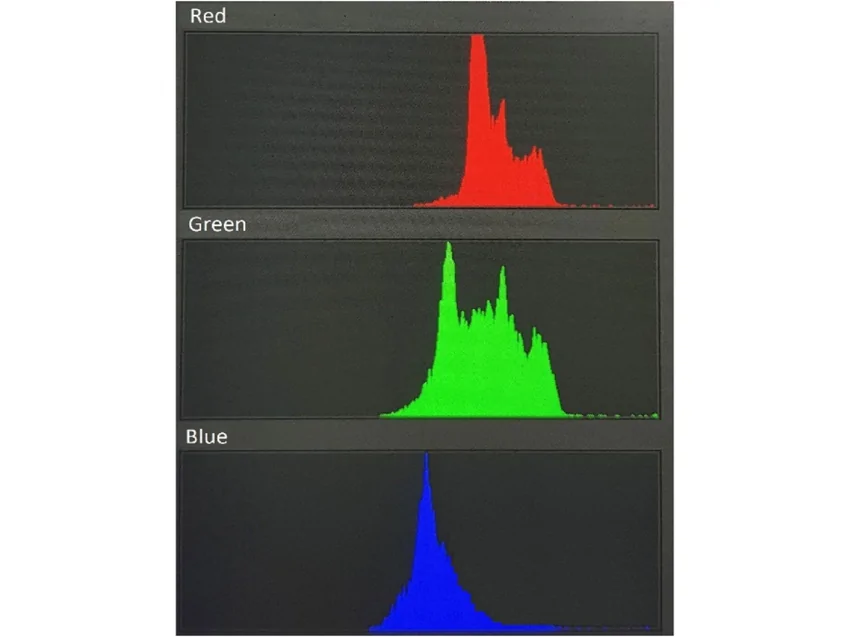
Another effective strategy is modifying the color curves. By controlling the individual color channels, including red, green, and blue, you can selectively brighten and improve particular regions within the picture to simulate the glowing impact seen under the blacklight.
Frequently preview the photograph to guarantee the colors do not end up overly artificial. Tune the alterations to guarantee the neon colors stay premium without overpowering the composition.
Step 2: Utilize A Hue/Saturation Adjustment Layer
If you are using Photoshop or a comparative program, use a Hue/Saturation adjustment layer to redirect the colors within the picture. By dragging the hue slider, you can alter the general tone of the image to highlight resonant colors, including neon pinks, greens, or blues, which are generally correlated with blacklight effects.
Grow the saturation of particular colors to upgrade their intensity. It helps create a more distinctive, gleaming formation that simulates the brightness of fluorescent materials beneath UV light.
If particular colors within the photo, like skin or neutral tones, are dimming the effect, utilize the Selective Color adjustment to focus on enriching only the neon hues. You can focus on colors such as yellow, green, or blue to make them look more striking.
Modify the color balance toward cooler tones like blues and greens to build the chill, vibrant atmosphere of blacklight settings, which often highlight cooler tones.
After each alteration, audit the picture to be sure taht the effect looks natural and dynamic without getting to be oversaturated or unrealistic.
Step 3: Add A Glow Effect
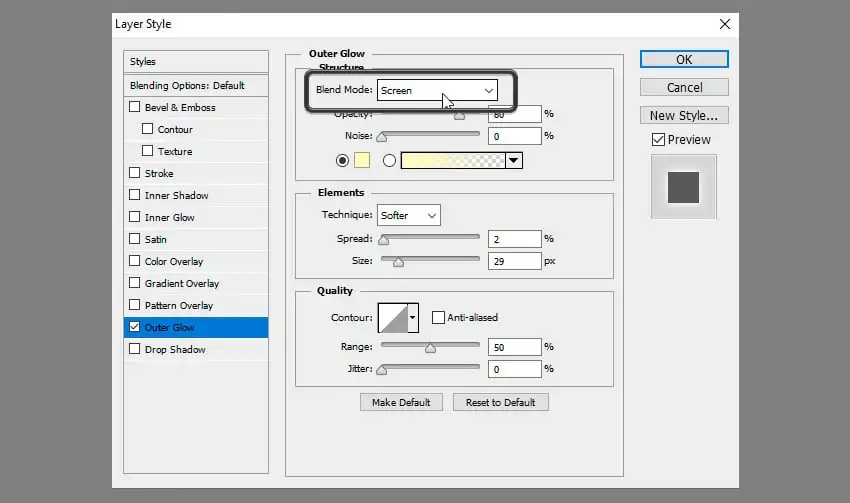
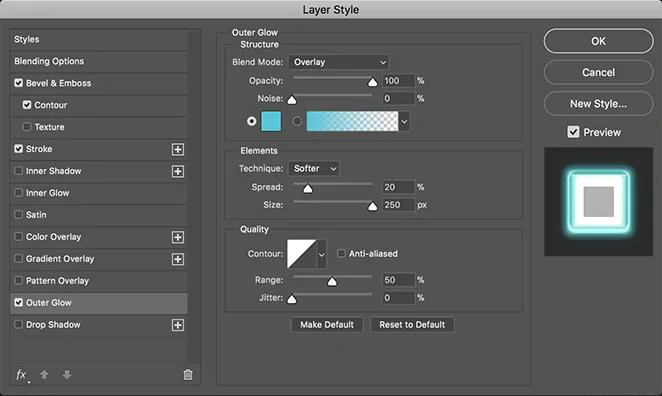
Locate the Outer Glow layer effect to include it in the subject of the photograph. That effect mimics the glow caused by UV-reactive materials. Specify the color of the glow to coordinate your neon tones, like bright pink or electric blue, and alter the size and spread to induce the required intensity.
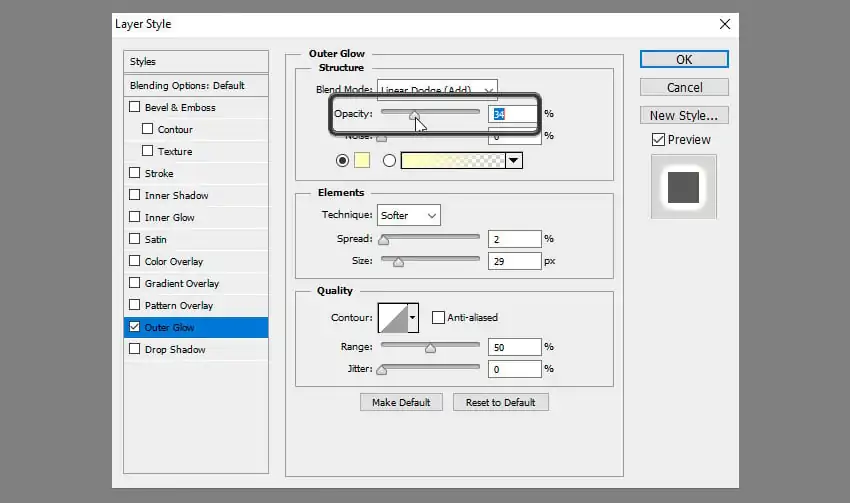
Regulate the opacity and spread of the glow to manage how diffuse or sharp the glow shows up. A loftier opacity makes a more fierce shine, while a bigger spread will soften the impact and create a more atmospheric impression.
To grow the effect, apply considerable glow layers in diverse colors around different components. Layering distinctive glowing tones offers the photo more dimension and complexity, mirroring the colorful brilliance seen under blacklight.
For a more modest glow, try blending modes such as Soft Light or Overlay. These modes include a more natural light effect without overpowering the image.
Alter the glow’s edge softness to blend consistently into the encompassing zones, guaranteeing the effect looks true to life and not artificially imposed.
Step 4: Decrease The Brightness Of The Background
Decrease the brightness of the background to form more contrast between the gleaming components and the surroundings. A darker backdrop permits the neon or fluorescent colors to look more dazzling, mimicking the effect of UV light and highlighting particular ranges in a dark space.
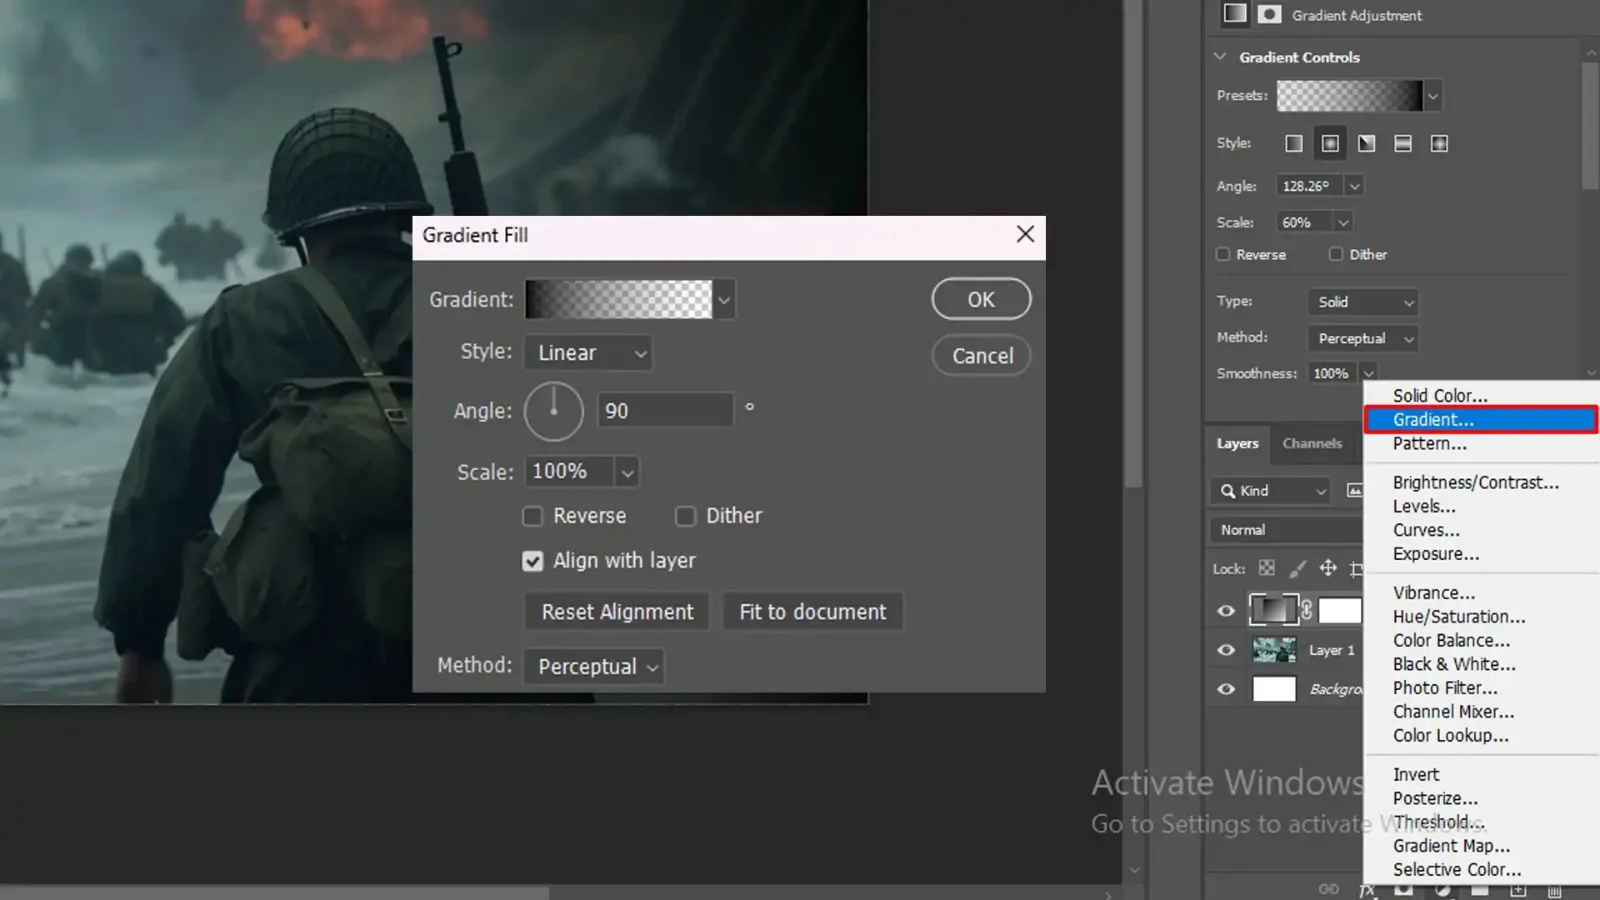
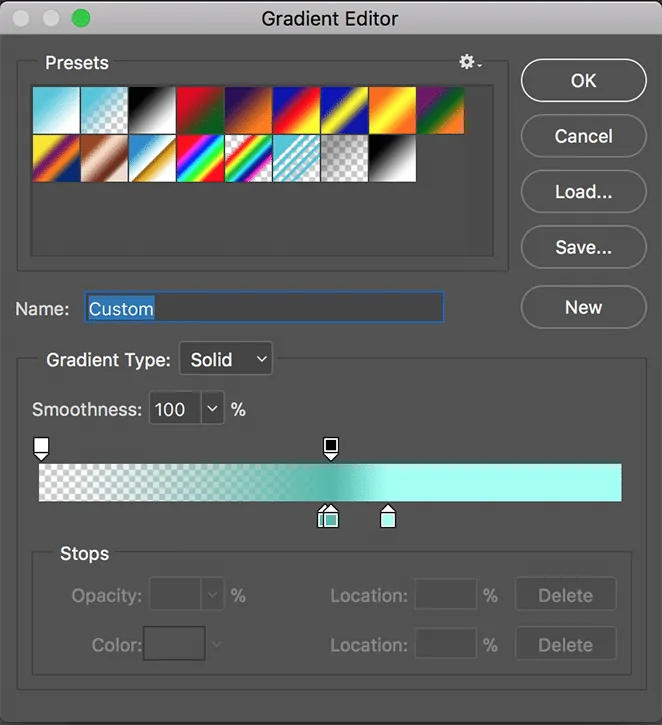
Utilize gradient layers to form a gradual darkening impact, concentrating on regions that ought to be shadowed or less lit up. This strategy can enrich the glow effect by leading attention to the central subjects while keeping up a modest, atmospheric background.
An easy way to darken the foundation is by including a black or dark gradient overlay. Spread it selectively to the regions you like darker, leaving the gleaming parts of the image intact to keep up their vitality.
With layer masks, you can absolutely handle where the background darkening occurs, guaranteeing that the effect is applied to the whole background without involving your main subject.
Once you are done with darkening the background, polish the overall contrast within the photograph to let the bright, radiant components stnd out against the presently darker setting.
Step 5: Expand The Contrast Between Light And Dark Regions
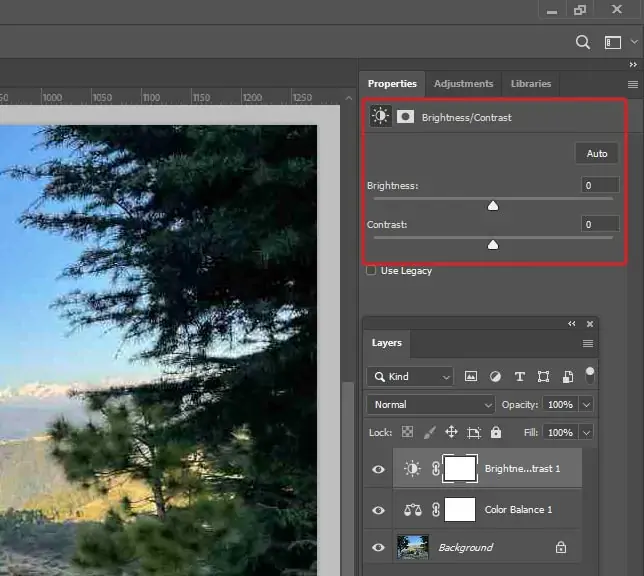
Utilize the contrast slider or adjustment layers to expand the contrast between light and dark regions within the photograph. It will enhance the gleaming components and make them look more dramatic against the darker foundation, amplifying the blacklight effect.
For more exact control, utilize the Curves adjustment tool to polish the contrast. By altering the RGB curve, you’ll increment the brightness of the highlights and deepen the shadows, further upgrading the gleam and making a more energetic image.
To include more depth, apply local contrast adjustments to particular zones where the glow effect occurs. It helps to make the glowing parts more dynamic while keeping the rest of the photograph adjusted and dark.
After expanding contrast, apply subtle sharpening to upgrade the edges of the glowing regions. It makes a fresh, eye-catching impact where the glow meets the dim foundation.
Keep previewing the image to confirm that the expanded contrast doesn’t make the colors too offensive or unrealistic. Alter the levels as required to preserve a balanced, shining impression.
Step 6: Utilize Specialized Fluorescent Or Neon Filters
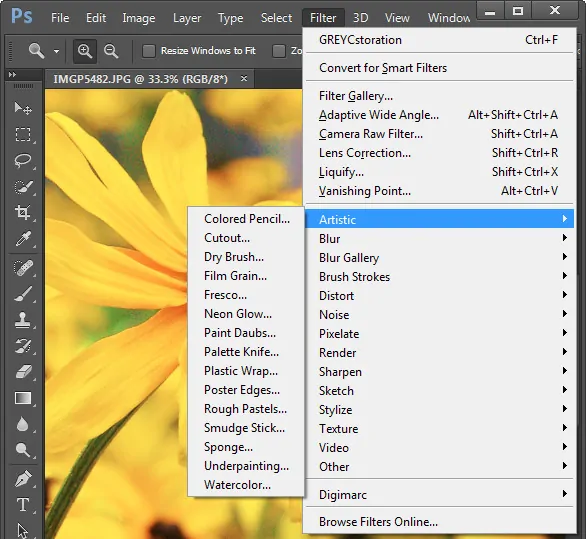
Utilize specialized fluorescent or neon filters to mimic the effect of materials glowing in the black light. These filters can upgrade the brightness of the colors and propose a subtle glow, helping to reproduce the UV-reactive appearance of neon lights.
Add the filter on a new layer and try blending modes like Screen, Overlay, or Soft Light. These modes can boost the glow without overwhelming the image, including a brilliant effect that imitates fluorescent materials under black light.
Expand the vibrance of your image after applying the filter. Revise the vibrance or saturation sliders to heighten neon-like colors and make them stand out even more.
In case the effect is too intense, alter the opacity of the filter layer to control the intensity of the glow. Bringing down the opacity will make a more inconspicuous glow, whereas higher opacity gives in a more intense fluorescent appearance.
For more complexity, layer distinctive fluorescent or neon filters above each other. It can add depth and divergence to the glowing effect, making it seem more vibrant and multi-dimensional.
Step 7: Finish With Neon Brushes
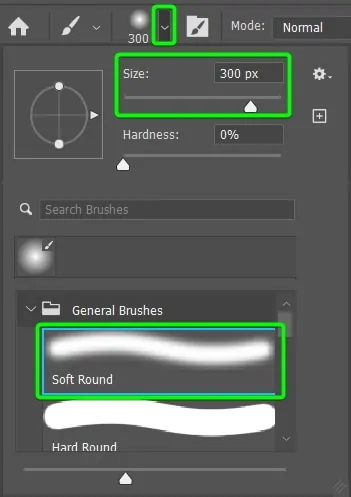
Pick neon or glowing brushes planned for making glowing effects. These brushes can be utilized to paint over critical ranges of the picture, including a layer of shining light that recreates the blacklight impact. Center on elements such as edges, outlines, or zones you need.
Choose neon shades such as electric blue, hot pink, or shining green for your brush strokes.
Set the opacity and size of the brush to handle the vigor of the glow. A gentler, low-opacity brush produces nuanced glowing components, whereas a higher opacity creates more evident, brighter gleams.
Utilize multiple layers to assemble the glow effect. By painting on isolated layers, you’ll be able to alter each layer’s opacity and blending mode separately.
To make your glow look more natural, utilize the smudge feature or Gaussian blur to integrate the painted spots into the remainder of the picture.
After you are content with the finalized blacklight effect, export the composition within the appropriate file format and resolution per your requirements, whether for digital or print purposes.
Conclusion
In conclusion, the blacklight effect application on images imbues an unusual kind of aesthetics into them, making them eye-catching and too good to ignore. It can bring forth a futuristic glow, highlighting crucial details and transforming the overall tone of your photograph. Whether you want to create a modernistic vibe or a lively nightclub ambiance, there are a few simple ways, as mentioned in this blog, to liven up your photos’ content and embellish your artwork. At the end of the day, you can significantly enhance your compositions with the assistance of editing tools and your own creative knacks.


