How To Create A Cardboard Cutout Effect
A cardboard cutout is a piece of card that has been cut into a specific shape, usually that of a person with a large portrait of that person, a character from a movie, or an object on it. Such cutouts are mainly used for promotional goals or as decorative displays for purposeful events. The phenomenal concept of a cardboard cutout is also prevalent in the field of image creation and enhancement, where images are modified to mimic the style of material cutouts. This special editing effect can serve various pursuits for an image, including bringing attention to the primary subject within a photograph, adding a tinge of three-dimensionality, and expanding the aesthetic of your photographs. The eminent editing strategies to edit an image with a cardboard cutout effect include the use of selection tools, texture applications, lighting manipulation, colour modification and many more. This blog article will proceed with the step-by-step process of employing different editing techniques, including the above-mentioned ones, to create a cardboard cutout effect from a photo.
Step 1: Preparing The Photograph
Select a photograph with clear details and high resolution to make sure that the cutout effect remains intense and illustrated. Those pictures having great contrast between the subject and background can work competently.
Import the decided picture into your image editing program’s workspace. Consider working on a duplicate layer of the main image for non-destructive edits.
Crop the photo to expel any disfavored ranges around the main subject. This action helps bring attention to the primary subject and simplifies the image-trimming process.
Thoroughly survey the shot’s lighting and shadow conditions. Identifying the light source will support including realistic shadows later and ensure that the cutout corresponds naturally with the backdrop.
Guarantee the picture is well equipped by accommodating contrast and brightness in case required. It will make it simpler to identify the subject from the background, leading to a more pristine cutout.
Step 2: Separating The Subject From Background
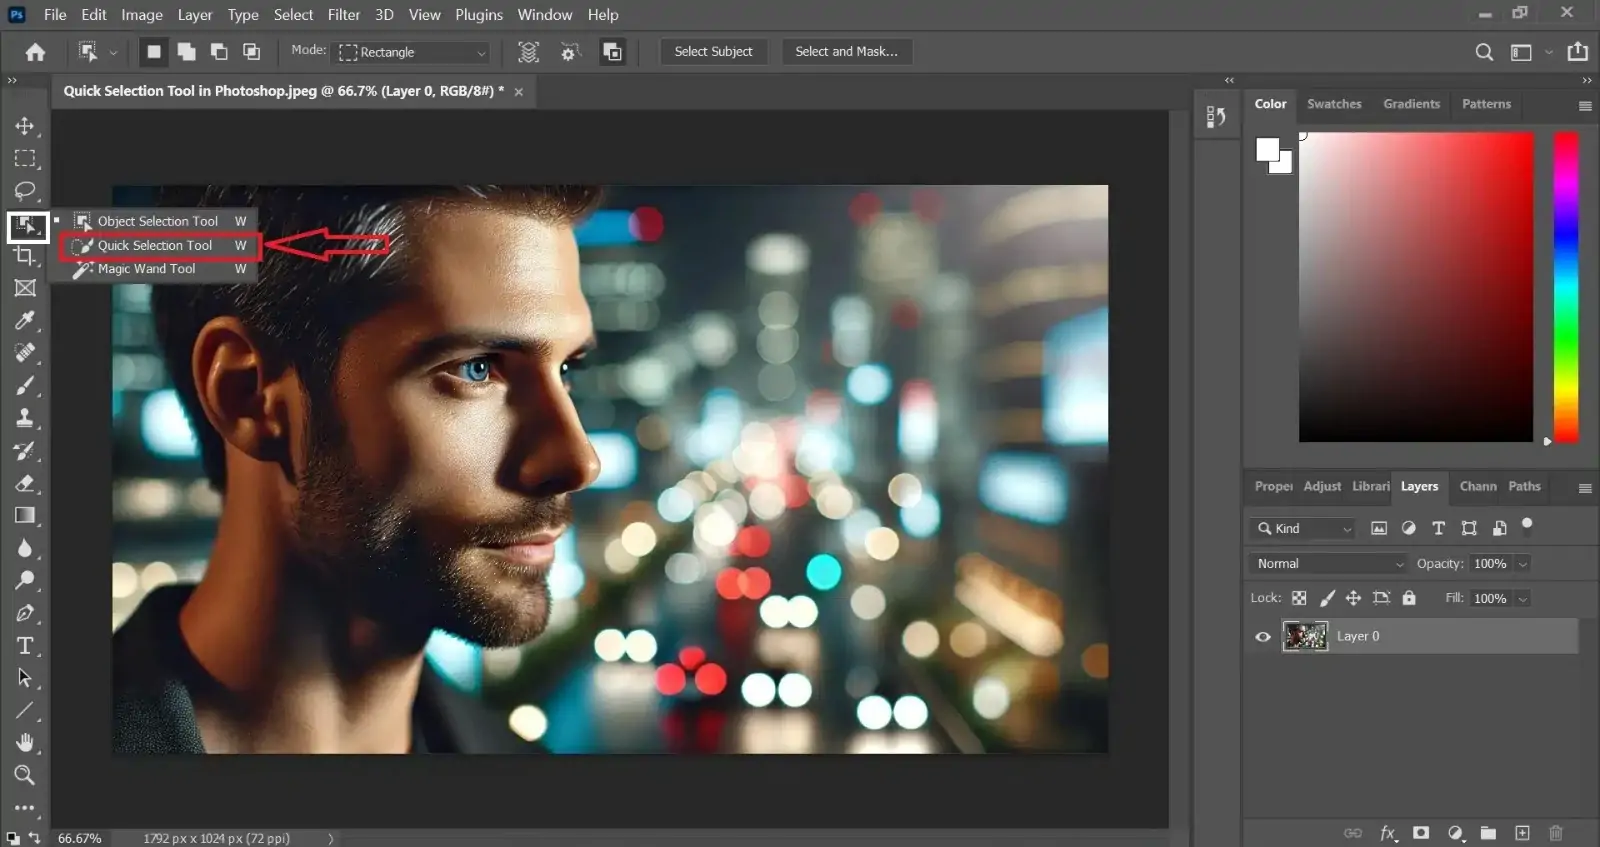
Utilize features like the Quick Selection Tool or Magic Wand to extensively select the subject. For more accuracy, utilize the Lasso Device or Pen Apparatus to characterize the edges precisely.
Get to the Refine Edge or Select and Mask highlight to progress the selected content. Adapt the edge detection radius to grab fine components, such as hair or complex designs.
Switch the selection into a mask to separate the subject from the foundation. It permits non-destructive editing and simple adjustments to the cutout.
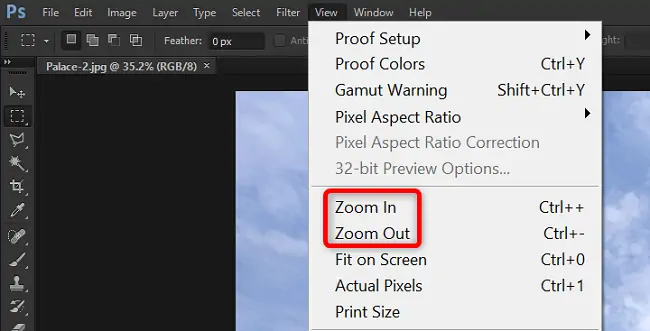
Use the Zoom-in feature and utilize the Brush Tool or Eraser Tool on the mask to smooth out any unpleasant or jagged edges. It will guarantee a clean, proficient look for the cutout.
Review the cutout for any remaining background leftovers or inadequate zones. Do conclusive edits to ensure the subject is superbly separated from the foremost background.
Step 3: Using Cardboard Texture
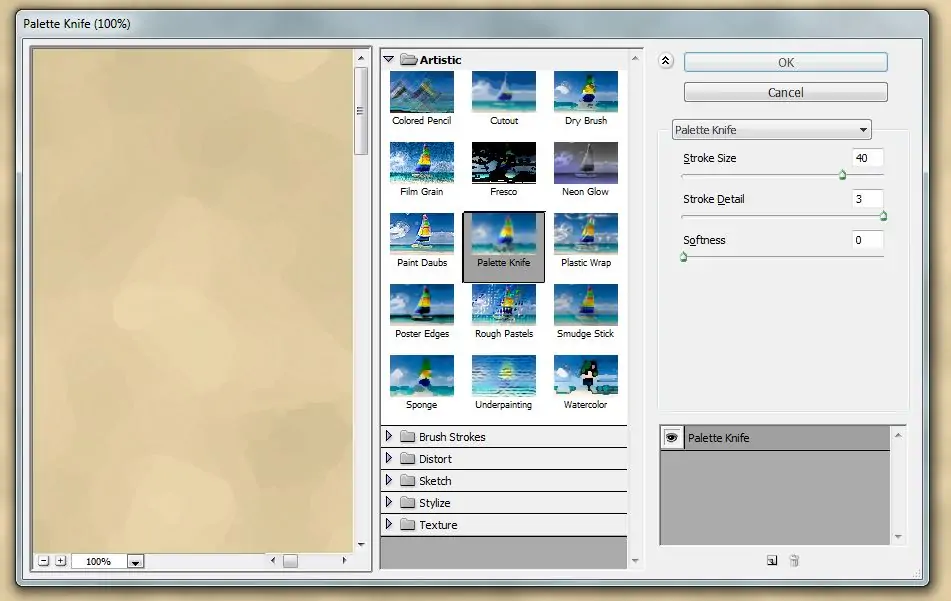
Make a cardboard surface utilizing graphic design tools, or you can look into importing a high-resolution picture of cardboard. Confirm that the texture features a natural and realistic impression.
Embed the cardboard surface as a new layer underneath the cutout subject. Reset its size and position to substitute the complete background zone of your composition.
Adjust the texture layer’s opacity and blending mode to integrate consistently with the picture. Utilize modes such as Overlay or Multiply to realize a natural blending.
Utilize a layer mask to expel any unnecessary texture from zones where it shouldn’t show up. It helps in keeping the attention on the subject while retaining the cardboard effect.
Ease the shift between the subject and the cardboard foundation. Utilize a light brush on the layer mask to mix edges smoothly, guaranteeing the subject shows up naturally placed on the cardboard.
Step 4: Creating 3D Depth
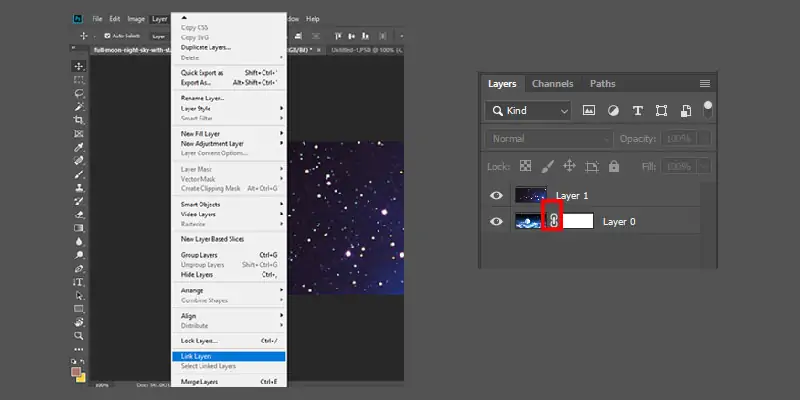
Make a copy of the separated cutout layer. This copy will be utilized to form a shadow effect, upgrading the 3D build.
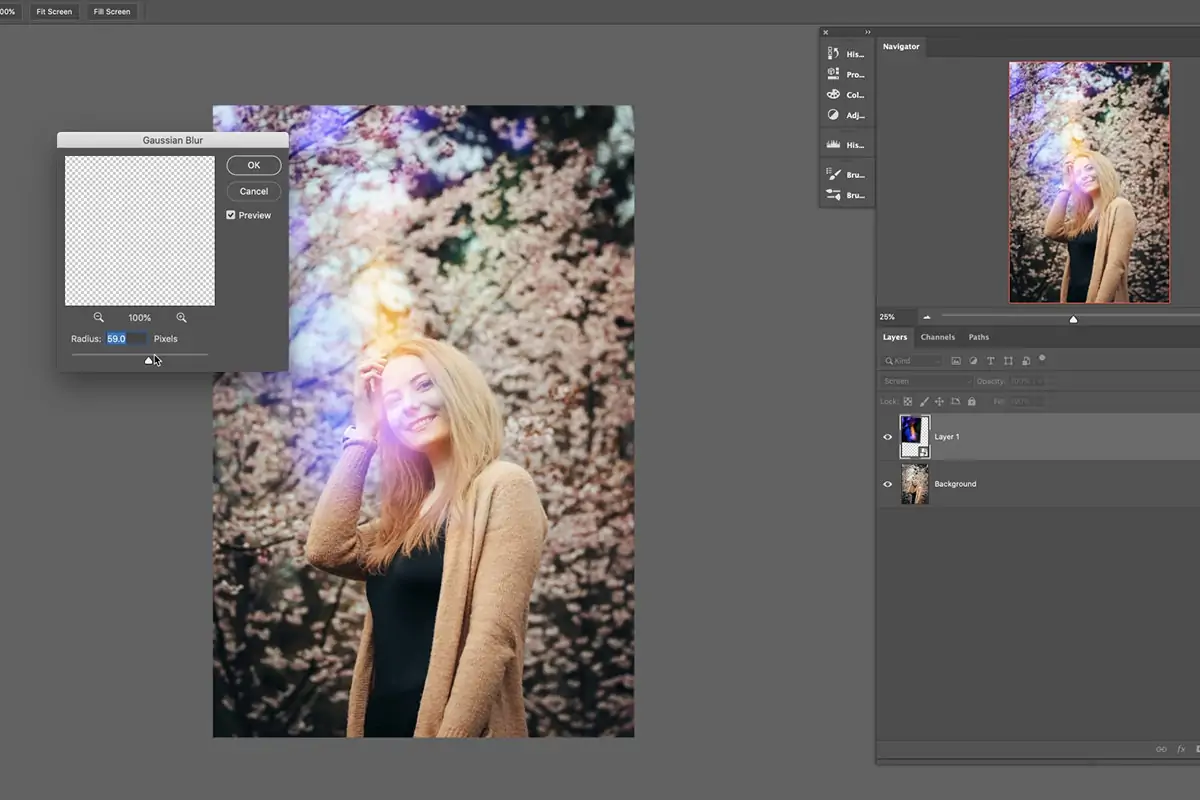
Infuse the copied layer with a strong colour like black or dark grey. Use a Gaussian Blur filter to this layer to soften the shadow rims, imitating natural shadow diffusion.
Carry the shadow layer moderately downward and to the side to recreate a light source. Alter the distance and angle to coordinate the original photograph lighting.
Lessen the opacity of the shadow layer to make it less drastic and more practical. The shadow should be unpretentious so as not to overwhelm the subject.
Once done with the shadow’s arrangement and opacity, merge the shadow layer with the first cutout layer. Guarantee the ultimate effect gives a persuading sense of profundity and dimensionality.
Step 5: Using Texture Overlay
Choose or create a surface that goes with the cardboard effect, like a slight paper grain or additional cardboard texture. The chosen or created texture should be aligned with the visual fashion of your project.
Put the texture as a new layer over the cutout subject. Alter its size and position to wrap the subject consistently.
Employ a suitable blending mode from choices like Overlay, Multiply, or Soft Light to the surface layer. It permits the texture to harmonize with the subject, including a realistic cardboard formation without totally clouding subtle elements.
Polish the opacity of the surface layer to attain the specified effect. It ought to upgrade the cardboard look without overpowering the cutout subject.
Utilize a layer mask to blend the surface consistently with the subject. Soften any unforgiving lines or ranges where the texture could be as well noticeable, guaranteeing a smooth and symmetrical final impression.
Step 6: Lighting And Color Settings
Interpret the lighting on the cutout subject and correspond it with the cardboard foundation. Remake the subject’s brightness and contrast to guarantee it adapts to the lighting in the background.
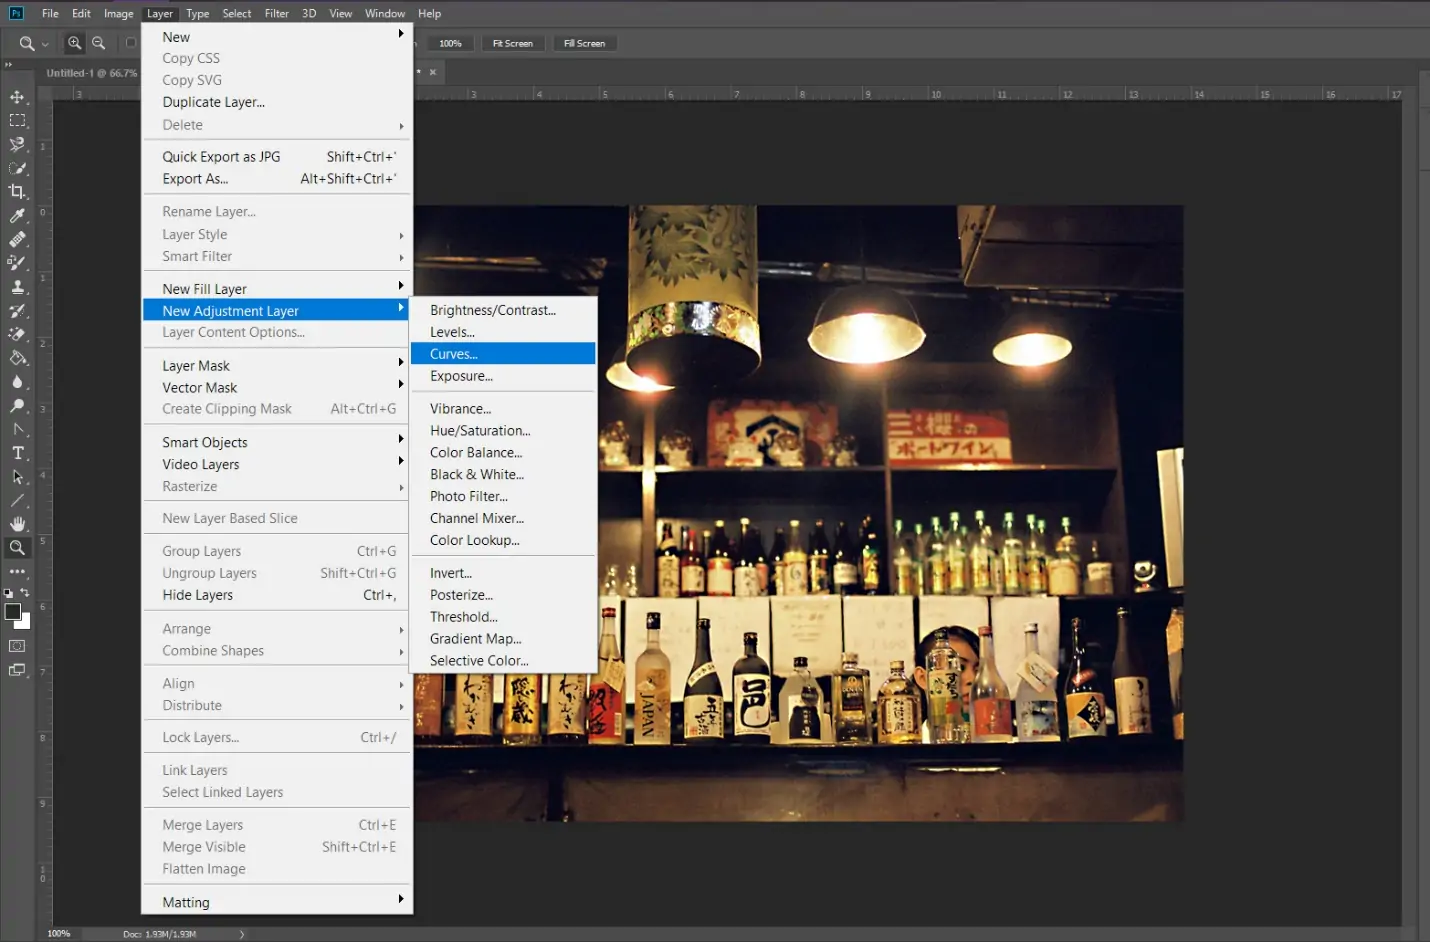
Utilize adjustment layers like Brightness/Contrast, Levels, or Curves to adjust the subject’s lighting. It helps in adjusting the light vigour and shadows, making the subject mix more naturally with the cardboard foundation.
Alter the colour balance of the subject to coordinate the background. Utilize tools such as Hue/Saturation or Color Balance to tweak the subject’s colours, guaranteeing consistency within the general image.
Look into applying a subtle colour overlay or gradient map to conform the colour tones between the subject and background. It can guarantee a harmonious look.
Look at the photo to ensure that the edits have made a cohesive and characteristic formation. Make absolute tweaks to lighting and colour to perfect the integration.
Step 7: The Final Tweaks
Cautiously examine the edited cardboard cutout effect image using Zoom In and look for any irregularities or harsh edges. Scan ranges where the subject encounters the background and ensure there are no undesirable remnants or messes.
Modify shadows and surfaces as required. Make sure that the shadow effect and textural overlays mix consistently with both the subject and background.
Utilize tools just like the Eraser or Brush tool on the layer mask to buff out any remaining blemishes around the cutout. That action helps accomplish a clean and proficient look.
Commit any eleventh-hour adjustments to brightness, contrast, or colour balance to guarantee the image is outwardly cohesive and engaging.
Lastly, save your work in a high-quality format that keeps up with resolution, like PNG or TIFF. Export the image concurring with your requirements, guaranteeing that all layers and effects are guarded.
Conclusion:
In summary, besides embellishing a photo’s visual charm and the viewer’s appeal, a cardboard cutout edit can also highlight the essential details of images. Additionally, it creates a sense of minimalism and simplicity by removing unnecessary backgrounds and objects surrounding the main subject. This approach can be much more worthy when the main purpose of visual content is to deliver a direct message or to bring attention to a specific theme. The cardboard cutout effect is functional for various applications like advertisement or marketing, making educational resources or creating visually aesthetic content or stories for your social media followers.


