How To Create A Camouflage Effect
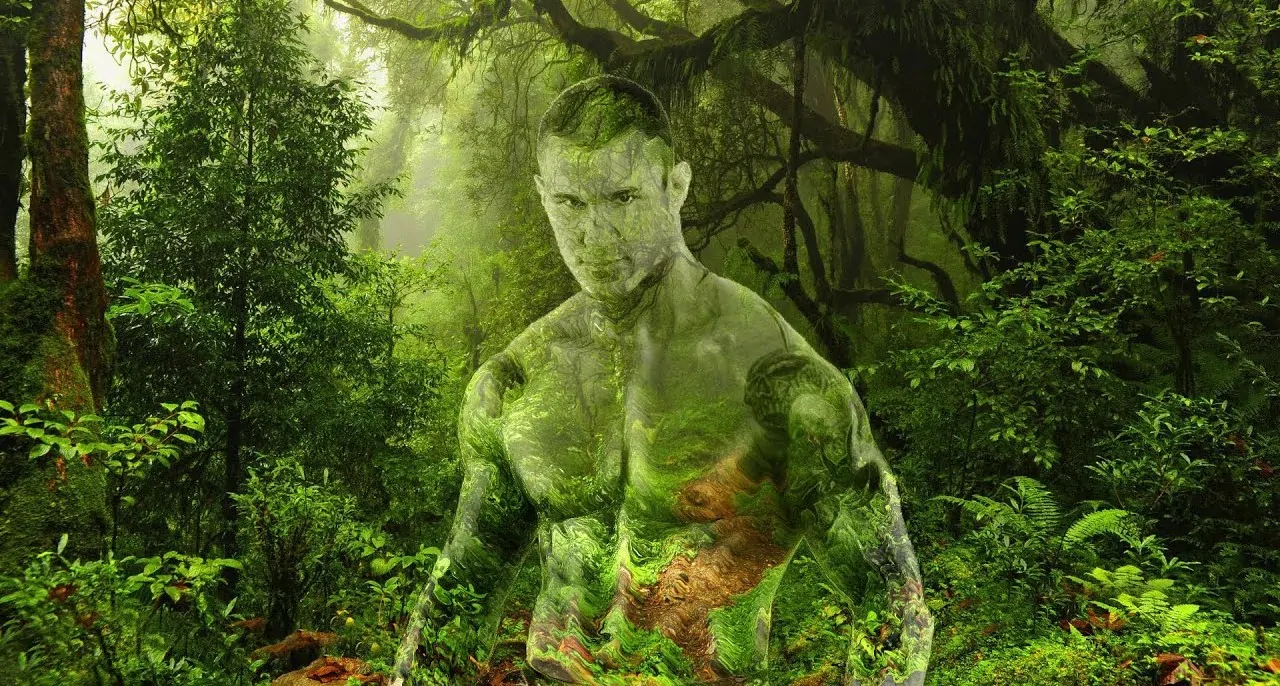
Camouflage art has been originally created for a particular purpose or environment. The idea it expresses is that anything visible can be made invisible by making it appear to be something different from what it truly is. People have always been amazed by camouflage since its arrival. Even before the introduction of this idea in industries like military uniforms and equipment manufacturers, nature around us has always been flaunting it. We can see this visual trickery around us; it enables plants and animals to blend in with their surroundings to be saved from falling victim to excessive predation. Following this unique visual illusion idea, a new generation of digital artists is also creating images using unique techniques that enable them to depict how humans can blend into their environment. Digital tools allow artists to either create illustrations based on the artistic idea of camouflaging or likewise they can also enhance everyday shots with a camouflage effect. This blog is going to employ the latter idea to create a camouflage effect using advanced tools and techniques and enhance the photograph’s narratives.
Step 1: Choosing A Photograph
Begin by choosing a photograph that will act as the ground for your camouflage impact. Pick one with a clear foundation pattern or surface, as that will be indispensable for blending the camouflage.
Recognize the particular range you would like to camouflage. It can be an object or individual that you would like to blend into the foundation.
Watch the background colors, surfaces, and light direction. Examine closely at any repeating colors or prevailing tones, as they can direct your camouflage palette.
Look into textural components like leaves, bark, or sand inside the background. That can be pivotal for practical blending.
Layout how many layers you may ought to recreate or imitate the foundation. This pre-planning can make the blending process smoother.
This preparation step establishes the foundation for realistic and persuading camouflage within the final photograph.
Step 2: Sampling The Prevailing Background Colors
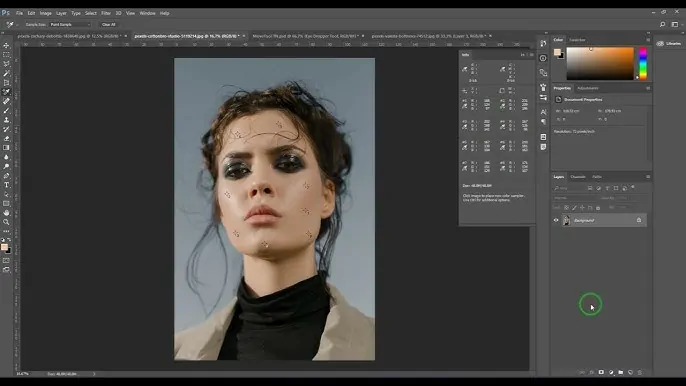
Utilize the color picker tool in your editing software to grab key colors from the backdrop. It will guarantee that the camouflage effect blends consistently with encompassing components.
Begin by sampling the prevailing background colors. Concentrate on the primary tones that possess large regions within the background, as they will position the overall color plot for the camouflage.
Play any secondary colors or highlights, like shadows, highlights, or other modest tones. These additional colors will help include depth and realism.
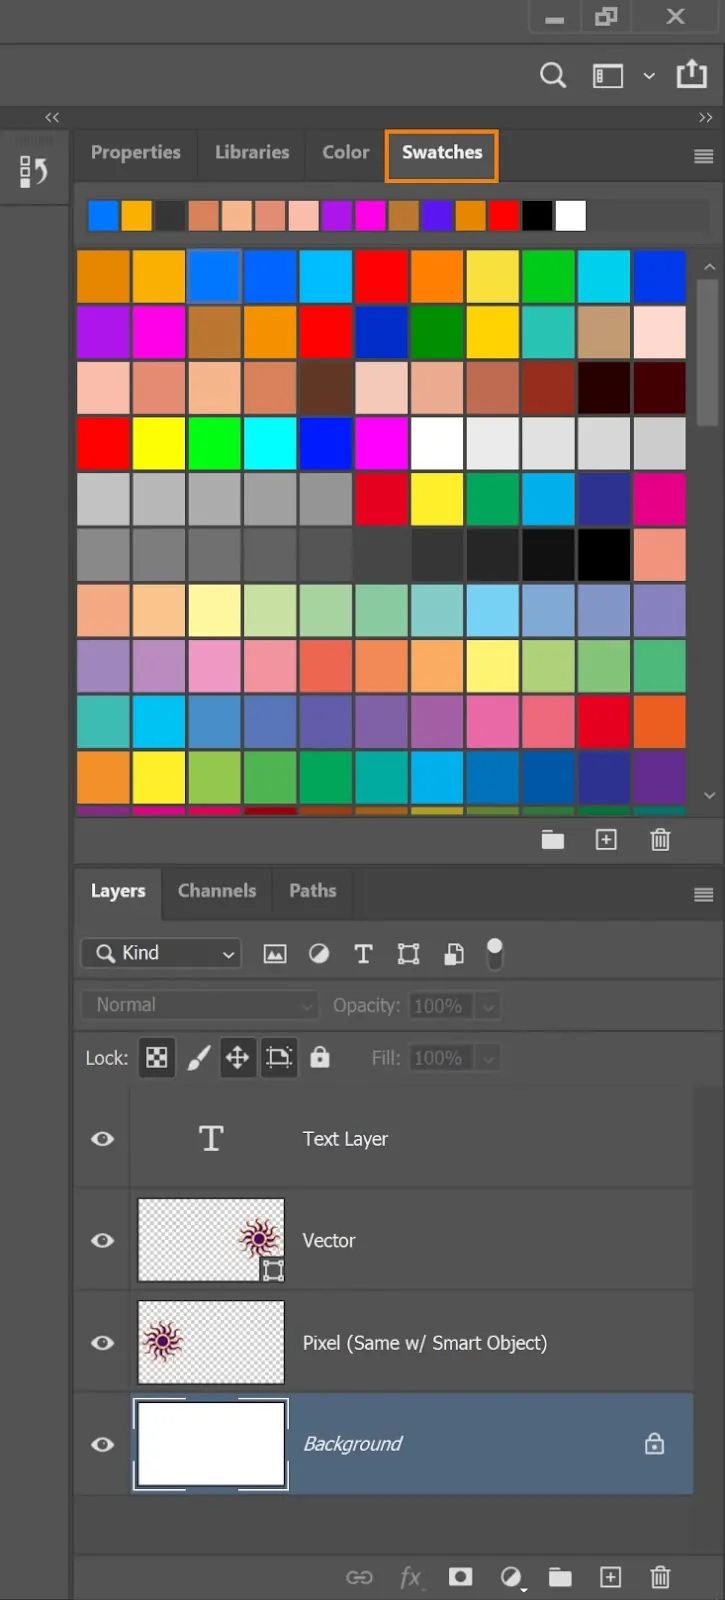
Arrange these sampled colors in a swatch palette. This palette will act as your reference for making the camouflage effect.
In case there are light deviations within the foundation, such as sunlight or shadows, note these within the sampled colors to preserve uniform lighting in your camouflage.
This step guarantees a concordant color palette, essential for an exciting camouflage effect.
Step 3: Choosing A Camouflage Pattern
Choose the kind of camouflage pattern that best suits the foundation. Choices incorporate abstract blotches, digital pixelation, or natural shapes that coordinate natural foundations such as woodlands or deserts.
Initiate a new layer in your editing software for the camouflage design. It will keep the impact separate from the initial picture, enabling flexibility in edits.
Utilize the brush or shape tool to make blotches or patterns utilizing the colors that you sampled in Step 2. Change the size and shape of each component to form an organic, uneven appearance.
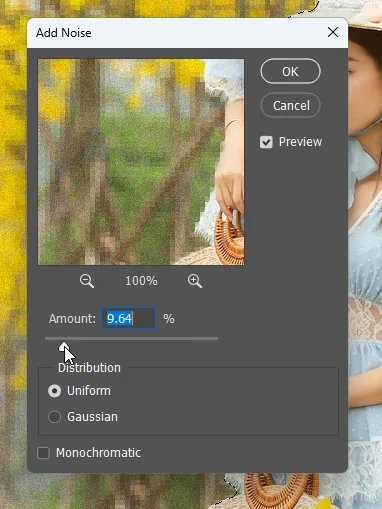
Include subtle surfaces to the shapes, such as grain or noise, to imitate the natural surface of the backdrop. It will make the camouflage blend more practically.
Prevent monotonous patterns; present slight varieties to break up any discernible consistency, which could indicate the camouflage.
That pattern layer gives the establishment for blending with the background in forthcoming steps.
Step 4: Choosing A Suitable Blending Model
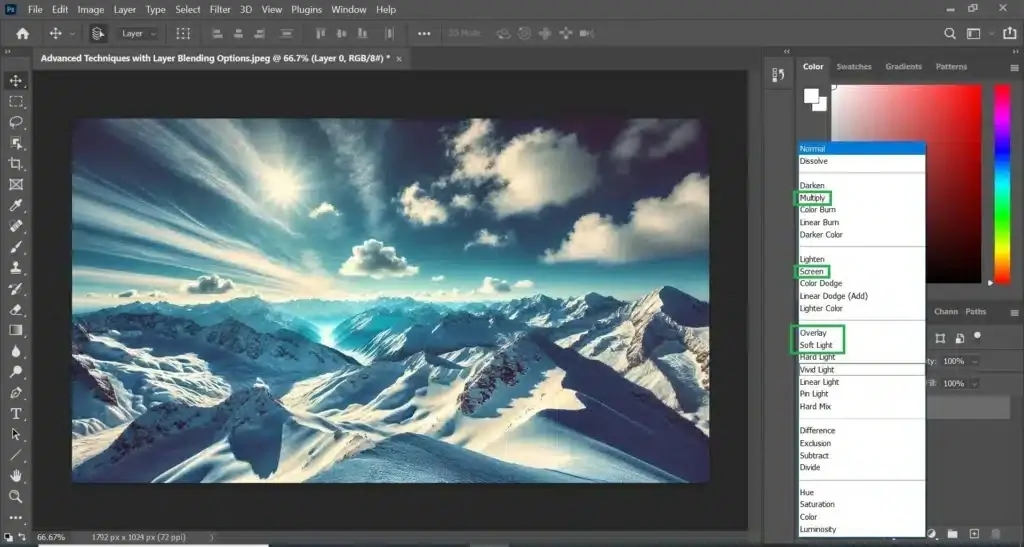
Use a blending mode to the camouflage layer, like Multiply, Overlay, or Soft Light, to integrate the design normally with the background. Try different modes to see which one gives the foremost consistent effect.
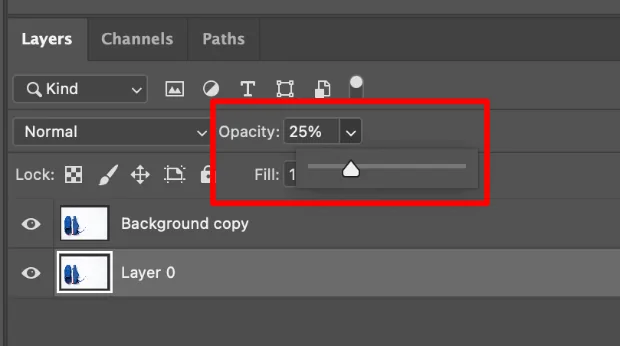
Tune the opacity of the camouflage layer to regulate the level of the blending. More down opacity can make a mild, translucent impact, whereas higher opacity highlights more detail.
In the case of complex backgrounds, look into utilizing multiple camouflage layers with distinctive blending modes and opacities. This kind of layering includes profundity and variation, closely imitating the natural formation of the background.
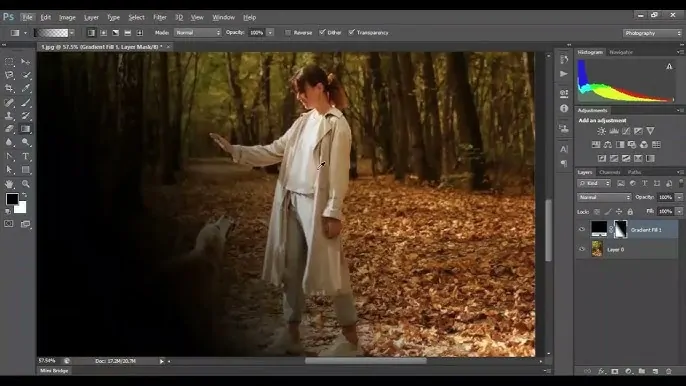
Utilize gradient masks to blend ranges of the camouflage pattern steadily, especially in case lighting or color gradients occur within the background.
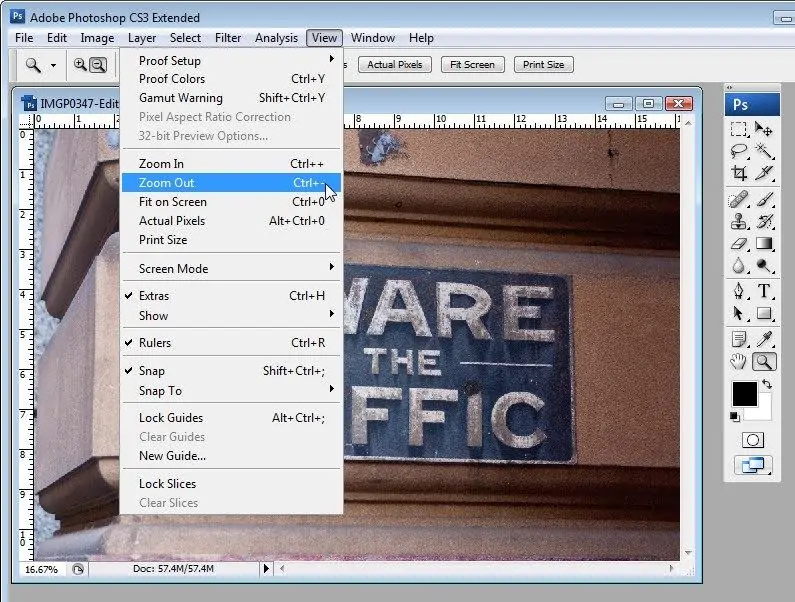
Use Zoom out to check the overall composition to confirm that the camouflage impact is uniform with the rest of the picture.
This step lets the camouflage visually combine with the background while holding natural profundity and texture.
Step 5: Modifying The Opacity Values
Begin by bringing down the opacity of the camouflage layer to around 50-70%. That helps to harmonize the pattern with the background in a more unpretentious, natural way, guaranteeing it doesn’t overwhelm the image.
Continuously alter the opacity up and down while inspecting how the camouflage interacts with the fundamental picture. Aim for a level where the pattern is obvious but not as well stark against the background.
Attend to ranges where the camouflage satisfies the foundation. On the off chance that the effect shows up too sharp, decrease the opacity further, particularly around the edges, to make the shift smoother.
For more accuracy, apply an opacity mask to particular regions of the camouflage layer. It permits you to control how much of the pattern is obvious in different areas, helping to soften or highlight the camouflage impact.
Alter the opacity to guarantee the camouflage keeps up a sense of depth. You need the pattern to seem like it is naturally a part of the scene, not an isolated overlay.
Opacity alterations polish the camouflage impact, guaranteeing it blends easily and practically with the background.
Step 6: Relaxing The Edges Of The Pattern
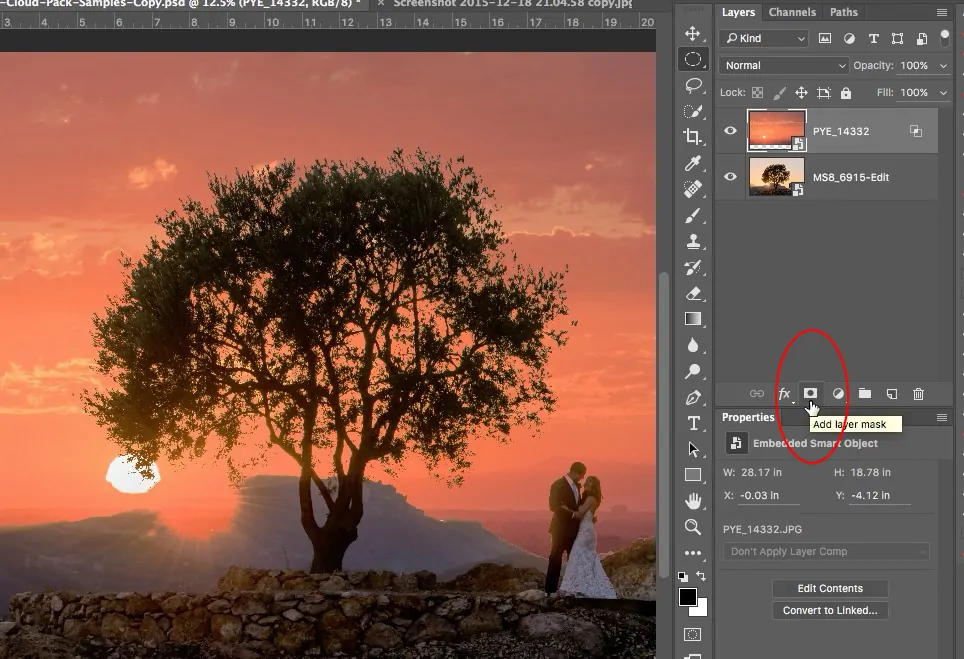
Apply a layer mask to the camouflage layer to polish the edges. It permits you to erase or relax zones of the pattern that could be too abrupt or unnatural, making a smooth move between the camouflage and the background.
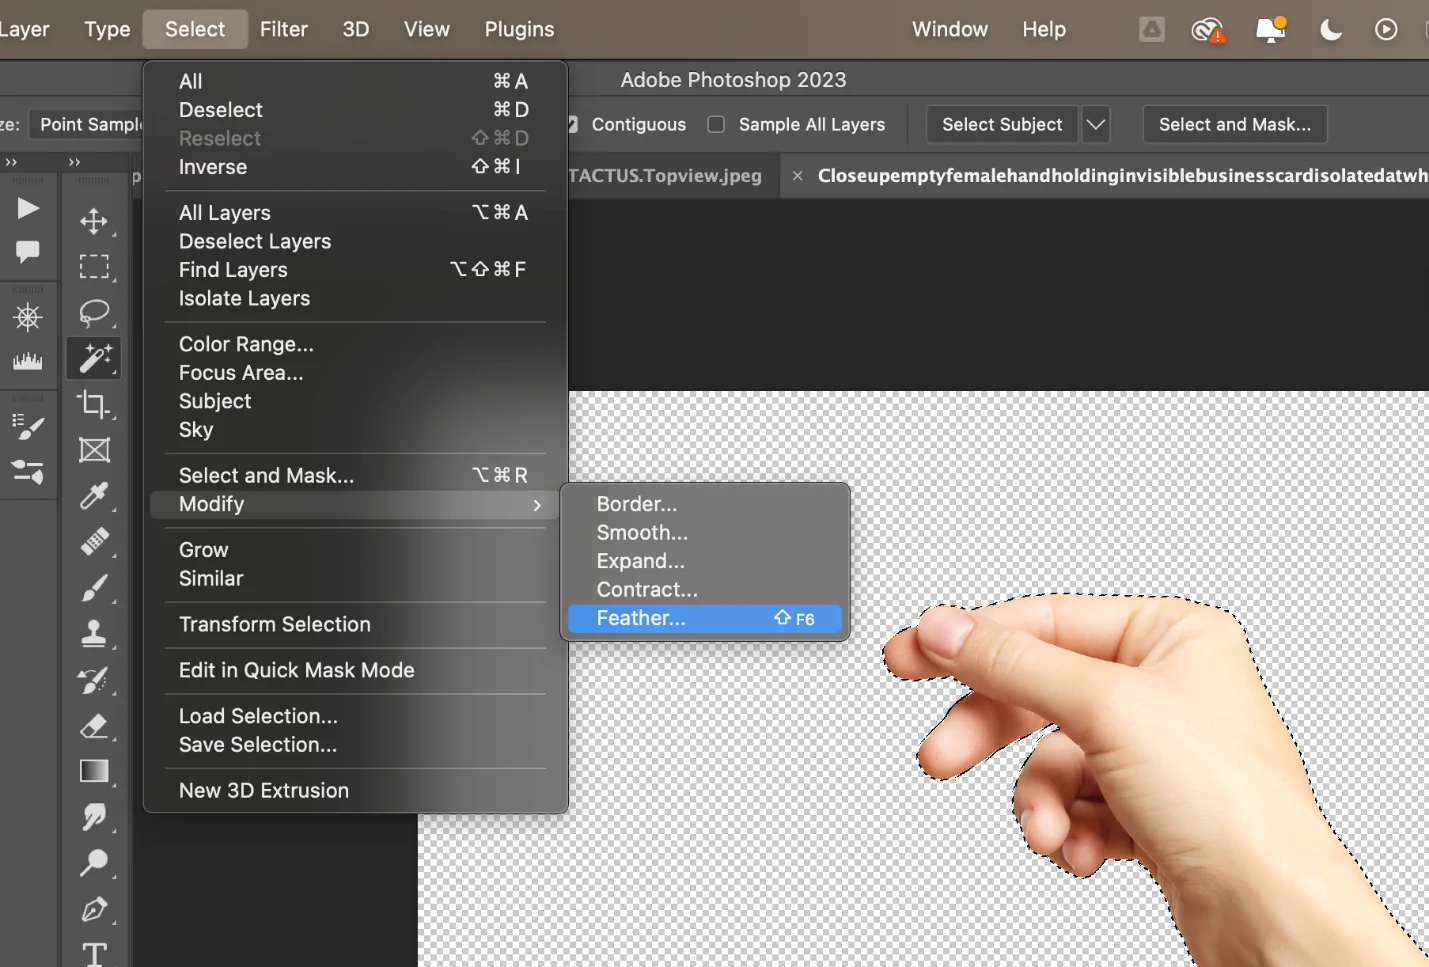
Utilize the feathering tool on the mask to relax the edges of the camouflage design. Feathering makes a slow move, making a difference in the pattern that blends consistently with its environment without visible lines or borders.
Add a slight Gaussian blur to the edges of the camouflage pattern in case essential. This impact can soften any sharp edges that make the camouflage look unnatural, particularly when the pattern overlaps with regions of shifting light or surface.
Utilize a delicate brush on the layer mask to manually tune ranges where the camouflage may still look too sharp or obvious. Delicately paint over the edges with a low opacity to merge the pattern into the foundation.
Use Zoom in to closely assess ranges where the camouflage conforms to the background. Guarantee the transitions are natural and free of harsh lines, making the pattern feel integrated instead of added on top.
Edge improvement smoothes the camouflage, making sure that the transition between the pattern and the background is nuanced and realistic.
Step 7: Performing Final Tweaks
Perform final tweaks to the general color balance and contrast of the picture to guarantee the camouflage impact fits the common lighting and tones of the foundation. Utilize tools such as Curves or Hue/Saturation to tune the formation.
Use selective sharpening onto ranges where you need the camouflage to stand out slightly, like including texture or definition to the design. In any case, you must avoid over-sharpening, because it can make the impact show up artificial.
Confirm that the camouflage pattern corresponds to the lighting and shadows of the scene. If the background keeps shadows, include delicate shadows to the camouflage pattern employing a low opacity brush or layer impacts to preserve consistency.
Return to the layer mask to ensure smooth moves. Polish any zones that still show up too sharp, particularly around the edges, and be sure the camouflage accommodates naturally inside the picture.
Use the Zoom-out option to survey the overall impact. Review to confirm that the camouflaged zone seems cohesive with the rest of the picture. If fundamental, alter the arrangement or scale of the pattern to improve the effect.
After done with the final touch-ups, export the ultimate composition within the preferred format, guaranteeing that all layers and edits are accurately protected.
Conclusion
In summary concept of camouflage is genuinely natural, as we observe various creatures employ this mechanism to conceal their identities in their environment. Some organisms blend in by changing their body patterns, mimicking objects in their environment, or changing their color to match their surroundings. Correspondingly, by inventing aesthetic ideas from these adorable behaviors seen in nature, digital artists and image editors are creating wonderful compositions that exhibit exciting and thrilling visual narratives. Especially in the field of image editing, the absolute images after a camouflage effect addition are remarkably engaging, making the viewer connect to the nature around them implicitly.


