How to create a 3D model with SelfCAD?
Designing has changed in a better way, thanks to 3D modeling. In addition to helping designers and end users in visualizing space requirements, 3D modeling increases the productivity and accuracy of drawing processes. When designing in 3D, the designer can see things that they couldn’t see when designing in 2D. It enables the designer to physically examine how much space an object occupies from all angles. To see an object’s space requirements when creating in 2D, the designer must first develop a separate plan and elevation view, which takes more time.
Well, you can find numerous 3D modeling software, however, in this article, we will learn about SelfCAD and how to use SelfCAD for 3D modeling.
What is 3D modeling?
By manipulating edges, vertices, and polygons in a simulated three-dimensional space, 3D modeling is the process of creating a mathematical coordinate-based representation of any surface of an object in three dimensions for use in 3D computer graphics.
What is SelfCAD?
SelfCAD is a fully functional online 3D modeling and slicing tool that allows you to design, model, and print all on the same platform. You don’t have to open several platforms and switch between apps in order to design, develop, and print anything because all the functionalities are available in one spot. You don’t need to download any software because the product is cloud-based. Even CAD specialists found designing and printing in three dimensions to be challenging. With the advent of SelfCAD, everything is now simple, allowing even beginners to flourish in this profession. To help newcomers quickly master the skill of 3D design, the vendor provides video tutorials and a training course.
The goal of SelfCAD is to make 3D design and printing available to everyone. Of course, this also applies to designers who work professionally, but it also applies to hobbyists and students who have never used CAD/CAM software before. SelfCAD is available to everyone due to its extremely low starting price point and user-friendliness.
It’s crucial to use a slicing tool to examine each layer of an object before preparing a shape for 3D printing. SelfCAD’s built-in slicing feature enables the user to accomplish just that. The slicer comes with pre-set profiles, so users may just pick one, alter the support structure and infill of the design, or select from a variety of more complex settings.
How to design a 3D model with SelfCAD?
We will tell you about setting up SelfCAD and making your first 3D model in this brief lesson. People with experience with SelfCAD can catch a peek at one or two things, but this course is intended for those who are just getting started. We are going to create a 3D-Printable house prototype.
Step 1: Creating an account
Creating a user account is the first thing you must do. You’ll have access to the Editor and be able to build and save your models in the cloud with the help of this.
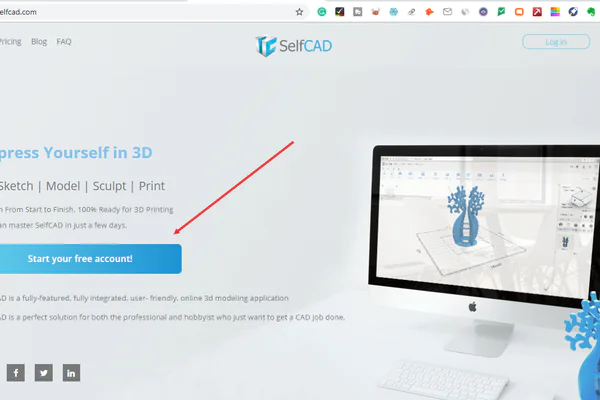
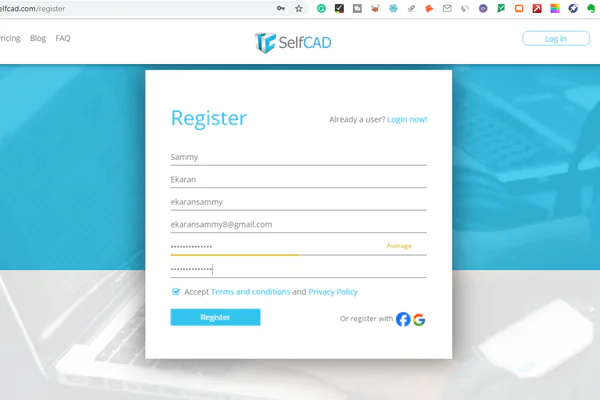
Visit the SelfCAD website and choose “start your free account” to register. Although the functionality of this free account is limited, you can still use it for training.
Launch the Editor once you are done with creating an account, and you’re ready to go.
Step 2: Create a myminifactory account

After signing up, you must now create a Myminifactory Account in order to access ready-to-print models and upload your own models to the cloud, where they can be accessed from any location and shared with others.
If you haven’t already signed up, click Myminifactory in the top-right column and choose to Sign up; if you have, click Connect.
After you’ve linked your Myminifactory account, you’ll be able to upload directly through SelfCAD, browse models across all categories, and download them as well.
Step 3: Understanding the workspace
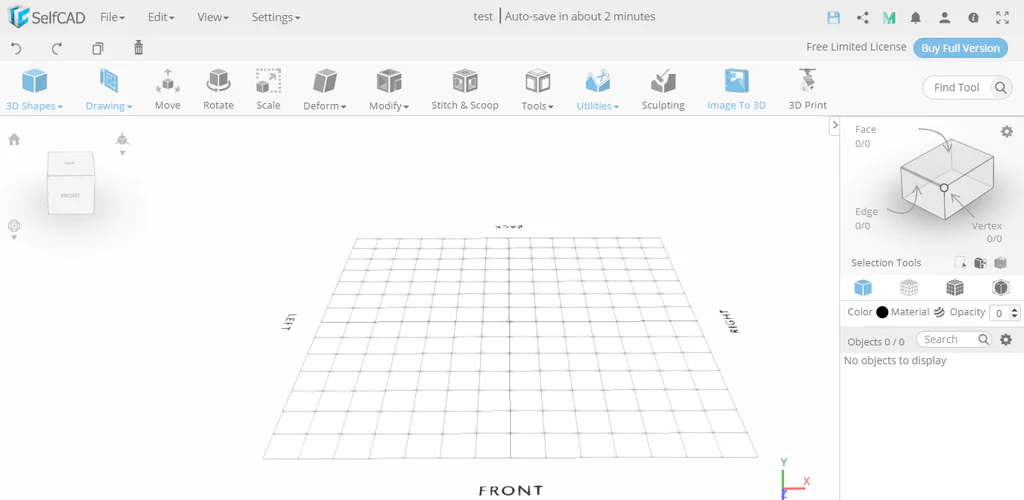
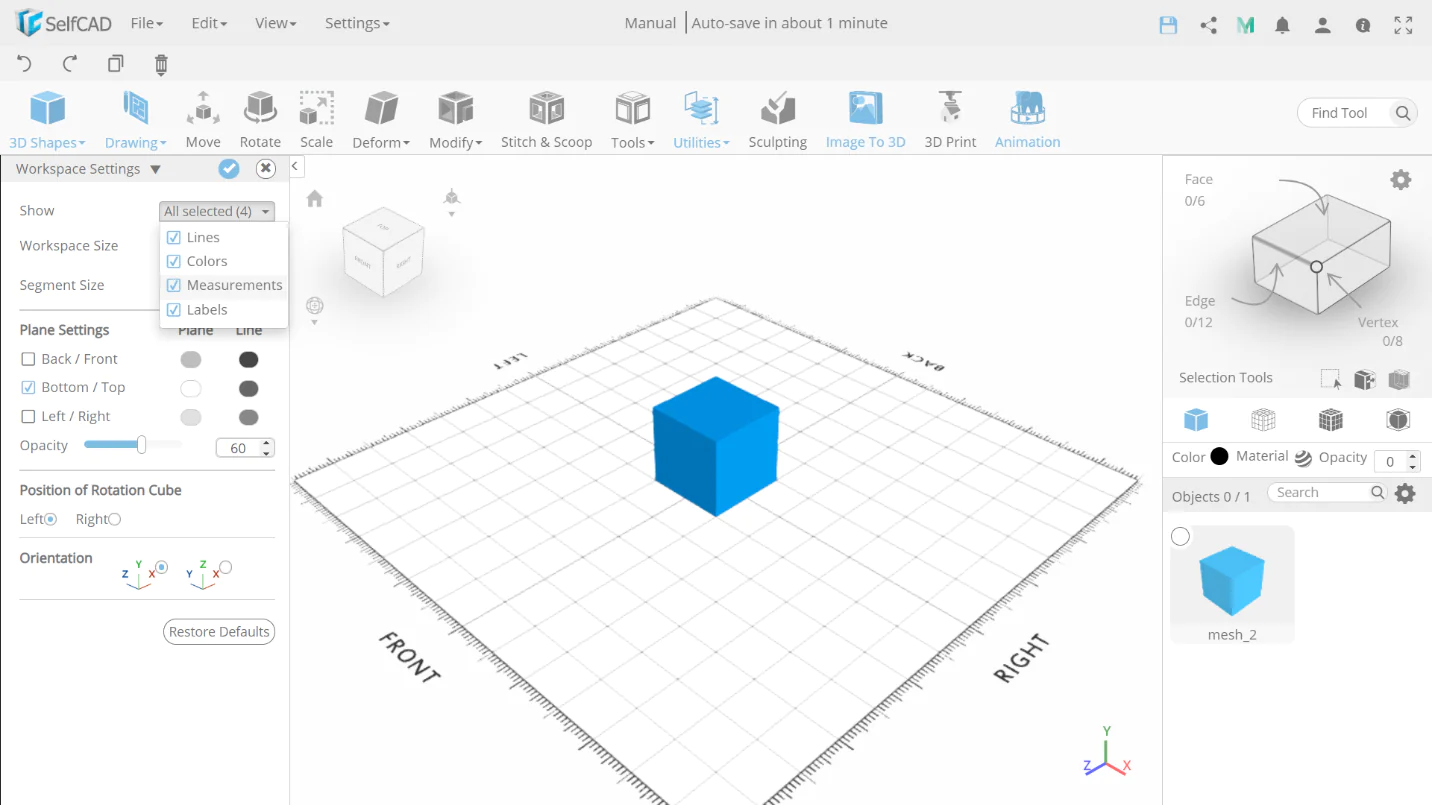
Here is how SelfCAD’s workspace seems. It serves as your primary design workspace, where you will be producing your work.
The gridded area is a representation of the build plate, which is typically utilized in 3D printers and where you will spend most of your time working.
Step 4: Understanding tools
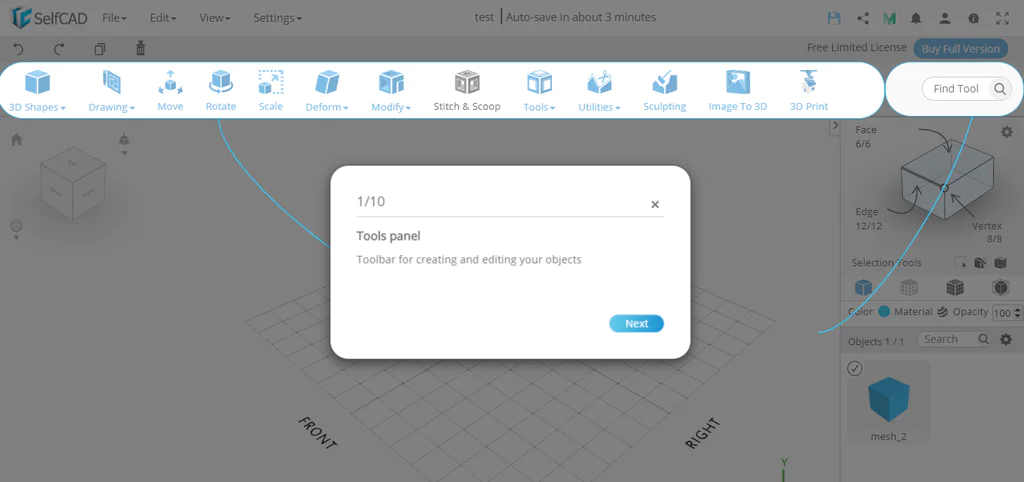
Here is the list of SelfCAD tools.
Step 5: Creating a shape
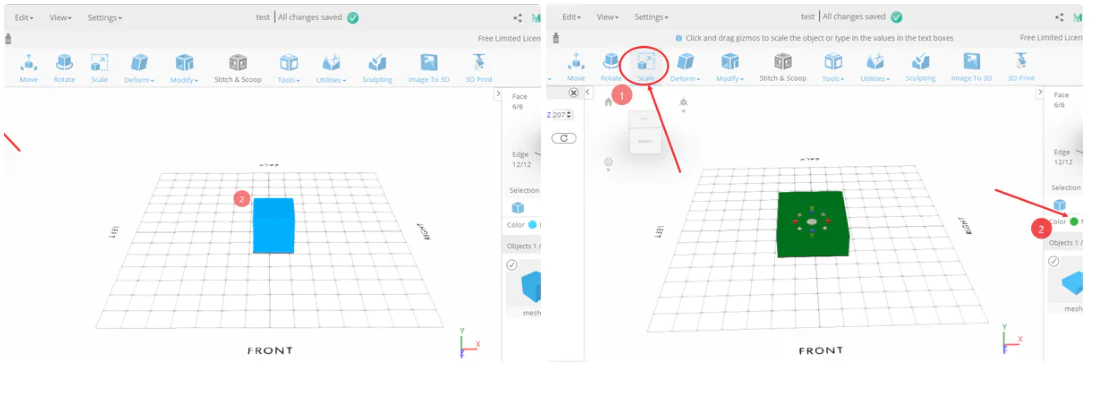
Choose a cube, then drag it to the workspace.
Select the Scale tool from the toolbar in order to change the shape’s size. Additionally, if you can see it, you can use the search box in the top-right corner to look for tools.
As seen in the second figure below, when you use the Scale tool, you will have the ability to increase the form on either side by dragging the colored points that appear on the shape.
Utilizing the color choice as indicated in the second image, you can also adjust the color.
Step 6: Modify the shape
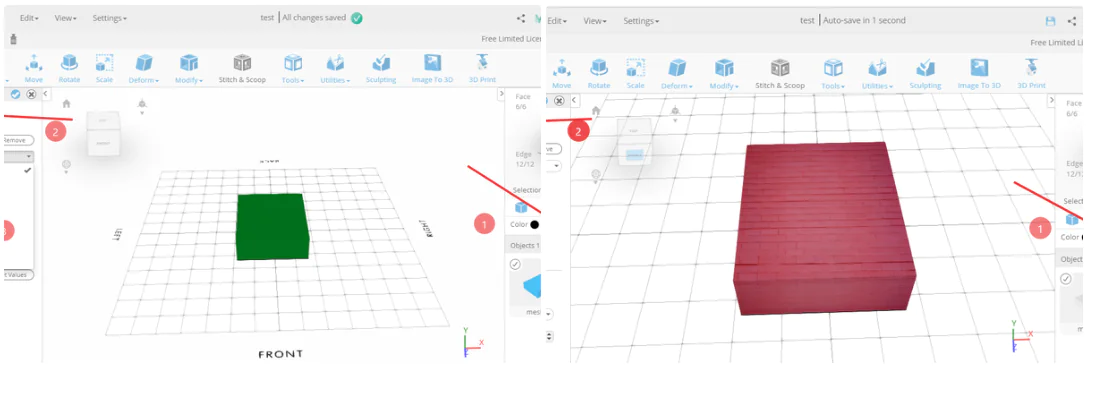
We can now also modify the model by adding textures after scaling it and adjusting its color.
To achieve this, click Textures after selecting the Material choice, which is located next to the Color option.
If you have them, you can load them or choose the best textures for your projects.
Step 7: Adding different shapes and modifying them
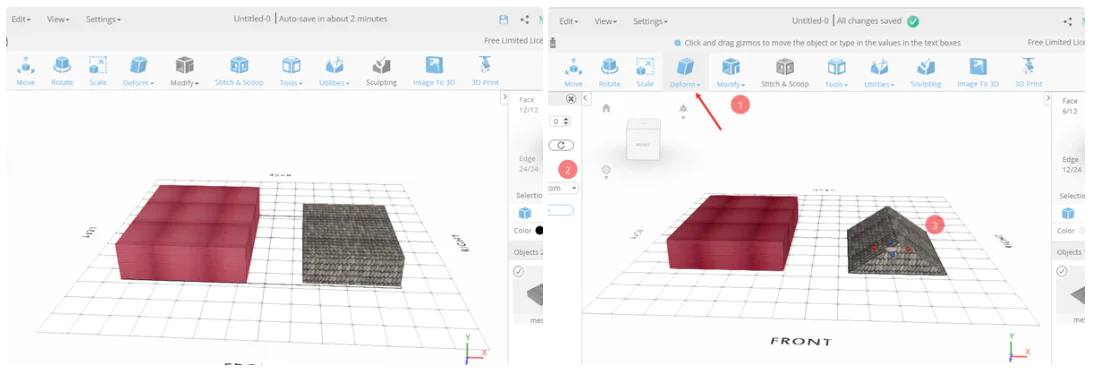
We’ll add another object and modify it as you now have become familiar with how to work with one shape.
Similar to before, pick out your shape from the list of basic shapes and drag it into the workspace.
After adding the model, you can scale it to look like in the first image below by choosing the Scale tool and adding textures similarly to how you did with other shapes.
Choose the taper tool from the deformation section to build the house’s roof. To create a pyramid-shaped model like the one in the second image below, make sure the you set origin to the Bottom in the advanced settings and stretch it toward the right side.
Step 8: Moving objects off the workspace
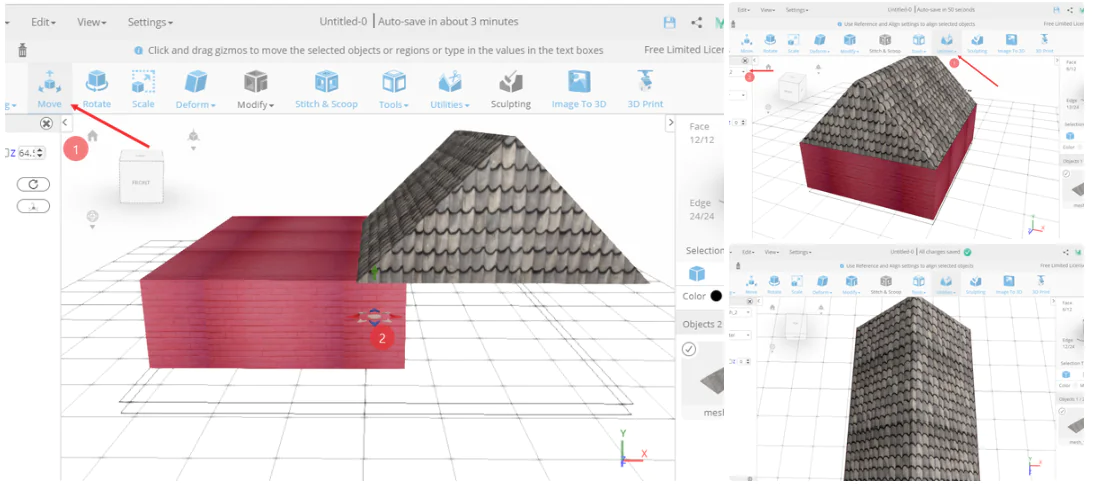
We can either use the Move tool or the Align tool to position the roof above the rectangle.
Select the Move tool, then move the model with the provided arrows toward the rectangle to utilize it. But positioning it over the rectangle is a difficult task. This is why the Align tool, one of my favorites in SelfCAD, is used.
Make sure that you only choose the roof. Use the U+A keyboard shortcut or select the Align tool from the tools menu.
Choose mesh 2 from the reference section, and choose Top-Center from the Align section.
Step 9: Finalizing your model
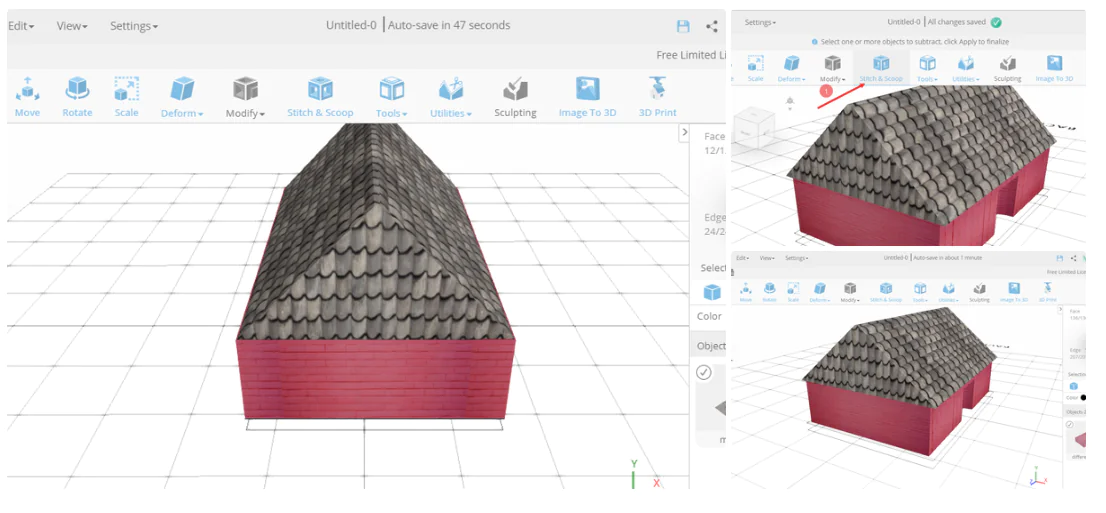
Use the Scale tool to scale the model to properly fit the rectangle.
To be able to see the inside of your house clearly, adjust your point of view.
Choose a new shape from the basic shape section, scale it, and then drag it toward the section where you need to place the door. The model displayed below can then be obtained by choosing the Stitch and scoop tool, Difference, and extracting the previous model you made.
You can utilize the merge objects tool, which is located in the utilities section, to merge the objects once you have selected them all.
Step 10: Save and print
After creating a model in SelfCAD, you have the option of saving it online, uploading it straight to Myminifactory, or both.
Select File. Then Save to save your model to the cloud or browser. The Scene can also be saved to the cloud via a web browser.
Use the steps in step two to upload it to Myminifactory.
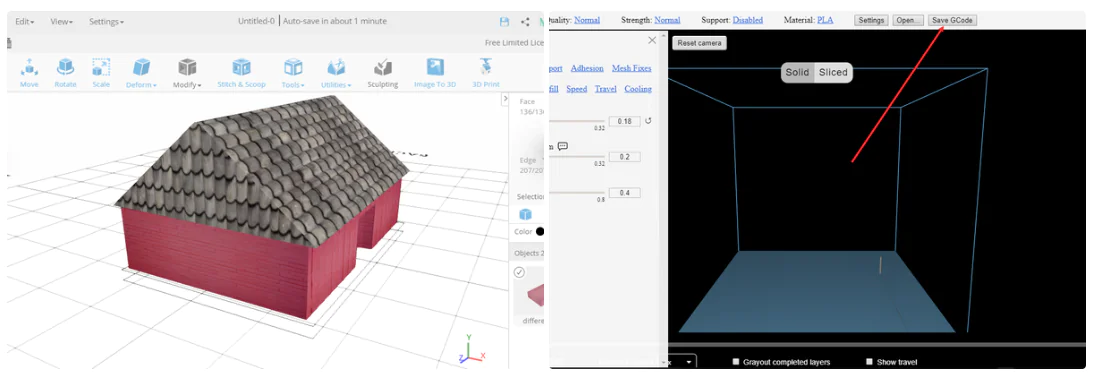
We’ll utilize the Magic Fix tool, which is located in the tools section, to get the model ready for 3D printing. Or you may use the T+M command.
The slice should be clicked after choosing 3D Print from the toolbar to print. You can save the G-Code after slicing it in order to transfer it to your 3D printer.
A 3D printing animation capability is available in SelfCAD. You can see a 3D print preview of your design.
Conclusion
There is no doubt that the benefits of 3D modeling for designers go beyond productivity and collaboration; it’s also a great tool for communicating with clients. During the design process, 3D models can facilitate crucial discussions and potentially avoid expensive construction blunders. By designing in 3D, the designer is also able to review a design with the end user utilizing 3d modeling software. This is especially beneficial for people who struggle to visualize designs from 2D drawings. Before a design is physically developed, they can use this to see how much room and accessibility they will have around it.
SelfCAD is a browser-based, online CAD/CAM tool that enables online modeling, sculpture, slicing, and printing. Users also don’t have to pay hundreds of dollars for the privilege or spend months learning a variety of complicated applications. Users can design and print objects in a small fraction of the time as compared to using traditional CAD/CAM software.
SelfCAD enables users to share their creations with others and save them to cloud-based services. There’s no need to stress over forgetting a flash drive at home. The days of losing an item or design because it was made on a different device are long gone. Additionally, transporting huge files requires less money, time, and effort when done with SelfCAD.
