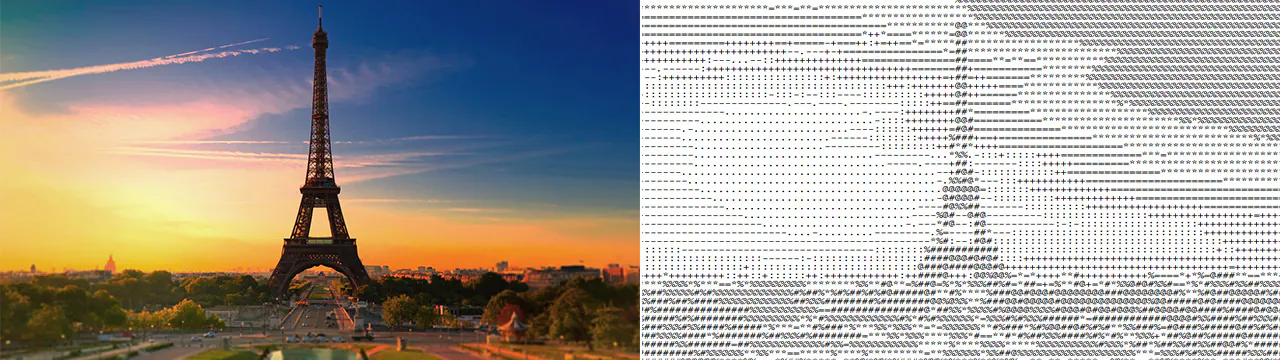
How To Covert A Photograph Into ASCII Art
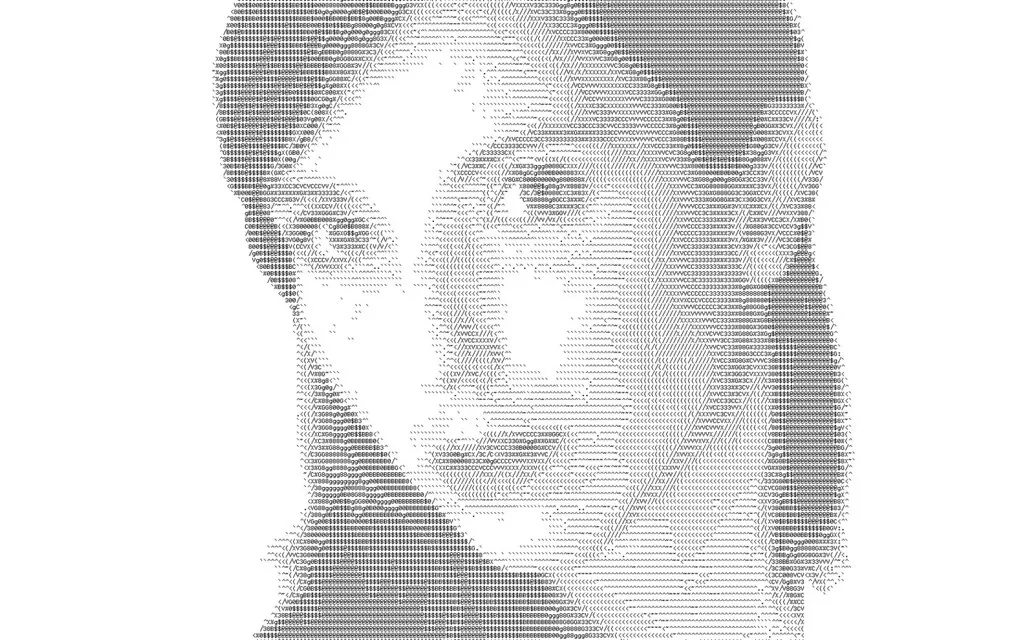
ASCII art forms a graphic mosaic-like design within images where ASCII characters work as pixels in the photograph. ASCII, a broadly adopted character encoding standard, introduces unique visual effects of numbers, symbols, and letters, enhancing the shading and contours of the images. Especially in photographs with scenes of distinct surfaces and intricate details, the ASCII art integration can trigger a wave of interest in viewers. The result generally varies with the complexity of the image and the artist’s expertise in selecting characters that show suitable shading and tones. For instance, characters such as “@” or “#” might speak to darker regions, whereas lighter characters like “.” or ” ” (space) would speak to brighter zones. These characters’ cautious course of action comes about in a composition that mirrors the initial photo. This blog offers a set of seven steps to use ASCII art characters in your images and turn them into appealing ASCII character representations.
Step 1: Choose a shot fitted to the ASCII representation
The photograph you wish to turn into stunning ASCII art should be carefully chosen.
Choose a well-suited photo for transformation, considering variables such as detail and contrast.
Take your time in this beginning step, as the complete process’s success relies on the chosen picture’s quality and suitability.
Browse your collection of images, heading to the one that will generate an attractive and coherent ASCII representation.
Be sure that the complexities of the chosen image will play a fundamental position in the viability of the ASCII transformation.
You set the foundation for a special and clearly striking ASCII art creation by beginning with a mindfully chosen photo.
This basic image selection phase will define the mood for the upcoming phases, making it essential to contribute time and thought to select the perfect picture for your inventive attempt.
Step 2: Experiment with different size options
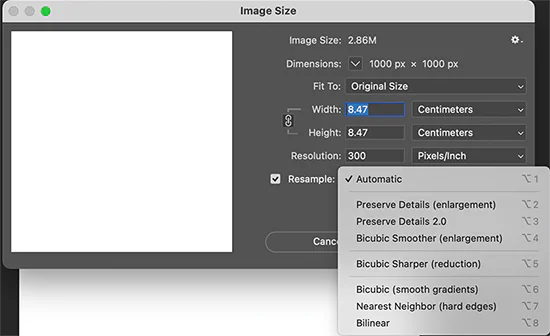
When considering resizing, look for measurements that are suitable for ASCII art. Smaller sizes often operate well, but avoid going for extra-small ones as it may cause loss of detail.
Do not ignore the image clarity aspect as you resize the image so that the fundamental, subtle elements stay perceivable and give a quality final composition.
Preserve the initial image’s aspect ratio to prevent distortion and protect the proportions of component representation in the ASCII frame.
Play with different size options. As various images respond well to different measurements, keep experimenting until you discover the sweet spot for your chosen picture.
Make fast visual assessments during the task so that the critical highlights of the photo are still apparent even at a decreased scale.
Explore different tools for resizing and employ user-friendly ones. Various online software applications streamline this task.
Try getting an ideal harmony between size adjustments and image clarity to grasp the essentials of the original file without missing too much detail.
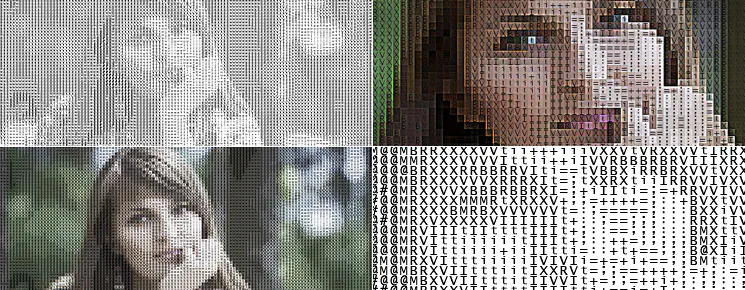
Step 3: Convert it into grayscale
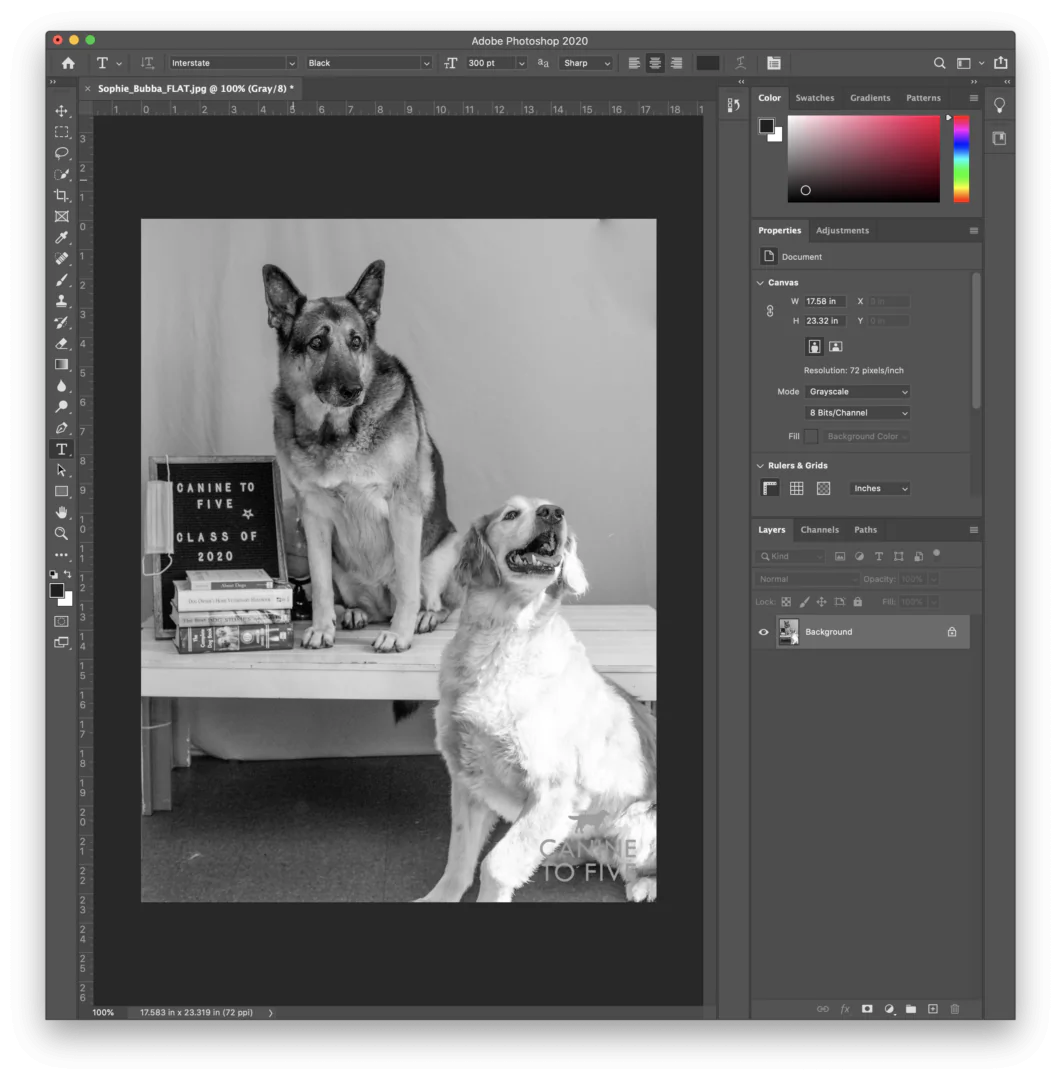
Turn your resized image into grayscale to simplify, dispense with color complexities, and boost clarity.
Select tools or apps that encourage simple grayscale transformations. Numerous online platforms and graphic programs provide direct adjustments for this step.
Make sure that your grayscale conversion process maintains the initial image’s contrast. This consideration helps to create a more defined ASCII representation.
As you focus on the most straightforward aspects of the grayscale effect, you should also keep the variations in shading in proper perspective, which is vital for conveying profundity.
Tune the grayscale conversion for proficiency using the settings or tools that streamline the task without compromising the quality of the ultimate grayscale image.
Consider customizing your grayscale conversion approach based on the picture’s complexity to properly illustrate the intricate elements and simpler components.
Utilize the preview function in your chosen software to survey the grayscale results before committing to the conversion.
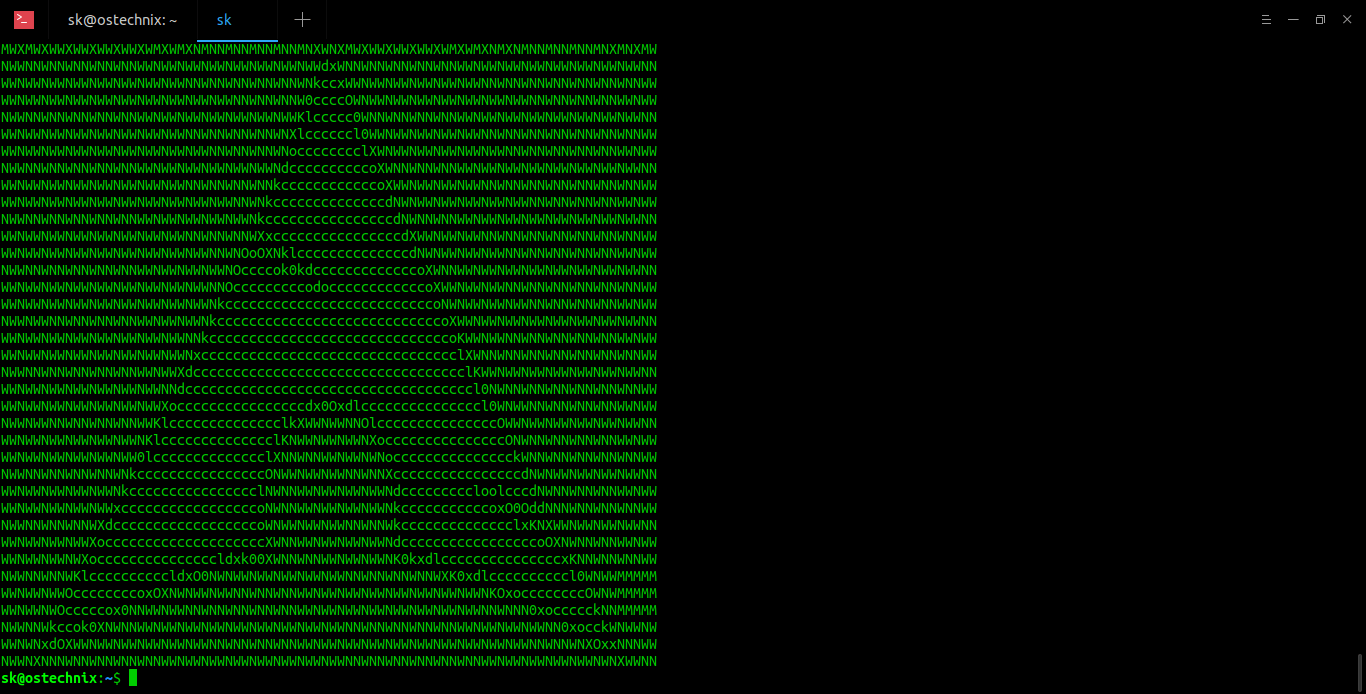
Step 4: Look for a suitable ASCII converter tool
Select efficient ASCII converter tools that coincide with your inclinations. Look into different tools and their highlights to find a smoother and more effective option.
Opt for intuitive online platforms for ASCII art. These robust tools often offer a simple interface and prompts, streamlining the overall encounter.
Think about local software choices for ASCII change, like jp2a. Such apps can be downloaded on your PC and provide adaptability over the editing process.
Examine the specifications of the tool you have selected in detail and become familiar with its character density and contrast configurations.
Prior to uploading your image to the chosen software workspace, you should also check user reviews for experiences to learn about the adequacy of the tool.
Verify that the chosen tool performs a quick upload function aligned with your image’s format.
Once you are done with all the necessary confirmations, you can move on to the next steps of converting your image to ASCII artwork.
Step 5: Play with initial ASCII conversion settings
Locate the character density modification settings of your chosen ASCII converter software. Make a moderate adjustment that maintains the ASCII representation’s clarity without overpowering the image with characters.
Tune the contrast settings to make the ASCII craftsmanship convey the essential properties between light and dark zones, corresponding to a more striking result.
Take advantage of the real-time view function of real-time to fine-tune settings productively, regulating ASCII art creation.
To get innovative results in your ASCII composition, experiment with the various options within your software.
While adjusting the software parameters, consider your photograph’s complexity. Focus on the complex, minute elements that require diverse alterations compared to less complex components.
Double-check periodically to make sure the changes adhere to your creative vision by evaluating how they relate to the standard elegance of ASCII artistry.
Step 6: Integrate the ASCII transition
Before uploading, confirm that your image is in a format consistent with the chosen tool. This efficiency decreases delays and lets you get a uniform transition to ASCII conversion.
Before continuing, utilize any accessible picture preview options to affirm that the transferred image shows up as expected, guaranteeing exact ASCII representation.
If you have a large image, resize it to hold a symmetry between quality and processing speed.
Contemplate how the tool maps characters to pixel values. This information permits you to predict and impact the ultimate ASCII result based on the character set utilized by the tool.
After starting the ASCII generation, conduct a fast yield check to check that the tool is advancing as anticipated and gives an early opportunity to capture any unforeseen issues.
Find the save choices the tool presents and select the format and settings that best suit your inclinations for sharing or additional refinement.
Step 7: Refine your composition before saving
If your composition demands manual refinement, focus on particular regions that might aid from alterations to improve the quality of the ASCII art.
After refining, visually assess the ultimate ASCII composition so that the refined areas contribute absolutely to the overall look.
Assess the alignment of ASCII art with your preferences to ensure that the representation successfully captures the substance of the initial photo.
Be open to iterative revisions if certain aspects still need modifications amid assessment. Reset and tweak the ASCII art until it acclimates with your imaginative vision.
Take a minute for a last affirmation of the refined ASCII art. Recheck that all alterations take a thoroughly positive role in the overall composition and visual charm.
Once fulfilled with the optimized and assessed ASCII art, continue to save the work of art. Select your favored format and settings. Later, you can share it on different platforms, such as social media, or incorporate it in your web journal, wrapping up the inventive process.
Conclusion
Overall, presenting the ASCII characters’ shading effect within the photographs includes enthusiastic angles while maximizing the surface and kinetic appeal. The inclusion of the grayscale transformation procedure in this art gives the photos a vintage look, referring back to the old days of computing data. By employing a telltale combination of ASCII characters in your image’s highlights, you’ll amplify the inventiveness exceeding common photographic representations, giving viewers an astounding and creative viewpoint. Eventually, ASCII art can make the essential components of your pictures more attractive with upgraded shading and surface controls, all dependent on character intensity and choice.
