How To Apply Bayes Rules In Image Enhancement
The Bayes rules are the elemental statistical concepts related to probability that can be connected to different angles of image optimization. Specifically, the approach helps retain noise or graininess, which could be a common occurrence in photos. It is done by modeling the probability conveyance of noise in pictures and driving the choice of noise diminishment calculations and variables. Bayes rules also include merging earlier data around the image features and the measurable properties of image degradation processes, empowering the estimation of ideal restoration parameters that minimize the inconsistency between spotted and anticipated image information. For issues related to color imbalances, bayes ‘s approach can create models about color transformations. For object acknowledgment and highlight extraction, Bayes’ rule can be utilized to show the probability of detected features given different object classes or categories. Then, Bayesian deduction strategies can be connected to create object realization and classification choices. To communicate the various aspects of your images requiring modifiability and editing, consider the following steps for image enhancement in the Bayes rules context.
Step 1: Assessing the Areas Needing Improvement
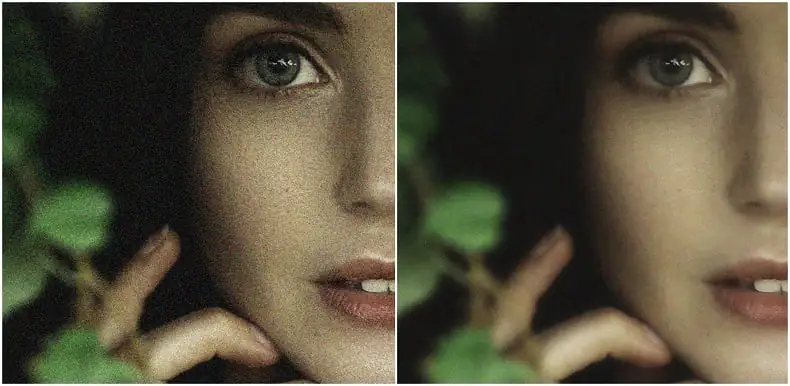
Manifestly lay out the specified improvements and changes you would like to attain through image editing. That may include errands such as noise decrease, color rectification, or sharpening to upgrade picture clarity and visual glamour.
Decide the particular zones or angles of the photograph that require improvement.; address the issues like lesser contrast, color irregularities, or blurriness.
Fix quality measures and criteria for evaluating the adequacy of the enhancement procedure. Consider components such as picture sharpness, color constancy, and overall appearance.
Archive the improvement prerequisites and targets to serve as a reference throughout the editing process. This documentation aids in keeping up focus and clarity on the specified results.
Guarantee that the upgrade objectives situate with the broader targets of the project or aiming use of the photograph. Look at the target viewers and the message or feeling you point to communicate through the improved photo.
Prioritize improvement strategies based on the noteworthiness of their effect on the photo and the degree of advancement required. That helps specify assets and exertion productively amid the enhancement process.
Step 2: Selecting Enhancement Model
Discover different models and systems accessible for image enhancement, like Bayesian approaches and conventional editing procedures.
Evaluate the suitability of each model with the particular characteristics of the picture enhancement task, considering variables such as image substance, complexity, and wanted results.
Investigate Bayesian models for their capacity to join earlier information and instability evaluation into the enhancement process, providing a principled approach to decision-making.
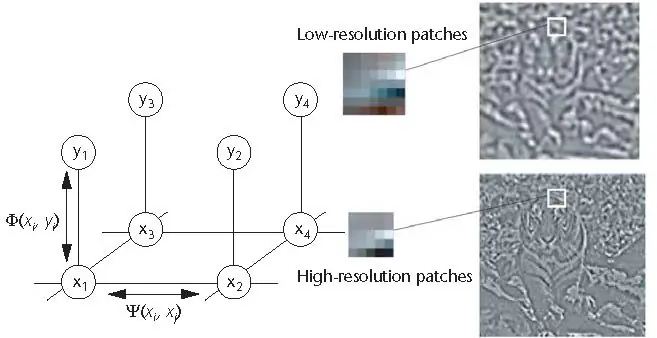
Examine probabilistic strategies such as Markov Random Fields (MRFs) and Bayesian systems, which offer effective tools for modeling picture characteristics and connections.
Check each model’s computational complexity and asset necessities, adjusting execution with practicality for real-world image-altering errands.
Based on the assessment criteria and contemplations, select the model or system that best adjusts to the particular prerequisites and goals of the image enhancement venture.
For future reference and transparency within the altering workflow, keep the basis behind the chosen model choice, including its qualities, confinements, and anticipated commitments to the enhancement process.
Step 3: The Initial Assessments and Tweaks
Establish the beginning parameters reflecting your presumptions about the picture characteristics, such as color adjustment, brightness, and noise levels.
Make likelihood dispersions based on your starting presumptions. For example, expect Gaussian conveyances for color channels or Poisson distributions for noise levels.
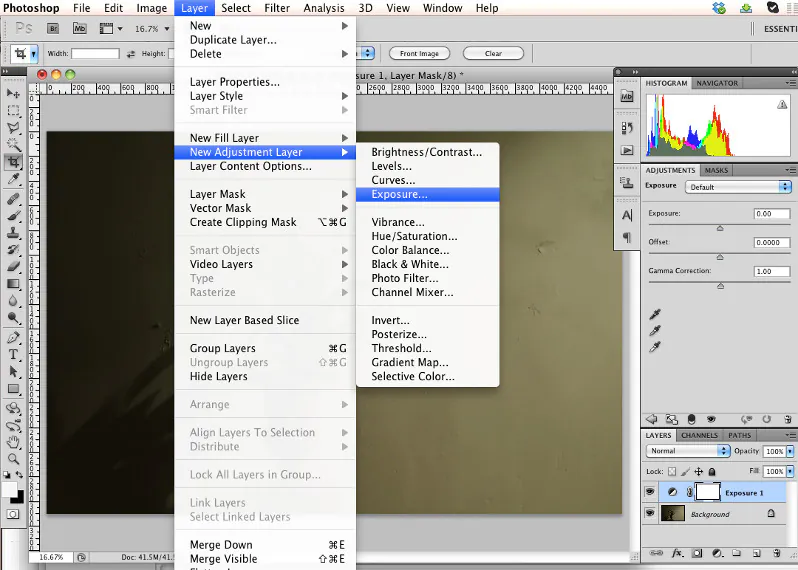
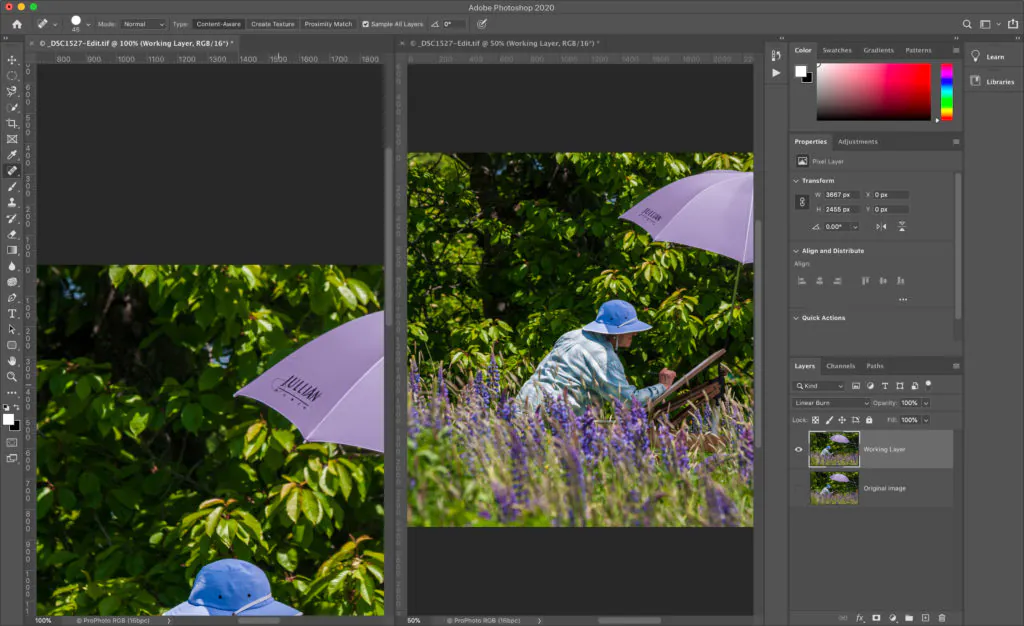
Employ adjustment layers in Photoshop to interpret your earlier distributions into noteworthy settings, like setting brightness with levels or curve adjustment layers.
Persistently refine your earlier presumptions based on the visual criticism you get while altering. If alterations do not comply with your predictions, reassess your earlier conveyances appropriately.
Figure in your past encounter and information of editing when indicating earlier distributions. Draw from past effective alters to educate your presumptions and conveyances.
Record the alterations made and the comparison of earlier distributions utilized.
Stay open to altering your earlier distributions as you advance through the editing process. Adjust to new experiences and perceptions, permitting your editing choices to shift naturally.
Step 4: Analyzing The Data Probability
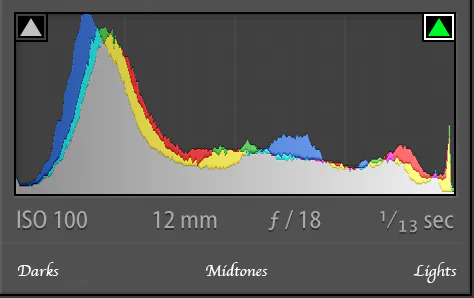
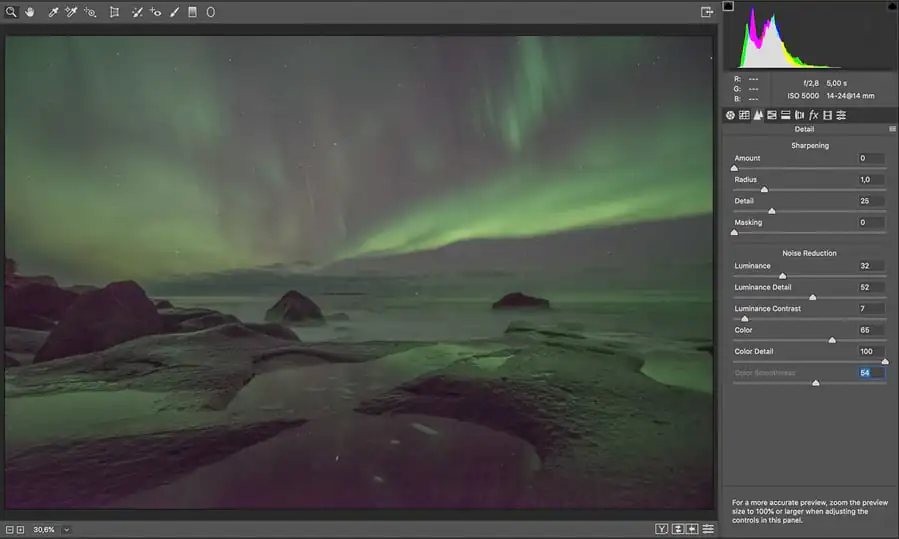
Start by looking at the compelling elements of the image, counting color conveyance, texture, and clamor levels. Utilize Photoshop’s features like the Histogram to learn about the image’s information distribution.
Create probability models that capture the relationship between the noticed image information and the underlying image attributes. Consider strategies like Gaussian blend models for color distribution or Laplacian models for edge location.
Utilize adjustment layers in Photoshop to apply distinctive enhancement procedures and examine their impacts on the probability of the observed information; you can employ sharpening channels to improve edge discovery.
Persistently survey the probability of observed information as you alter the image. Use Photoshop’s real-time see highlights to assess the effect of your transformations and refine your probability models appropriately.
Avail objective metrics such as sharpness or noise levels to evaluate the viability of your probability models. Alter your models as required to optimize picture quality and constancy.
Step 5: Determining the Parameters

Execute Bayesian inference procedures such as Markov Chain Monte Carlo (MCMC) or variational induction to assess the posterior distribution of model quantities.
Create custom scripts or plugins inside Photoshop to encourage parameter estimation forms. These scripts can automatize recurring tasks and smoothen the valuation process.
Repeat through the estimation process until merging is accomplished so that the evaluated parameters precisely reflect the elementary characteristics of the picture.
Approve the assessed parameters utilizing methods such as cross-validation or comparison with ground truth information. This approval guarantees the accuracy and precision of the parameter gauges.
Refine parameter estimation calculations for computational proficiency, considering components such as memory utilization and handling time. This optimization permits quicker and more adaptable parameter estimation.
Record the outturns of parameter estimation, counting the evaluated parameter values and any related instability measures.
Join the assessed parameters into the image enhancement workflow and continuously refine them based on visual feedback and execution evaluation.
Step 6: Applying the Informed Data Modifications
Assess the posterior distribution obtained from the Bayesian inference process, which typifies updated information around the picture parameters based on evaluated information and earlier presumptions.
Translate the likelihood estimates inferred from the posterior dissemination to form informed choices about picture enhancement procedures and settings. Higher probabilities show more noteworthy certainty in particular parameter values.
Introduce the posterior distribution to direct specific editing in Photoshop, focusing enhancements on zones with higher likelihood estimates while protecting picture astuteness in unstable regions.
Assume the uncertainty characteristic within the back distribution when making editing choices. Consider consolidating uncertainty evaluation procedures to moderate potential dangers related to dubious parameter gauges.
Adjust trade-offs between competing destinations, such as noise lessening versus picture sharpness or color precision versus creative expression. Utilize the posterior distribution to advise choices that optimize image quality while assembling client preferences and project prerequisites.
Proceed through the inference and decision-making process, refining parameter gauges and altering editing methodologies based on iterative criticism and execution evaluation.
Step 7: Executing the Final Assessment
Polish up the editing modifications based on the insights picked up from Bayesian inference and decision-making steps. Utilize Photoshop’s features and adjustment layers to refine the improvements incrementally.
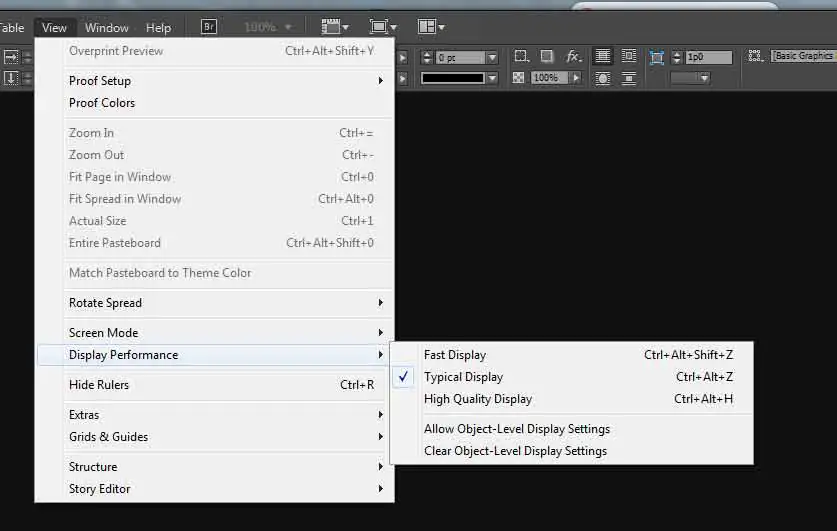
Perform a comprehensive visual review of the edited picture to evaluate the viability of the upgrades. Utilize Photoshop’s zoom and pan options to look at subtle elements and confirm overall image quality.
Analytically assess image quality measurements such as sharpness, color precision, and noise levels utilizing Photoshop’s measurement tools or outside software. Contrast these measurements against predefined quality measures and targets.
Keep editing fashion and visual characteristics consistent over different images inside the same project or arrangement. Utilize Photoshop’s batch processing feature to apply reliable adjustments productively.
Archive the editing choices made in the post-processing stage, counting the basis behind alterations and any input received.
Execute a last audit of the altered image to guarantee it meets the built-up quality benchmarks and objectives.
Save the edited images and related editing records in a coordinated way for future reference and retrieval. Keep up backups to protect against information loss and protect the keenness of the edited pictures.
Conclusion
In conclusion, the implementation of the byes rules for editing images is a step toward precision and accuracy for a flawless final composition. Bayes’ rules can direct the choice and application of image improvement procedures by joining earlier knowledge about picture characteristics and the required visual results. It provides an upstanding system for adjusting competing goals and limitations within the image process. In general, Bayes’ rules give a capable system for reasoning beneath instability and making informed choices in image editing processes. By coordinating Bayesian principles into the image-altering workflow, editors can accomplish more precise, vital, and observational outcomes.
