How To Add An Opal Effect To Images
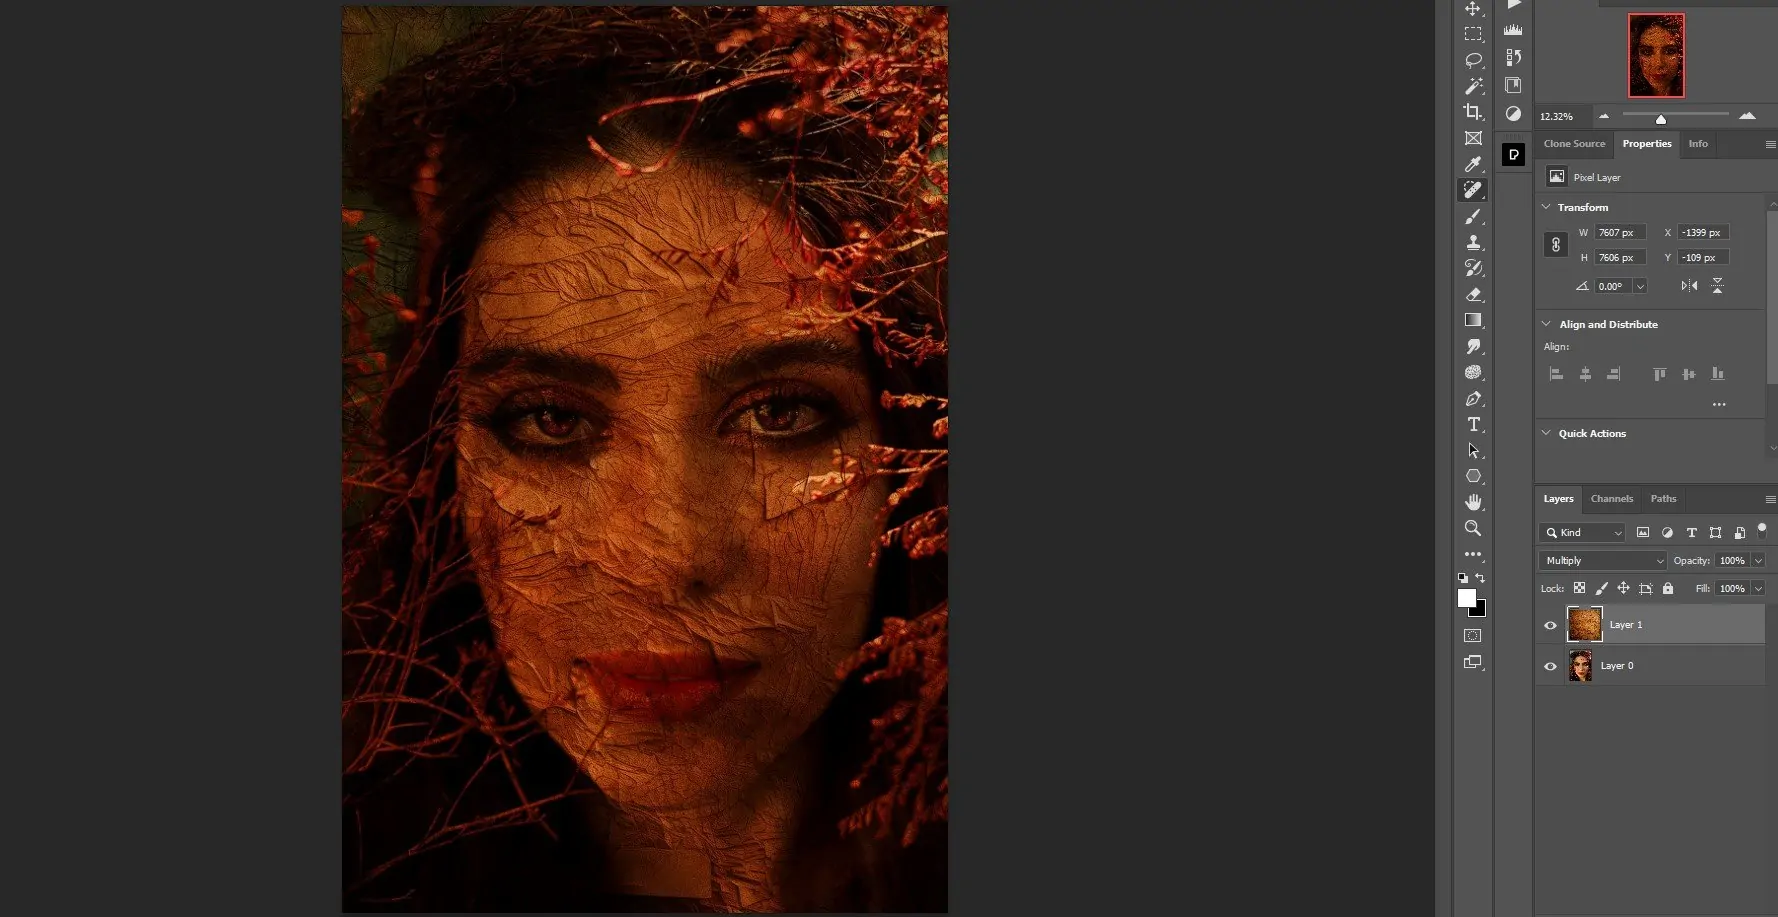
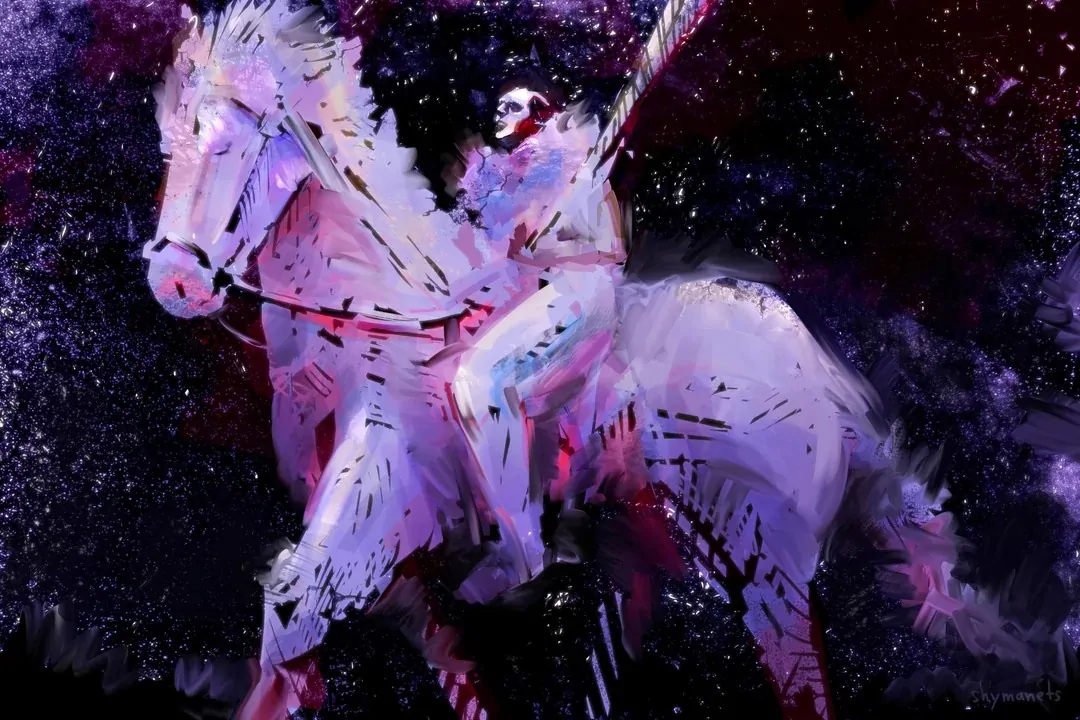
Opal gemstones are popular for their unique presentation of colours after light strikes their surface. This enchanting effect happens because the opals have a distinctive internal structure, which contains tiny balls of silica positioned in a grid pattern. That interesting colour play spectacle exhibited by opals’ interaction with light rays is commonly called opalescence, which is immensely pleasing to the gazes. Additionally, the adorable spectrum and light effects produced by opals serve as a theme for various digital artists to edit or create images, keeping this unique and visually exquisite phenomenon in mind. You can apply the opal effect to different styles of illustrations and make your images look more extravagant and have a metaphysical appearance. Further, opal textures, either availed via online libraries or manually created, are also used to enhance the backgrounds or selective textures within images. To add an opal effect to an image using editing tools, the following step-by-step process can be observed to attain your desired results, aiming to give each image a jewel-like glow.
Step 1: Resolution And Size Settings
Load the Photoshop application on your computer by clicking its icon, go to the top menu bar, select File, then click Open.
Within the dialog box that shows up, scan through your folders to find the picture you need to modify.
Tap on the image file to choose it. Ensure it’s the right file you need to work with.
Press the Open button within the dialog box. That action will load the picture into Photoshop as a new project.
Your image will show up within the fundamental workspace zone. In case it’s not obvious, inspect the Layers panel to guarantee it is appropriately loaded.
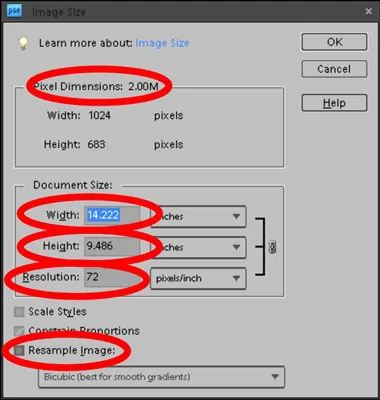
Affirm that the picture resolution and size are suitable for your editing requirements. Modify if essential by reaching to Image > Image Size.
Step 2: Use Of Gradient Maps
Be sure the Layers panel is seeable by going to Window > Layers. That panel shows all the layers in your existing project.
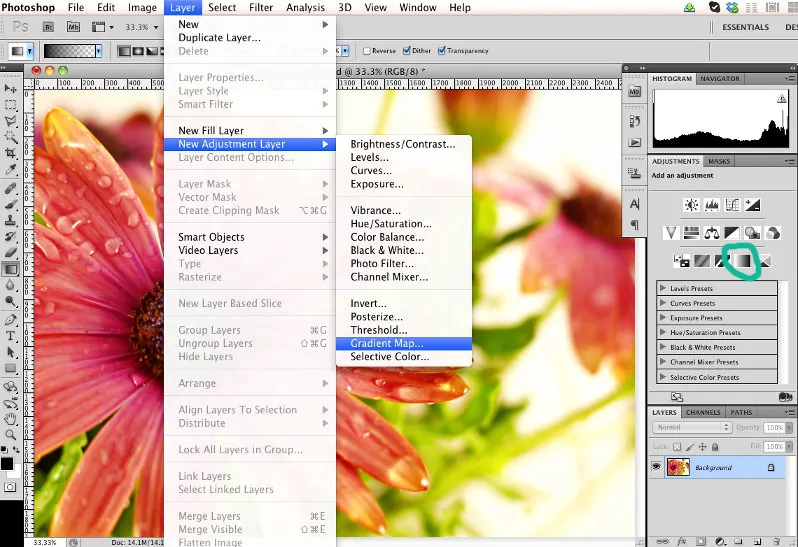
Within the Layers panel, tap on the New Adjustment Layer symbol at the foot, which can be like a half-filled circle and select Gradient Map from the list.
The Gradient Map settings will show up within the Properties panel. Press on the gradient bar to unlock the Gradient Editor.
Within the Gradient Editor, you’ll be able to select a preset gradient or make a custom one. Press on the colour stops underneath the gradient bar to alter colours. To imitate an opal effect, select a gradient that incorporates a range of colours, including pinks, blues, greens, and purples.
Adjust the colour stops and opacity stops to refine the gradient. Utilize the gradient preview to catch changes in real time.
Once the gradient is satisfactory, tap Ok to apply it. Your picture will presently have the gradient map effect connected, changing the colours based on your chosen gradient.
Alter the gradient map layer’s opacity or blending mode within the Layer area as required to get the specified intensity of the opal effect.
Step 3: Applying Noise Filter
Proceed to the Layers area and tap the New Layer symbol at the foot or use the Shift + Ctrl + N keys to make a modern layer.
Choose the Paint Bucket Tool or tap G. Select a neutral colour like grey and press on the new layer to fill it. That colour will act as the base for including noise.
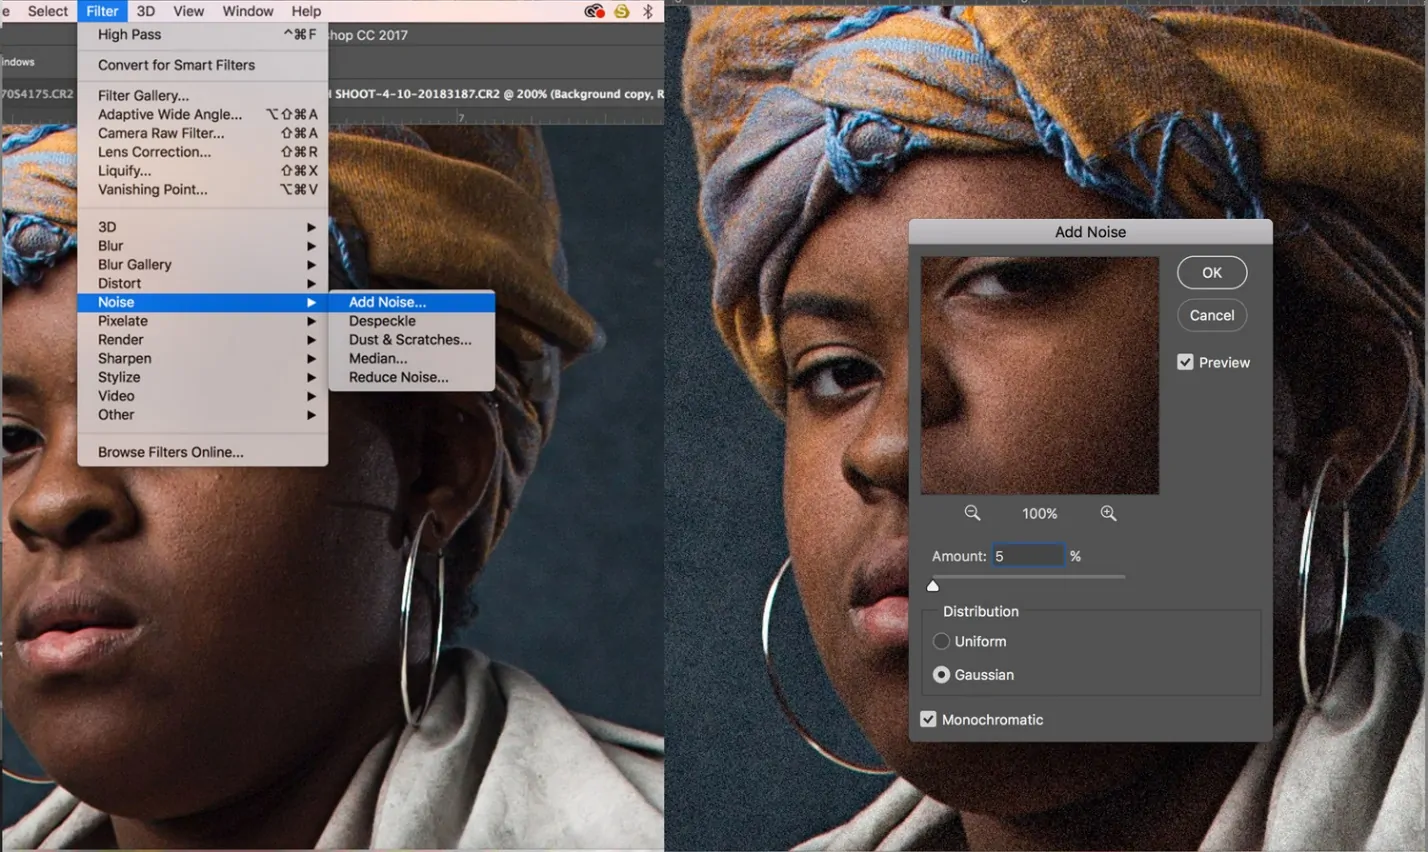
Head to Filter > Noise > Add Noise. Within the dialog box, alter the Amount slider to include noise; choosing a value between 5-10% ordinarily works well, though you can alter it as per your choice. Confirm that Monochromatic is checked to uphold the noise colour neutral.
Review the Preview box to catch how the noise will appear. Alter the Amount slider in case required, then tap Ok to execute the noise impact to the layer.
Lessen the opacity of the noise layer within the Layers panel in case the noise effect is too potent. This alteration guarantees that the noise surface mixes calmly with the underlying image.
Retitle the noise layer to something graphic like Noise Surface by double-clicking on the layer title within the Layers panel. It can let you keep your layers systematized.
Save your progress by reaching File > Save As, choosing your favoured file format, and documenting your project.
Step 4: Adding Blur Effects
Within the Layers panel, press on the noise layer you made within the previous step to be sure it is in action.
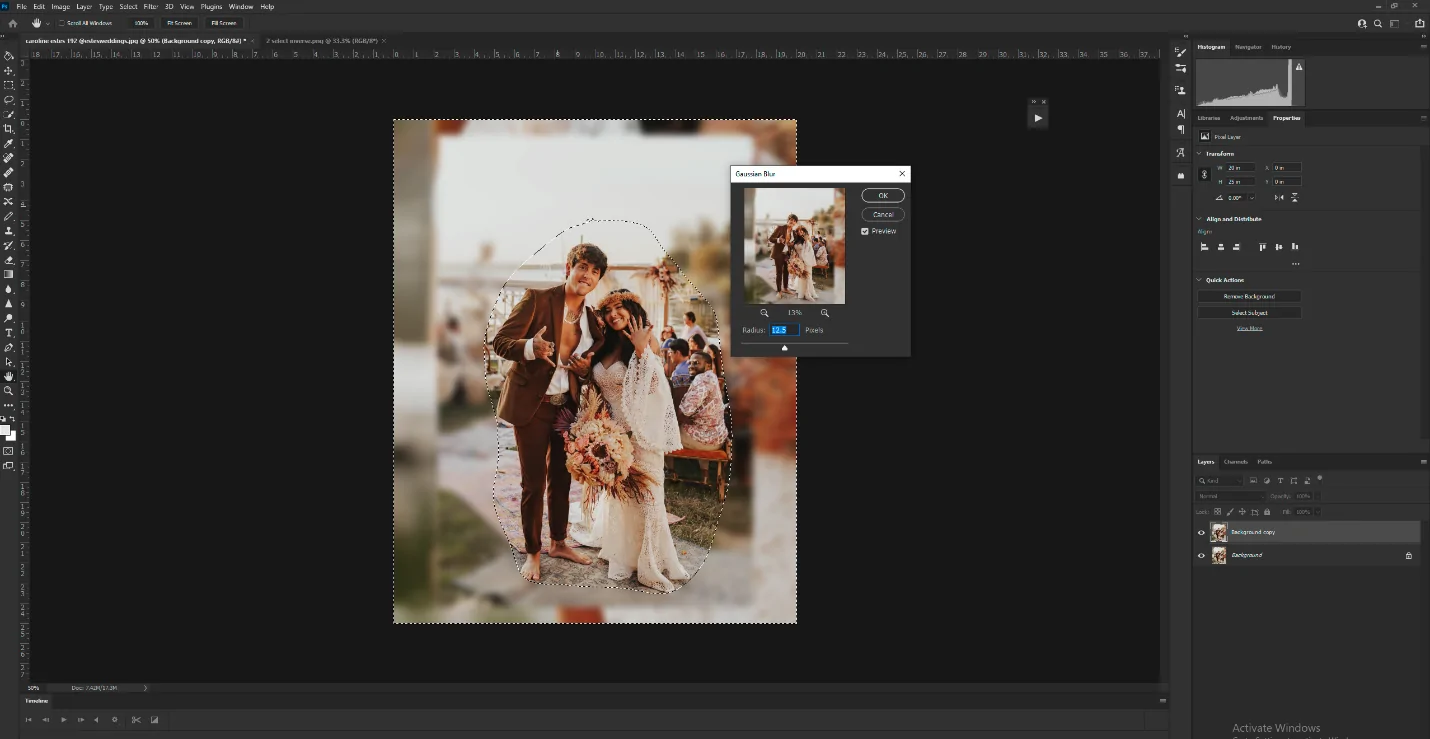
Follow Filter > Blur > Gaussian Blur within the top menu to get to the Gaussian Blur dialog box.
Within the Gaussian Blur dialog box, utilize the Radius slider to alter the amount of blur. Begin with a low radius level like 2-5 pixels) and increment as required. The objective is to de-stress the noise surface to imitate the transparency of opal.
Examine the Preview box within the dialog box to observe how the blur influences your picture in real-time. Vary the Radius slider until you accomplish a smooth, slightly blurred noise surface.
After you’re comfy with the blur impact, press Ok to add it to the noise layer.
If the blurred noise impact is too strong, reduce the opacity of the noise layer within the Layers panel to mix it more naturally with the gradient map underneath.
Protect your work frequently by aiming to File > Save or Save As to sidestep losing changes.
Step 5: Blend Mode Settings
Make sure the noise layer is dynamic within the Layers panel by tapping on it.
Navigate to the top area of the Layers panel and find the dropdown menu that defaults to Normal to modify the blending mode.
Press on the blending mode dropdown menu. Considering an opal effect, play with Overlay, Soft Light, or Screen mode. Each of these modes can blend the noise layer with the gradient map in an unexpected way, influencing how the noise surface relates to the colours beneath.
After you have decided on a suitable blending mode, alter the opacity of the noise layer if it is vital. Decrease the opacity to lessen the impact’s vigour so that it coordinates smoothly with the gradient map.
Watch the changes and vary the opacity or blending mode in case required. This alteration helps accomplish the required level of texture and glow.
If you think so, include layer styles like Drop Shadow or Inner Glow by clicking the fx symbol at the foot of the Layers panel. These styles can upgrade the widespread appearance.
Preserve your work by getting to File > Save or Spare As to have your progress intact.
Step 6: The Final Touches
Press the New Layer symbol at the bottom of the Layers board to include a new layer over your existing layers. That layer will be utilized to include highlights and shadows.
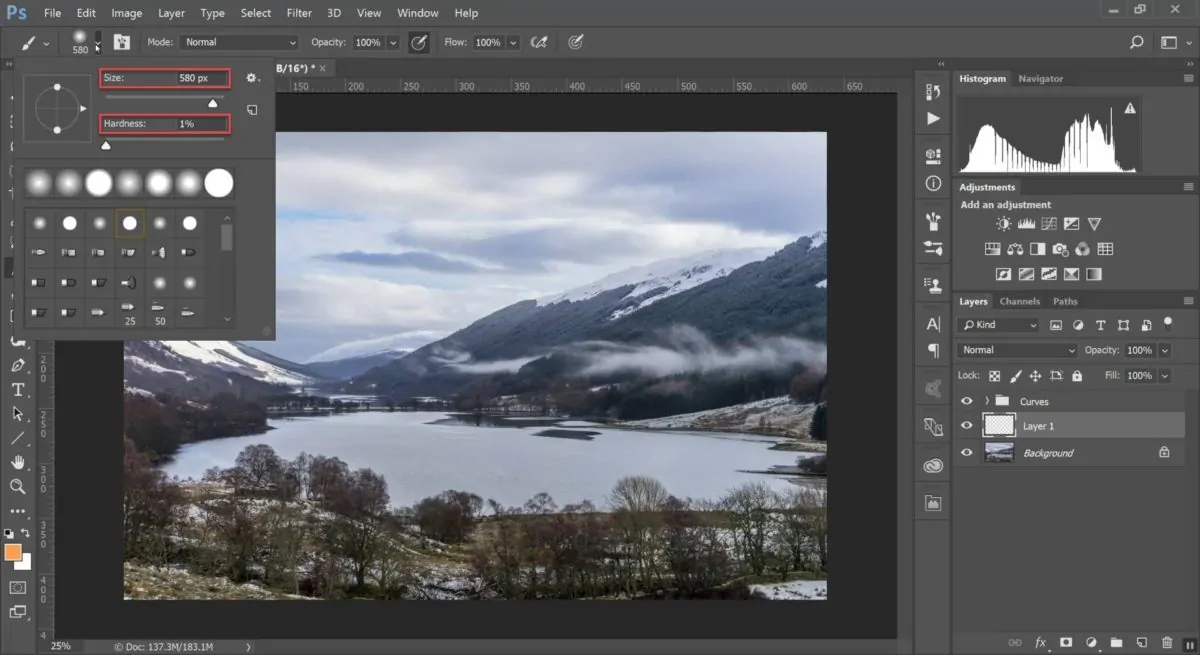
Pick the Brush Tool from the toolbar or use key B. Get a brush with a soft, circular tip and alter the opacity to a low amount, like 10-20.
Pick a light colour for highlights and a darker colour, such as dark blue or purple, for working on shadows.
Within the new layer, delicately paint highlights where you need to improve the light reflection and include shadows to develop the contrast. Utilize low opacity and delicate strokes for a modest effect.
Decrease the opacity of the highlight and shadow layer in case the impact is too solid. That will aid the included details blending consistently with the fundamental layers.
Include a layer mask to the highlights and shadows layer by clicking the Include Layer Mask symbol at the foot of the Layers panel. Utilize a delicate brush with a lower opacity to represent regions where the effect should be less articulated.
Audit the ultimate look to guarantee it confronts your desired effect. Make any last alterations in case vital. Preserve your work by attending to File > Spare or Save As to ensure all changes are protected. Don’t forget to consider the suitable format and resolution setting for a polished final composition.
Conclusion
In a nutshell, the image manipulation process involving the application of an opal effect can be a step to arousing a glimmer of elegance and fancy into the atmosphere of your images. The traditional beliefs associated with opals which relate them to the power to find love or rekindle feelings of affection between duos, further add to opal efefct charm while used in visual art. Opal is also used in various spiritual practices and meditation processes. Eventually, through your opal effect, images become a source of spiritual awareness and connection for viewers, breeding a deeper understanding of spiritualism.


