How To Add A Matte Finish To Your Images
Matte finishes are commonly utilized to form a more classic or aesthetic feel. The approach predominant in different areas like photography, printing, and design interprets a surface texture or effect included in materials to attain a non-glossy, mellow appearance. In contrast to glossy finishes that reflect light emphatically, matte finishes offer a repressed, milder display, minimizing glare and reflections. This quality makes them especially appropriate for different applications where a more downplayed aesthetic is wanted. In photos, accomplishing a matte finish involves utilizing particular printing or post-processing strategies. Editors prefer matte finishes to give their pictures an enduring, classic feel. The non-appearance of intense reflections permits viewers to dwell more on the substance of the photo instead of being occupied by glare. Matte finishes also tend to replicate colours and points of interest with more prominent nuance, improving the broad visual quality of the picture. The following blog article will overview the essential steps, tools and adjustments required during the post-processing of images to create a fetching matte finish.
Step 1: Contrast Settings
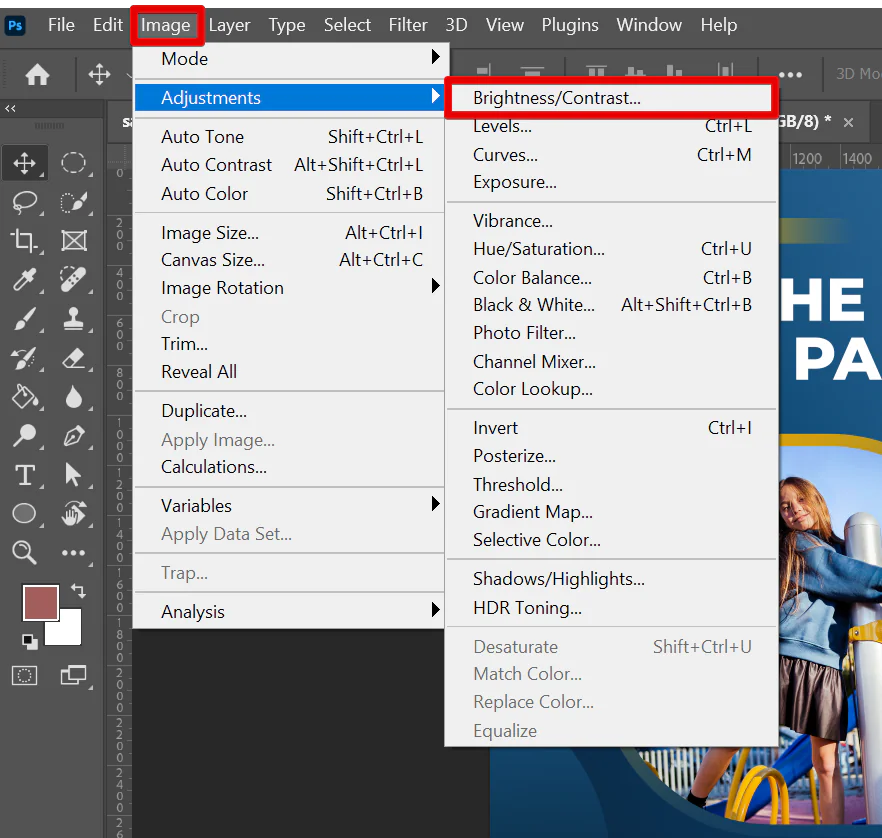
Start by opening your photo editing program and importing the picture in which you need to introduce a matte finish.
Find the “Contrast” settings or panel, then decrease the contrast steadily by moving the slider or adapting the settings. Strive to lessen the refinement between highlights and shadows without losing much detail.
Be careful with high contrast ranges, such as bright highlights and profound shadows, guaranteeing they hold satisfactory definition while contributing to the overall muted look.
See the changes as you make them to determine their effect on the picture. Look for a proportional decrease in contrast that upgrades the matte effect without compromising the image’s visual impact.
Avoid excessive adjustments which will result in a level or washed-out appearance. Strive for an unpretentious reduction in contrast that complements the required matte finish.
After the contrast alterations, tune other components like colour saturation and texture overlay to advance and improve the matte effect.
Save your work intermittently to protect your progress and permit alterations as required throughout the editing.
Step 2: Saturation Reduction
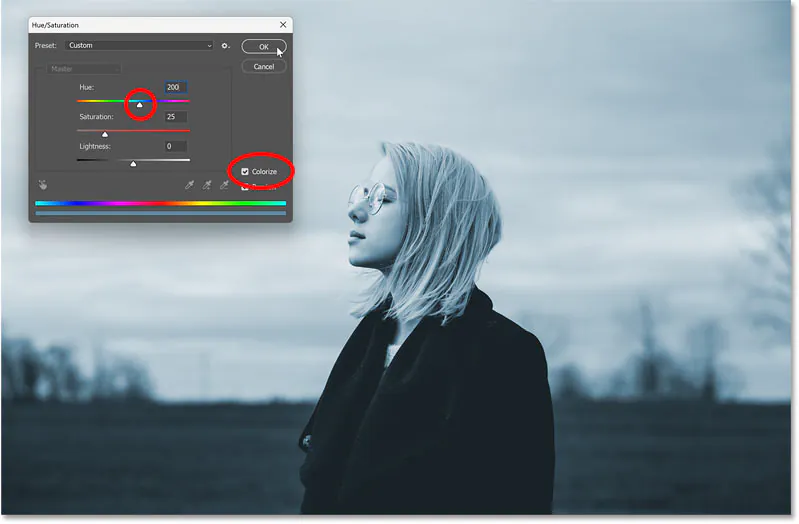
Move on to the saturation settings of your software and search for the “Saturation” or “Vibrance” adjustments within the colour adjustment panel or menu.
Slowly reduce the saturation levels by altering the slider or entering particular values. Try to desaturate the colours while protecting their tonal astuteness.
Consider the mild colour variations and skin tones, guaranteeing they remain natural and adjusted throughout the desaturation process.
Assess the picture as you make alterations, examining how the decrease in saturation contributes to the specified matte effect.
Focus on keeping up an agreeable colour palette that complements the overall disposition and composition of the image.
Avoid overdoing desaturation, which will result in a gloomy or dead appearance. Look for a subtle reduction in saturation that creates the matte finish without compromising visual interest.
Tune the saturation levels until you accomplish the specified balance between quieted colours and overall picture aesthetics.
Step 3: Integrating Texture Overlays
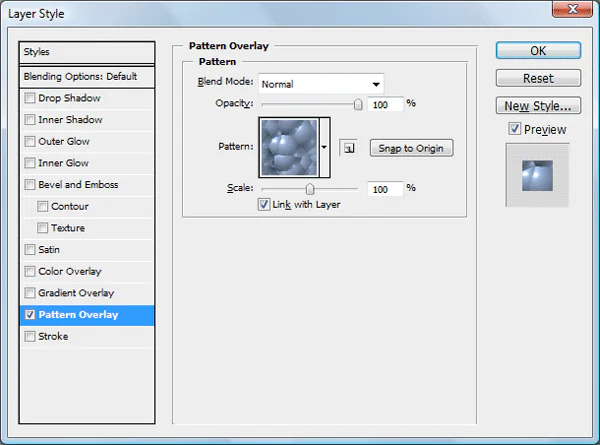
Apply a texture overlay to progress the image’s matte finish by giving it profundity and visual esteem.
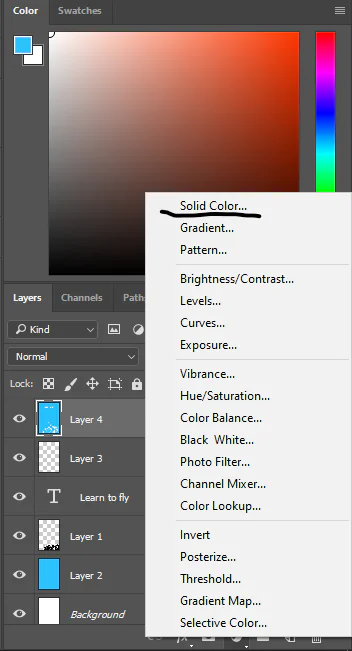
Get to the “Layers” panel or menu in your picture editing software to make a new layer for the texture overlay integration.
Select an appropriate texture image or design that complements the temperament and theme of your photo. Ponder choices like subtle grains, paper textures, or fabric designs.
Put the texture overlay layer over the initial picture layer and alter its opacity to blend it easily with the underlying image. Play with opacity levels to attain the specified intensity of the texture impact.
Employ blending modes such as “Overlay,” “Soft Light,” or “Multiply” to actively blend the texture overlay with the fundamental picture. Each mode offers particular impacts, so experiment with different alternatives for the most appropriate one.
Scale and position the texture overlay to cover the whole picture or particular regions where extra profundity and texture are desired.
Alter the texture overlay by applying settings like levels, curves, or hue/saturation to harmonize its appearance with the initial picture. Look for a cohesive blend that improves the matte effect without overwhelming the photo.
Step 4: Decreasing Highlights
Get to the highlights alteration tool inside your program and moderately decrease the brightness of highlights by moving the slider or entering particular values. Look for a subtle decrease that highlights detail while lessening their prominence.
Observe the parts of the picture where the highlights appear too bright or distracting. Work on toning down these highlights to make a more uniform and calm appearance.
Apply strategies like selective editing or adjustment brushes to target particular highlight zones that require toning down, such as reflective surfaces or regions of direct light.
Reliably evaluate the photo as you make adjustments, guaranteeing that toning down highlights contributes to the overall matte effect without giving up on picture clarity or the level of detail.
Set an appropriate balance between decreasing high light intensity and protecting fundamental highlight details, such as specular highlights and reflections.
Experiment with distinctive alteration levels and strategies to attain the required harmony between highlight lessening and general aesthetics.
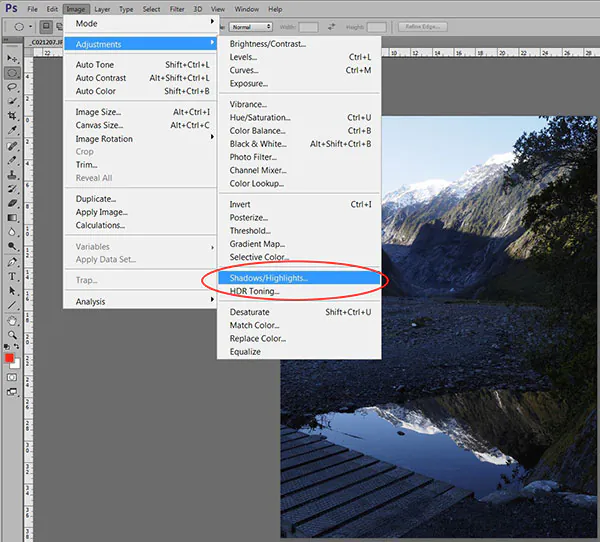
Step 5: Shadows Adjustment
In this step, you need to soften shadows to attain a cohesive matte finish and an adjusted dispersion of light and shadow.
Find the “Shadows” adjustment tool around tone or exposure alteration options.
Continuously alter the shadow settings to lighten shadowed regions while sustaining contrast and profundity inside the image.
Look for places where shadows appear too much defined, particularly in regions with emphatic contrast or intricate shadow detail.
Apply shadow recovery or selective editing to target shadowed zones that require softening, such as underexposed areas or ranges clouded by harsh lighting conditions.
Attain a gentle softening effect that boosts the overall matte finish without compromising picture clarity or contrast.
Adjust the softening of shadows with alterations to highlight and mid-tone regions to guarantee a pleasing distribution of light and shadow throughout the picture.
Persistently evaluate the image as you make alterations, refining the softening effect to attain the specified balance of shadow aesthetics.
Step 6: Using Vignette Tool

Get to the vignette tool found inside the effects or lens correction settings.
Alter the vignette settings to obscure the edges of the image slowly, moving gently from the centre to the periphery.
Try distinctive vignette shapes, such as circular or rectangular, to complement the composition of your photo and emphasize its central focus.
Customize the vignette parameters, including intensity, feathering, and shape, to attain the required visual effect while maintaining a natural and even appearance.
Make sure the vignette fits into, instead of taking away from, the overall composition by paying attention to how it relates to the image’s subject matter, highlights, and shadows.
Avoid immoderate vignetting that seems artificial or diverts from the photo’s main subject. Try for a subtle impact that quietly guides the viewer’s eyes towards the centre of the picture.
See the picture with the vignette effect connected, surveying its impact on the matte finish and making alterations as vital to attain the required visual result.
Save your work and continue to conclude the matte finish by checking on the picture as a whole and making any additional alterations or refinements to upgrade its overall style.
Step 7: Finishing Matte Finish
The ultimate step includes applying a matte coating or finish to the under-editing composition for a reliable and cohesive appearance over all components.
Pick the option to apply a matte coating or finish inside your editing software, often found within the export or finalization settings.
Select the suitable matte finish option based on your software’s capabilities and your desired aesthetic inclinations. That can be selecting a matte paper texture or applying a matte filter to the image.
Alter the strength or opacity of the matte coating to get the specified level of subtlety and texture. Go for a matte finish that improves the overall temperament and environment of the image without overwhelming its visual components.
Pay consideration to the interaction between the matte coating and other altering alterations connected through the method, guaranteeing they complement each other to form a cohesive matte finish.
See the ultimate picture with the matte coating connected, check its effect on the generally stylish and make any fundamental alterations to reach the specified result.
Assess the composition’s totality, considering colour accuracy, contrast, and sharpness to guarantee a high-quality final yield.
Once done with the matte finish, save the picture within the wanted file format and resolution, protecting your editing adjustments for future reference or refinement.
Conclusion:
In outline, a matte finish is an expansion for refined aesthetics, speaking to the moments smoothly and exquisitely. The matte finish effect naturally stimulates sentiments of reflection and wistfulness, drawing viewers to connect with the photo more profoundly and introspectively. Its hushed tones and tender moves pass on a temperament of tranquillity and immortality, prompting reflection and introspection. In a world immersed with sensory excess, the matte finish offers a welcome respite—a calm oasis of quietness and modernity that welcomes watchers to stop, consider, and appreciate the world’s distinct excellence.
