How Do I Make A 2D Model Printable
In recent years, 3D printing has become increasingly popular, allowing users to bring their digital creations to life in the physical world. While 3D printing has dominated the world of digital fabrication, there is still a need for creating 2D models that can be printed on paper or other flat surfaces. Whether you are an artist, designer, or hobbyist, you may wonder how to create 2D models suitable for printing. This blog post will explore the steps necessary to create 2D models that can be printed on paper or other flat surfaces. We will discuss the software tools and techniques required to create printable 2D models and the considerations you should consider when designing for print. We will also explore the various materials and techniques you can use to bring your 2D models to life in the physical world. Whether you are creating posters, flyers, or other 2D designs, this blog post will provide you with the insight and skills you need to make your designs printable.
Software Tools Used to Make 2D Models Printable
CAD software:
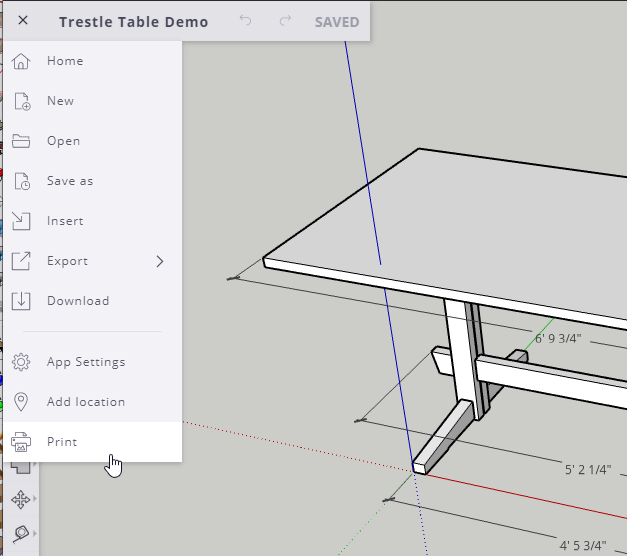
Computer-aided design (CAD) software is used to create the 2D model. Common CAD software includes AutoCAD, SolidWorks, and SketchUp.
2D to 3D conversion software:
If the original model is in 2D format, it may need to be converted to a 3D model to be printed. Software such as Blender or Tinkercad can be used for this purpose.
Slicing software:
Slicing software is used to break down the 3D model into printable layers. Examples of slicing software include Cura, Simplify3D, and Slic3r.
3D printer software:
The software that controls the 3D printer is essential for ensuring a successful print. Popular 3D printer software includes Ultimaker Cura and PrusaSlicer.
File preparation software:
It may need to be adjusted for size, orientation, and support structures to prepare the model for printing. Meshmixer and Netfabb are commonly used for this purpose.
Printer firmware:
The firmware on the 3D printer must be up-to-date and compatible with the chosen software. The printer manufacturer typically provides the firmware.
Also, various benefits of printer maintenance management provide support to keep your printer running smoothly. This software is essential for ensuring that your printer operates correctly and optimally, resulting in high-quality prints.
The Leading Steps to Make a 2D Model Printable:
Making a 2D model printable is a process that involves several steps. Now we will go through the necessary steps to make a 2D model printable.
Step 1: Choose the Right Design Software
The first step in making a 2D model printable is to choose the right design software. Many different design software programs are available, but some are better suited to creating printable 2D models than others. Some popular design software programs for creating 2D models include Adobe Illustrator, CorelDRAW, SketchUp, and Inkscape.
When choosing your design software, consider your experience level and the complexity of your design. Some software programs are more user-friendly than others, and some are better suited to creating intricate designs. Choose a program to meet your needs and help you create the best possible model.
Step 2: Create Your 2D Model
Once you choose your design software, you can create your 2D model. Start by sketching out your design or creating a rough draft of what you want your model to look like. That will give you a visual reference to work from as you create your model.
Using your chosen design software, start creating the shapes and lines of your 2D model. Use the various tools available in your software to create the desired shapes and lines and arrange them to represent your design. You can also add color and texture to your model to make it more visually appealing.
As you create your model, save your work regularly to avoid losing progress. You may also experiment with design variations to find the best possible version.
Step 3: Export Your Model
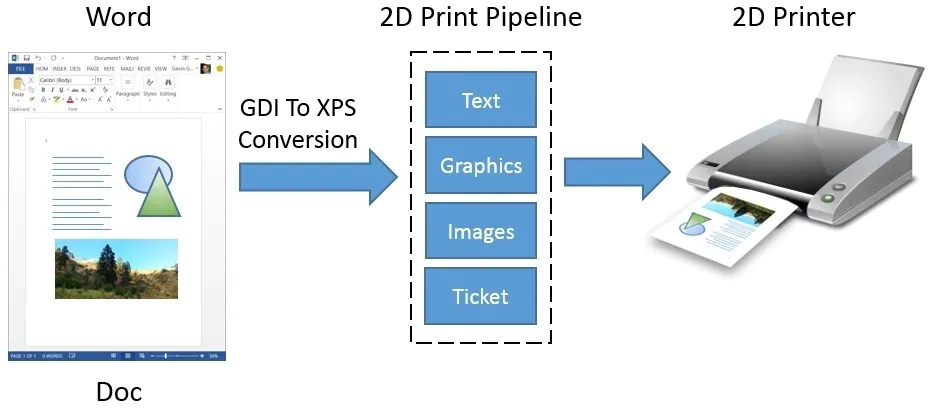
Once you have completed your 2D model, export it into a file format suitable for printing. Some popular file formats for printable 2D models include PDF, JPEG, and PNG.
Select the appropriate settings for your chosen file format when exporting your model, including selecting the appropriate resolution and colour space and specifying any other printing requirements.
Step 4: Prepare Your Model for Printing
Before printing your 2D model, you need to prepare it for printing. Preparing your 2D model for printing involves several important steps, including:
Choosing the right paper or flat surface for your intended use
Ensuring that your model is properly aligned and scaled for printing
Setting up the correct orientation for your model
Previewing how your model will look when printed
Choosing the right paper or flat surface:
Consider the intended use of your model when selecting paper or surface type
Heavier-weight matte paper is good for educational materials
Glossy finish or vinyl surfaces are good for promotional materials
Ensuring proper alignment and scaling:
Adjust the size of your model in your design software as needed
Please make sure the dimensions of your model match the dimensions of the paper or surface on which it will be printed
Ensure that your model is properly centered and aligned for accurate printing
Setting up the correct orientation:
Adjust the page layout settings in your design software to ensure the correct orientation (landscape or portrait)
Previewing your model:
Use your design software to preview how your model will look when printed
Make any necessary adjustments to ensure that your model looks its best when printed
Step 5: Print Your Model
Once you have prepared your 2D model, you can print it using a printer or a professional printing service. Select the appropriate print settings to ensure the best possible quality, and monitor the printing process to ensure your model is printed correctly.
Step 6: Finish Your Model
Once your 2D model has been printed, you may need to do some finishing touches to complete it. That involves trimming the edges of the paper or applying a protective coating to ensure that the model lasts longer.
Carefully inspect your printed model for any errors or defects, and make any necessary adjustments to ensure it looks as good as possible. You may also want to display or share your model with others to showcase your work.
Some Important Tips and Considerations:
Creating a 2D model that can be printed on paper or other flat surfaces requires careful consideration and attention to detail. Here are some important considerations to consider when making a 2D model printable:
Design Software: The first consideration is to choose the appropriate design software for creating your 2D model. Many options are available, ranging from basic drawing tools to more advanced software such as Adobe Illustrator or CorelDRAW. The software you choose will depend on the complexity of your model and your familiarity with different programs.
Model Complexity: When designing a 2D model that will be printed, it is important to consider its complexity. Complex models with lots of detail may be difficult to print or require a larger surface area. Additionally, complex models may require more time and effort to prepare for printing, so it is important to consider this when designing your model.
Print Quality: The quality of the print will depend on several factors, including the resolution of the design, the quality of the paper or flat surface, and the printing technology used. To ensure that your model prints at the highest quality, it is important to use high-quality paper or surface and to choose the appropriate printing technology for the job.
Color Selection: Color is an important consideration when designing a 2D model for printing. Your chosen colors should be appropriate and visually appealing for the model’s intended use. It is also important to consider the printing technology, as some printing methods may not accurately reproduce certain colors.
Size and Dimensions: The size and dimensions of your 2D model are important considerations when preparing it for printing. You should ensure that your model’s dimensions match the dimensions of the paper or flat surface on which it will be printed and that it is properly centered and aligned for accurate printing. Additionally, consider your model’s scale, as some details may need to be recovered or become difficult to see when the model is scaled down for printing.
Printing Method: There are several printing methods available for printing 2D models, including laser printing, inkjet printing, and screen printing. Each method has advantages and drawbacks, so it is important to consider the model’s intended use, the print quality required, and the materials used when choosing a printing method.
Finish: The finish of the printed model is an important consideration, as it can affect the appearance and durability of the model. For example, a glossy finish may be more visually appealing but more prone to smudging or fingerprints. In contrast, a matte finish may be more durable but may need to be more visually striking.
Overall, creating a 2D model that can be printed on paper or other flat surfaces requires careful consideration of the design software, model complexity, print quality, color selection, size and dimensions, printing method, and finish. Considering these factors, you can ensure that your model prints at the highest quality and looks its best when presented to others.
Conclusion
In brief, Creating a printable 2D model requires creativity, attention to detail, and a passion for bringing ideas to life. With the right software, techniques, and materials, anyone can create beautiful and engaging 2D models ready to be printed and displayed. It allows for expressing ideas and communicating the vision in a tangible and accessible way, making it a refreshing and rewarding way to connect with others and showcase talents.
