Step by step guide to create a data entry form in excel
As we all know that it is very necessary for all organizations to maintain their bulk of data with the help of different computer software because manual work is so time-consuming and requires a lot of effort. However, in general, data maintenance work is not easy at all whether the software is used or not. In order to save time and effort, organizations are inclining towards data entry services since these services have professionals for data maintenance tasks. Most of these companies used MS EXCEL for data entry tasks because EXCEL is a broad-spectrum software.
Microsoft, a major player in technology, developed the spreadsheet tool, Excel. This software is useful for organizations since it makes accounting and financial tasks easier. Indeed, Excel is a commercial application that offers a grid-like interface for entering data, making graphs and charts, and analyzing data. Although Excel data entry appears to be easy, there are many difficulties. Well, do not worry! We are here for you. We will tell you all the basic and easy steps to create a data entry form in Excel.
What is a data entry form in Excel?
A data form offers an easy way to enter or show a single full row of data in a range or table without having to scroll horizontally. When you have multiple columns of data than can be displayed on the screen, you might find that using a data form makes data entering easier than navigating from column to column.
It gives a record of the data entered into a database or spreadsheet using a form, log, or other electronic submissions. It may consist of financial information, research information, personnel data, survey results, student data, etc.
Why should we use a data entry form?
When it comes to entering data into Excel, people commonly run into two problems:
It takes a lot of time: You must input the data in one cell before moving on to the next cell and doing the same. Sometimes, you must scroll up to determine which column you are in and what information needs to be typed. In the event that there are several columns, you can also scroll to the right before returning to the beginning.
It’s prone to errors: There is a chance that you might enter something into a cell that wasn’t meant for it if you have a large data collection with 40 entries that need to be made.
However, the procedure can be sped up and made less prone to mistakes with the help of a data entry form.
How to create a data entry form in Excel?
Step 1: Add Data Entry Form Option to Quick Access Toolbar
A little pre-work is required before using an Excel data entry form. You would find that using a data entry form is not an option in Excel (not in any tab in the ribbon). You must first add it to the Quick Access Toolbar before using it (or the ribbon).
To add the data entry form option to the Quick Access Toolbar, follow these steps:
1 Click the right mouse button on any of the Quick Access Toolbar’s present icons.
2 Select “Customize Quick Access Toolbar” by clicking.

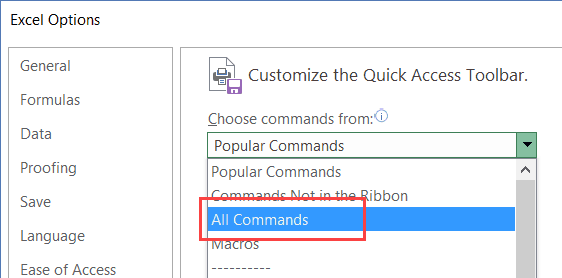
3 Choose the ‘All Commands’ option from the drop-down menu in the ‘Excel Options’ dialogue box that appears.
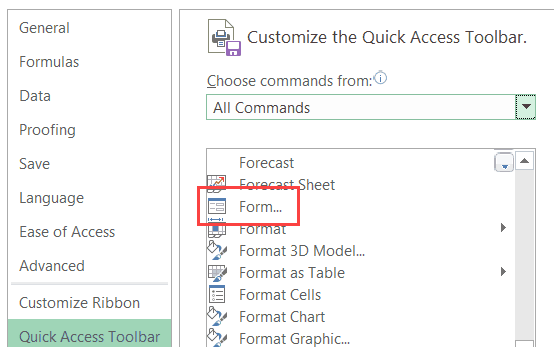
4 Select “Form” from the list of commands as you scroll down.
5 Click the “Add” button.
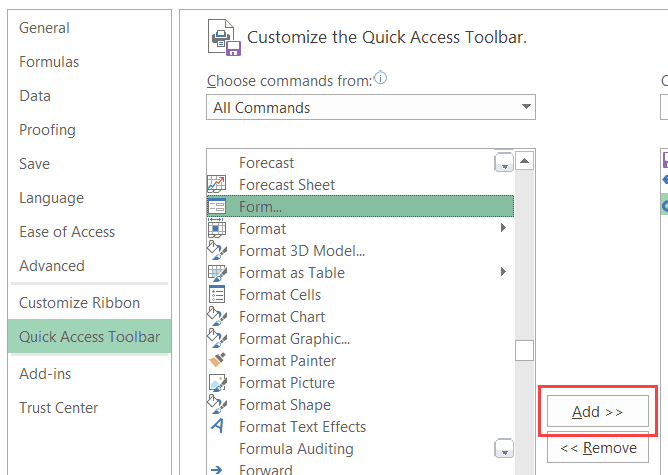
6 Click ok
All these steps would add the Form icon to the Quick Access Toolbar.
![]()
Once it is in QAT, you can pick any dataset cell in which you want to make the entry by selecting it, then selecting the Form icon.
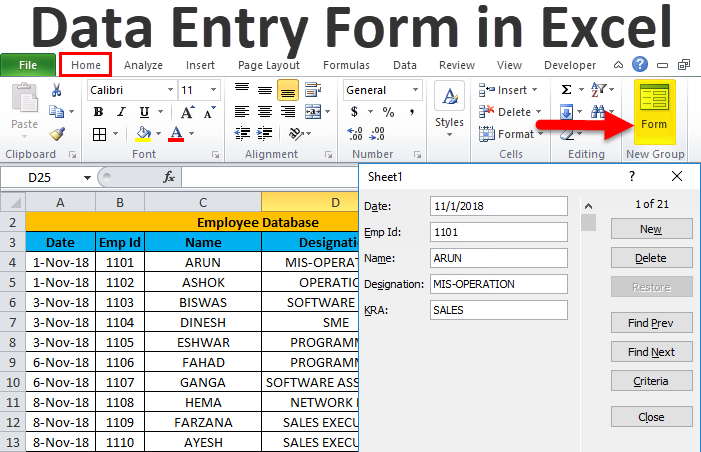
Step 2: Understand data entry form parts
The buttons on an Excel Data Entry Form are numerous. The purpose of each button is briefly explained as follows:
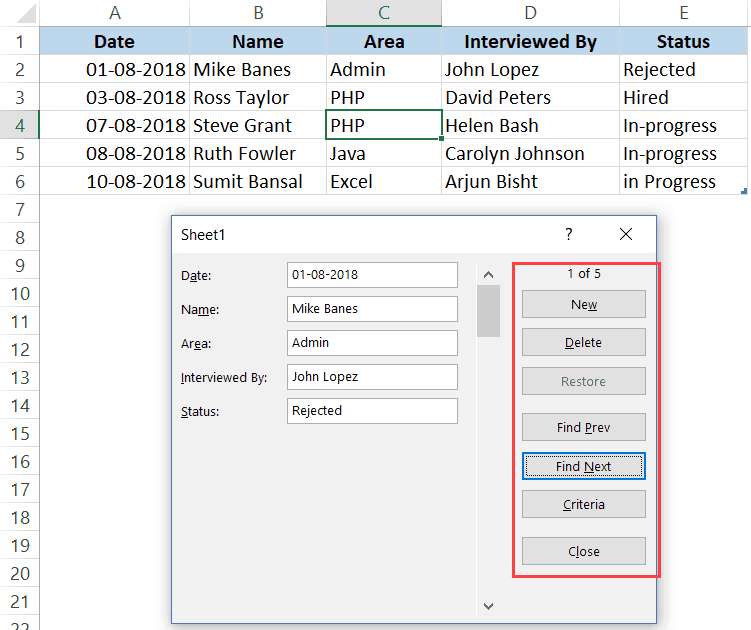
- New: By doing this, you can make a new record by clearing out any current data in the form.
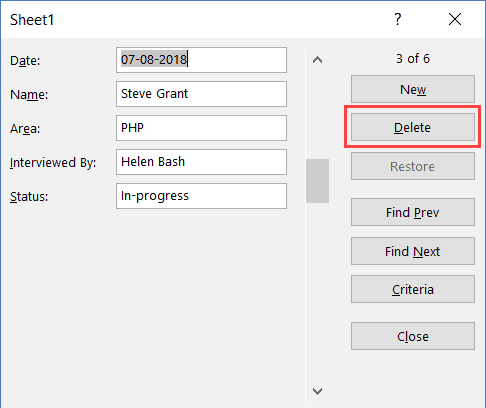
- Delete: You can use this to remove an existing record.
- Restore: If you’re updating an existing entry and haven’t pushed Enter or New, you can go back and edit the form’s prior data.
- Find Prev: This will locate the prior entry.
- Find Next: This will locate the following entry.
- Criteria: This enables you to locate particular records. To search all the entries where the candidate was hired, for instance, I would need to select the Criteria button, type “Hired” in the Status column, and then use the find buttons.
- Close: This will cause the form to close.
- Scroll Bar: The scroll bar can be used to browse through the records.
Let’s now go over everything you can achieve with an Excel data entry form.
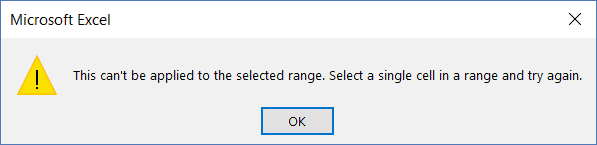
To activate the Data Entry form dialogue box, you must first convert your data into an Excel table and choose any cell inside the table. The Excel Table will display a prompt similar to the one below if you haven’t chosen a cell to select:
Step 3: How to create a new entry?
The following are the steps to make a new entry using Excel’s data entry form:
1 Select any cell in the Excel table.
2 In the Quick Access Toolbar, select the Form icon.
![]()
3 Fill up the form fields with your info.
4 To input a record in the table and obtain a blank form for the following record, press the Enter key or click the New button.
Step 4: Understand how to navigate through existing tools
The ability to quickly navigate and change the records without ever leaving the dialogue box is one advantage of using the Data Entry Form. If your dataset has a large number of columns, this can be extremely helpful. You can avoid a lot of back-and-forth scrolling by doing this.
Here are the steps for using a data entry form to browse and edit the records:
1 Select any cell in the Excel table.
2 In the Quick Access Toolbar, select the Form icon.
3 Click the “Find Next” or “Find Prev” icons to move to the next or previous entry, respectively.
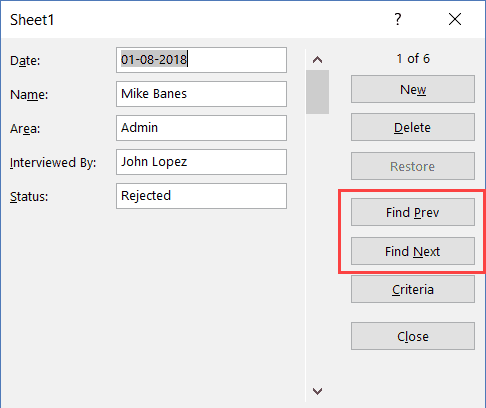
4 Simply make the necessary changes and press enter to modify an entry. If you haven’t pressed the enter key and would like to return to the original entry, click the “Restore” button.
5 The scroll bar can be used to browse through entries one at a time as well.
Step 5: How to delete a record?
From the Data Entry form, you can delete records. When you wish to delete a certain kind of record, this can be helpful.
The processes to remove a record from a data entry form are as follows:
1 Select any cell in the Excel table.
2 In the Quick Access Toolbar, select the Form icon.
3 Go to the record you wish to delete by navigating.
4 Click on the delete button.
Even though it may seem like a lot of work to just input and scroll through information, it actually saves a ton of time if you work with a lot of data and need to enter it frequently.
Step 6: Limiting Data Entry Using Rules
To ensure that the data entered to comply with some requirements, employ data validation in the cells. For instance, you can establish a data validation rule to only permit dates if you want to ensure that the date column only allows a date during data entry. A message indicating an error will be displayed if a user provides data that is not a date.
Here is how to formulate these guidelines while entering data:
1 In order to make a data validation rule, select the cells (or even the entire column).
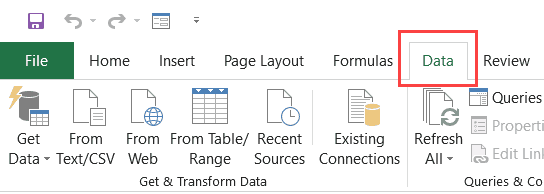
2 Click On the Data tab.
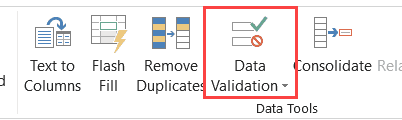
3 Choose the data validation option.
4 Choose “Date” from the “Allow” drop-down menu in the “Settings” tab of the “Data Validation” dialogue box.
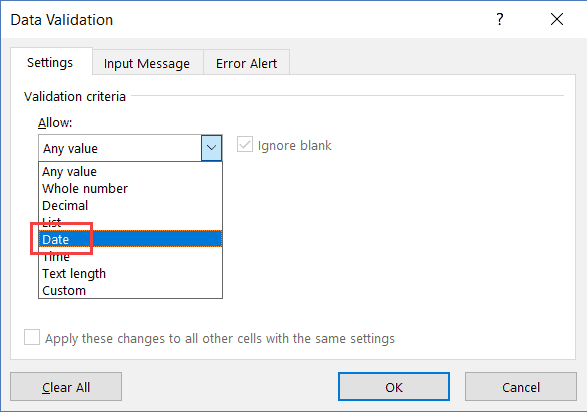
5 Enter the beginning and ending dates. Only entries received within these dates will be accepted; all others will be rejected.
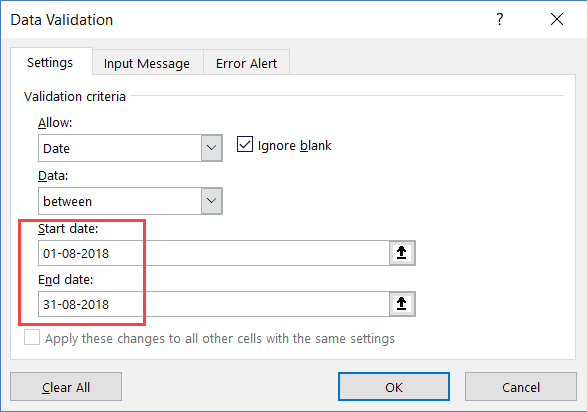
6 Click ok.
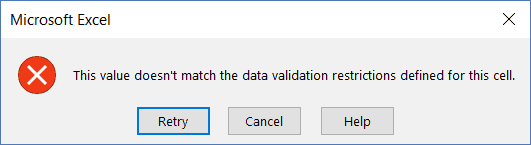
It is now disallowed to submit information in the Date field of the data entry form if it is not a date.
You will see the following message:
Conclusion
No one can deny the importance of data entry services because every organization needs to maintain its data in the proper manner. Though one can find multiple tools for data entry, Excel is the most commonly used software for this purpose. In business terms, Excel is considered to be the most essential tool because Excel is a powerful resource that has established itself in commercial operations all throughout the world, whether for budgeting, organizing customer sales lists, or assessing stocks or issuers. We hope after reading this tutorial, you can now create a data entry form in Excel.
