How to use JotForm for creating online forms?
These days when businesses have to manage multiple tasks for their progress, no one can deny the importance of data entry services. These services are playing a very important role and help businesses to expand their horizons. Furthermore, they use a different kinds of data entry tools which save this time and effort. Well, in this article, we will tell you about a widely used data entry software JotForm so that you can begin with it easily if you are new to it. Online form creation is made simple for users with JotForm, a freemium web, and mobile application. Users are spared the headache of downloading and installing software because it is online. Let’s go and learn more about it.
What is JotForm?
To design web forms, JotForm is used by thousands of businesses. Industries including IT, healthcare, and marketing rely on survey data frequently, but they could find it challenging to divide their attention between developing forms and taking care of their daily tasks. However, using JotForm, most of the work is automated, allowing even those without prior design or coding skills to quickly develop forms.
Why one should use JotForm?
Anyone may instantly design personalized online forms using the extensive online tool JotForm. Its simple drag-and-drop user interface eliminates the need for any coding and makes form creation exceedingly easy. You may develop and publish forms using JotForm, incorporate them into your website, and get responses via email.
Work Together as a Team: JotForm enables you to work on a form as a team. Forms have version histories and may be shared and updated.
Payment Collection: JotForm works with over 20 payment processors to make sure you get paid while also gathering important data.
What is the purpose of JotForm?
Basically, JotForm is used for forms (and there are also Table and PDF templates). Forms are needed by businesses and organizations in a variety of ways. It may be an application for admission to a university, a questionnaire for a new product’s marketing campaign, an order form for an online store, and so much more. Users of this form-design software can easily create forms that satisfy their unique requirements. Also, using the drag-and-drop functionality, users may build the forms by adding particular fields. Additionally, respondents’ particular data is collected using JotForm, and the procedure can be automated.
Pricing for JotForm
Four pricing tiers are available for JotForm. Starter, Bronze, Silver, and Gold namely. All of the other premium plans—aside from the Starter plan—are billed annually.
Starter: This free plan offers customers a 5-form limit, 100 monthly submissions, and 100MB of storage.
Bronze: It costs $24 a month and comes with a limit of 25 forms, 1000 submissions, and 10GB of storage.
Silver: With 100 forms, 10,000 submissions, 100GM space, unlimited form views, reports, and HIPPA compliance, the Silver plan is the most cost-effective.
Gold: A user receives unrestricted access to all services, 1TB of storage capacity, and HIPPA compliance for $79 per month.
The good news exists for Nonprofits. A 50% Discount is offered by JotForm. The same is true for academic institutions.
How to create your first web form?
First-time Users of Jotform frequently have questions about how to make an easy form, how to configure email notifications, how to embed a form on a website, how to test the form to see if it’s functioning, and how to view responses in your email and Jotform Inbox. Read the information below if you’re looking for the answers to these queries.
1 Choose your questions
Consider the questions you want to ask your users first. The best forms are shorter and simpler, which increases conversion rates. If a form has too many questions, a lot of users will just quit using it. Keep your forms as brief and unambiguous as you can.
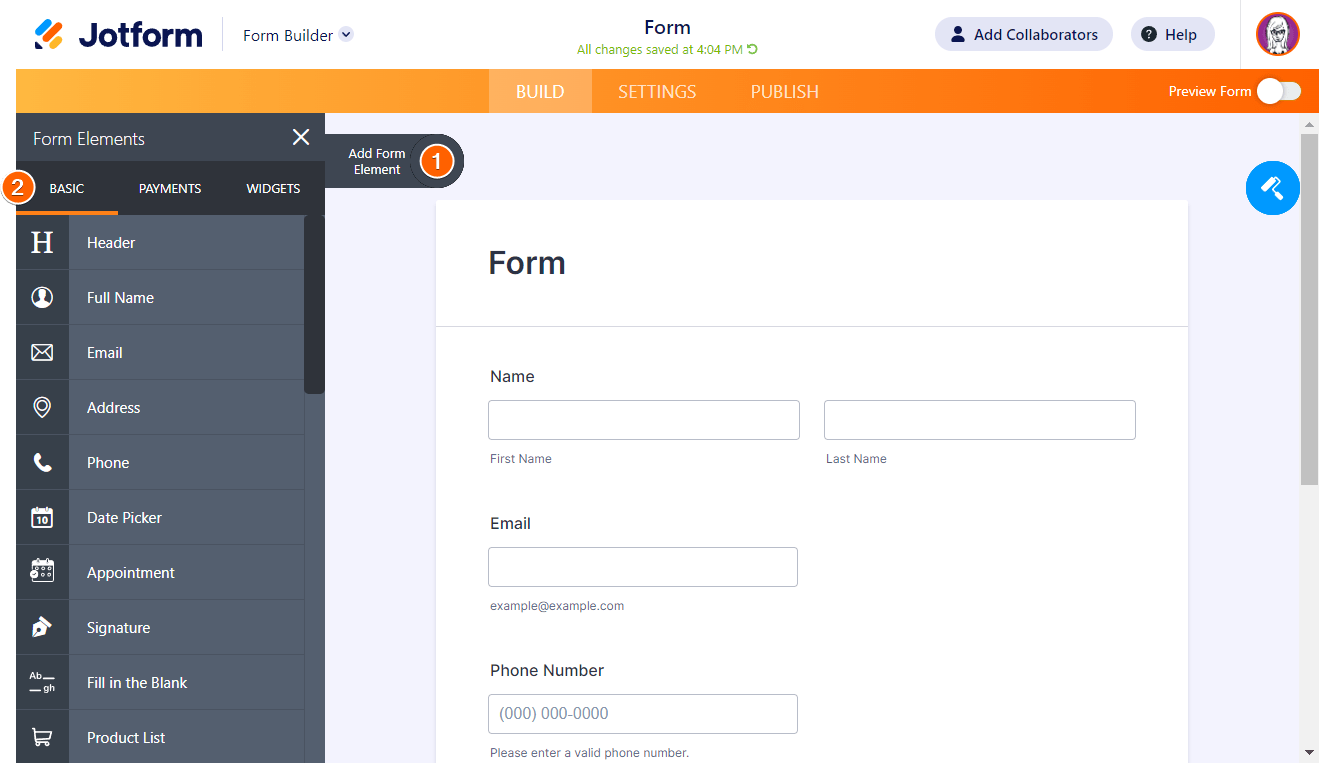
2 In the heading, state the purpose
You already know why you’re making this form, but unless you explain its purpose to website users that visit your page, they won’t know why you’re making it. On your form, use a brief header like “Contact Us.” Put further information in the subheading if it is required.
3 Utilize the predefined form fields
To track form submissions and follow up with visitors, ask for the names and email addresses of your visitors. On the left side of the form builder, click Add Form Element. The Basic tab contains every element of a standard form.
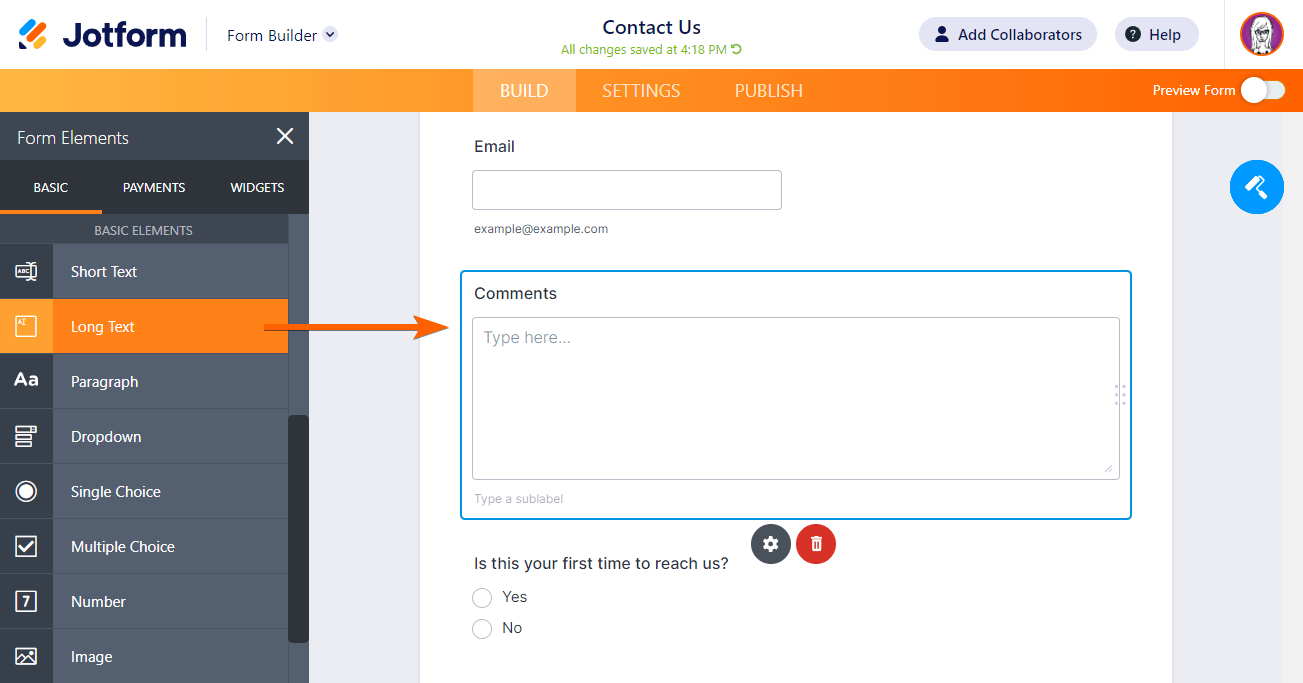
4 For lengthy responses, use a long text element
Visitors can post longer responses because of the size of the comment box. Use the Long Text element found in the Form Elements Section’s Basic tab.
5 Configure email notifications
Every time someone submits your form, email notifications will notify you. To add a new email notification, choose Settings in the top-right corner, Emails on the left, and the plus (+) sign. Choose a notification email since you are producing an email that will be sent to you. When you need to email a user who filled out your form a confirmation, you can utilize the autoresponder.
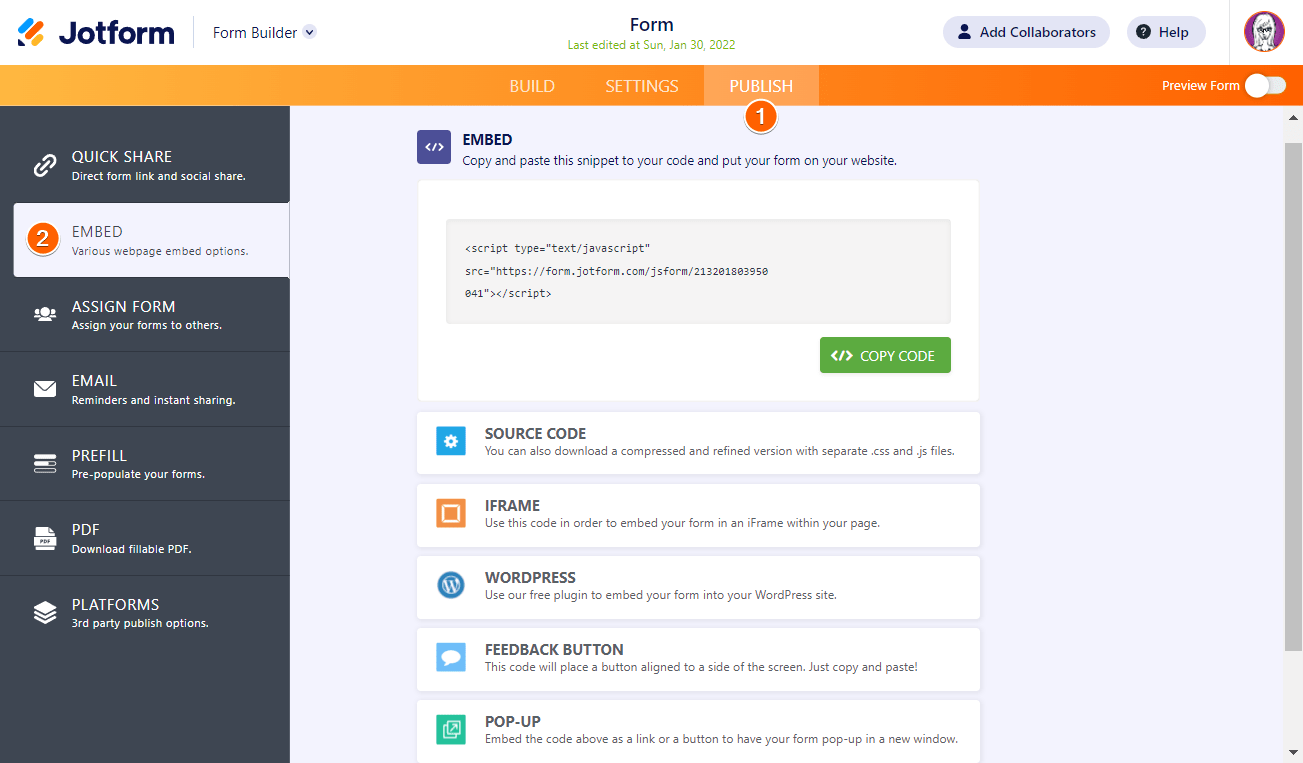
6 Integrate your form with a website
To continually gather data, it is essential to embed your form within a website. Click Publish at the top, followed by Embed in the left navigation, to obtain your embed codes. Select the embed strategy that best suits your needs.
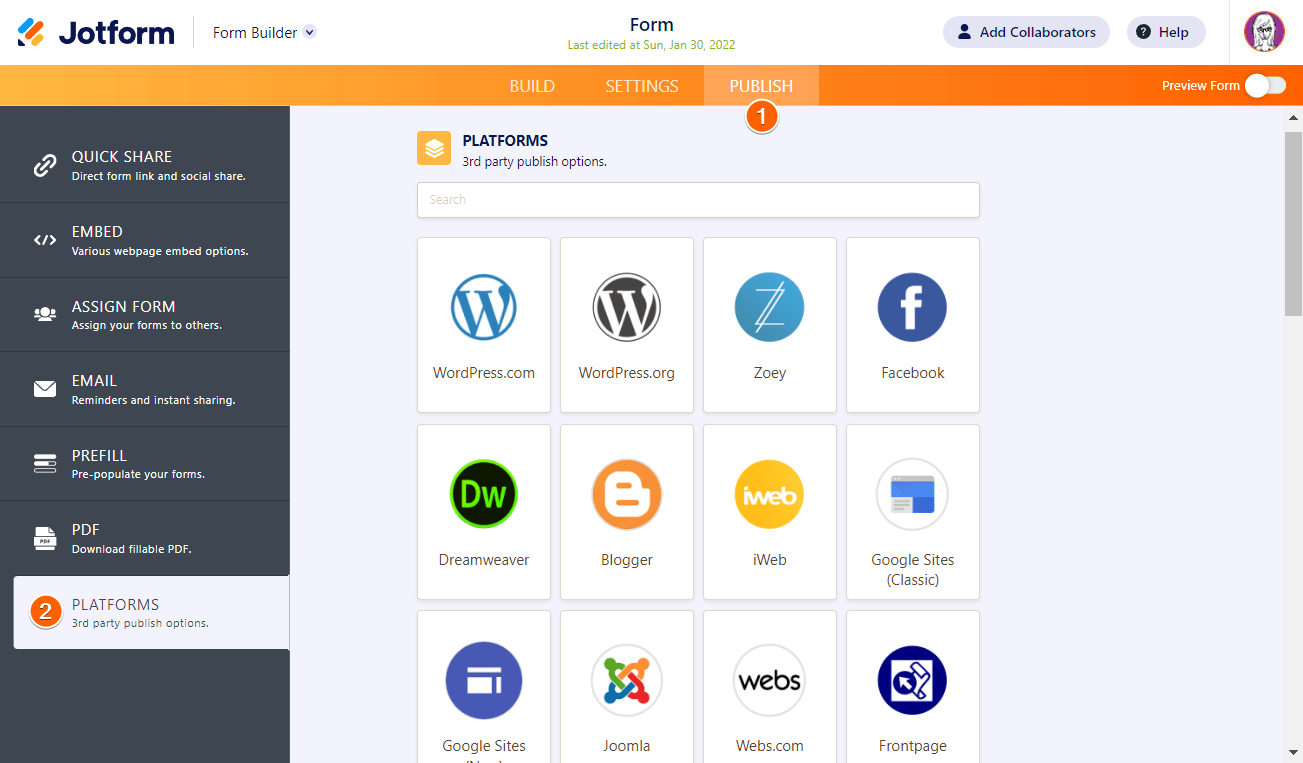
Additionally, there are particular ways to incorporate your form into various website builders and content management systems. Instead, select the platform you’re using from the Platforms menu if you’re using one.
Whenever you save the changes in your editor, your form will be integrated once you copy and paste the codes into the source code of your website, often inside the body tag.
To make sure your form is working, test it out
Check sure notifications are reaching your email and Jotform Inbox by testing your form on a live version of your website. If nothing happens, double-check that your form and notification email were configured properly.
Here you are! You have created your first online form.
Extra tips
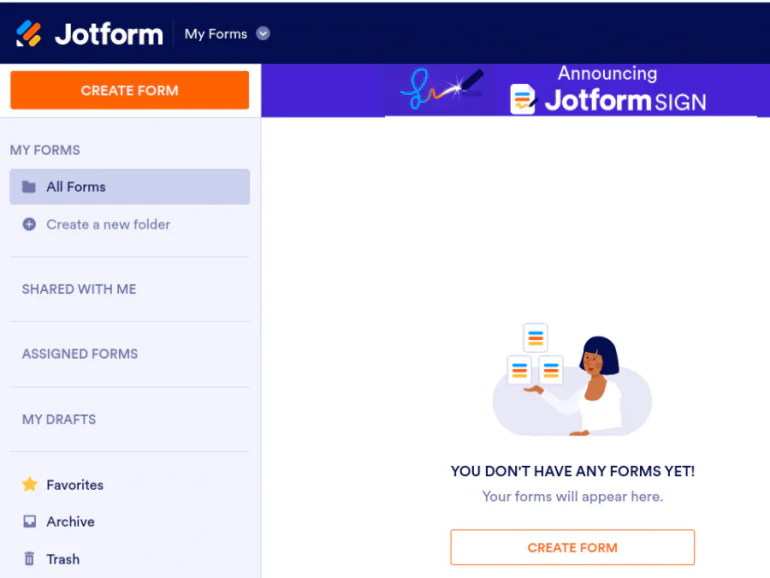
How to restore the deleted forms
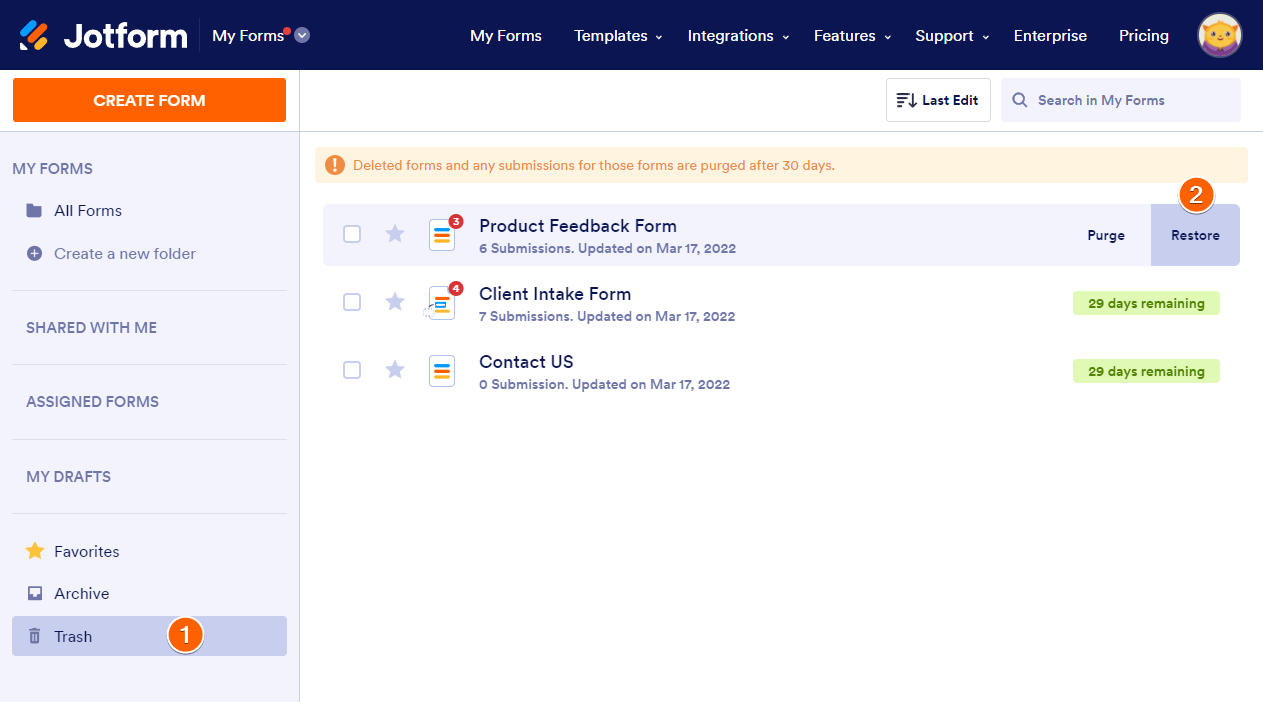
The procedures listed below can help you recover a form that you accidentally deleted:
Open My Forms.
On the left, click Trash.
Click Restore after hovering over the deleted form.
How to take pictures on your form
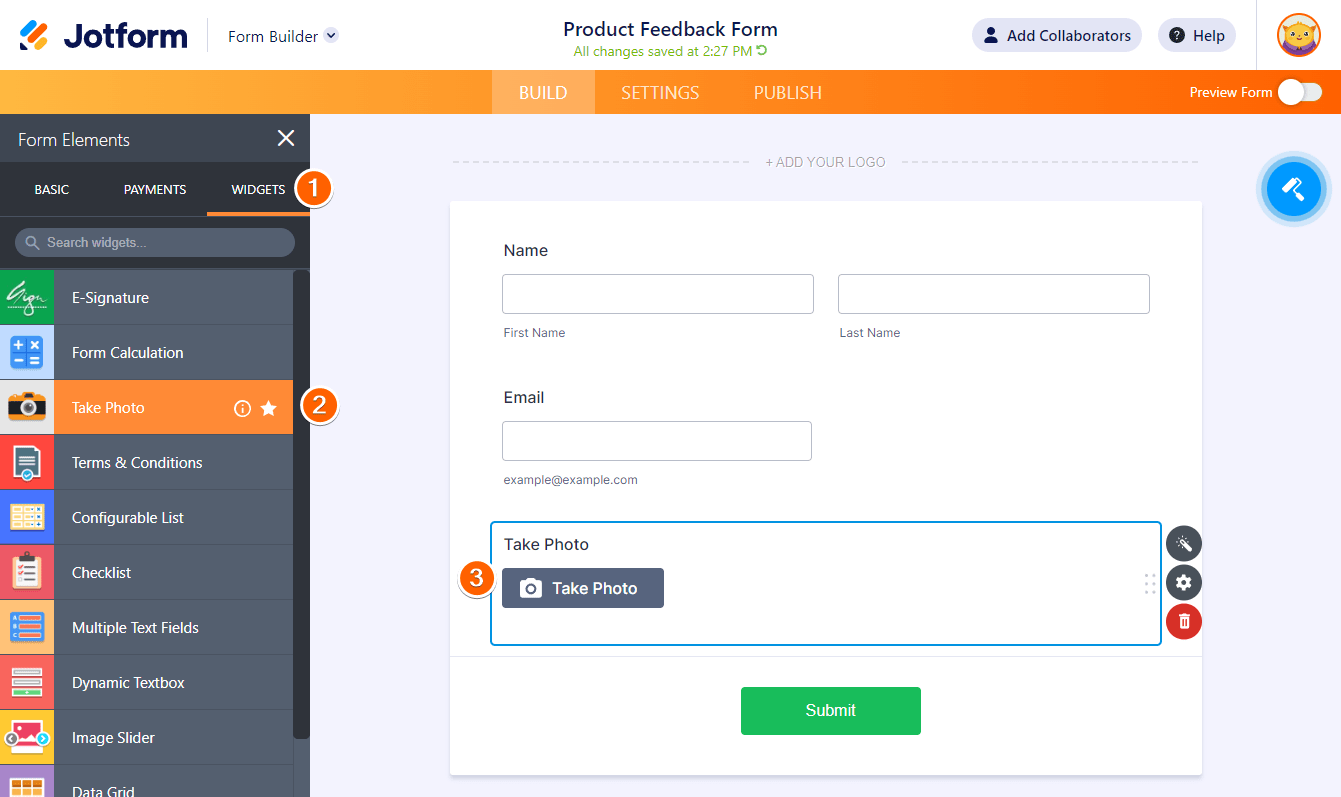
Have you ever thought about enabling your users to directly use their webcams to capture an image from your form? The Take Photo widget from Jotform makes that possible.
Go to the Widgets tab in the form builder.
Look for the Take Picture widget.
To add it to your form, click or drag it there.
How to clone an existing form from a URL
The instructions in this manual explain how to copy an existing form into your Jotform account.
The best outcomes come from copying Jotform forms. The system will make every effort to recreate non-Jotform forms. In Form Builder, you can make changes to the form from there.
The steps following must be followed once you have copied the URL of the form you wish to copy:
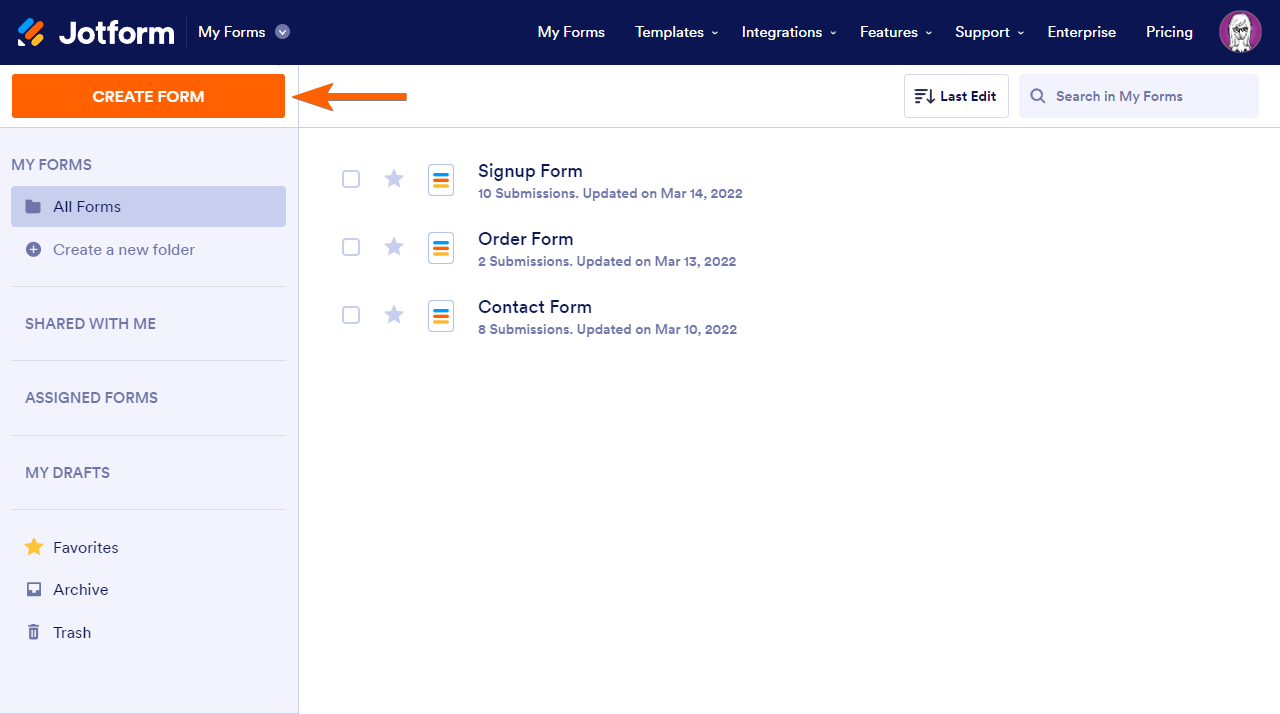
1 Go to My Forms and click on Create Form in the upper left corner.
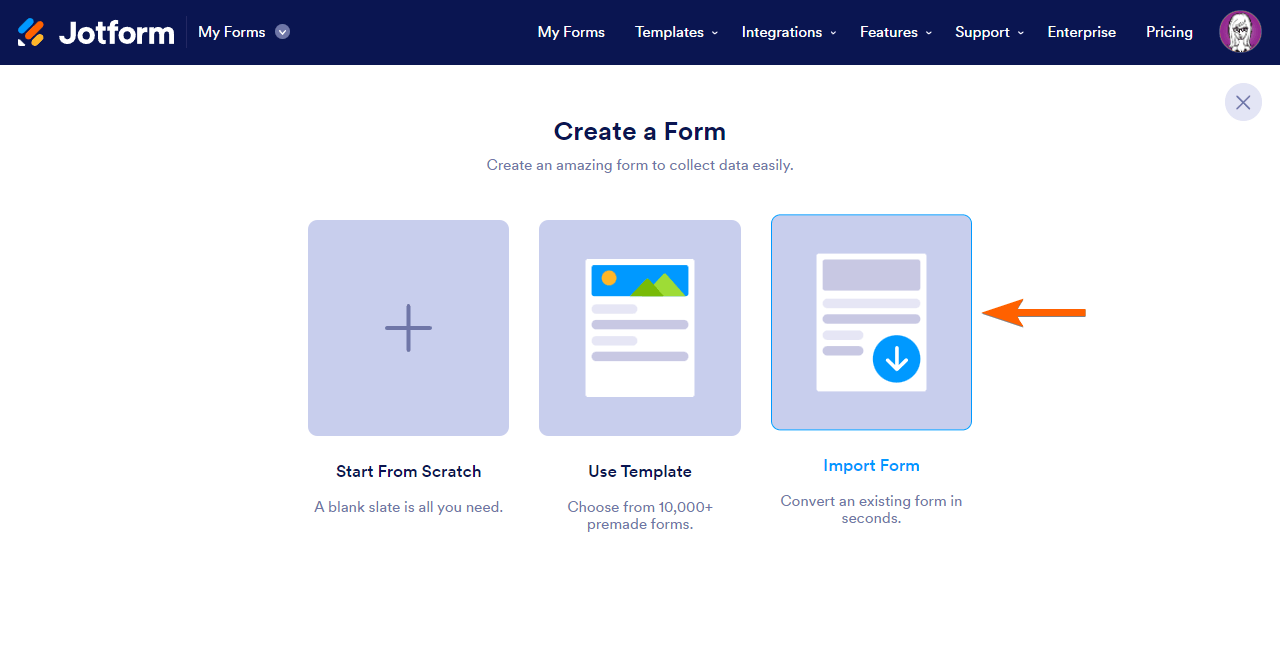
2 Now choose Import Forms.
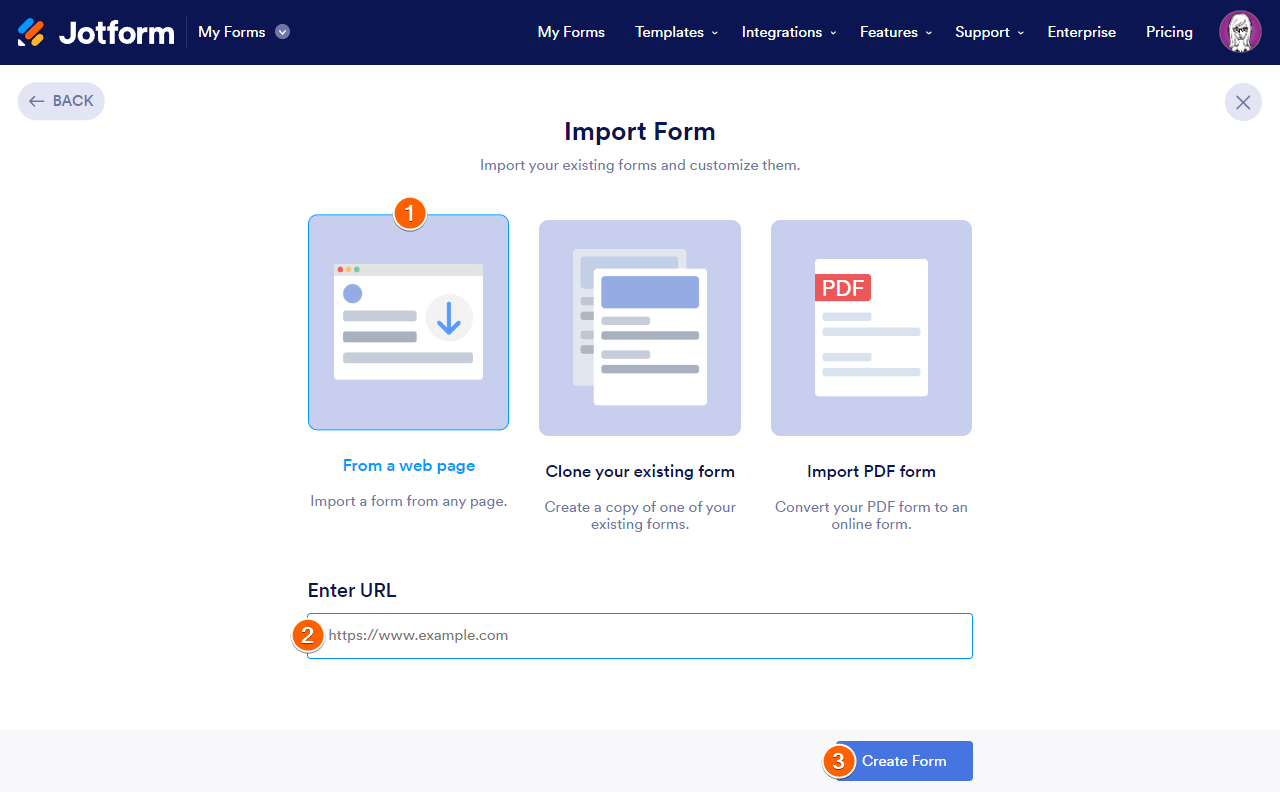
3 Next, choose From a web page.
4 Enter the URL for the form in the Enter URL field.
5 At the bottom, click Create Form to finish.
After that, Form Builder will redirect you so you can begin modifying your newly cloned form.
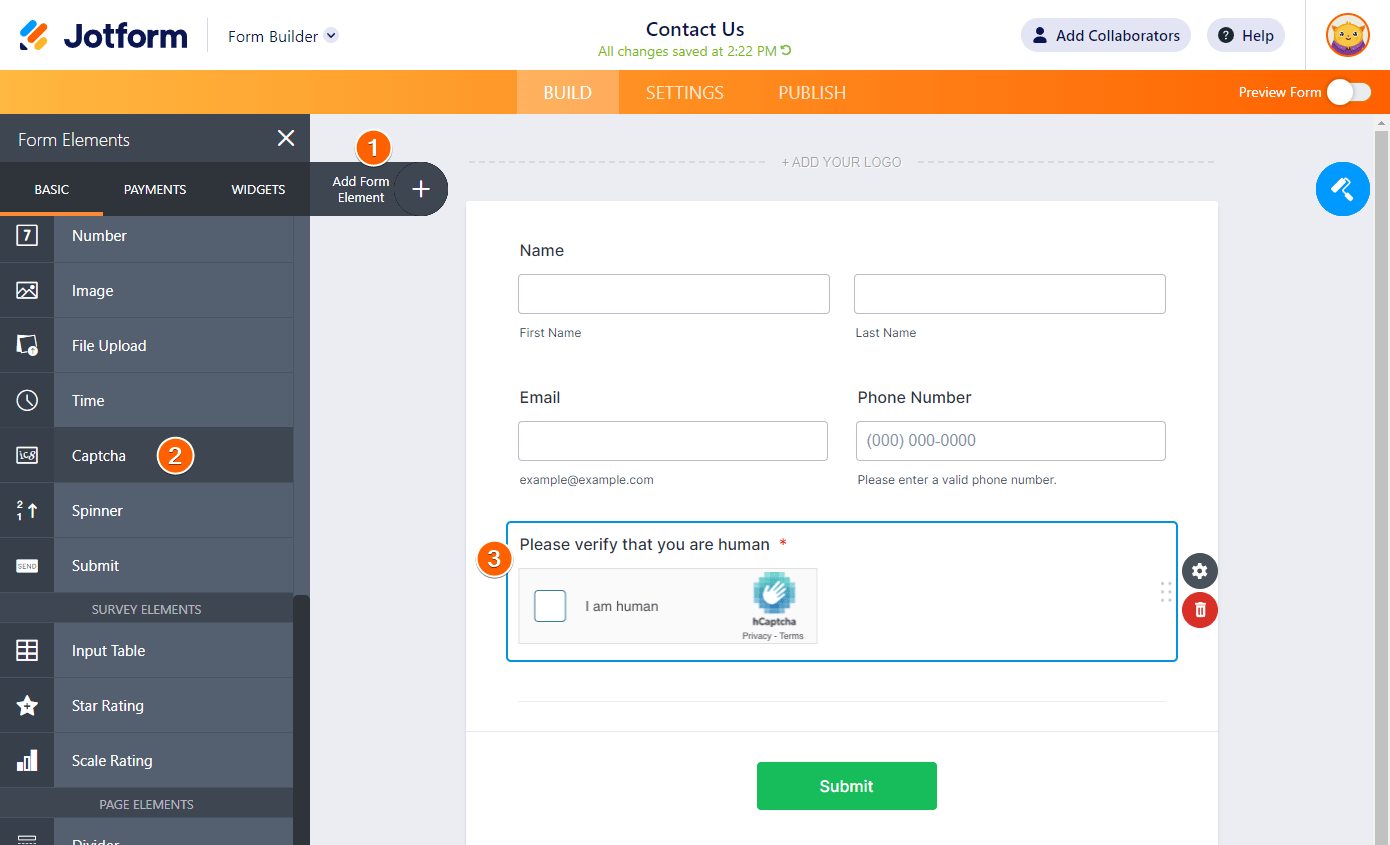
4 How to include a CAPTCHA in your form
To help defend your forms from spammers and spambots that are engineered to assault websites and overwhelm them with lots of unwanted information, a CAPTCHA asks users to perform short challenges.
To add a CAPTCHA to your form, follow these instructions:
- In the Form Builder, click the Add Form Element button.
- Under Basic Elements, look for the CAPTCHA component.
- Add the element by dragging it into your form.
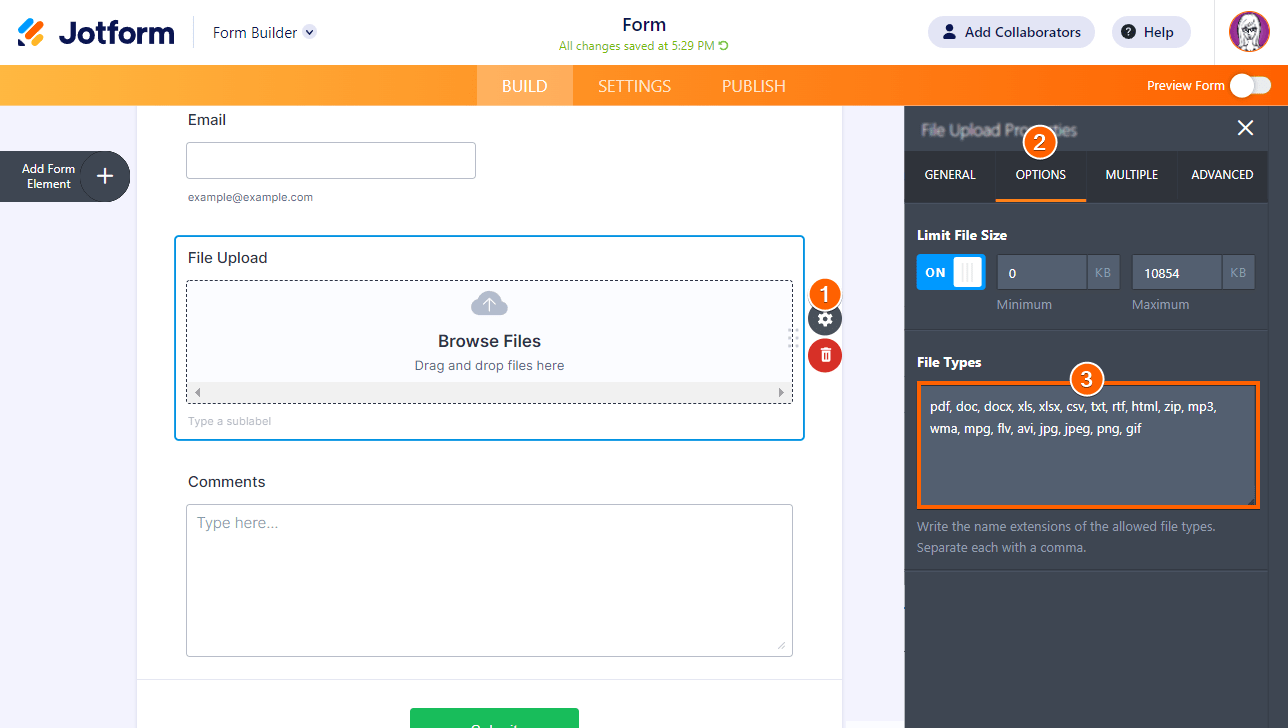
How to change the allowed file types in the File Upload Element
Which file kinds are accepted by the File Upload element is a common question from users. Jotform’s standard file types that it accepts are:
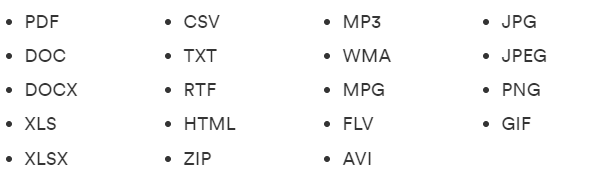
However, you are free to add and remove file types as you like.
- To access the File Upload Properties panel, click on the gear icon to the right of the File upload field.
- Select the Options tab.
- In the File Types field, type the allowed file extensions.
Note:
- Use commas to distinguish each type of file.
- Do not type the leading dot (for example, type “pdf” rather than “.pdf”).
- To allow all file types, enter an asterisk in the File Types area.
Conclusion
To sum up, we would point out that the vast majority of users and experts are impressed by the thousands of template options of JotForm. This distinguishing characteristic earns it the title of top online form generator and because of this aspect, it is widely used by data entry services. Another element that is valued is the easy drag-and-drop process, which enables anyone to create a customized form. It continues to be one of the best solutions when compared to alternatives, and its flexible pricing also makes it a favorite among its expanding user base.
