How to use ParseHub for Web Scraping?
Since there is so much information available on the internet or online, it has grown to be a really powerful resource. Furthermore, this information can be used for web scraping. It is widely used by marketers, web developers, investors, and data scientists to gather online data that can be used to make important decisions. However, using a web scraper tool incorrectly can be frustrating and wasteful. Well, the purpose of this post is to introduce web scraping to individuals who are unfamiliar with it or who are unsure of where to begin.
In this guide, we will introduce you to the commonly used web scrapper, ParseHub. ParseHub is free and simple-to-use software. Data can be obtained from websites and analyzed once it has been downloaded as an application on a desktop. So, let’s go and learn about Web scrapping and how to use ParseHub for it.
What is web scraping?
Web scraping or web harvesting is the procedure of obtaining data from a website and transferring it to another format. Despite the fact that it can also be done manually, this operation is typically carried out using software tools. Additionally, the data is typically formatted into Excel, CSV, or JSON forms for additional processing and analysis. Also, it is fairly common to generate APIs from nearly any website using web scraping.
What are the benefits of web scraping?
Speed: Compared to traditional web scraping techniques, where it can become tiresome and challenging to analyze the page for each command, these tools are much faster.
Visual, user-friendly interface: When ParseHub is “seeing” the data, for example, it brings up the webpage and highlights the necessary section for your reference. The text will be covered by a box when choosing which web page components to scrape. Instead of attempting to keep track of numerous lines of code, this makes it easier to monitor what is happening within the application.
Simple-to-use command list: Each command can be expanded upon, changed as necessary, and even removed. Additionally, you can rename them by just clicking on the word and entering the new name.
Not much coding knowledge is needed: This is perfect for researchers seeking to detect trends without much coding experience, small businesses who want web-scraped information without having to employ a professional, or anyone who wants to collect data to study.
Installing ParseHub
Visit https://www.parsehub.com and create an account there. Not to worry, it is totally free. Your email drive will immediately receive the data you scrape. Additionally, it will notify you once the scrape is complete.
How to use ParseHub as a web scraper tool?
The tutorial that opens when you open ParseHub for the first time after installing it is one of the many wonderful features of the tool. By providing a sample website to scrape data from as the tutorial progresses, it saves the newcomers from the botheration of trying to grasp the UI on their own. Although the UI is reasonably basic, some of the concepts must be understood in order to scrape data from other pages.
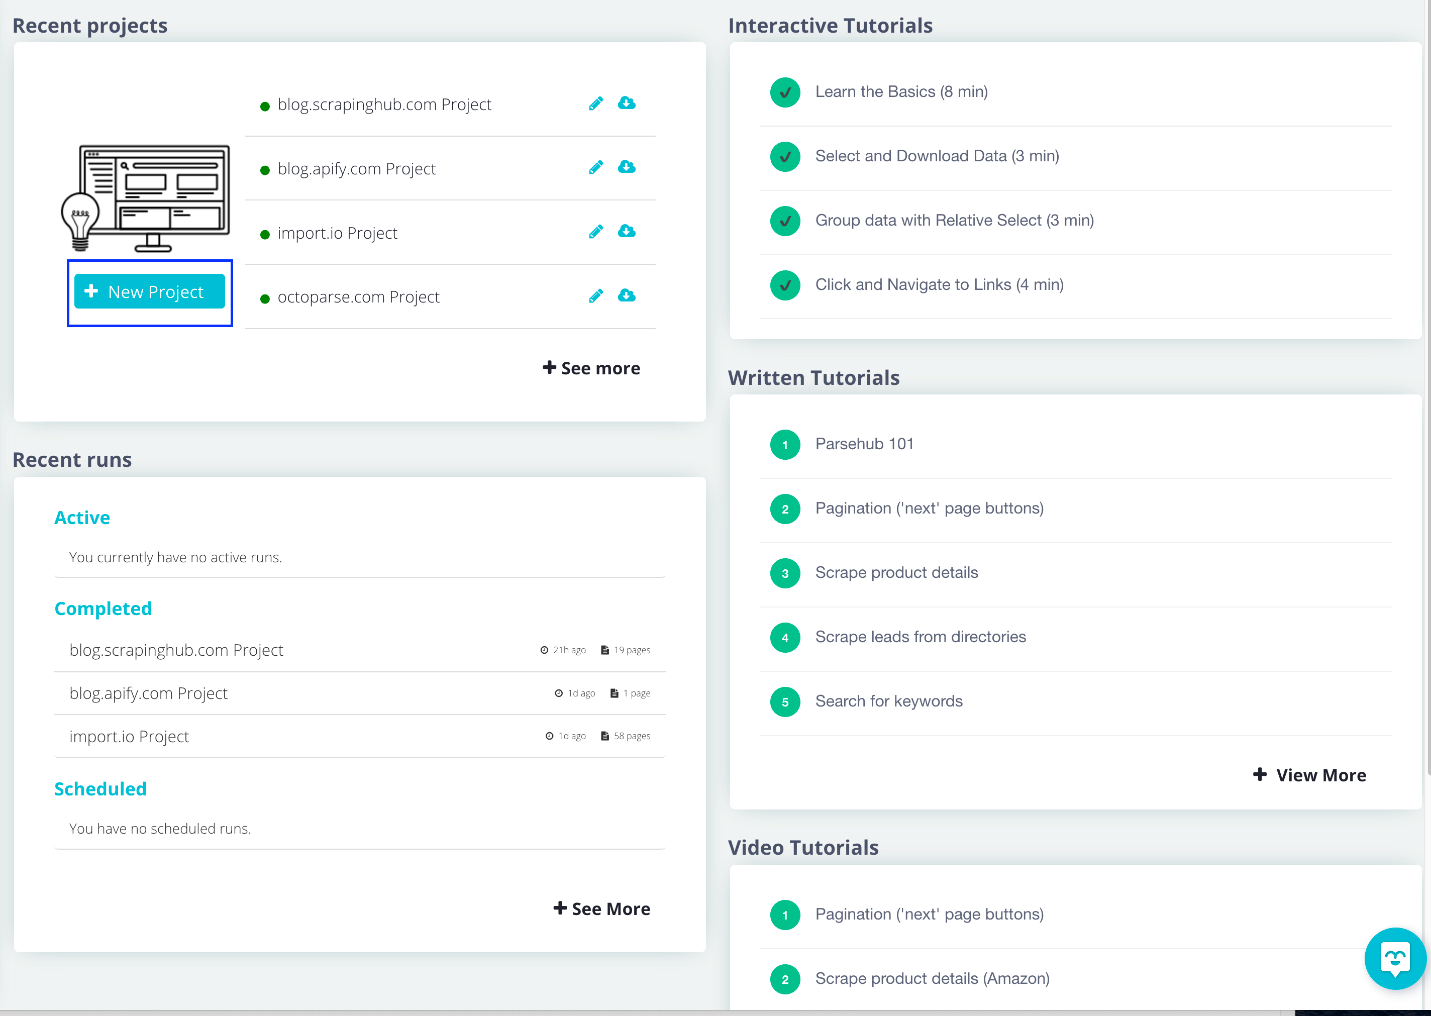
Step 1: Creating a new project
Select “New Project” after opening ParseHub to start a new project.
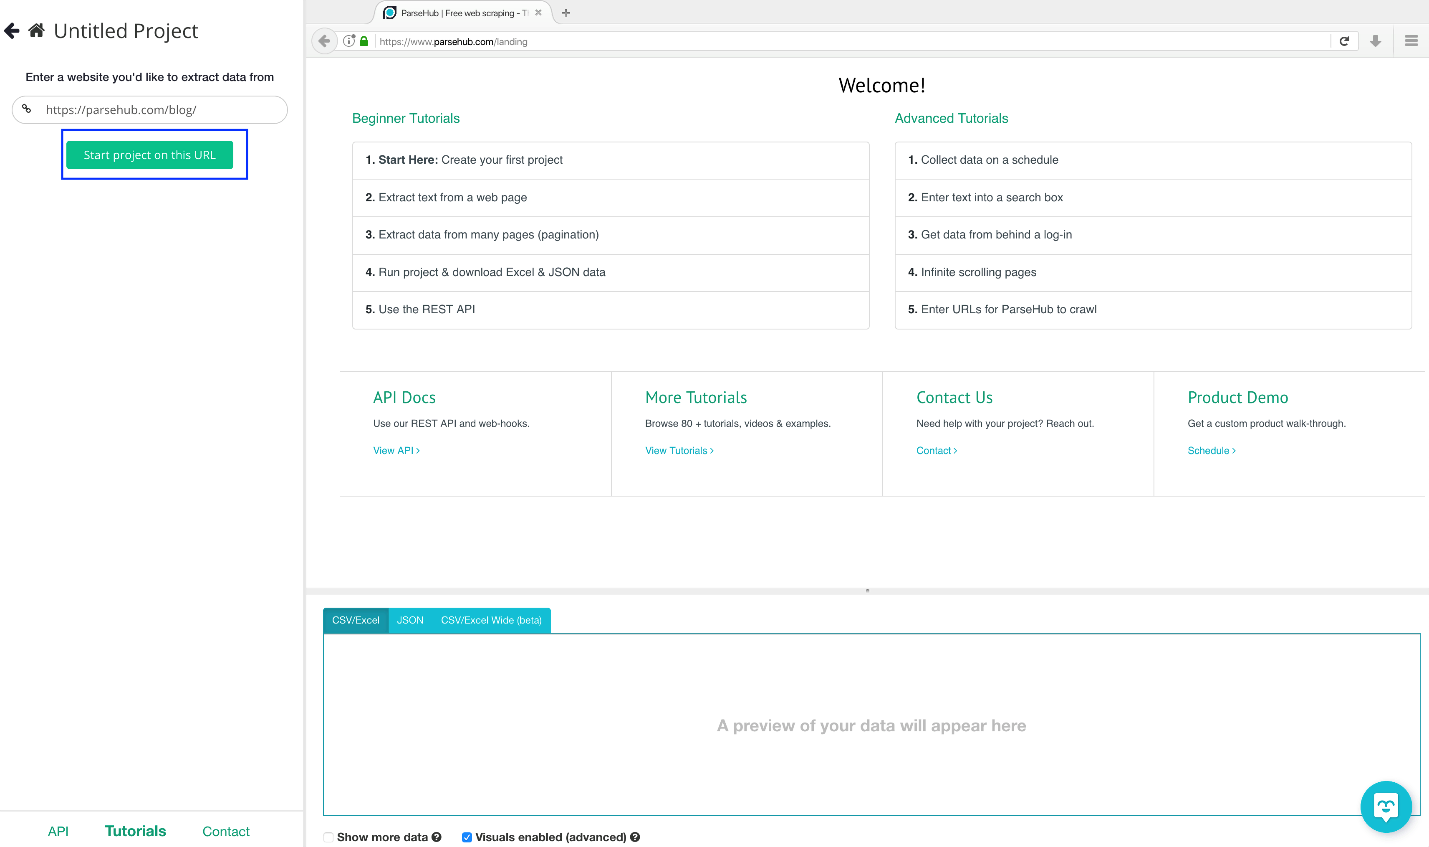
Step 2: Copying URL
Enter the following URL in the text box on the left: https://www.parsehub.com/blog/ and click the “Start project on this URL” button.
Step 3: Understanding the ParseHub sections
There are three sections on ParseHub once the page has loaded:
- Command section
- The web page you’re extracting from
- Preview of what the data will look like
In the command section, you will tell the software what to do, whether it’s a simple click to select or one of the more complex functions ParseHub can perform.
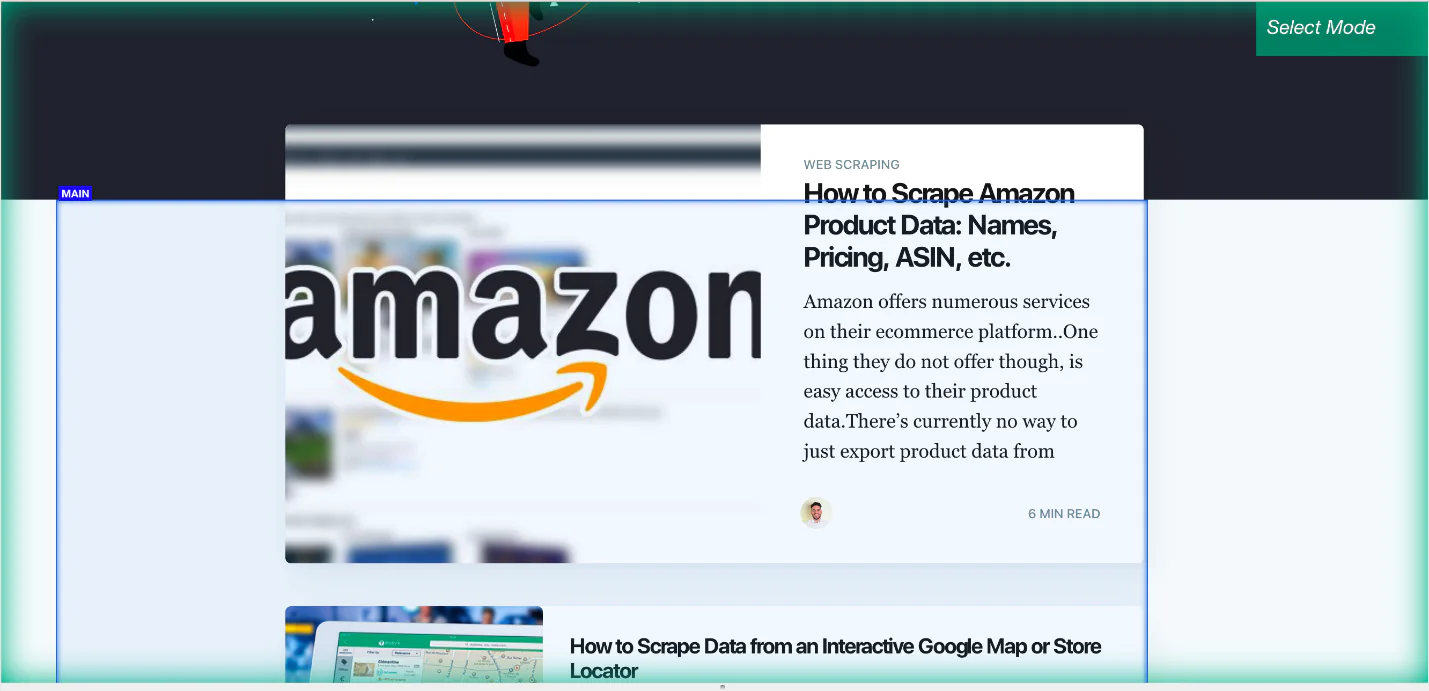
Step 4: Extracting data
Click on the specific data you want to extract—in this case, the blog title—to start the extraction process. The first blog title you see should be clicked. The choice you picked will turn green when you click. Then, ParseHub will propose what it believes you want to extract.
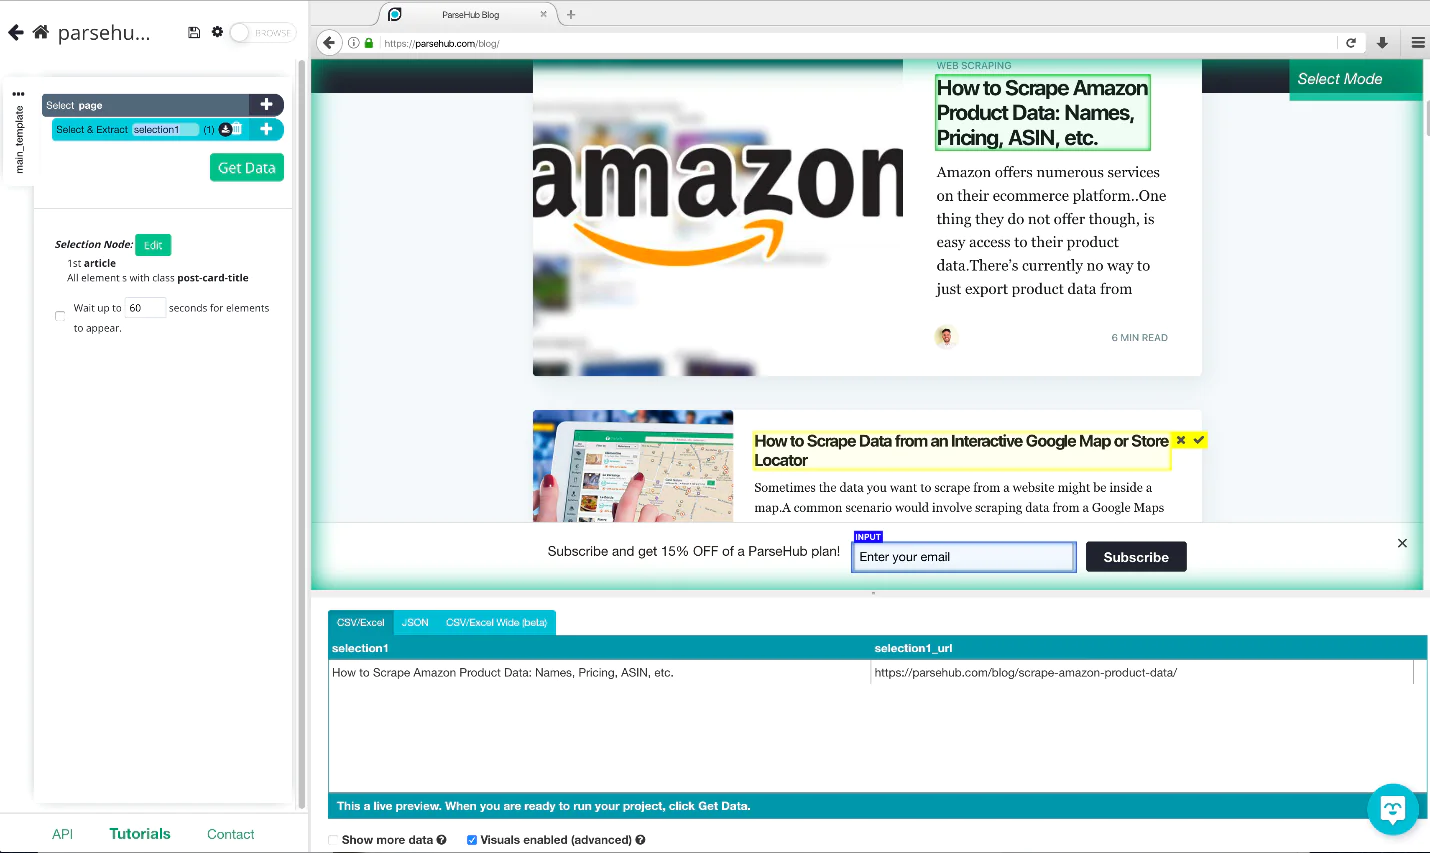
In a yellow container, ParseHub will suggest the data. All blog titles will be selected when you click on a title that is inside a yellow container. Check the bottom of the page to make sure the blog title is not missing. When you export the data, you can see a preview of it now that you have some data.
Step 5: Renaming the selection
Let’s give our choice a new name that will make it easier for us to keep our data organized. Simply double-click the chosen item to accomplish this; the name will then be highlighted, allowing you to change the name. We’ll call it “blog_name” in this instance.
Note: Avoid using spaces when renaming your choices or data; for example, blog_names will work instead of blog names.
Now that all blog titles have been chosen, we want to determine who wrote each blog post and how long it takes to read it. We’ll have to choose something relative.
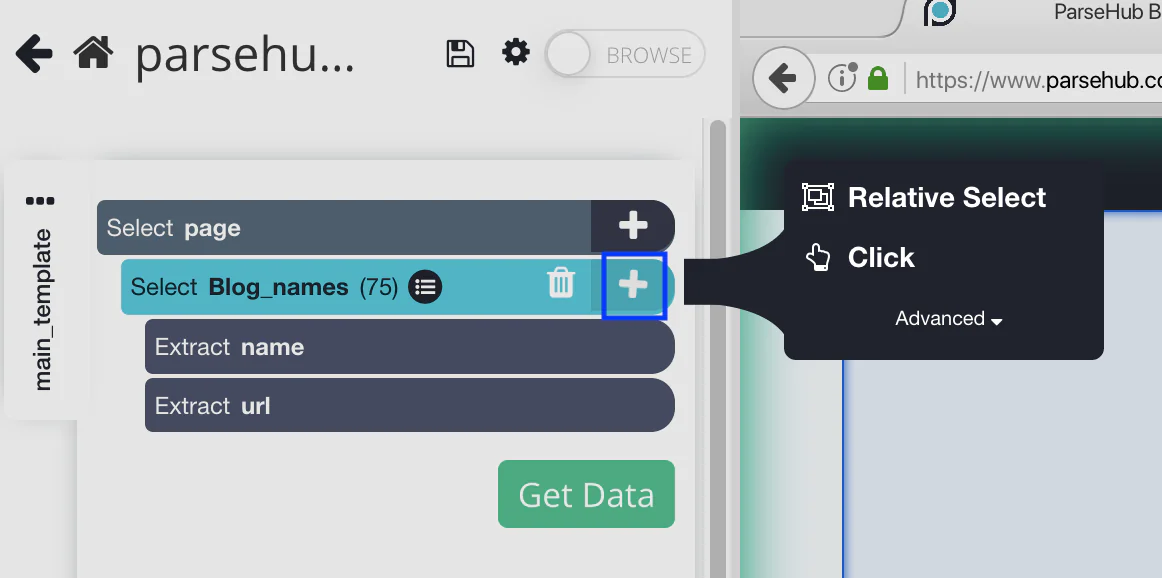
Step 6: How to select the Relative Select command?
Click the PLUS (+) sign that is next to the blog name selection on the left sidebar, then select the Relative Select command.

Step 7: How to use Relative Select Command?
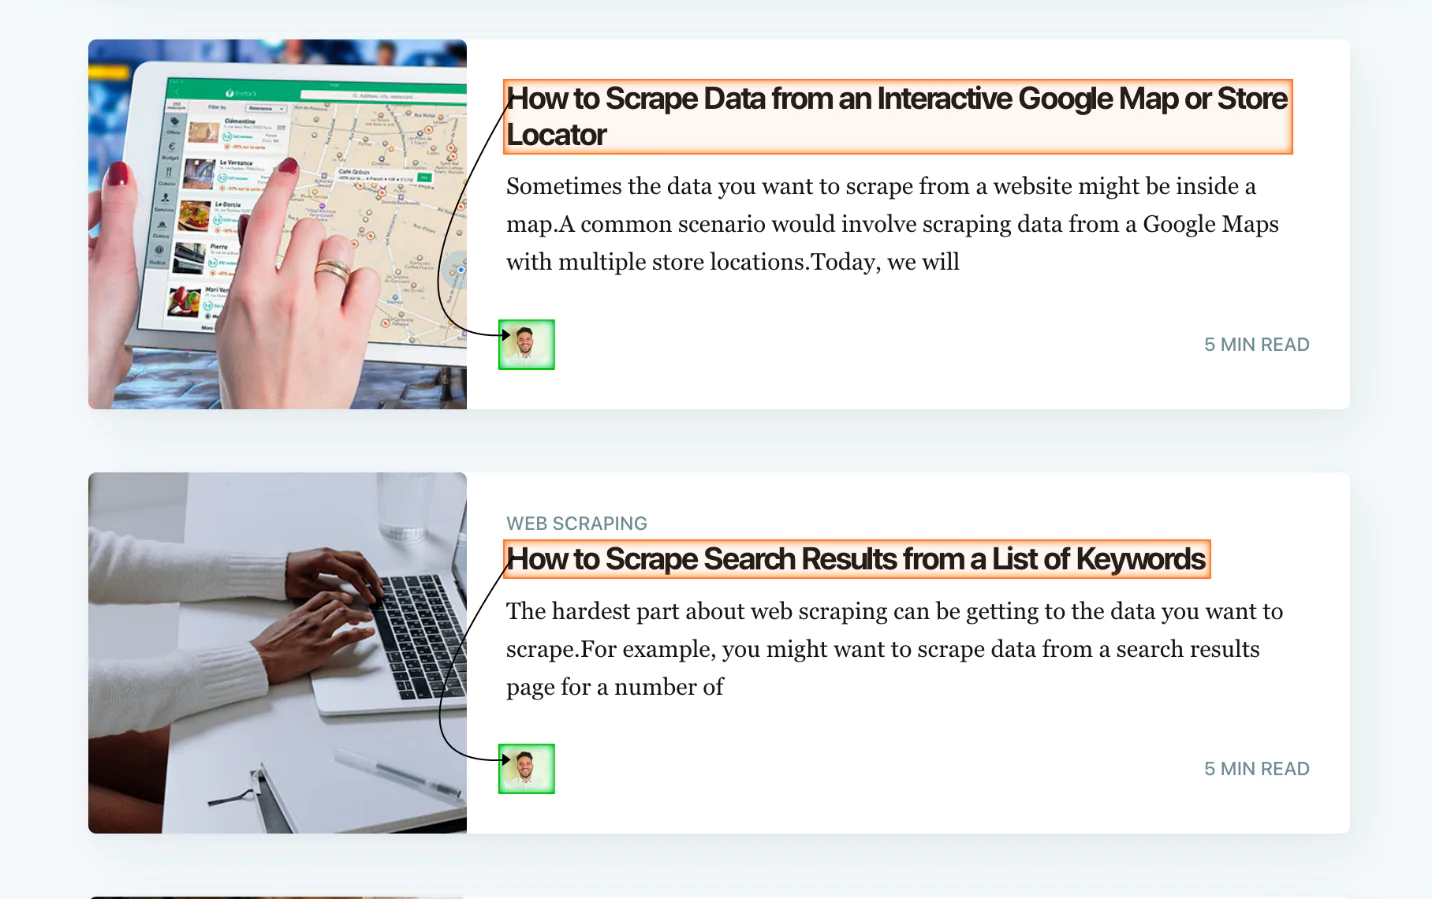
Click the author’s name after the first blog name using the Relative Select command. The two options will be connected by an arrow. You ought to see something similar to this:
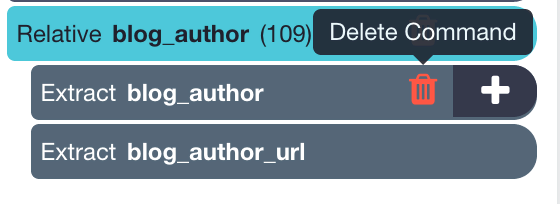
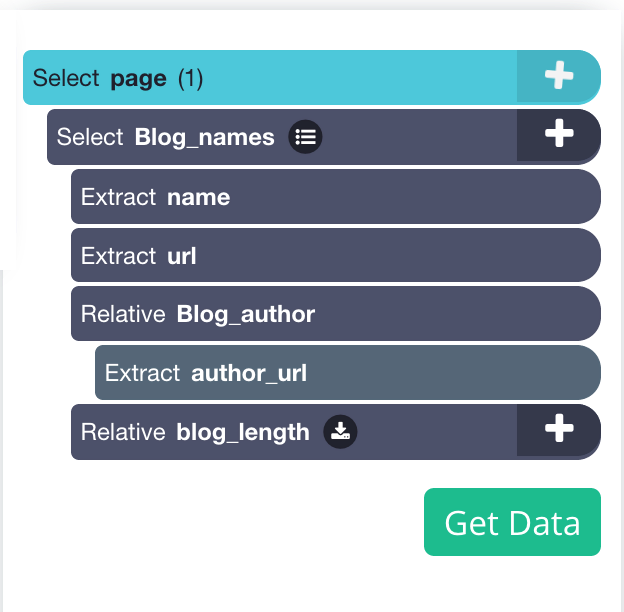
The relative selection should now be renamed, call it blog_author. Let’s get rid of the picture URL as we don’t require it. To accomplish this, pick “relative blog_author” and then click the expand button.

The trash can next to “extract blog_author” can now be chosen.
Step 8: How to get the length of the blog?
You won’t need to erase the URL because we are extracting a text, so repeat steps 6 and 7 to retrieve the length of the blog. Give this choice the name “blog_length”. This is how it will look.
We will need to instruct the software to scroll to display all of the content because our blog is a scrolling page (scroll to load more). Currently, only the first five blogs would be extracted if you ran the project.
Step 9: Selecting the main div to implement the scroll function
To do this, select by clicking the PLUS + sign next to the page selection. The primary component of this needs to be chosen, which in this case will seem like this.
Step 10: Adding the scroll function
You may add the scroll feature once you’ve clicked the main Div. To do this, go to the left sidebar and click the PLUS (+) sign next to the main selection. After this click on advanced, then select the scroll function.
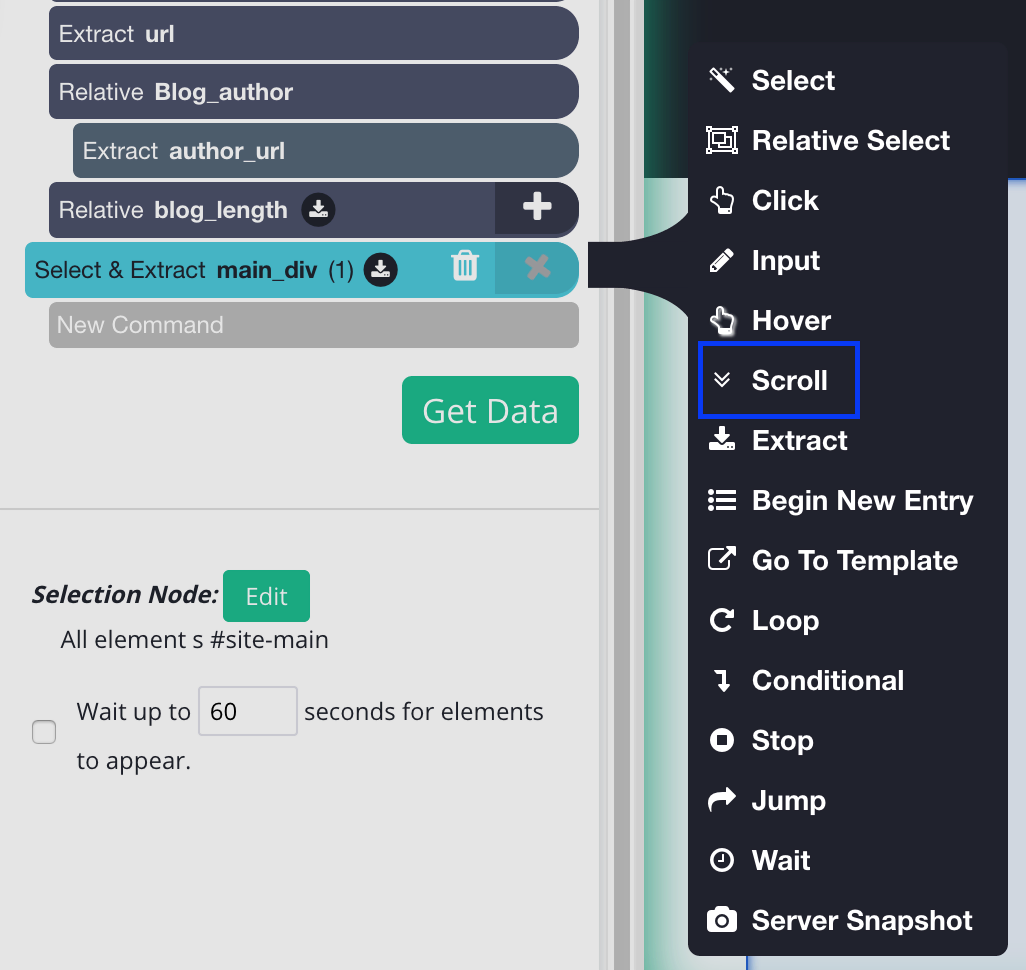
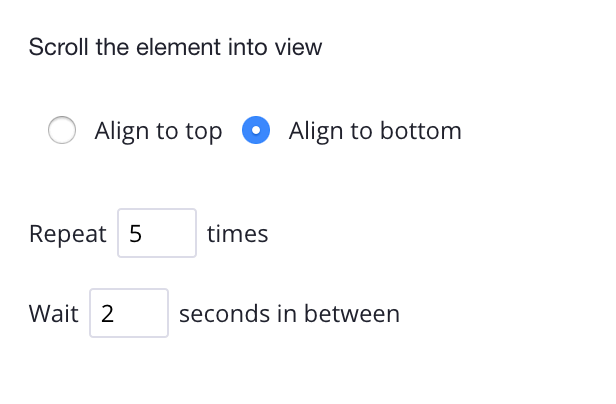
You must specify how long the software should scroll; the length of the blog may require a higher amount. But for the time being, place it five times and check that it is centered at the bottom.
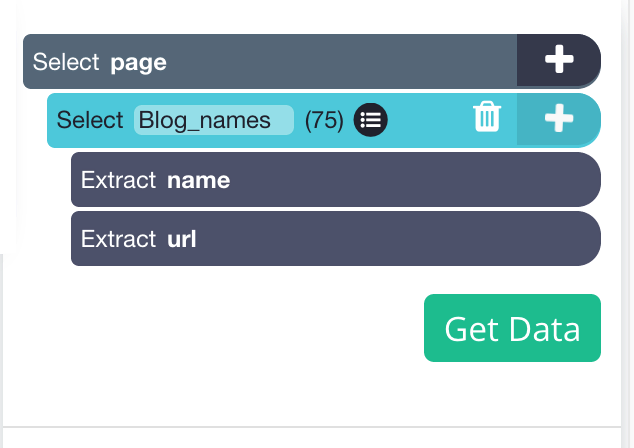
Step 11: Commanding ParseHub to extract data
Now that we’ve extracted everything we wanted, we can sit back and let ParseHub work its thing. Select “Get data” from the menu. You will get the following window.
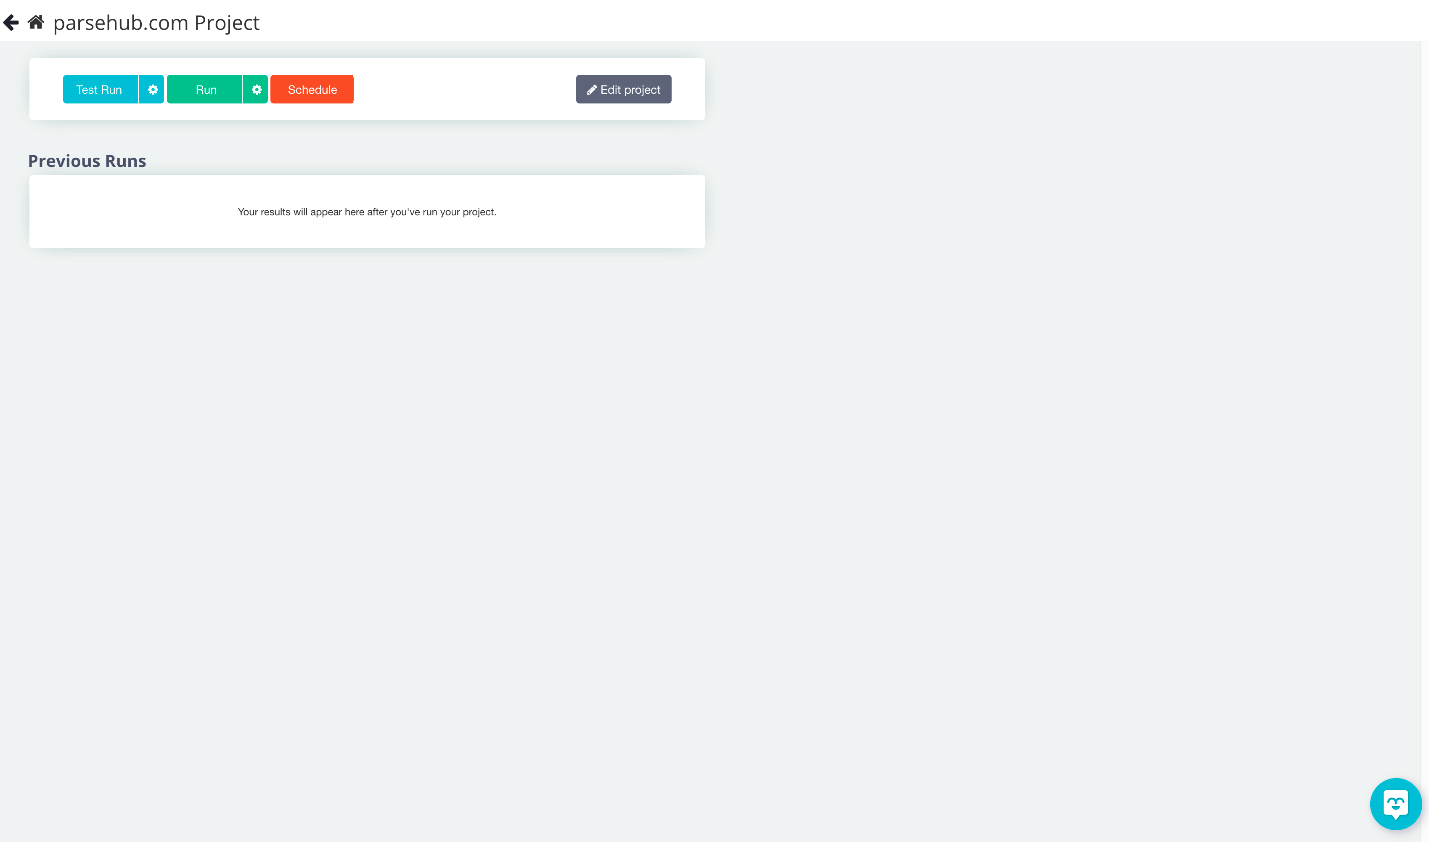
To make sure your extraction is effective, you can test it. We advise conducting a test run first for larger projects. But let’s click “run” for this project so ParseHub can gather the online information.
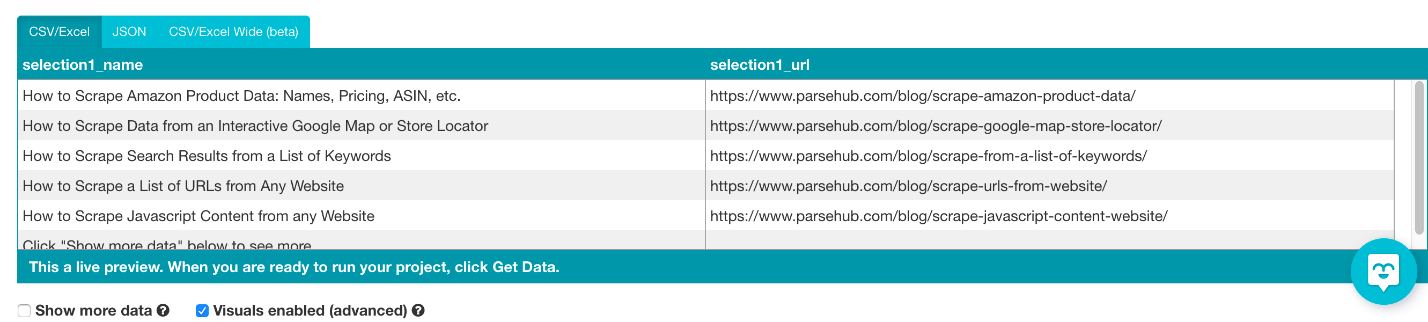
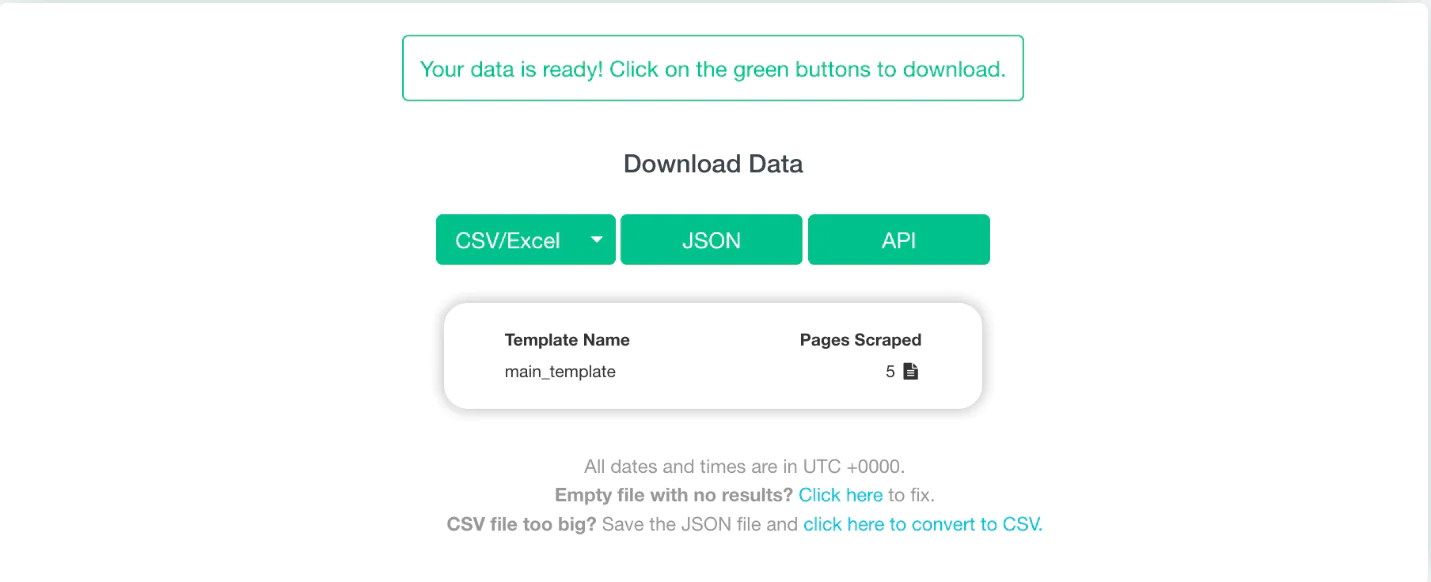
Step 12: Downloading and exporting
It shouldn’t take too long to complete this project, but after ParseHub has finished extracting the data, you may download it and export it as a CSV/Excel, JSON, or API. But for this project, all we need is a CSV or Excel file.
There you have it! Your first web scraping job is finished.
Conclusion
Web scraping can benefit your company in a variety of ways, and every day, many companies come up with inventive methods to use web scrappers to expand their operations. Web scraping is a fantastic approach to gathering the data you require, but it might be frightening at first if you have no prior experience. In order to provide you with a better knowledge of what web scraping is, how it functions, and how you can utilize it for your business, we wanted to write this beginner’s guide.
We all know that every Data Scientist must face the complex process of web scraping in order to obtain high-quality data for their research. The time, hardware, and technical skills needed for web scraping are better used in other ways. An application called Parsehub was created, specifically to help with online scraping. It does what most web scraping libraries would do, all for free and without the need for any technical expertise. Only a small portion of Parsehub’s capabilities are covered in this lesson since this tool covers a broad spectrum. Also, it is very user-friendly, that’s why beginners prefer to use it.
