How To Use Rhino For Jewellery Rendering
Rhino is a 3D modeling software widely used in the jewelry industry. Its cutting-edge features make it popular for jewelry designers and makers who want to create intricate designs for various purposes, from prototyping to final product manufacturing. In this blog post, we will lay out an in-depth analysis of how to use Rhino for jewelry rendering. We’ll cover the basics of setting up a project, creating complex geometries, and applying materials and lighting. Whether you’re new to Rhino or an experienced user looking to improve your skills, this article will provide the knowledge and techniques you need to create stunning jewelry designs. We aim to help you understand how to use Rhino for jewelry rendering so that you can create your intricate designs. By the end, you will have a sweeping knowledge of Rhino and be equipped with the necessary tools to create stunning jewelry designs.
Step 1: Getting Started with Rhino for Jewelry Rendering
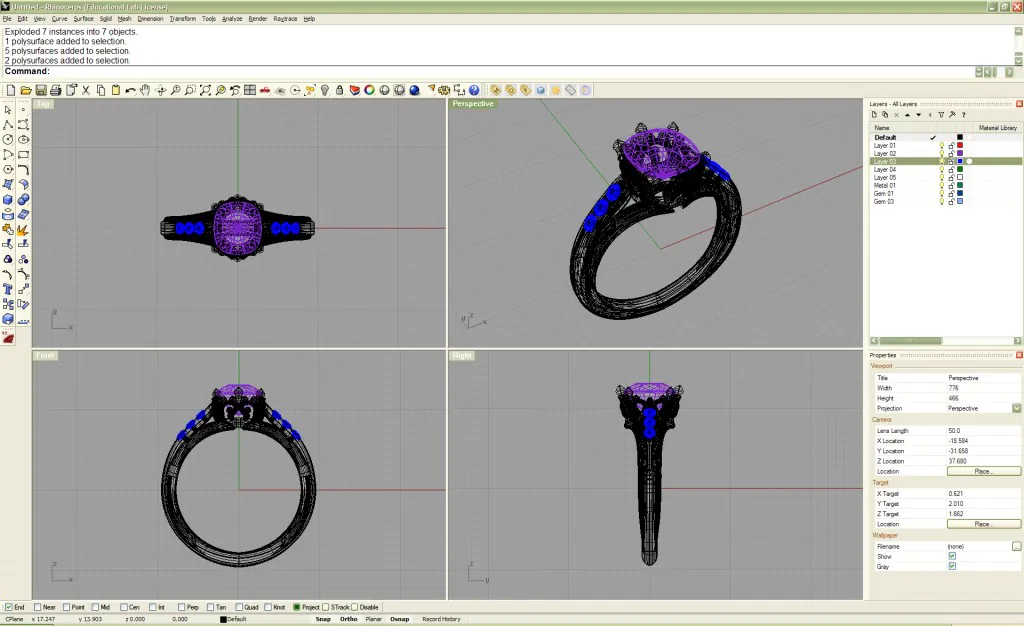
Before creating stunning jewelry designs in Rhino, you must become familiar with the software’s features and tools. Rhino’s interface can initially seem daunting, but with some practice, you’ll quickly become comfortable navigating the viewport, creating and editing curves, and using the command line.
When starting with Rhino, one of the first things to do is customize the interface to your preferences. Rhino allows you to arrange toolbars, change color schemes, and even create custom commands, making building a workspace that suits your needs easy.
To start creating jewelry designs, it’s essential to understand the basic building blocks of Rhino: curves and surfaces. Curves are the fundamental shapes that make up your designs and can be created using various tools, such as the Line, Arc, and Circle commands. Once you have completed your curves, you can use Rhino’s surface modeling tools to create 3D shapes and surfaces.
In addition to curves and surfaces, Rhino also offers a variety of other tools for creating and editing your designs. These include the Transform, Trim, Boolean commands, and more advanced tools such as T-Splines and Grasshopper.
It’s important to practice using these tools and become familiar with their capabilities to become proficient with Rhino for jewelry rendering. Rhino also offers a variety of online resources, including tutorials, forums, and user groups, that can help you improve your skills and connect with other designers.
By learning the basics of Rhino and practicing using its tools, you can set yourself up for success in your jewelry rendering projects.
Step 2: Creating Complex Geometries
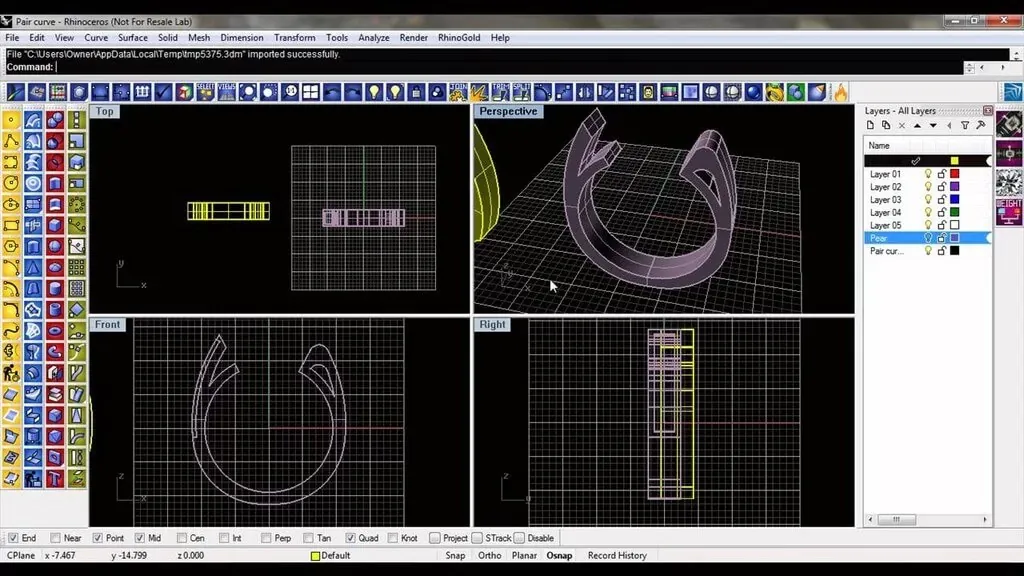
Once you have become comfortable with Rhino’s interface and essential tools, it’s time to start creating more complex geometries for your jewelry designs. Rhino offers a variety of advanced tools for creating intricate shapes and surfaces, such as Sweep, Loft, and NetworkSrf.
T-Splines is one of the most powerful tools for creating complex geometries in Rhino. T-Splines is a plugin allowing you to create smooth, organic shapes and surfaces easily. T-Splines work by converting polygonal meshes into NURBS surfaces, allowing you to create complex shapes with high control.
Another tool for creating complex geometries is Grasshopper, a visual programming language for Rhino. Grasshopper allows you to create parametric designs, meaning that you can create a set of rules and parameters that govern the shape and appearance of your plans. That can be especially useful when creating complex geometries, as it allows you to iterate and test different variations of your designs quickly.
In addition to these tools, Rhino also offers a variety of advanced editing tools, such as Gumball, CageEdit, and Deformable Modeling, which allow you to manipulate your designs in new and creative ways.
You can create stunning and intricate geometries for your jewellery designs using Rhino’s advanced tools and features. With some practice and experimentation, you can unlock the full potential of Rhino’s powerful modelling capabilities and take your jewellery designs to the next level.
Step 3: Applying Materials and Lighting
Once you have created your jewelry design in Rhino, the next step is to apply materials and lighting to bring your design to life. Rhino offers a variety of powerful tools for using materials and lighting in your designs, including Rhino’s built-in materials library, the ability to create custom materials, and the ability to import materials from other sources.
To apply materials to your designs, you can use Rhino’s Material Editor, which allows you to adjust the properties of different materials, such as reflectivity, transparency, and texture. Rhino also offers various rendering plugins, such as V-Ray and Rhino Render, which allow you to create high-quality renders of your designs with realistic lighting and materials.
When it comes to lighting your jewelry designs, Rhino offers a variety of options, including point lights, spotlights, and environmental lighting. You can also adjust the properties of your lights, such as intensity and color, to create the desired effect.
It’s essential to remember that materials and lighting can significantly affect the overall appearance of your jewelry design. Different materials can produce other effects, such as glossy, matte, or metallic, and various lighting setups can create different moods and atmospheres. You can find the combination that best showcases your design by experimenting with other materials and lighting setups.
In addition to Rhino’s built-in materials and lighting tools, various third-party plugins and resources are available for creating realistic materials and lighting effects. By taking advantage of these tools and resources, you can create stunning and lifelike renders of your jewelry designs that will impress you.
Step 4: Exporting Your Designs
Once you have completed your jewelry design in Rhino and applied the appropriate materials and lighting, the final step is to export your design in a format that can be shared with others or used for production purposes.
Rhino offers a variety of export options, including STL, OBJ, and 3DM. STL is a commonly used file format for 3D printing, while OBJ is a popular format for sharing 3D models across different software applications. 3DM is Rhino’s native file format, which allows you to save all of the information about your design, including materials, textures, and lighting.
When exporting your design, it’s essential to consider the intended use of the file. For example, if you are exporting your design for 3D printing, you must ensure that the file is in a format compatible with your printer’s software. If you export your design for a different software application, you may need to convert the file to another format.
In addition to exporting your design as a 3D model, Rhino also offers a variety of 2D export options, such as JPEG, PNG, and PDF. These formats can help create presentation materials or technical drawings of your design.
It’s also important to remember that when exporting your design, you may need to adjust the settings to ensure that the file is exported at the appropriate level of detail and resolution. That can be especially important when exporting large or complex designs, as higher levels of detail and resolution can result in larger file sizes.
By carefully considering the intended use of your design and adjusting the export settings accordingly, you can ensure that your jewelry design is exported in a format that is suitable for its intended purpose.
Mastering Jewelry Rendering with Rhino: Key Considerations for Designers
Computer hardware requirements
Rhino is a powerful software that requires a computer with adequate hardware capabilities to run smoothly. If your computer needs to be more powerful, you may experience lag or slow performance when using Rhino for jewelry rendering. Ensure the minimum hardware requirements before installing Rhino.
Skill level and training
While Rhino is an intuitive and user-friendly software, it still demands a certain level of skill and training to use effectively. Take tutorial classes to learn the software and its features.
File size and compatibility
Jewelry designs can be complex and detailed, which means they can be large files. Ensure you have enough storage space to save your designs and be aware of the file size limitations when exporting your designs. It’s also essential to ensure your files are compatible with the software or hardware used for manufacturing or prototyping.
Accuracy and precision
When designing jewelry in Rhino, accuracy and precision are critical. Make sure you use the appropriate measurement units and pay attention to detail. Minor errors or inaccuracies in your design can significantly impact the final product.
Collaboration and communication
If you’re working with a team of designers or manufacturers, it’s vital to maintain open communication and collaboration throughout the design process. Be sure everyone is on the same page concerning the design specifications and any changes that need to be made.
Prototyping and testing
Before finalizing your design, it’s important to prototype and test it to ensure it meets your specifications and is suitable for manufacturing. Consider using 3D printing or other prototyping methods to create a physical prototype of your design. That will allow you to make any necessary adjustments or changes before proceeding with manufacturing.
By considering these essential considerations, you can ensure that your jewelry designs created in Rhino are accurate, precise, and suitable for manufacturing.
Conclusion
Rhino offers designers comprehensive tools to create intricate and detailed jewelry designs. By considering factors such as intended use, level of detail, and export formats, designers can produce high-quality designs suitable for various purposes. With practice, designers can unleash the full potential of Rhino and create unique and visually appealing jewelry designs.
